Hero Arts October 2025 Release | Merry Era
It’s time for the Hero Arts October 2025 Release Blog Hop, and this month’s theme is Merry Era! I had so much fun creating two festive cards that sparkle and shine in very different ways.
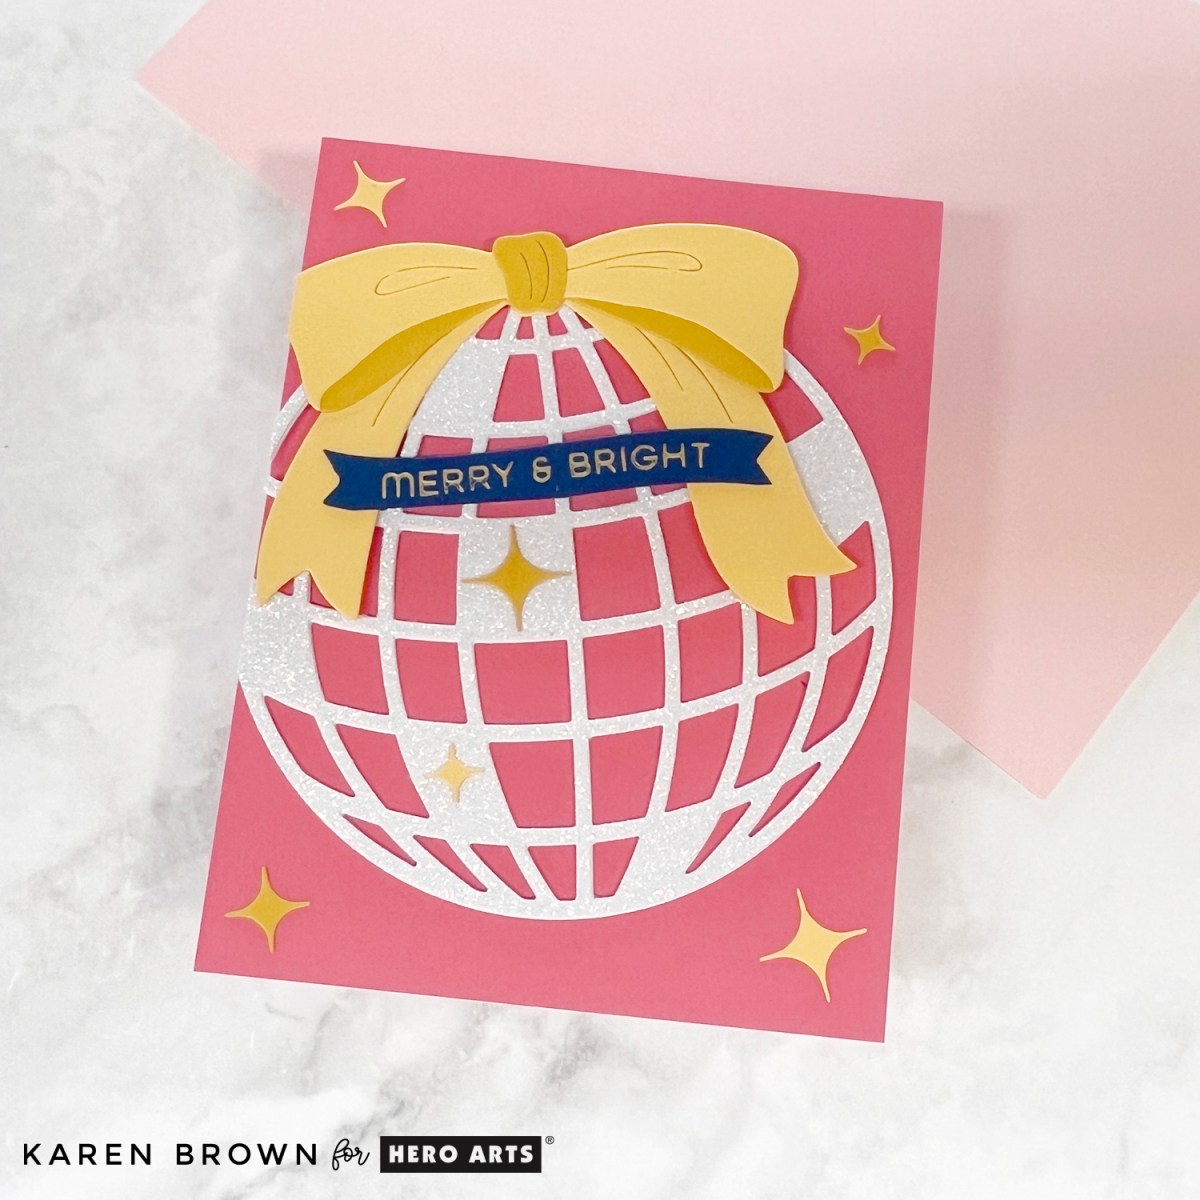
Glittery Pink Christmas Ball

For my first card, I reached for the “Have a Ball” Die Set from the October 2025 Card Kit. I wanted a sparkly look, so I die cut the large Christmas ball twice from white glitter cardstock for extra stability. My card base is Dahlia cardstock (included in the kit) which makes the ornament pop.
The layered bow was cut from Beeswax and Tuscan cardstock, also in the kit, and I finished it off with a BetterPress “Merry & Bright” sentiment stamped on navy cardstock. I love the subtle glitter that catches the light—this card is festive yet elegant.
💡 Design tip: This die set would work beautifully for New Year’s cards too!
What’s Included in the Kit?
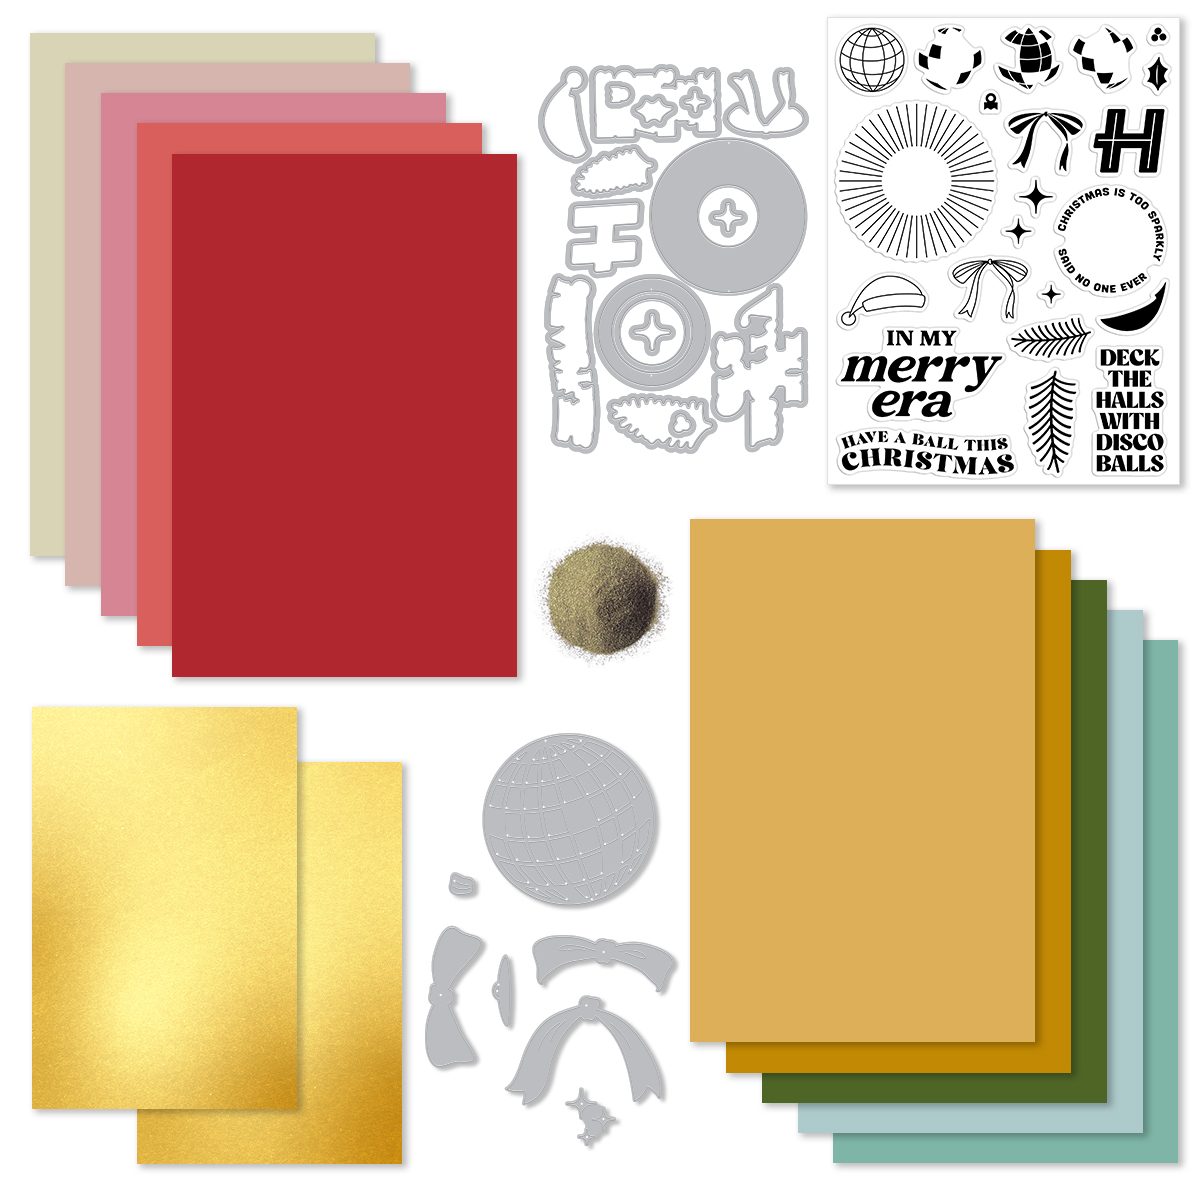
• Deck the Halls with Disco Balls 6×8 Stamp Set
• Deck the Halls with Disco Balls Coordinating Dies
• Have a Ball Die Set
• Gold Embossing Powder .5 oz
• 10 Sheets of Cardstock- 1 of each color, 5.5″ x 8.5″
• Two Sheets of Gold Matte Paper, 5.5″ x 8.5″
Receive a FREE beautiful Merry Everything Die Set when you purchase The Whole Studio!
Hero Arts has many different Monthly Kits that you can subscribe to including:
- The WHOLE Studio – All 5 Kits (a 40% savings: $130 subscription + Free Shipping)
- Card Kit of the Month ($60 Subscription + Free Shipping)
- Stamp and Cut of the Month ($27.50 Subscription + Free Shipping)
- Fancy Studio Dies of the Month ($25 Subscription + Free Shipping)
- Cling Stamp of the Month ($20 Subscription + Free Shipping)
- Layering Stencil of the Month ($17.50 Subscription + Free Shipping)
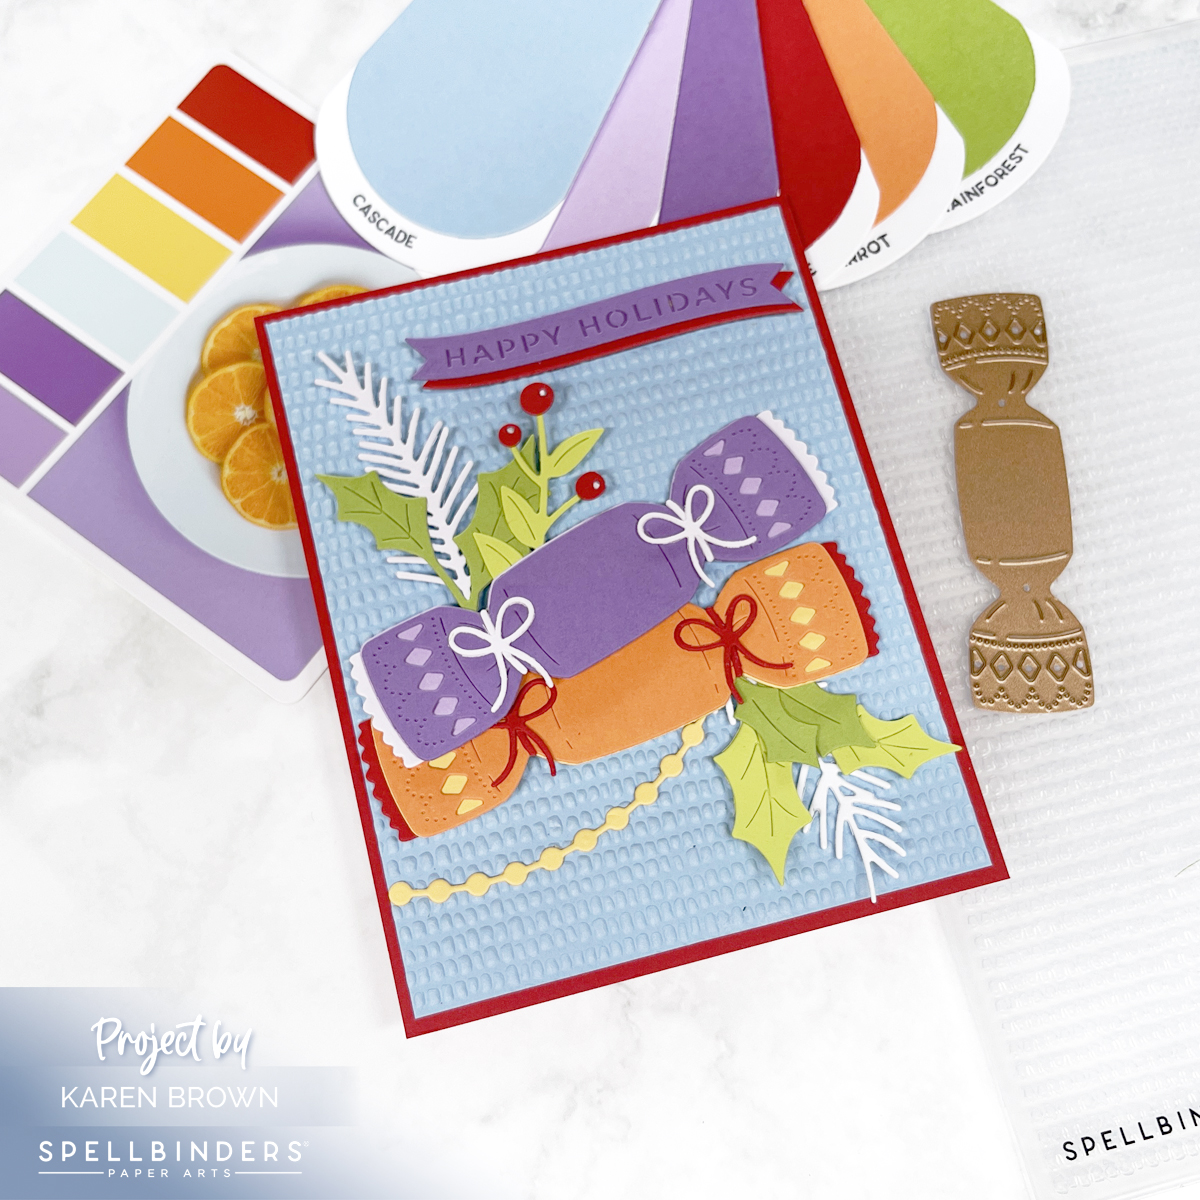
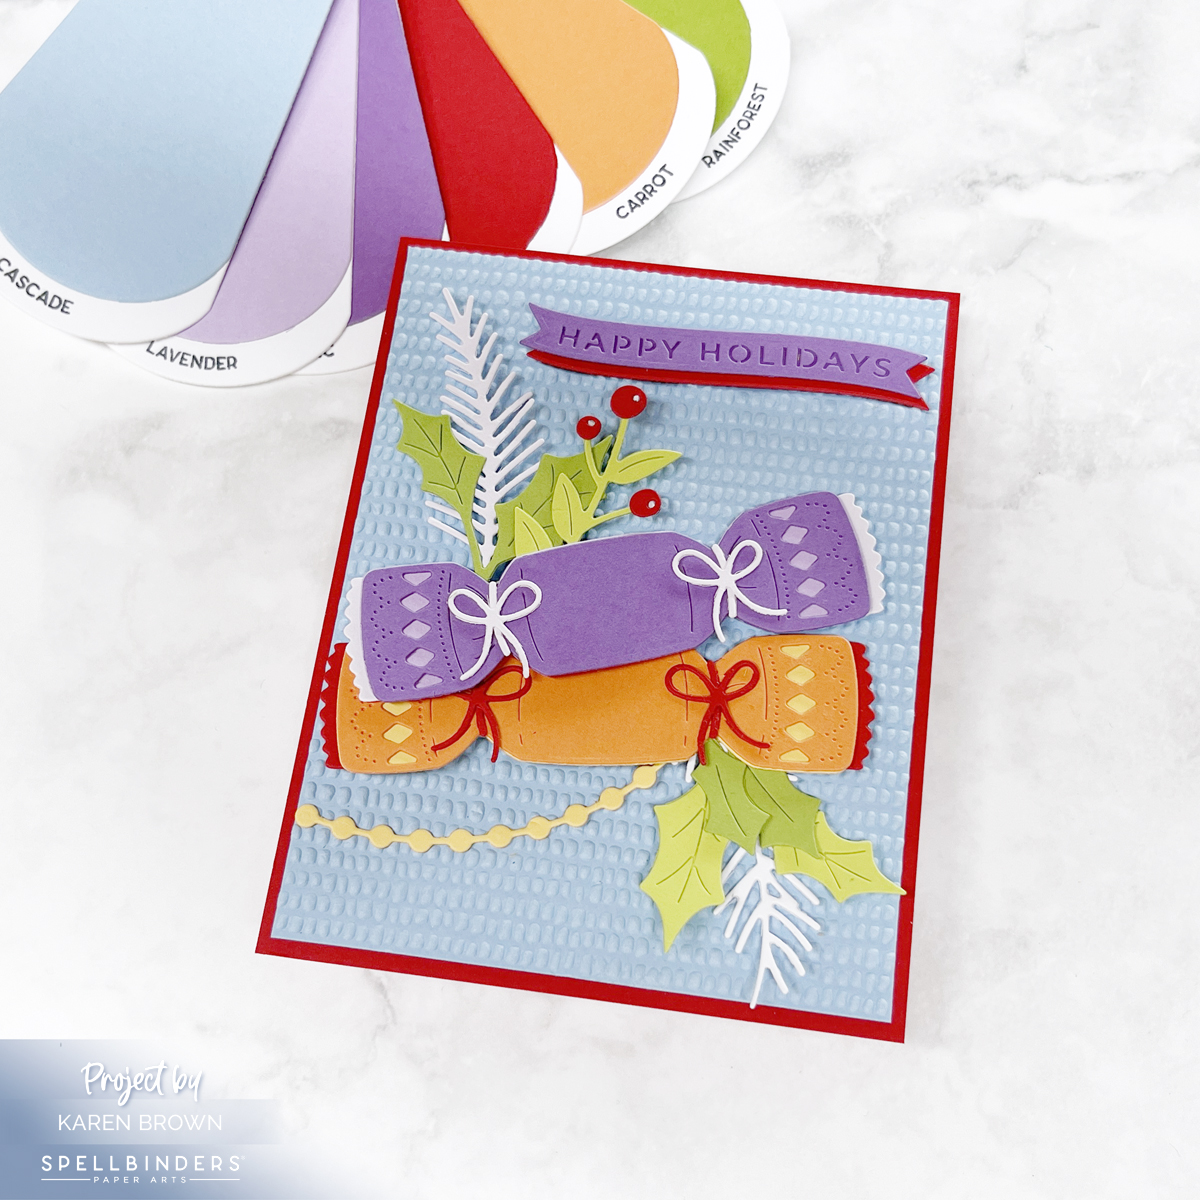
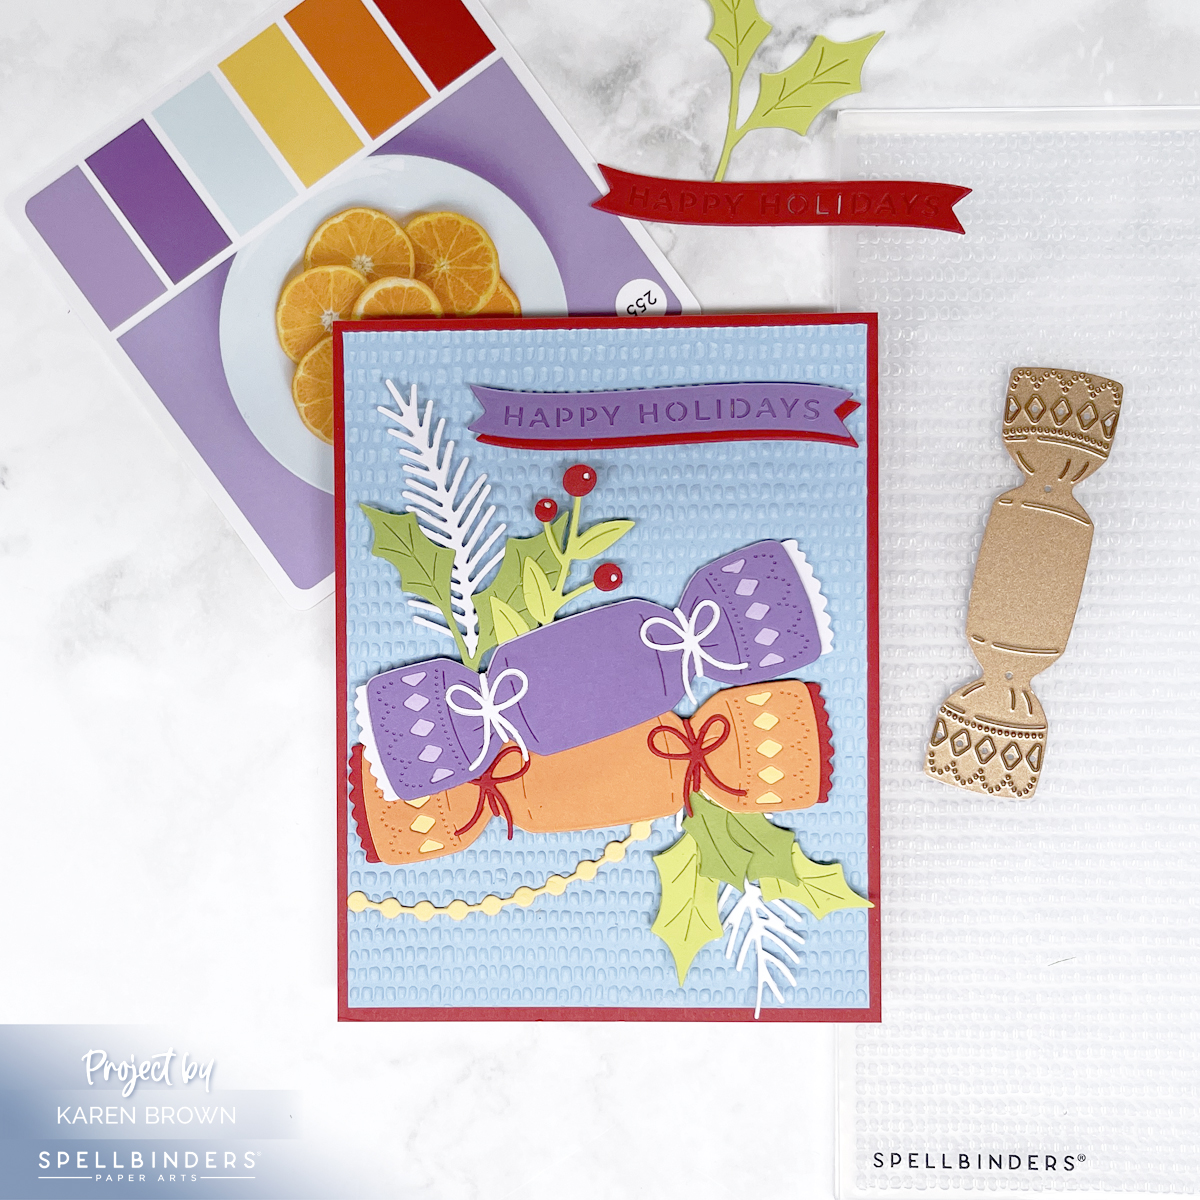
Twinkling Lights

For my second card, I used the Twinkle Lights Fancy Dies. I die cut the string of Christmas lights from gold paper (included in the kit) and then added pops of color by cutting the bulbs from colorful cardstock scraps.
Placing the strands artfully across teal cardstock created a playful, modern background. The circular sentiment—“Christmas is Too Sparkly … Said No One Ever”—is also part of the October Card Kit.
💡 Tip for small die cuts: A Ninja Jewel Picker and Bearly Arts Glue are lifesavers when attaching those tiny bulbs!
The combination of shiny gold strings, bright bulbs, and the bold sentiment makes this card full of Christmas cheer.

>>> Click HERE. to see my other October Card Kit Cards.
GIVEAWAY
Hero Arts will give away a $50 gift card, drawn from the comments left across the hop. Enter by Sunday, October 5th at 11:59pm PT, and the winner will be announced on the Hero Arts blog the following week. Leave a comment on all stops for more chances to win!
BLOG HOP ORDER
Hero Arts
Nichol Spohr
Seeka
Rosie Lopez
Rachel Kleinman
Natasha Polite
Mindy Eggen
Michelle Short
Michelle Lupton
Lisa Tilson
Karen Brown You Are Here!
Jennifer Kotas
Jeannie Lieu
Charlene Madrid
Channin Pelletier
Anna Mahtani