cardmaking · Cardmaking Kit · stitching

Spellbinders Stitching Die of the Month – Beautiful Blooming Florals

Handmade stitched floral card with layered pink, coral, and yellow die cut flowers on a Waterfall aqua blue background, accented with gems.

This month’s Spellbinders Stitching Die of the Month is a true floral beauty! The set includes three sizes of blooms, and I couldn’t wait to dive in with floss, cardstock, and gems to create a stitched garden full of detail and color.

You might also enjoy my blog post for the September Small and Large Die of the Month Kit.

🌼 My Stitching Process

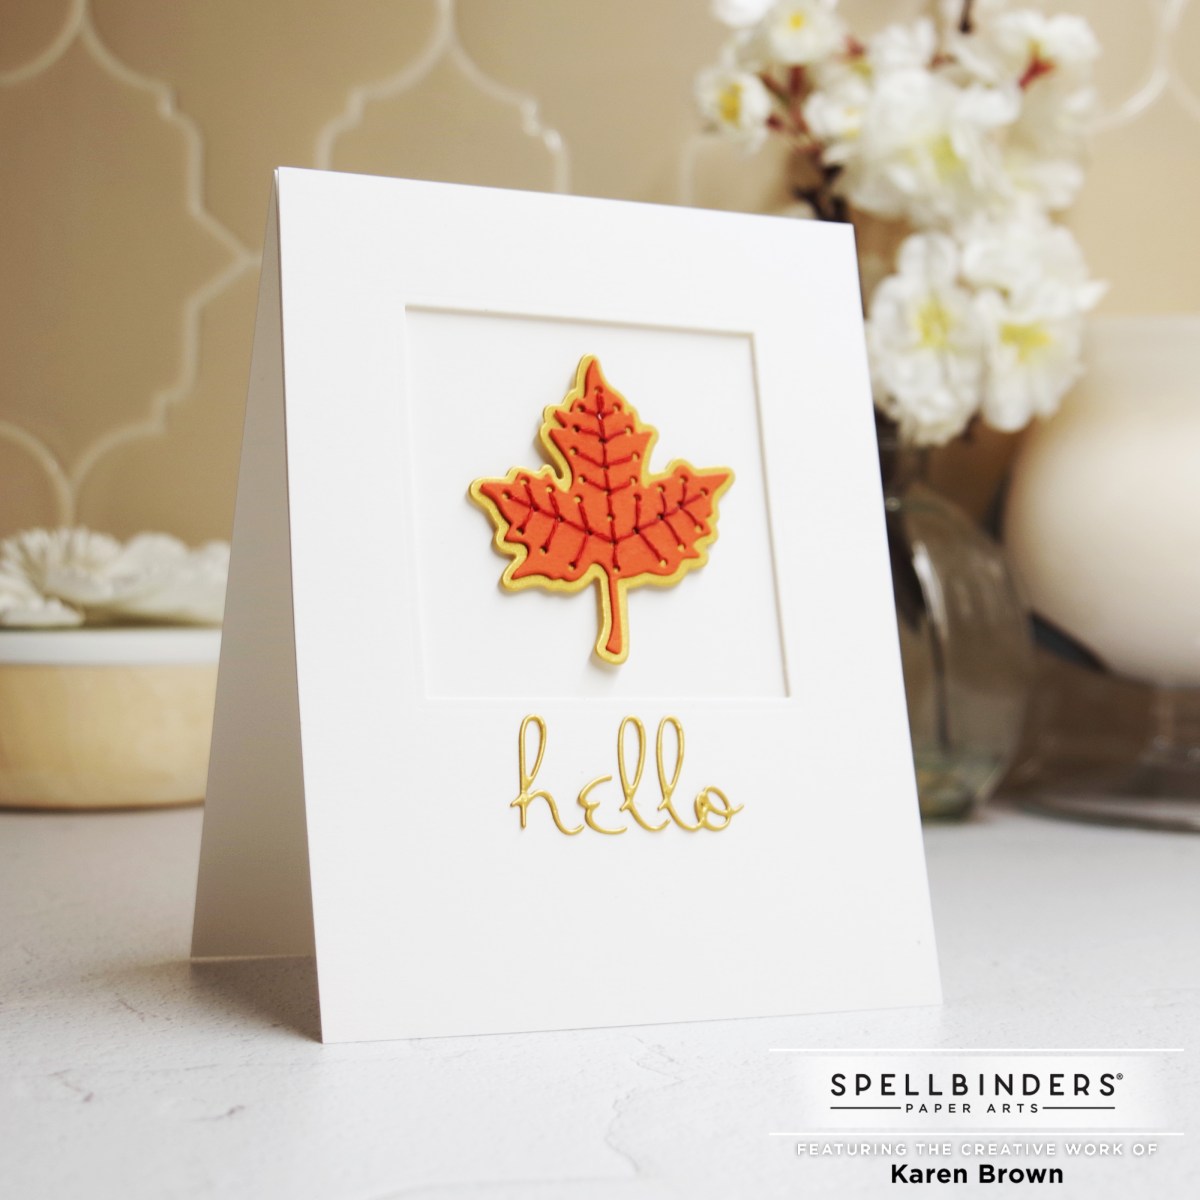
To give my flowers a sturdy stitching base, I die cut each bloom twice and glued the layers together before stitching. This little extra step makes the stitching so much easier and helps the finished blooms hold their shape beautifully.

I used two threads of floss throughout, which was just the right weight for crisp yet delicate details.

Close-up of stitched die cut flowers with pale pink and yellow floss, Citrus Spritz leaves, and gem embellishment.

🎨 Stitching Recipe & Color Palette

For this project, I worked from the Color Cubes Palette #391 (Color Cubes Bundle) and pulled together a warm, happy scheme:

The combo of pinks, corals, and yellows pops beautifully against the fresh aqua-blue background!

✨ Finishing Touches

  • I added a touch of sparkle with Woodland Tales gems, which highlight the flower centers perfectly.
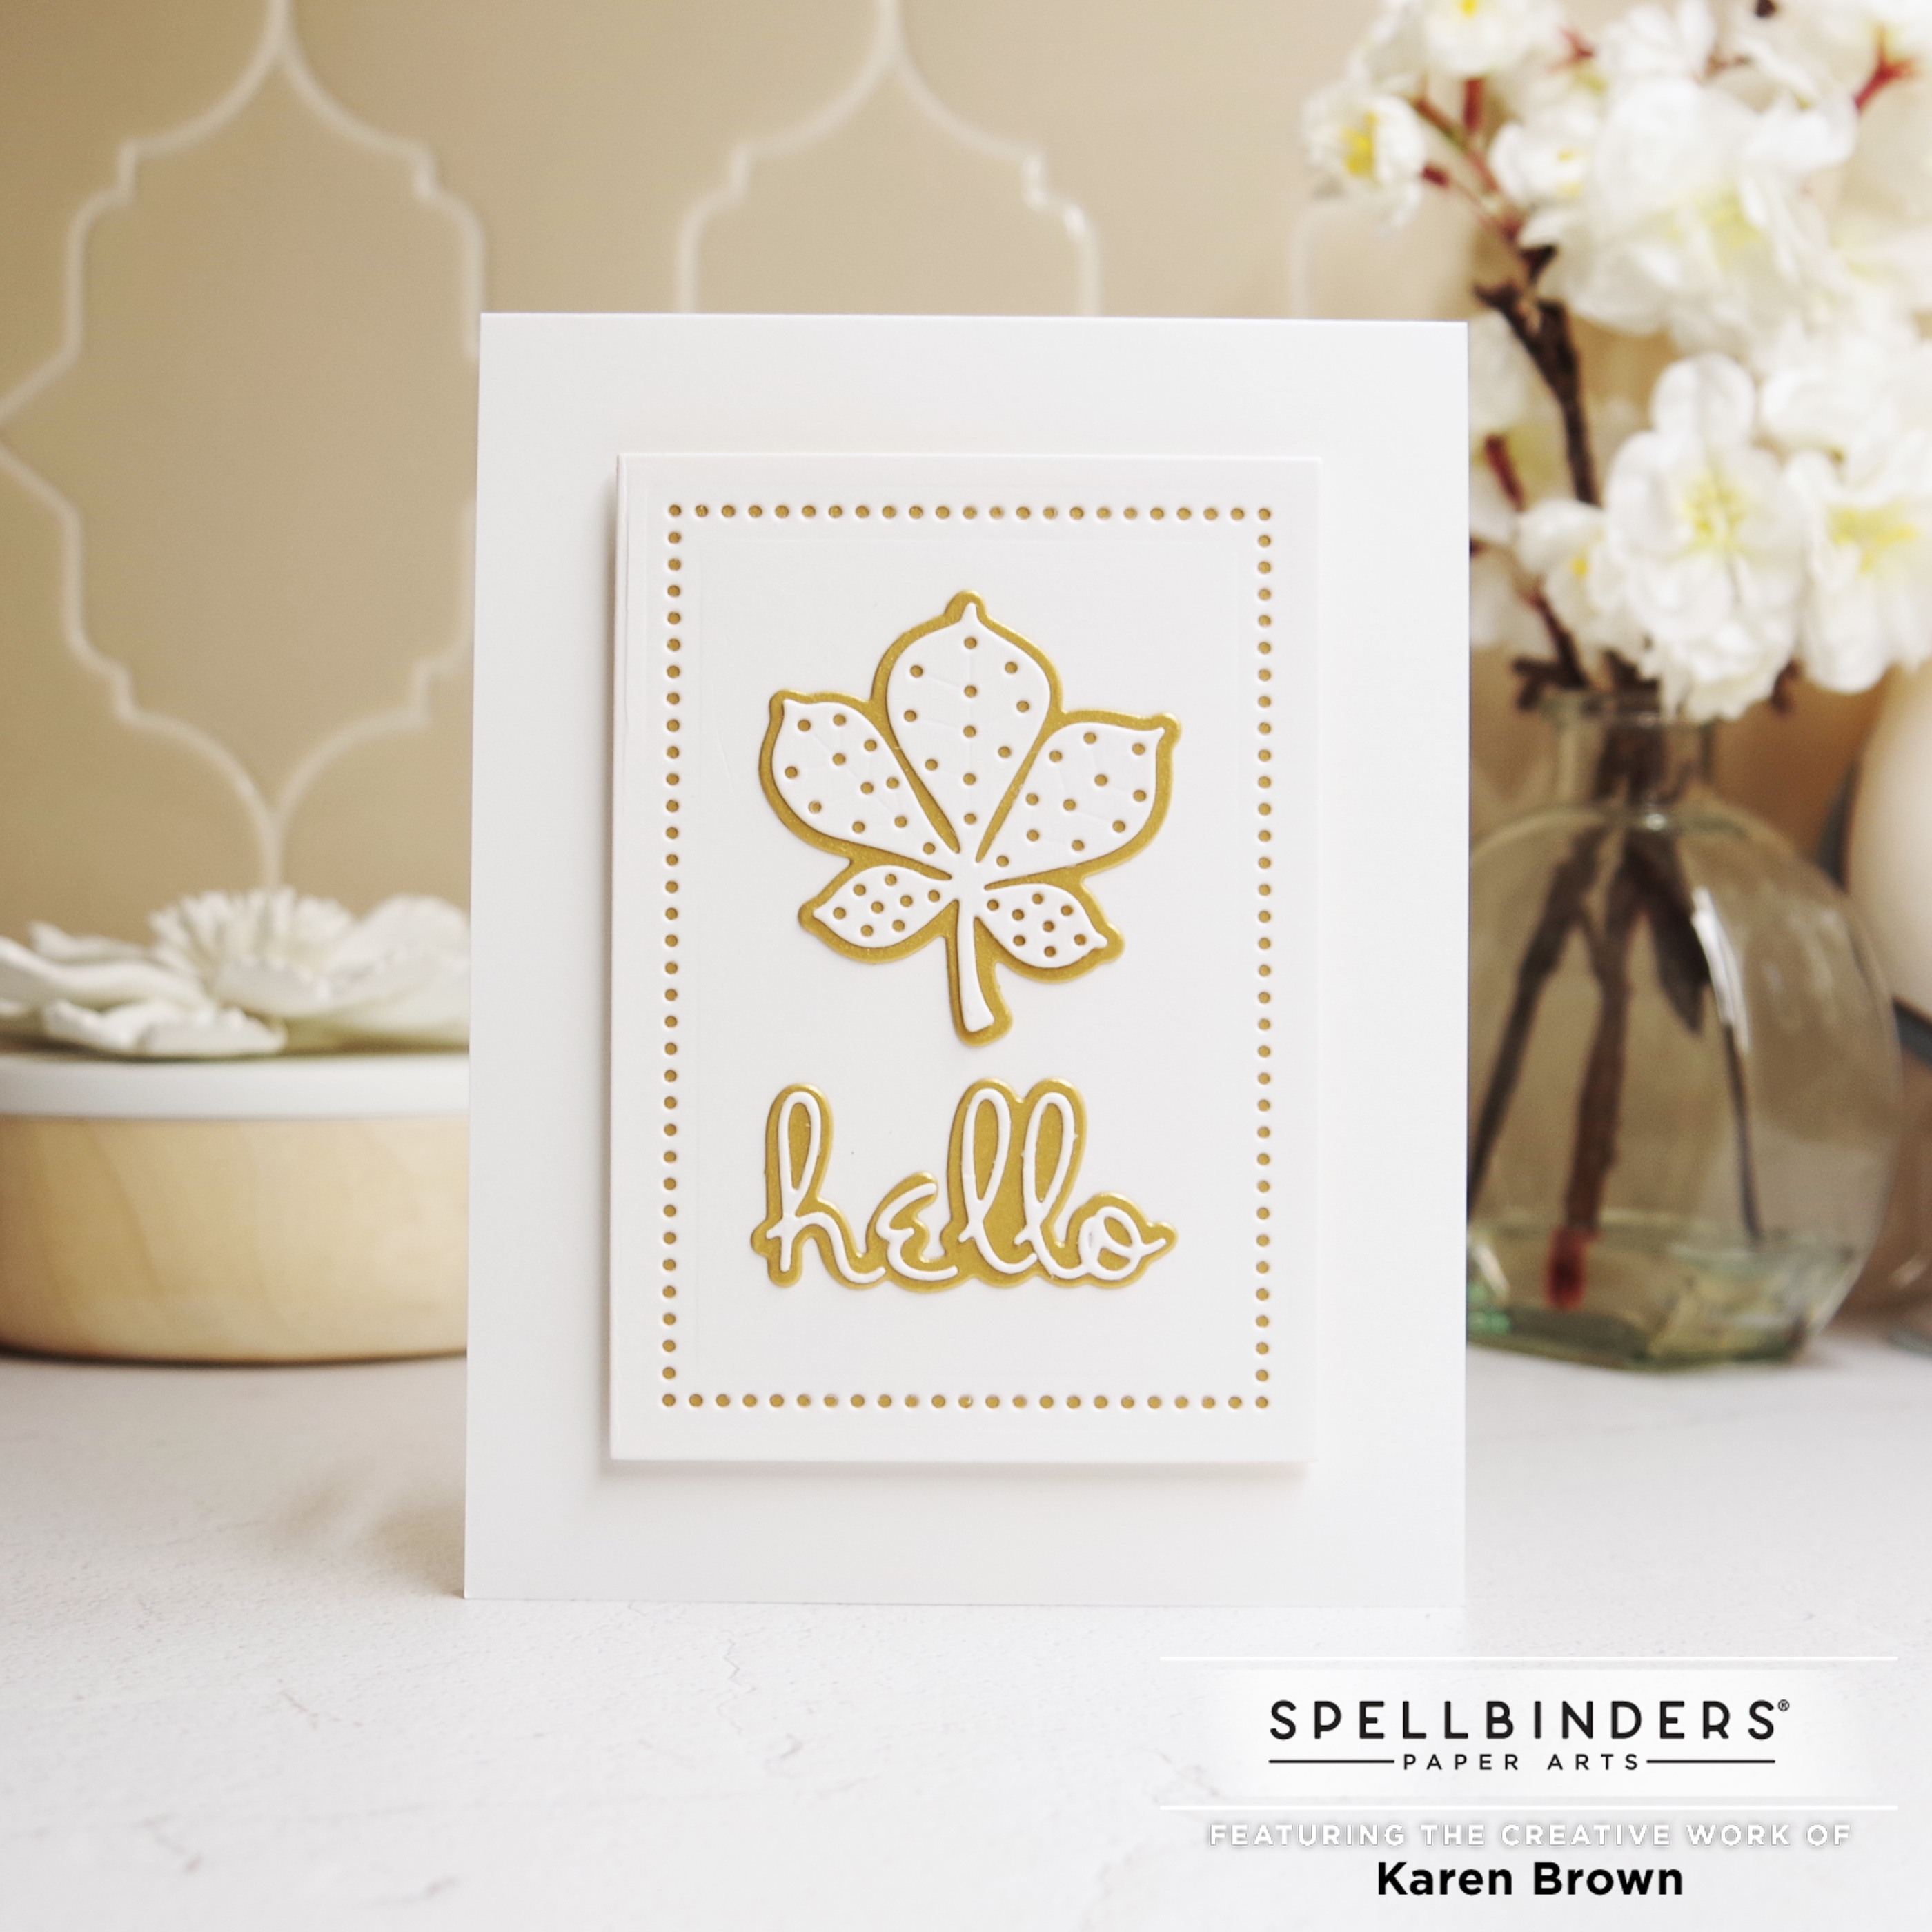
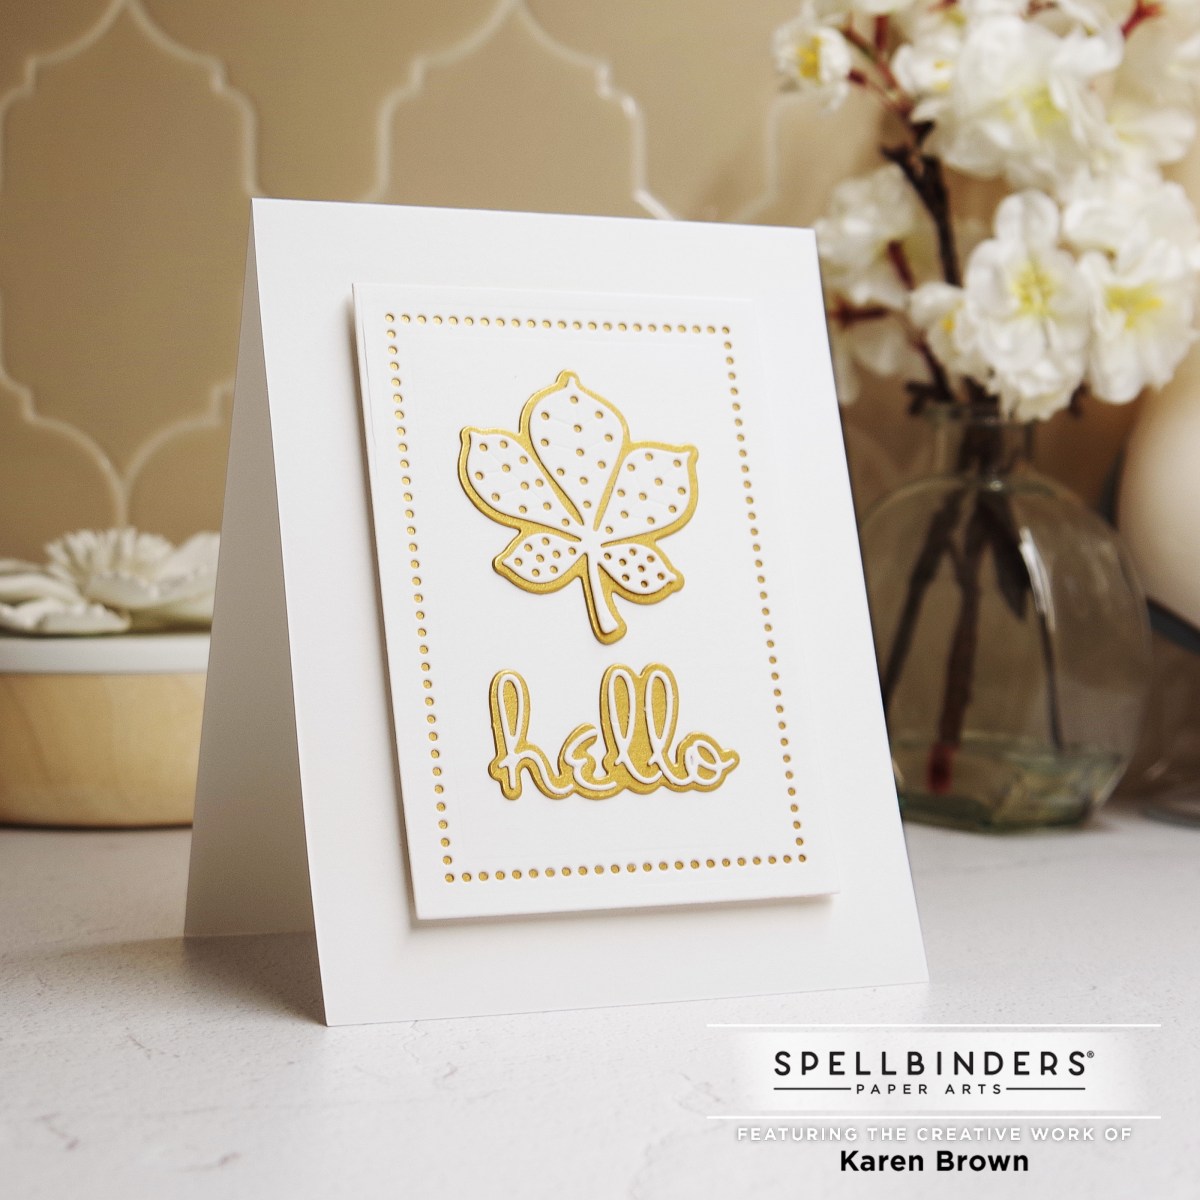
  • For the foliage, I decided to switch things up! Instead of using the leaves included in the set, I reached for the pretty die cut leaves from Citrus Spritz (Here is a LINK to a post using the Citrus Spritz Die Set).

💡 Extra Tips for Stitched Dies

  • Don’t be afraid to mix and match leaves, blooms, and embellishments from other kits for added variety.
  • Layering blooms in groups of three always creates a pleasing, balanced look.
  • Keep a small piece of tape handy to hold your floss tails on the back of stitched elements until you’re ready to glue them down.
Handmade die cut and stitched card using the  floral Spellbinders September 2025 Stitching Die Club Kit.

This month’s kit is such a joy—relaxing to stitch, yet bold and beautiful when assembled. I can see these blooms being used for birthdays, thank you cards or just becuase.

Cardmaking Kit · stitching

Spellbinders | Stitching Die of the Month | May 2024

Hand stitched Pineapple card with an embossed background and accent opal gems.

Aloha! Delight in the sweet essence of tropical charm with my latest crafting adventure using this month’s Spellbinders Stitching kit! I am diving into the art of hand-stitching to create a whimsical pineapple card that’s as vibrant as it is heartfelt. So, grab your needle, thread, and a sprinkle of creativity as we embark on this delightful journey together!

The Deluxe Caboodle

I also wanted to mention what a wonderful deal the Deluxe Caboodle Kit is. You save 60% off all TEN kits for the month + you get a bonus gift. So, if you are thinking about multiple kits, consider the Caboodle. The current cost is $120 but the kit value is $315, which is 60% off!

Stitched Pineapple Handmade Card

Die cut and hand stitched pineapple card in yellows, golds, and greens.

My Cardmaking Process:

  • The kit has 6 cutting dies and I started by cutting all my pieces with my Platinum 6 die cutting machine. I used the Happy Day Assorted Cardstock Pack + a sheet of Pesto for a 4th shade of green.
  • Spellbinders has a nice selection of stitching accessories in their shop that you can find HERE. I used a bronzy gold thread for my pineapple.
  • When I started stitching, I took two strands of floss, separated them one at a time, brought them together and then stroked and lengthened them until they seemed tame and ready to use.
  • I usually stitch with size 22 Tapestry needles.
  • I like to use 1/8th inch double sided liner tape to attach my floss to the die cut.
  • Remember to keep your floss taught as you stitch.
  • When I move from one area to the next, I run the floss through the just finished stitched area to keep the thread secure. This gives a nice look on the finished project.
  • Don’t stitch with threads that are too long or they are likely to knot. 
  • When I was done, I added a bit of Bearly Glue to the ends so that they would stay in place.
  • To finish my project I embossed white cardstock with the my longtime favorite embossing folder: Intertwined Lattice.
  • I hot foiled my sentiment with Yana’s Special Glimmer Sentiments and my Glimmer Hot Foil System.
  • I added 6 Opal Gems around the pineapple with my Ninja Pickup Tool.

Helpful Links:

Spellbinders Club Info:

  • Clubs Preview on the 1st of each month.
  • Club members can cancel, upgrade or change clubs from the 1st-5th of each month. Popular Clubs frequently sell out during this period so club members get first dibs on everything.
  • NEW for 2024: Club Members get EARLY access to new releases on the 6th!
  • On the 6th, Clubs become available to non-members.
  • On the 27th, Club registration closes for the current month.
  • If a club did not sell out, you can buy under “Shop Past Clubs”. Past kits are available on the 10th of the FOLLOWING month.

Thanks for stopping by!

Karen

cardmaking · papercrafting

Spellbinders Magical Deer Card

Spellbinders Magical Deer S4-1215 Christmas Card die cut kit

Hello! I am excited to share a new Spellbinders Collection that releases today called Winter Tales that was designed by the talented Zsoka Marko. I was instantly attracted to this die kit called Magical Deer: S4-1215. I love the Nordic look and used Scandanavian red and blue as accent colors to give the neutrals some pop.

Die cutting and paper crafting with Spellbinders Winter Tales Magical Deer kit.

None of the dies are particularly big so I chose three browns, a red and a blue from my scrap pile. I glued all the pieces, except the deer’s head, directly to my background. I used foam tape for the head and I added crystal accents (SCS-128) to my flower centers. The sentiment is from the Amazing Paper Grace Christmas Tree kit (which is currently on sale!). For a bit more color, I added a matching red border to my background and then popped it on an A2 Top Folding Card Base. This card came together very quickly and I am pleased with the finished result.

Thanks for stopping by!

Karen

cardmaking · papercrafting

Spellbinders September 2022 Card Club Kits

Spellbinders Large Die of the Month Thankful Tractor handmade card.
Thankful Tractor Card

Hello friends! It’s reveal day for Spellbinders September Club Kits and I am excited to share four cards with you. My projects feature the Large Die of the Month, Small Die of the Month and Embossing Folder of the Month and as you can see, the new kits are so fun!

Spellbinders September 2022 Large Die of the Month Club Kit: Thankful Tractor

Its harvest time and I love the veggies and adorable tractor included with this month’s Large Die of the Month kit called Thankful Tractor! The kit is large so I made a substantial 5 x 7″ card. I used bright bold green, yellow and orange cardstock for my focal elements. To set the stage I embossed my background with the September Embossing Folder of the Month. Next, I tore a piece of kraft cardstock and then lightly ink blended my “dirt”. I assembled my project with glue and foam tape. I found using a sticky mat helped with the die cut assembly.

Die Cut Tractor Card with trailer filled with vegetables, pumpkin, corn and squash.
Spellbinders Thankful Tractor

Spellbinders September Embossing Folder of the Month: Scattered Fall

I love the vegetables so much that I made a second card. I again embossed the background with the September Embossing Folder of the Month. The basket was die cut from Frosted Silver Mirror Cardstock using last month’s Large Die Kit of the Month called “Strawberry Patch”.

Spellbinders September 2022 Large Die of the Month card with die-cut vegetables.
Spellbinders Scattered Fall Embossing Folder

I added a sentiment (retired) and flowers from the kit that were embellished with Crystal Mix Gems (SCS-128) and then used a Spellbinders A2 Top Fold Card Base.

Die Cut Basket full of vegetables card with pumpkin, eggplant, squash, and corn.

Spellbinders Small Die of the Month: Stitched Fall Leaves

This month’s Small Die of the Month has loads of beautiful stitched leaves with coordinating shadows plus two word sentiments (hello fall). For my first card, I wanted to showcase the elegant simplicity of just one leaf. The stitching went very quickly and I kept the rest of the card clean and simple.

I used the included hello sentiment die. This is a beautiful yet delicate die and I’ve found it works well if you attach a sheet of double sided adhesive paper to the cardstock prior to die cutting. After you die cut, just pull away the backing paper and apply!

Wouldn’t it be fun to make a series of these as a gift?

Spellbinders September 2022 Small Die of the Month card:  Stitched Fall Leaves.
Stitched Fall Leaves

Products Used:

Clean and Simple stitched die cut leaf card.

“Unstitched” Card

Spellbinders Unstitched Leaf Card.
“Unstitched” Fall Leaves

The leaf dies in the September Small Die of the Month kit are so fun that I wanted to make a card without stitching. To keep the theme, I mounted the leaf and shadow on a panel die-cut with one of my favorites, Essential Rectangles Dies. I love how this keeps the unstitched card theme. The gold details are achieved using Brushed Gold Cardstock and I mounted the panel with foam tape on an A2 Top Fold Cardbase. I find the result is a fresh clean card.

Spellbinders September 2022 Die of the  Month Card:  Stitched Leaves in white and gold.

I think the September kits are sure to be favorites…what do you think?

Karen