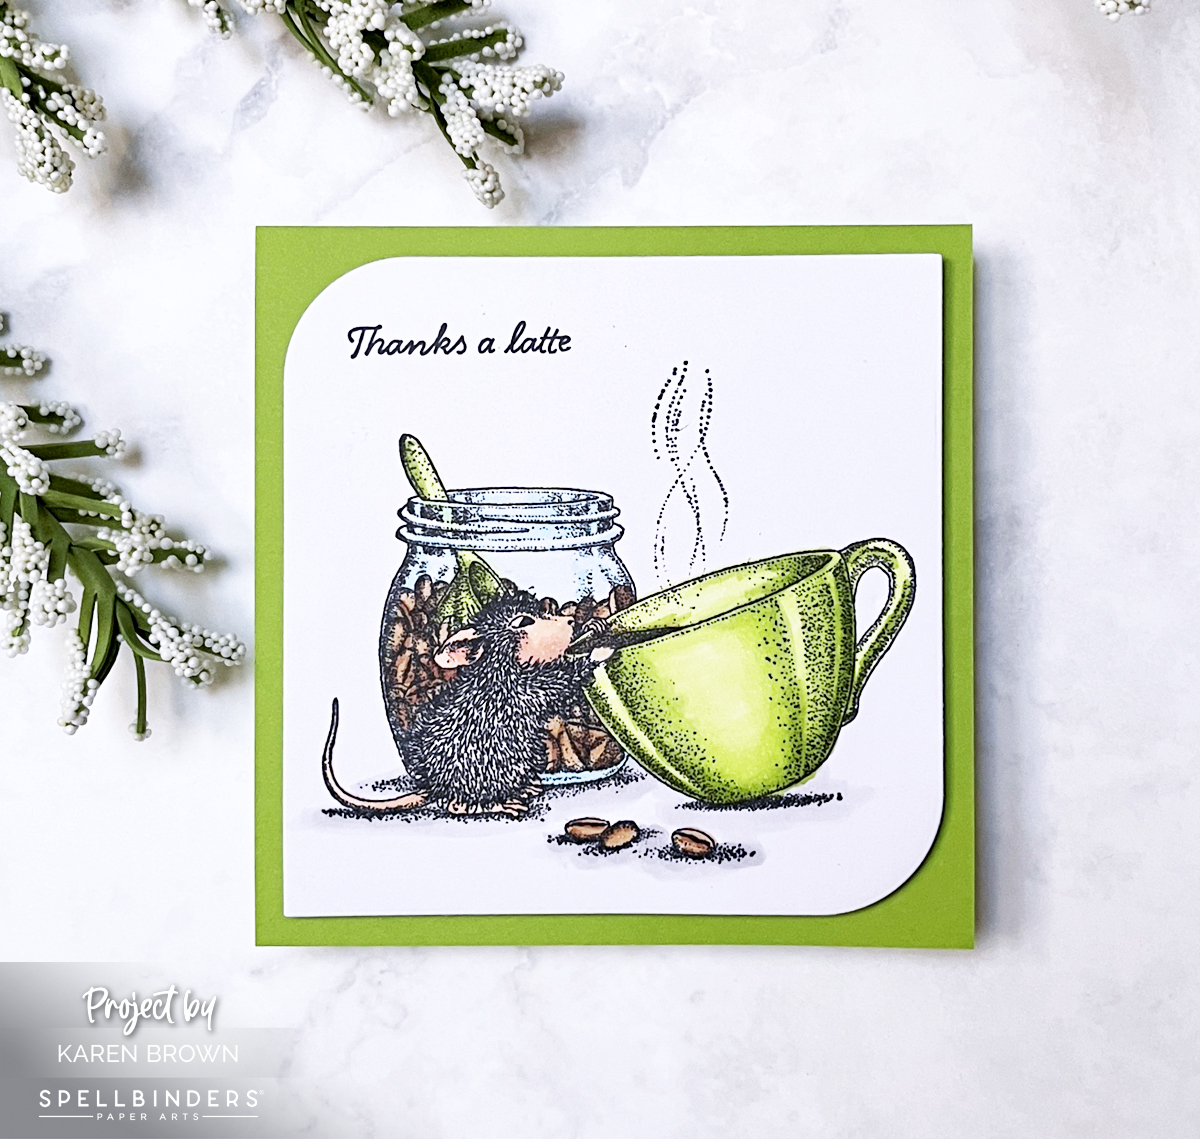
Today I’m sharing a cute square coffee-themed thank you card featuring the House Mouse Brew-tiful Day rubber stamp from Spellbinders. I can never resist a coffee pun, so I went with “Thanks a latte” for my sentiment—one of my all-time favorites!
I stamped the adorable image and colored it with Copic markers:
Copic Colors Used:
Cup & Spoon: YG01, YG03, YG05
Coffee: E55, E25
Glass: BG00, B00
Mouse: E40, E21, R20
Shadows: N0, N1
Before stamping, I simply trimmed the included sentiment using my Spellbinders Shears so only “Thanks a latte” remained—super easy! The little scene includes our sweet mouse taking a sip from a giant (to him!) latte cup, with a coffee bean canister behind him. Such a cute little tableau!
This card comes together very quickly and is so fun to color. House Mouse is always popular with card recipients—every little mouse scene just makes you smile!
I’ll link to several other House Mouse posts I’ve created, because I just can’t resist these sweet little critters. You can see House Mouse is a definite favorite!
Whimsy and Cheer – 3 House Mouse cards I created for the Spellbiners Blog
You probably already know that I am a BIG fan of the House Mouse series. Today, I am on Spellbinders Blog with 3 darling cards. I couldn’t wait to get my hands (and markers!) on the newest collection called Rare Bloom. These stamps are crisp, deeply etched, and beautifully detailed—making them an absolute joy to color and create with.
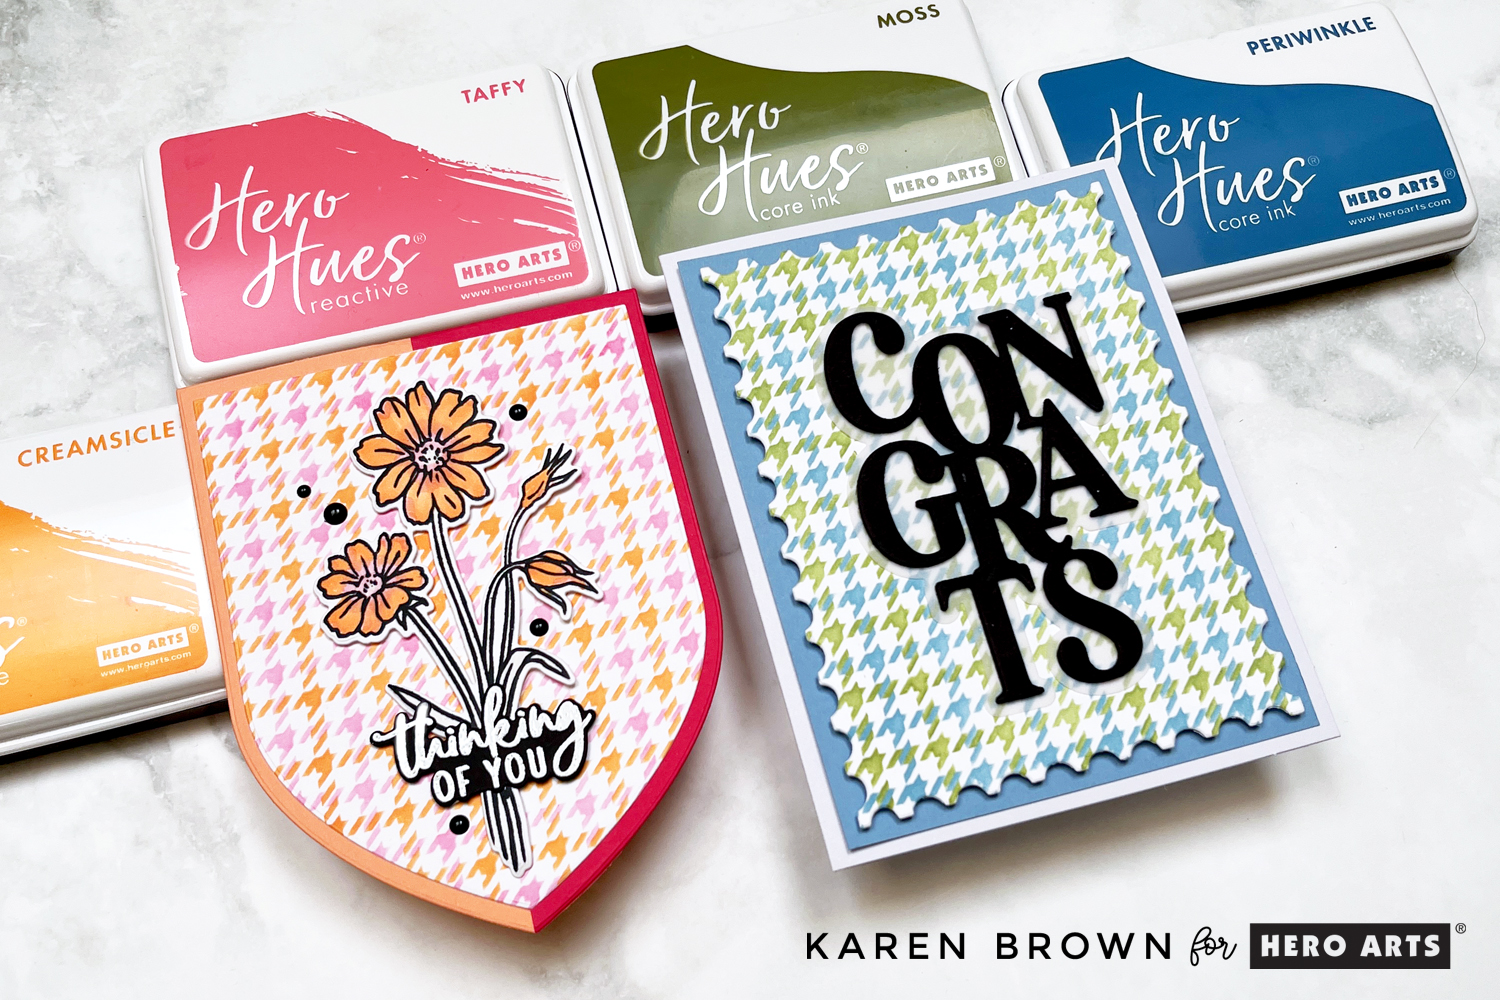
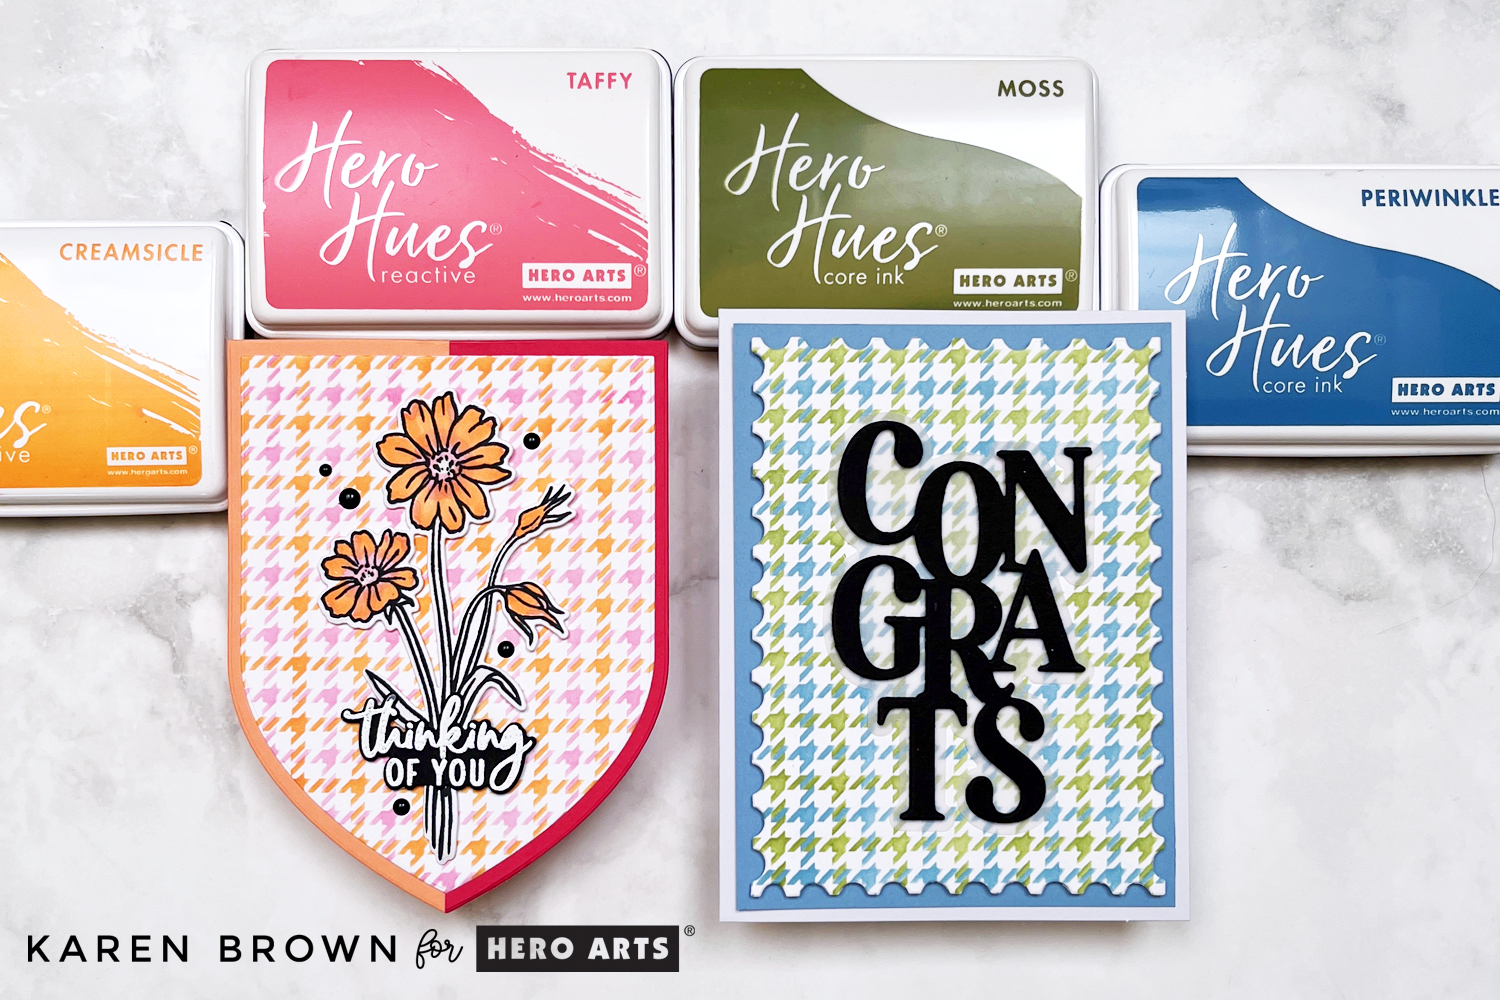
Plaid, but make it personal! Today I’m excited to share two bold and beautifully customized cards using the new Houndstooth Layering Stencils from the Case Closed Collection by Hero Arts.
Click HERE if you’d like to read my companion Case Closed Blog Post.
This two-piece stencil is already becoming one of my favorite backgrounds—it’s quick, clean, and incredibly versatile! Whether you’re going soft and sweet or crisp and classic, this pattern plays nicely with every palette.
A Few Tips Before You Ink
Here’s what made my stenciling process smooth and successful:
Stencil Orientation Matters: Make sure the Hero Arts logo is facing up. To keep my layers aligned even after rotating for even inking, I added a tiny arrow sticker pointing to the logo. It’s a game-changer!
Alignment Squares Are Your Friend: I marked the alignment squares lightly in pencil before starting so I could line up both layers of the stencil perfectly—no guessing, just precision.
Feminine Florals in Pink & Orange
For my first card, I created a lovely pink and orange plaid background using Creamsicle and Taffy inks. I die cut the stenciled background with the Pointed Arches Infinity Dies to create a shaped card—hello, visual interest!
I originally tried a single color mat but it felt flat. Splitting the mat—Coral on the left, Azalea on the right—instantly made the card pop with contrast. I layered on a cluster of Copic-colored florals from the Wild Flower Bundle, a heat-embossed “Thinking of You” sentiment (included in the bundle) in white on black cardstock, and five black enamel dots for a finishing touch.
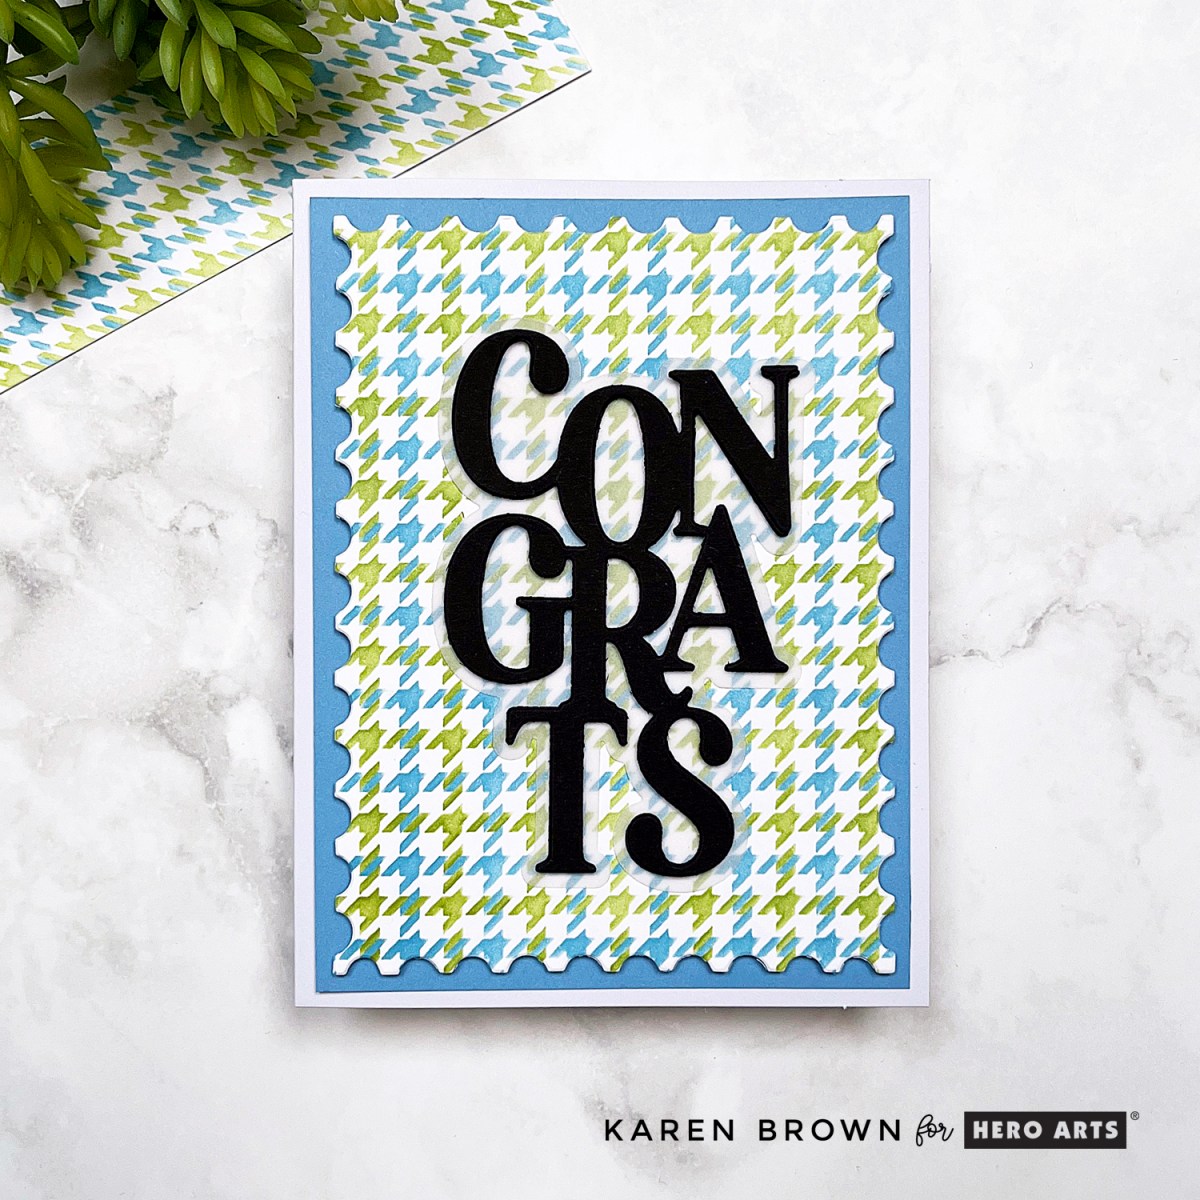
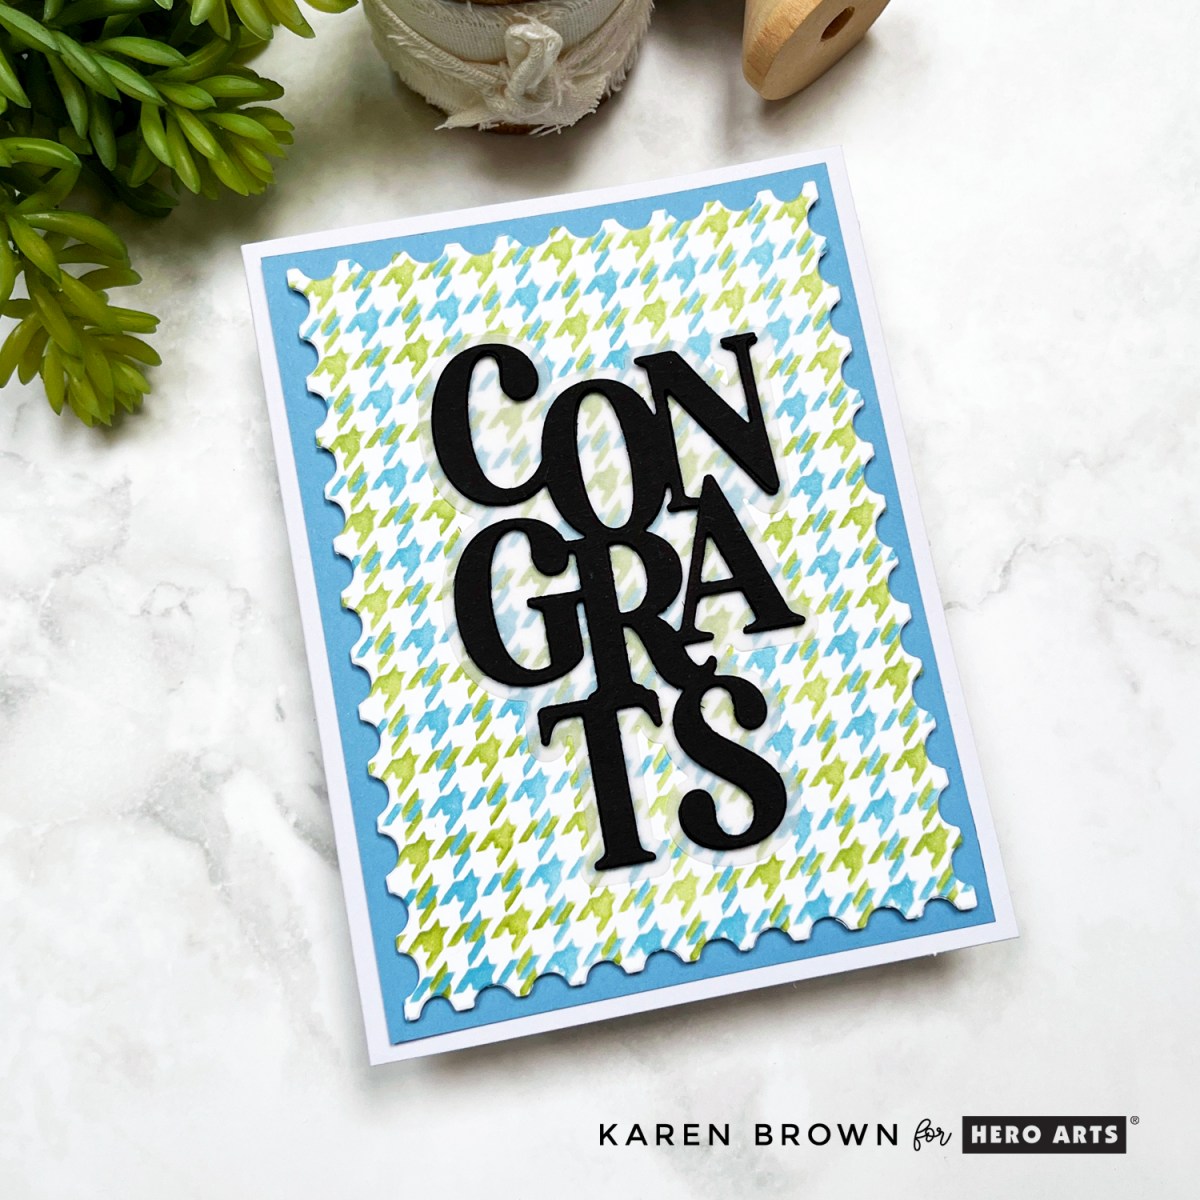
I die cut the bold Congrats sentiment from black cardstock three times, stacked and glued for dimension, and added a soft vellum mat underneath to make it stand out. The sentiment comes from the Congrats and Yay Stamp & Cut Set. Everything was mounted on Periwinkle cardstockand attached to an A2 card base.
You can try monochrome, neutrals, school/team colors, or even select the recipient’s favorite colors. The options are endless—and this stencil plays well with nearly every kind of stamp or sentiment.
The case is cracked, the sleuth is on the scene, and this crafty caper is officially adorable! I’m thrilled to be part of the Hero Arts Instagram Hop – Link to Instagram Hop – celebrating the launch of the Case Closed Collection. My card today features the delightful Curious Crafter Bundle and its star: Miss Detective.
Card Tutorial: The Curious Case of the Custom Cape
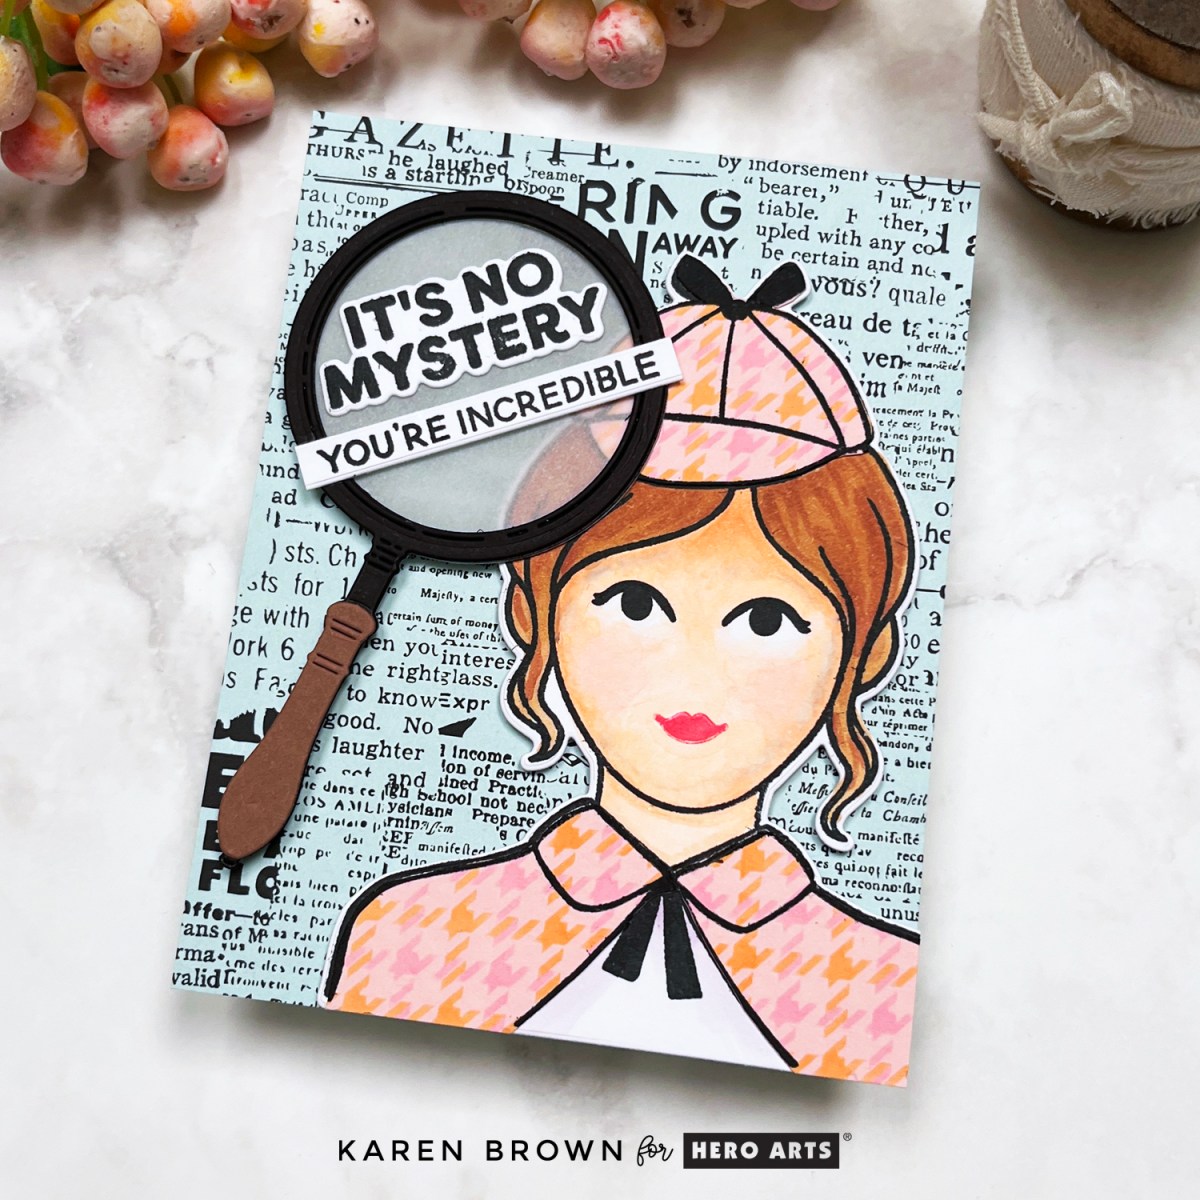
Say hello to my favorite cardmaking detective—a stylish sleuth (inspired by my own daughter!) ready to crack any case with flair. She’s decked out in a stenciled houndstooth plaid cape and Sherlock Holmes-inspired hat, thanks to the Curious Crafter Bundle. The finished look? Think Nancy Drew meets crafty couture!
Here’s how the case unfolded:
Clothing Construction: I stenciled a custom houndstooth pattern over Peony cardstock, then stamped and fussy cut the pieces to dress Miss Detective.
Copic Coloring: I brought her to life with Copic markers: E00, E21, E25, E55, R000, BV000, and BV02.
Vintage Vibes: My background is one of my absolute favorites — the Collage Backgrounds Rub-On Transfers applied to Arctic cardstock. The vintage newspaper style is the perfect setting for some crafty sleuthing.
Spotlight on Sentiment: A large die cut magnifying glass with vellum “glass” focuses attention on the stamped sentiment: “It’s No Mystery, You’re Incredible” — just one of the many clever sayings in this charming Sentiment Stamp Set.
Finishing Touches: I used Precision Glue and craft foam to give the layers dimension and used a bone folder for flawless rub-on application.
Click HERE if you’d like to see my post on how to customize your Hounstooth stenciled background.
Pro Tip: These rub-ons are pure magic! They transfer easily with a bone folder and give a rich, detailed finish — no ink needed!
The Verdict?
The Case Closed Collection is a creative knockout—quirky, clever, and a total blast to work with. Whether you’re channeling your inner sleuth, crafting a personalized card, or just in it for the vintage vibes, this collection offers so many possibilities.
Thanks for hopping along with us on Instagram today! Be sure to follow the trail (aka the hashtag) for more clever creations and inspiration from this fun Hero Arts release.
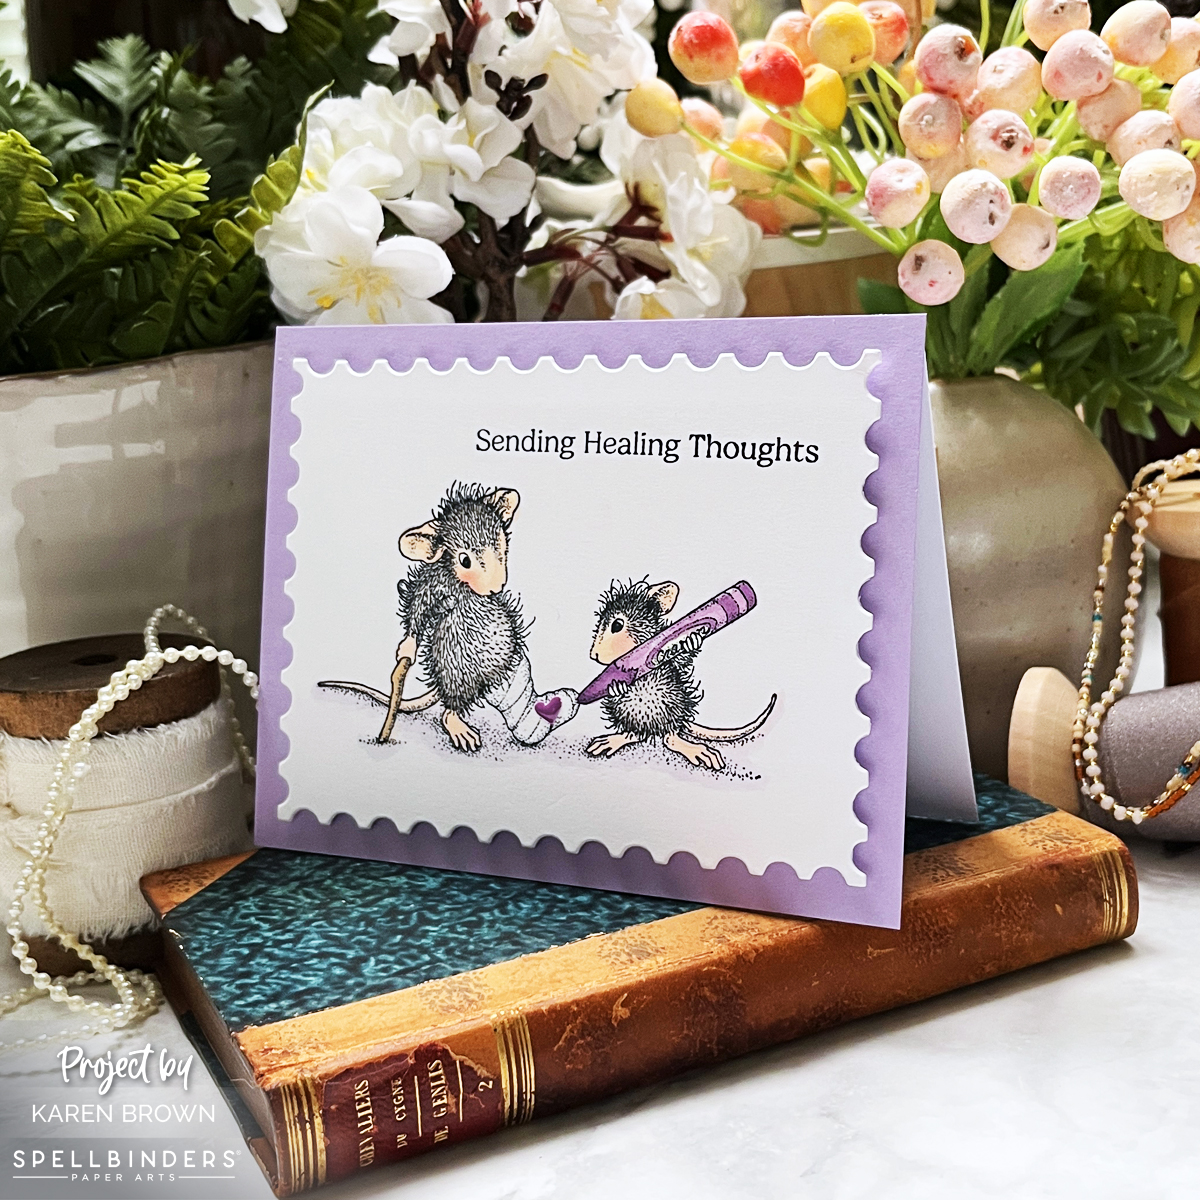
There’s nothing quite like sending a little handmade kindness when someone isn’t feeling their best. Today’s card features the always-adorable House Mouse stamps in a sweet and simple Healing Thoughts Get Well design. With its soft monochromatic colors and heartwarming scene, this card is as charming as it is easy to make!
A Look at the Design
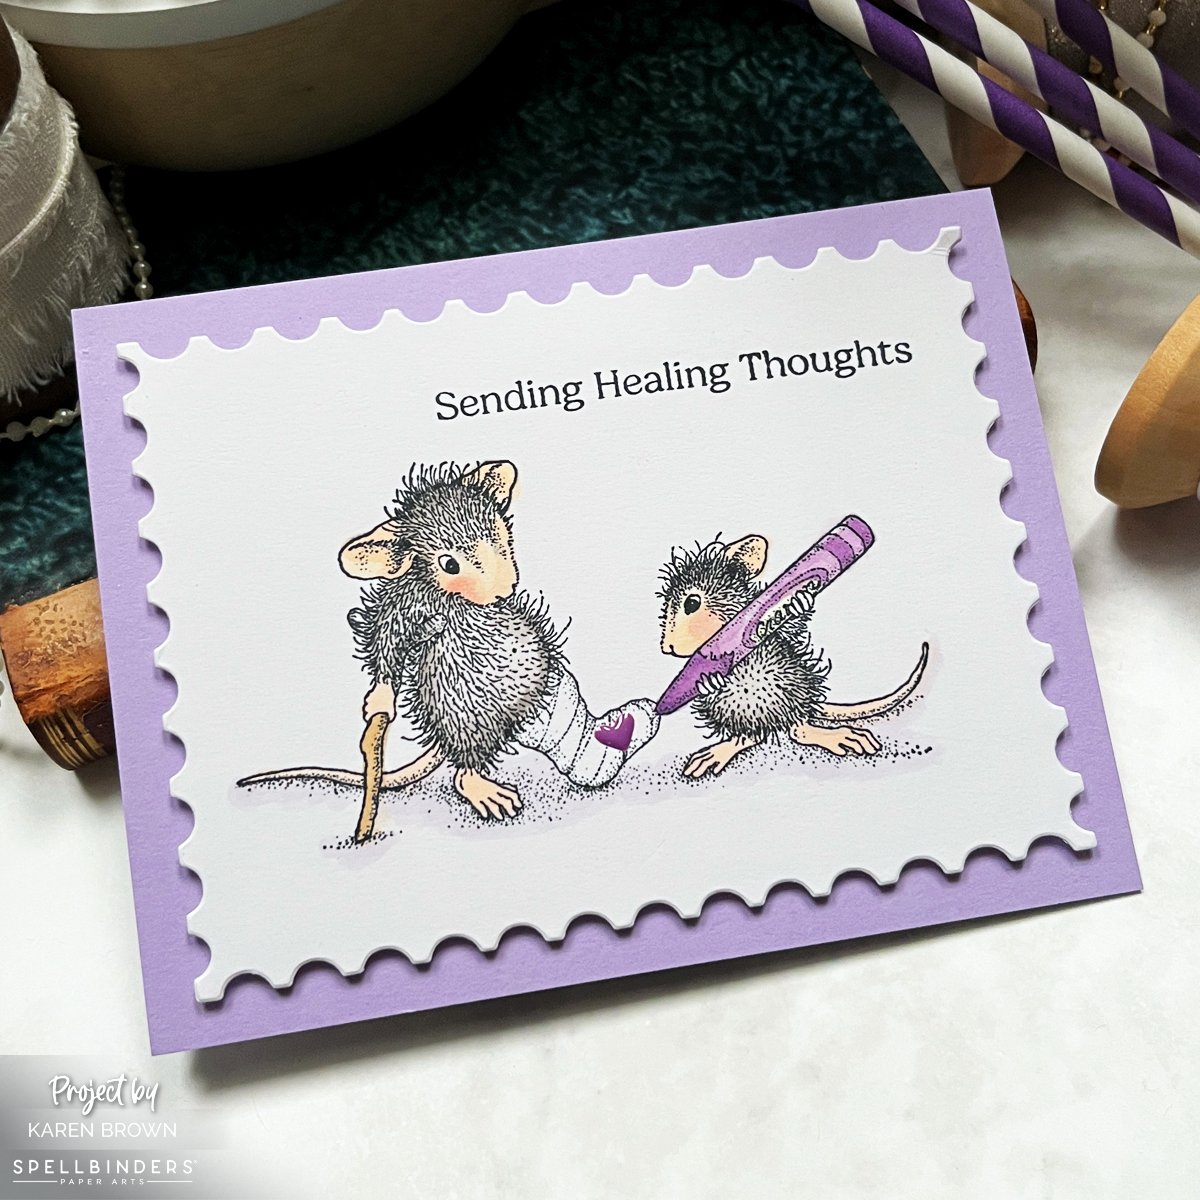
The stamped image showcases an adult mouse with a cast on his left leg, while a juvenile mouse signs the cast with a giant purple crayon—adding a little heart for extra love. It’s a scene that captures both the innocence and warmth of these stamps so well!
To keep the design clean and simple, I used the Nesting Postage Stamp Infinity Die to cut out the panel and mounted it on a Passion Flower lavender card base. The soft lavender hue adds a soothing touch, making this card perfect for lifting someone’s spirits.
The sentiment, “Sending Healing Thoughts,” ties everything together beautifully—because sometimes, a thoughtful card is just the thing to brighten someone’s day.
Why I Love House Mouse Stamps
There’s just something irresistible about House Mouse stamps! 🐭💜 These little critters bring so much warmth, charm, and personality to every card. Whether they’re getting into mischief, sharing a sweet moment, or—like in today’s card—spreading a little cheer, they always manage to bring a smile.
I love how these stamps work for so many occasions. Their soft, sketchy details make them a joy to color, whether you go for bold tones or a simple, monochromatic look like I did here.
House Mouse cards are always a hit with recipients, and I can’t wait to share more of my little mousey creations with you!
Copic Colors Used
Mice: W0, W3, W5, E00, E50, R000, R20
Crayon: V01, V15, V17
Cane: E31
Shadows: BV0000
Final Thoughts
Having a few Get Well cards on hand is always a great idea, and this quick and easy House Mouse design is perfect for the job! Sometimes simple is best, and this card proves that a heartfelt sentiment and a sweet image can go a long way in brightening someone’s day.
Do you love House Mouse as much as I do? Let me know in the comments! And if you’re looking for more inspiration, check out these previous House Mouse creations:
Welcome to another exciting Hero Arts release! For March 2025, I created two unique cards that highlight the versatility of the new products. One is a vintage-inspired die-cut design featuring the Suitcase and Florals Fancy Die, while the other is a beautifully blended, pastel-hued circular stamped card. Let’s jump into the details!
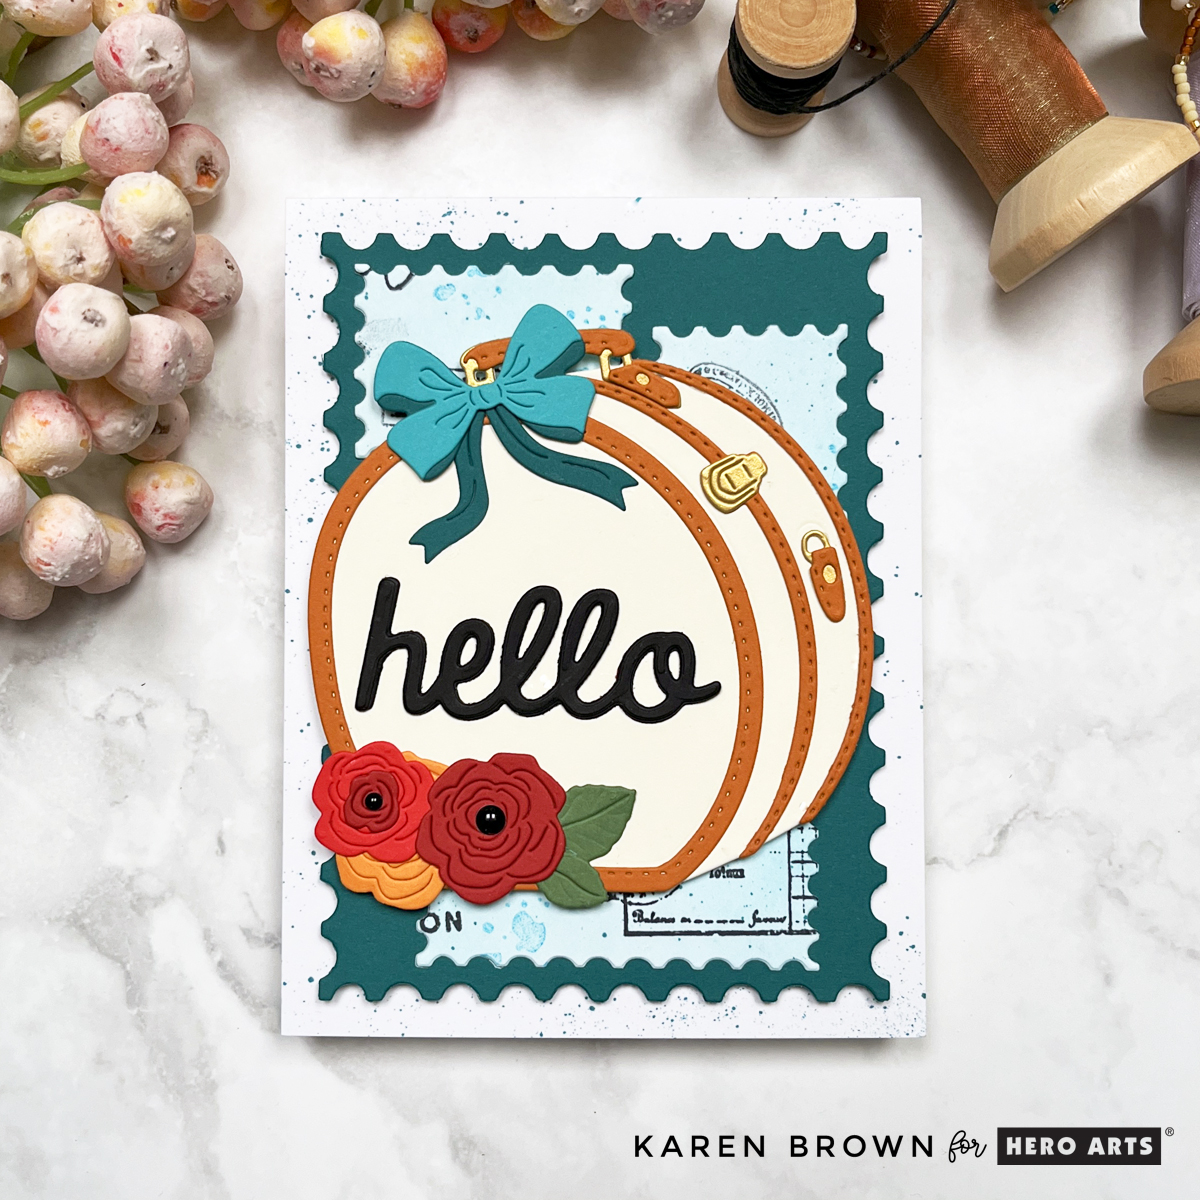
This card is all about vintage charm! The focal point is a cream-colored hat box-style suitcase with tan trim, die-cut from the Suitcase and Florals Fancy Die. A lovely teal bow is tied to the handle, and delicate die-cut flowers add a soft floral touch.
Framing: A vivid Blue Spruce mat behind the die-cut stamps makes the alabaster hat box pop.
Sentiment: A die-cut, scripty “hello” (Friend Words Sentiment Dies) that complements the vintage theme. Two black enamel dots in the center of the flowers continues the bold color palette.
Pro Tip:
A deep Blue Spruce background mat is key to making lighter elements like the alabaster suitcase stand out.
Color Swatching:
To help with color coordination, I also swatched my cardstock colors using the Spellbinders Color Swatch Petal Dies—a handy way to visualize your palette before committing to a design!
Color Wheel Cardstock Colorsused: Alabaster, Terracotta, Poppy, Cranberry, Carrot, Teal Topaz, Blue Spruce, Fern and Brushed Gold.
You can find the entire Color Wheel Collection HERE.
Card 2: Pastel Bow-Themed Circular Card
For my second card, I went with a soft, rainbow gradient-colored design that’s easy to recreate. This is a DIY card that’s great for beginner cardmakers, offering a fun way to experiment with color blending and shaped card designs. The 6 x 6″ Bold Print makes stamping so easy! The bows are already laid out perfectly, so no need to spend time arranging your dies.
Design Details:
Stamp: The “Bows” Bold Cling Stampstamped on smooth white cardstock and colored with pastel Copic markers.
Color Gradient: Blends from creamy yellow at the top to soft pinks, corals, lavender, and blues at the bottom.
Card Shape: Using my Nesting Circle Dies, I die cut a circle from my Copic colored panel. To make my card base, I die cut two circles from Charcoal cardstock, scored the back one at 3/4″ and then glued the tops together. To make this card even easier, you could make a traditional A2 rectangular card, which would exclude using infinity dies.
Finishing the Card: I added a small “for you” heat embossed sentiment and some Clear Enamel Dots.
Pro Tip:
Use craft foam behind your card panels for a polished, professional look with added dimension!
Final Thoughts
Both of these cards showcase the March 2025 Hero Arts release in different ways—one with vintage textures and layers, the other with simple stamping and coloring. Whether you’re a fan of intricate die-cutting or quick, colorful stamping, there’s something in this release for you!
Let me know in the comments—which card style do you love most? And don’t forget to check out the full Hero Arts release for more inspiration!
Hi there! I’m so happy to share a card project that combines whimsical charm with vibrant color. If you love crafting as much as I do, you’ll want to stick around for all the dreamy details.
The Star of the Show: A Floral Rainbow
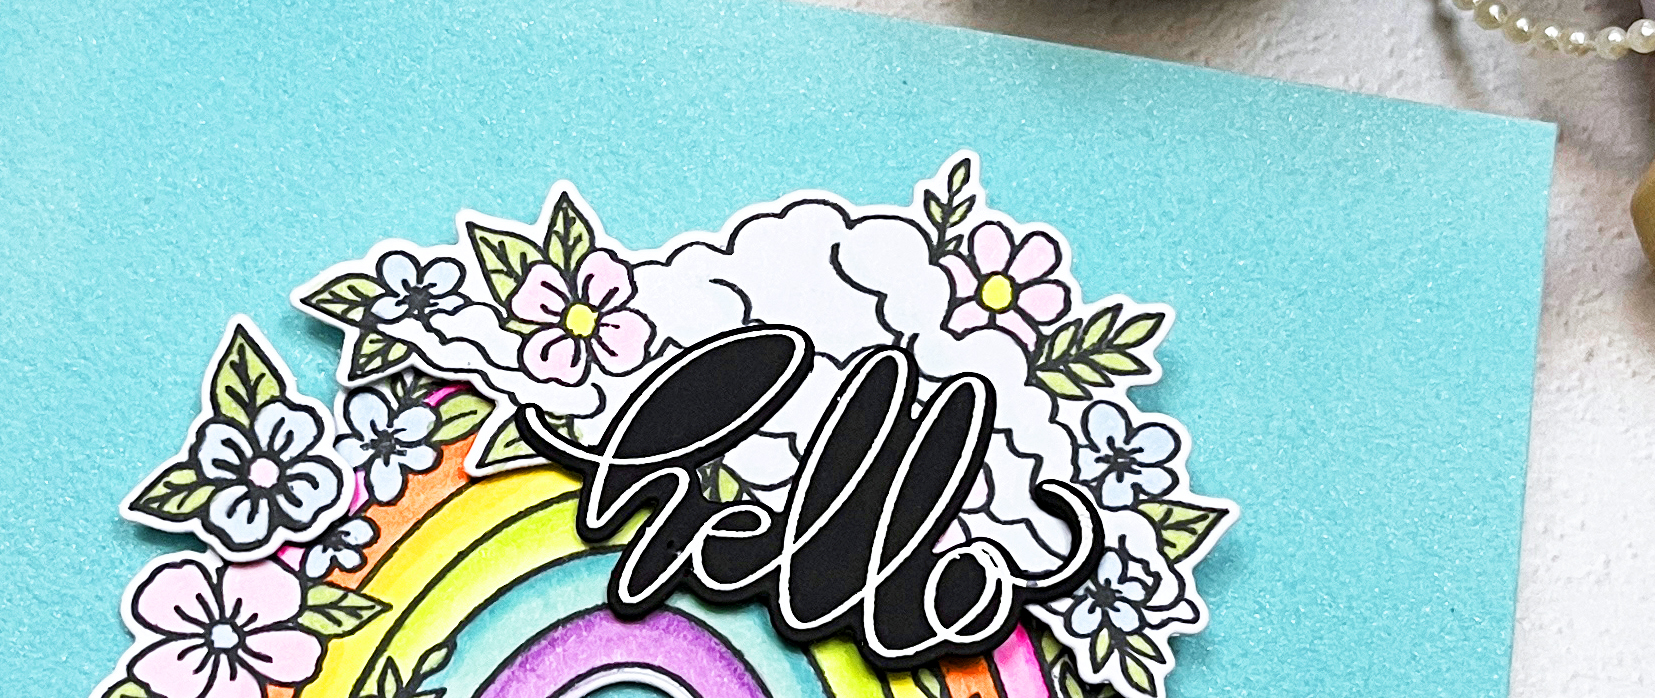
To me, Hero Arts Floral Rainbow and Clouds stamp and die bundle feels like a burst of happiness! I perched my rainbow and clouds on a custom background made of handmade glitter cardstock. By combining blue and green metallic shimmer sprays on watercolor paper, I created a sparkling, ethereal look that mimics a sunny sky. Now, let’s dive into the details of this colorful creation!
At the heart of this design is a vibrant rainbow that I stamped and brought to life with Copic markers. The colors are rich yet soft, evoking a dreamy vibe that’s both uplifting and playful. After coloring, I used coordinating dies to cut out the floral arc, ensuring clean lines and perfect dimension. It’s not just a rainbow; it’s a celebration of color and joy!
Creating your own glitter cardstock is easier than you think and adds a personalized touch to your projects. Here is how I created my background:
I taped a panel of watercolor paper to a hard board and brushed water over the surface with a flat brush. I didn’t saturate the paper, but I did add a light coating of water.
Next, I mixed Blue + Shimmer Tone on Tone Metallic Spray with just a hint of Green + Shimmer Tone on Tone Metallic Spray in a paint palette and then painted the mixture on the wet watercolor paper with a damp flat brush. These sprays are very pigmented, so start with a little and add additional spray if you want more intense color, or more water if you want a more muted shade. I applied two layers but I didn’t bother to let it dry in between.
I let my shimmer panels dry overnight, but you could speed up the drying with your heat tool.
Experiment with different color combinations to make your custom glitter cardstock truly one-of-a-kind!
To finish my focal point, I heat embossed the beautiful scripty “hello” sentiment that is included in the bundle.
Glitter can be tricky to capture on camera, but I hope you can see shimmer and sparkle in this close-up photo.
Who wouldn’t love a little rainbow magic in their mailbox? Let’s keep spreading those handmade vibes, one card at a time! 🌈✨
Adorable animals…..yes please! Stamping a cute puppy, reindeer or fox onto a “Holiday”, “Get Well Soon” or “Happy Birthday” card is a wonderful way to share encouragement and celebrate someone special. And it’s not just for the holidays, Hero Arts November Card Kit is going to be a year round favorite in my craft room as my family loves cute critter cards.
And, there are LOTS of changes going on at Hero Arts. I’ve included some Hero Studio changes later in this post, so keep scrolling!
Hero Studio November 2024 Card Kit of the Month
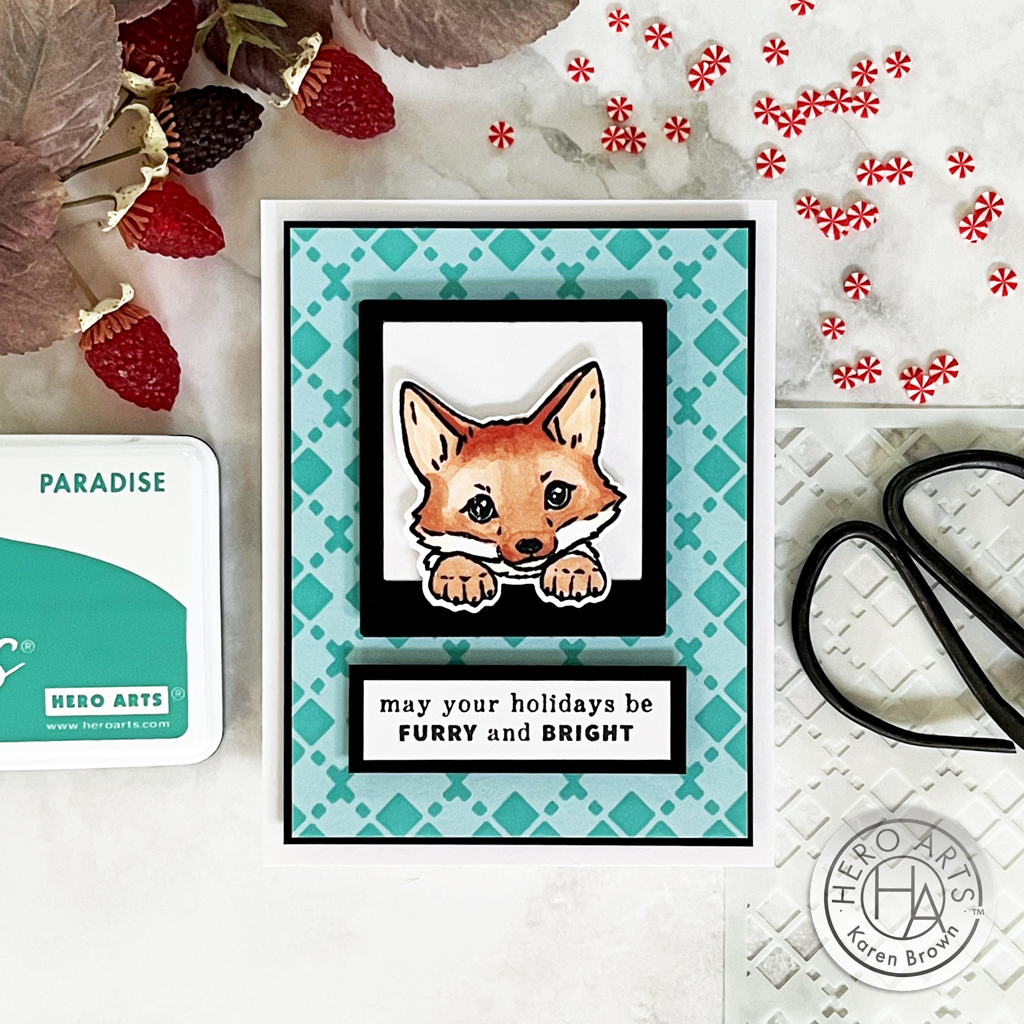
I obviously LOVE this kit! Today I am sharing three cards made with the November Kit and I can’t decide which is my favorite. The kit includes loads of greatness and I used 3 of the 8 charming animal stamps and dies, the two stencils and Merry Christmas sentiment.
Curious about this month’s kit? Let’s take a peek inside the November Card Kit:
KIT INCLUDES: • Peeking Animals Clear Stamp Set, 6” x 8” • 17 Coordinating Dies • 6 Fancy Dies • 2 Sheets Each of Pine & Cherry Cardstock, 5.5″ x 8.5″ • 2 Stencils in Argyle & Cable Knit Patterns, 4.75″ x 6″ • 28 White Die Cut Tags, 4 different styles • White Hero Pearls, 0.6 oz. • Berry Hero Wax, 1 oz.
Kit Cost:
$46 with Subscription + FREE SHIPPING!
$49.99 One Time Purchase (while supplies last)
5 Wonderful Kit Options:
For this blog post, I created with the November kit and two Extraordinary Extras, but there there are 5 kits plus 6 Extras available. You can also buy the Whole Studio, which includes all 5 kits at a wonderful savings.
I wanted to show you two more kit cards that I created. I used to have a sweet blond lab named Shelby, so I created this card with Shelby in mind. Isn’t she darling? My Shelby was with us for 12 1/2 wonderful years.
Sometimes I just like to color, and this Winter Foliage Pattern Stamp Setis perfect coloring fun! The stamps are already perfectly positioned on one large 4×6″ clear stamp, which makes stamping a breeze! I didn’t use it today, but there is also a coordinating Winter Foliage Pattern Cover Die.
Creation Details:
I stamped and Copic colored my foliage elements. Copic colors used: N1, R22, R24, R27, R39, YG03, YG25, YG17, BG11, BG23, Black.
Pro Tip: I added ink splatters by flicking the brush end of my Black Copic Marker along the inside of the cap towards the colored panel. This gives nice small ink splatters. Another easy way to add ink splatters is by putting some Licorice Reactive Ink on an Acrylic Block and then flicking the ink onto the panel with a fine brush or fan brush. Great results either way.
The sentiment is from the Holiday Messages Stamp and Die Bundle and I added a Vellum shadow.
Big Changes at Hero Arts:
Faster Orders: New subscribers will no longer have to wait until the following month to receive their first kit. Now receive the the same monthly design when you subscribe! The sign-up window will be open the 1st – 27th each month. Also, starting in December the Monthly Add-Ons will be available for purchase on the 1st of each month as well.
• Charge Edit Window: Subscription charge day is moving to the 3rd of each month. Beginning in December, we will revealing kits on the 1st, which means you can make subscription changes prior to the charge date following the reveal.
• Subscribers Come First: Non-subscribers will no longer be able to purchase the a la carte products that are live within the Hero Studio month. Those designs will ONLY be available to active subscribers the first month. If there are any leftovers, they will be available for a la carte purchase to non-subscribers the following month.
• Fulfillment Changes: We are also making some fulfillment changes to help us get the orders out quicker and more efficiently. One of the main changes will be the Hero Studio Add-Ons will ship separately from the recurring Hero Studio orders. Subscribers will still receive free shipping on the add-ons for the first week.
Want to learn more about all the changes coming to Hero Studio? Check out the FAQ section of the website.
BLOG HOP:
Hero Arts will give away a $50 gift card, drawn from the comments left across the hop. Enter by Sunday, November 10 at 11:59pm Pacific, and the winner will be announced on the Hero Arts blog the following week.
In the world of cardmaking, some stamps hold a special place in our hearts, evoking memories of past projects and creative journeys. As Hero Arts celebrates their 50th Anniversary, I thought it would be fun to grab one of my oldest stamps and rediscover the magic of this long time favorite: Venetian Neighborhood.
Best Background Stamp for Coloring
I’ve owned and loved Hero Arts Venetian Neighborhood for five years. I bought this stamp in April 2019 when it was part of that month’s MMH release. It’s been such a fan favorite over the years, that it is still available in the shop.
The Best of Hero Arts
I created a quick Instagram Reel of my cardmaking process that you can find BELOW:
There’s a unique joy that comes with coloring a beautiful stamp like Venetian Neighborhood. The process is meditative, therapeutic even, as we lose ourselves in the rhythm of shading and blending, completely absorbed in the act of creation. And when we finally step back to admire our handiwork, there’s a sense of pride and satisfaction that comes from making it uniquely ours. In a world filled with hustle and bustle, coloring a beautiful stamp offers a moment of peace and serenity, a chance to reconnect with our inner artist and revel in the simple pleasure of creating something beautiful.
We’ve discovered in today’s blog post, there’s something truly special about revisiting old favorites like the “Venetian Neighborhood” background stamp. I enjoyed our trip down memory lane and am so pleased you stopped by today!
Hey, crafty friends! Today, I have a super fun and enjoyable cardmaking project to share with you, featuring everyone’s favorite little critters – House Mouse – and the NEW Stay Cool stamp set. This time, we’re creating a whimsical card with the cute mouse chilling in front of a fan, perfect for sending a refreshing message to someone special. What makes this card extra special is its minimalist vintage look, achieved through a limited color palette of blues and tans. So, let’s dive in and get crafting!
House Mouse: Stay Cool (RSC-028)
“Stay Cool” is also perfect for creating a good “Man Card” and I plan to give this creation to my husband. Wouldn’t this make the cutest postcard?
My Design Process:
Stamp House Mouse: I stamped my panel with the Stay Cool stamp and my Misti stamping tool.
Color Your Mouse: Now comes the fun part! I used Copic markers but you can also use your colored pencils or watercolors to bring your adorable mouse to life. I found this stamp easy to color because of all the shading detail.
Add the Sentiment: Stamp or adhere your chosen sentiment. I selected “You are the coolest”. This adds a sweet touch to your card and ties everything together. This stamp set also has two other fun sentiments: “take time to just chill” and “I am your biggest fan”.
Finishing Your Card:
I used a corner rounder on the edges of my background and kraft card base.
In keeping with the vintage vibe I was going for, I added some subtle ink blending around the edges with Antique Linen Distress Ink.
I really love the House Mouse series and I have past blog posts with a few other charming stamp sets. If you would like to see my House Mouse Valentine, click HERE. And I have three adorable House Mouse cards that you can see HERE.
This House Mouse card with its darling mouse enjoying a cool breeze is sure to bring a smile to anyone’s face. So, grab your crafting supplies and get ready to create something truly special!