I’m so excited to be part of CASE Me A Christmas Card 2025! My talented crafty friend @michelle_lupton invited me to join this year’s creative lineup, and I was thrilled to say yes. This fun annual event features ten creative hops throughout October—two on YouTube and eight on Instagram—where cardmakers CASE (Copy And Selectively Edit) cards from one another.
To join the fun, create your own Christmas card inspired by one from the hop and upload it via Inlinkz on Michelle’s blog. You can also win prizes from amazing sponsors just by participating or leaving comments on the hop posts!
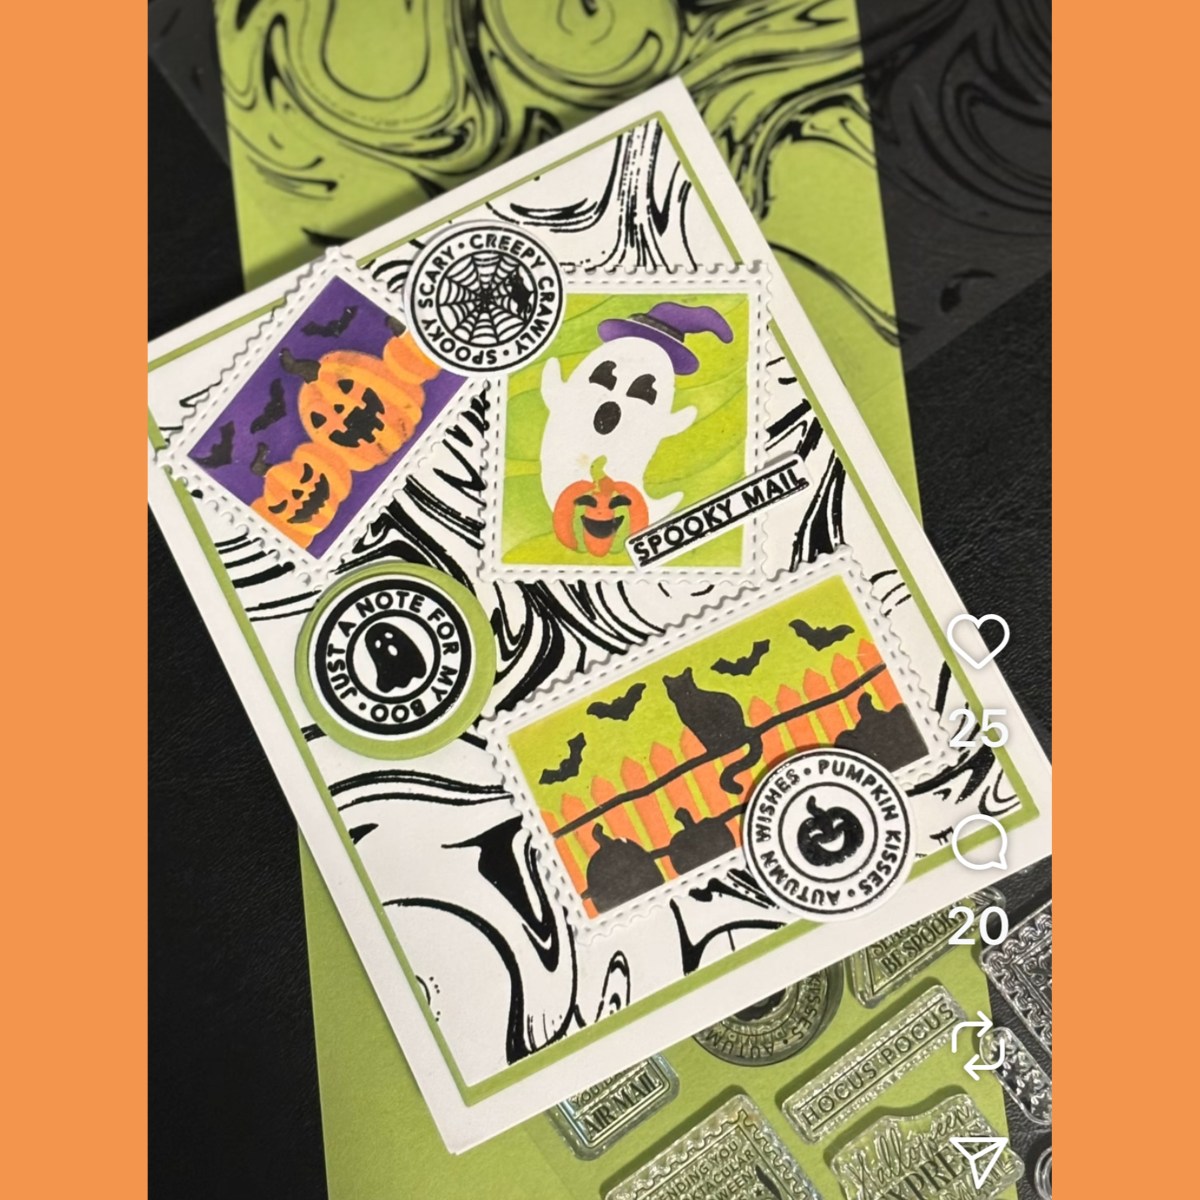
I’m part of Hop #9 and am CASEing the wonderful @expressivepaper – Kathy Pisupati. Kathy created an absolutely adorable Halloween card that I just had to reimagine as a Christmas design!
Kathy’s Halloween Card:
My Card Details
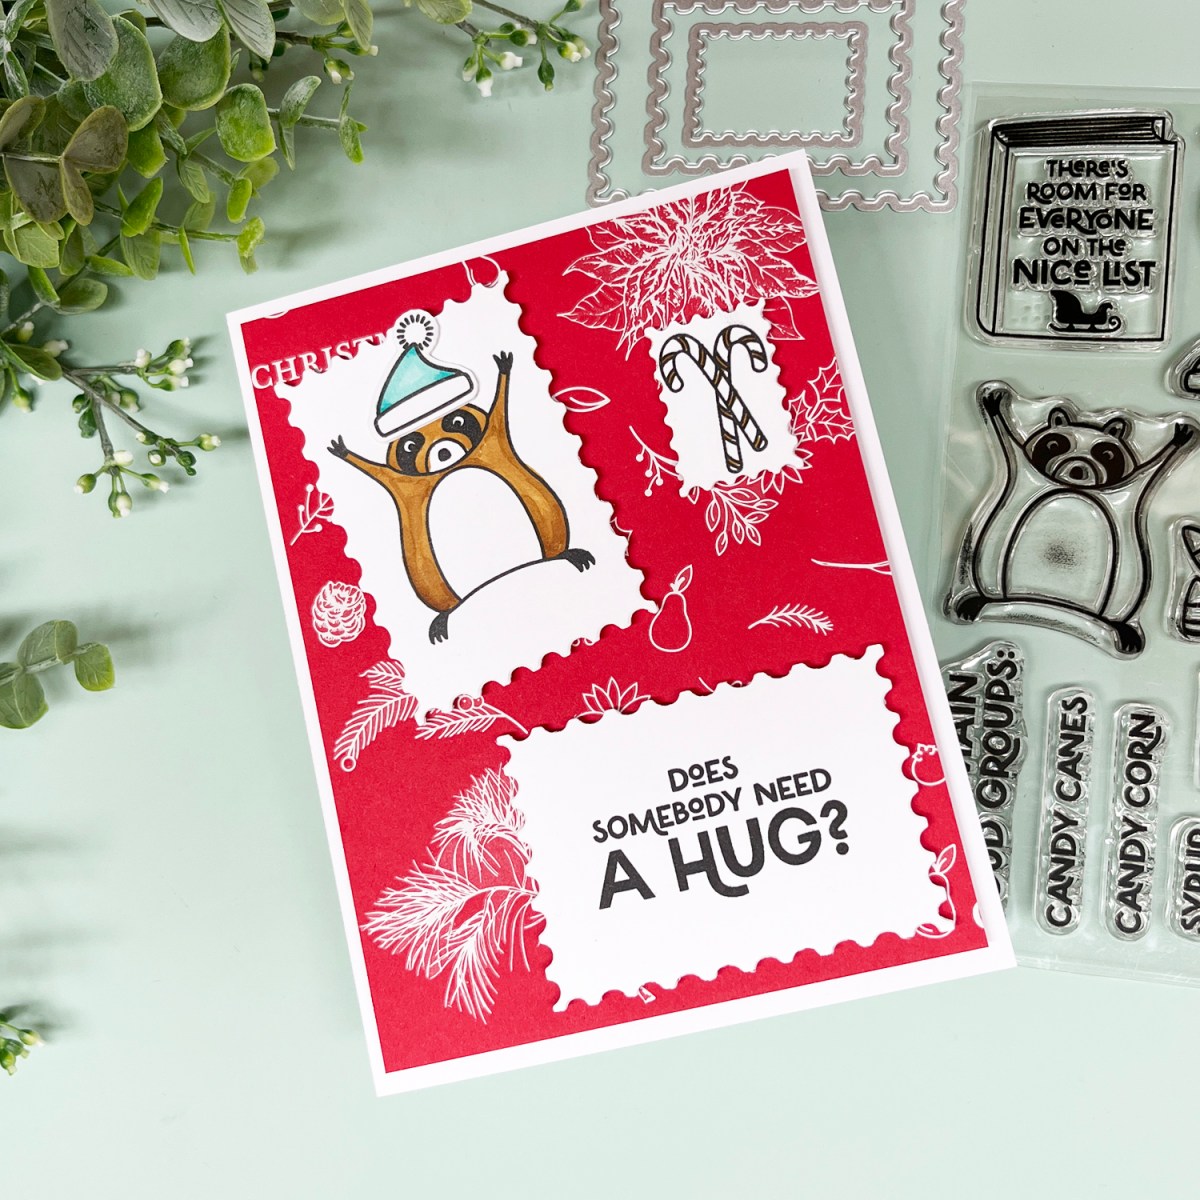
I was inspired by Kathy’s use of postage stamp dies (always a favorite of mine) and her clever background. Instead of stenciling, I used one of my other go-to products—Hero Transfers—to create my own twist.
I stamped an adorable raccoon reaching for a hug, paired with the perfect sentiment: “Does Somebody Need a Hug?” My color palette is limited to Christmas red, white, and small dabs of aqua and tan, which gives the card a striking and dramatic look while keeping it silly, fun, and a little bit heartwarming. I also think it’s a great option for masculine cards this holiday season!
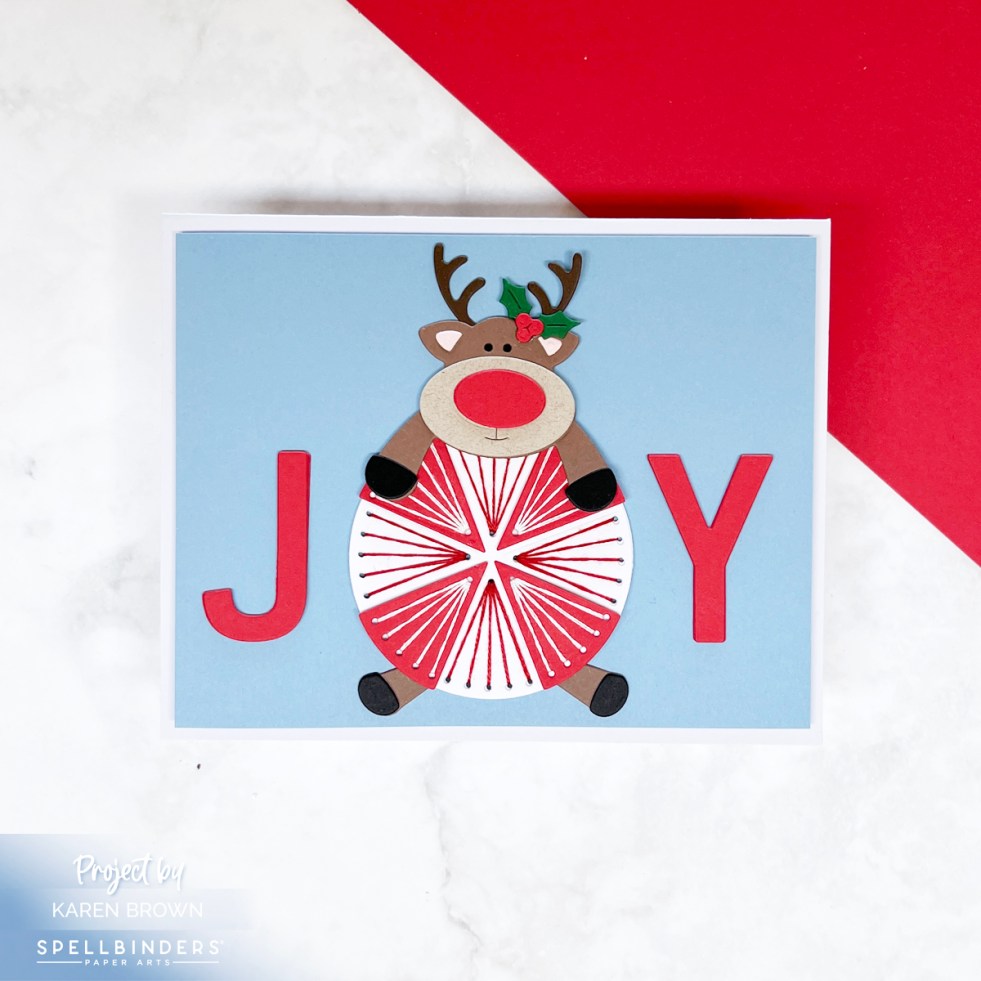
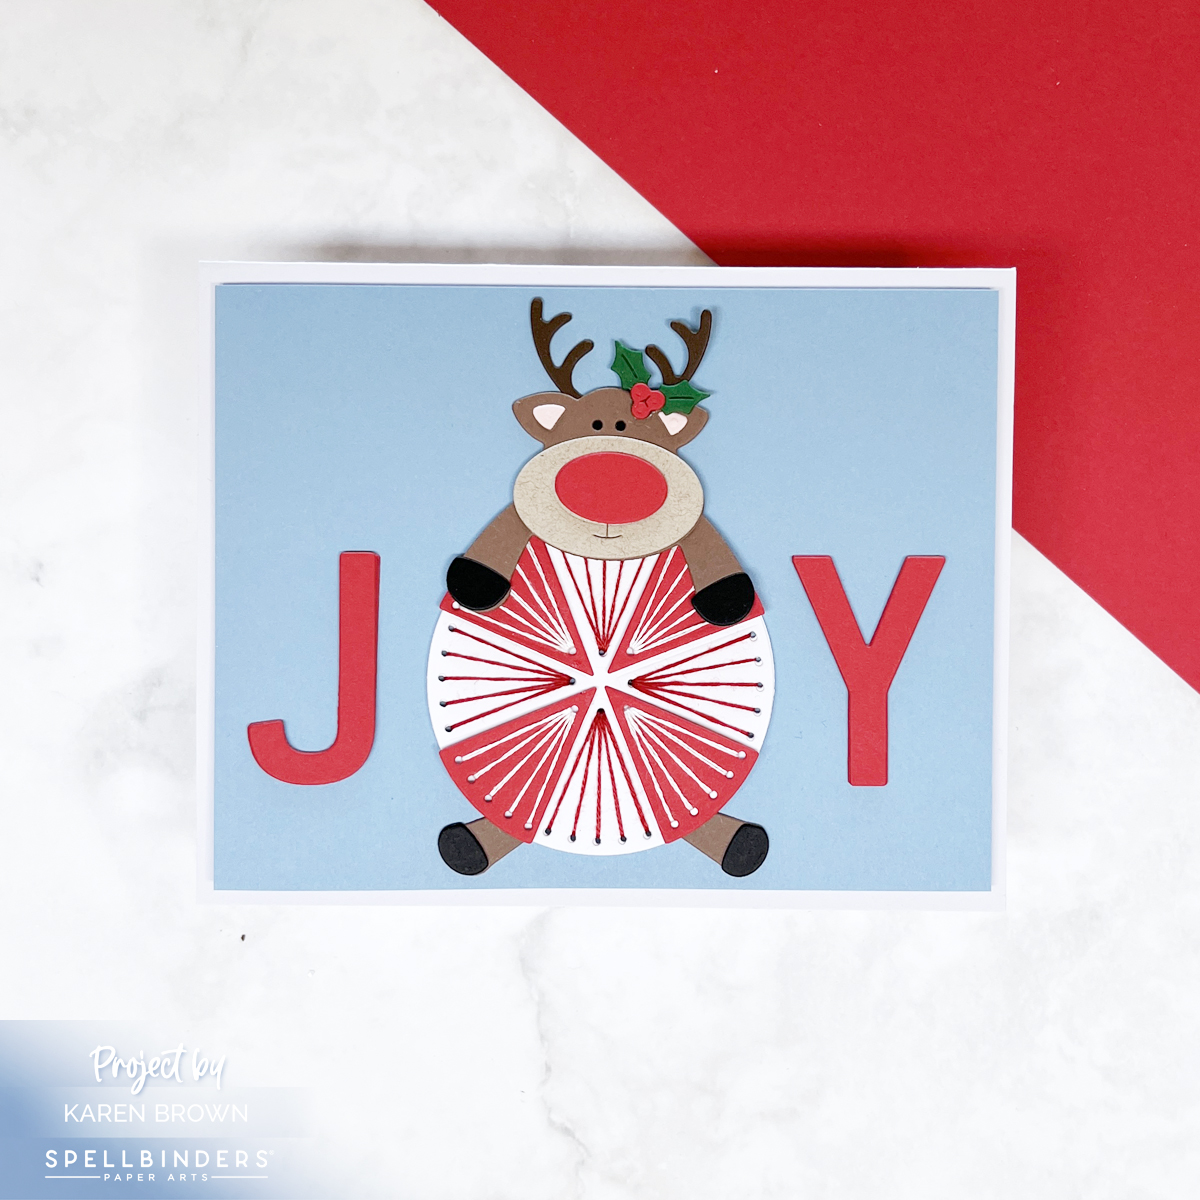
The October 2025 Stitching Die of the Month is called Peppermint Prancer, and it’s as festive as it sounds! This month’s design combines the sweetness of peppermint candy with the whimsy of a playful reindeer—perfect for cheerful holiday cards.
🍬 The Peppermint
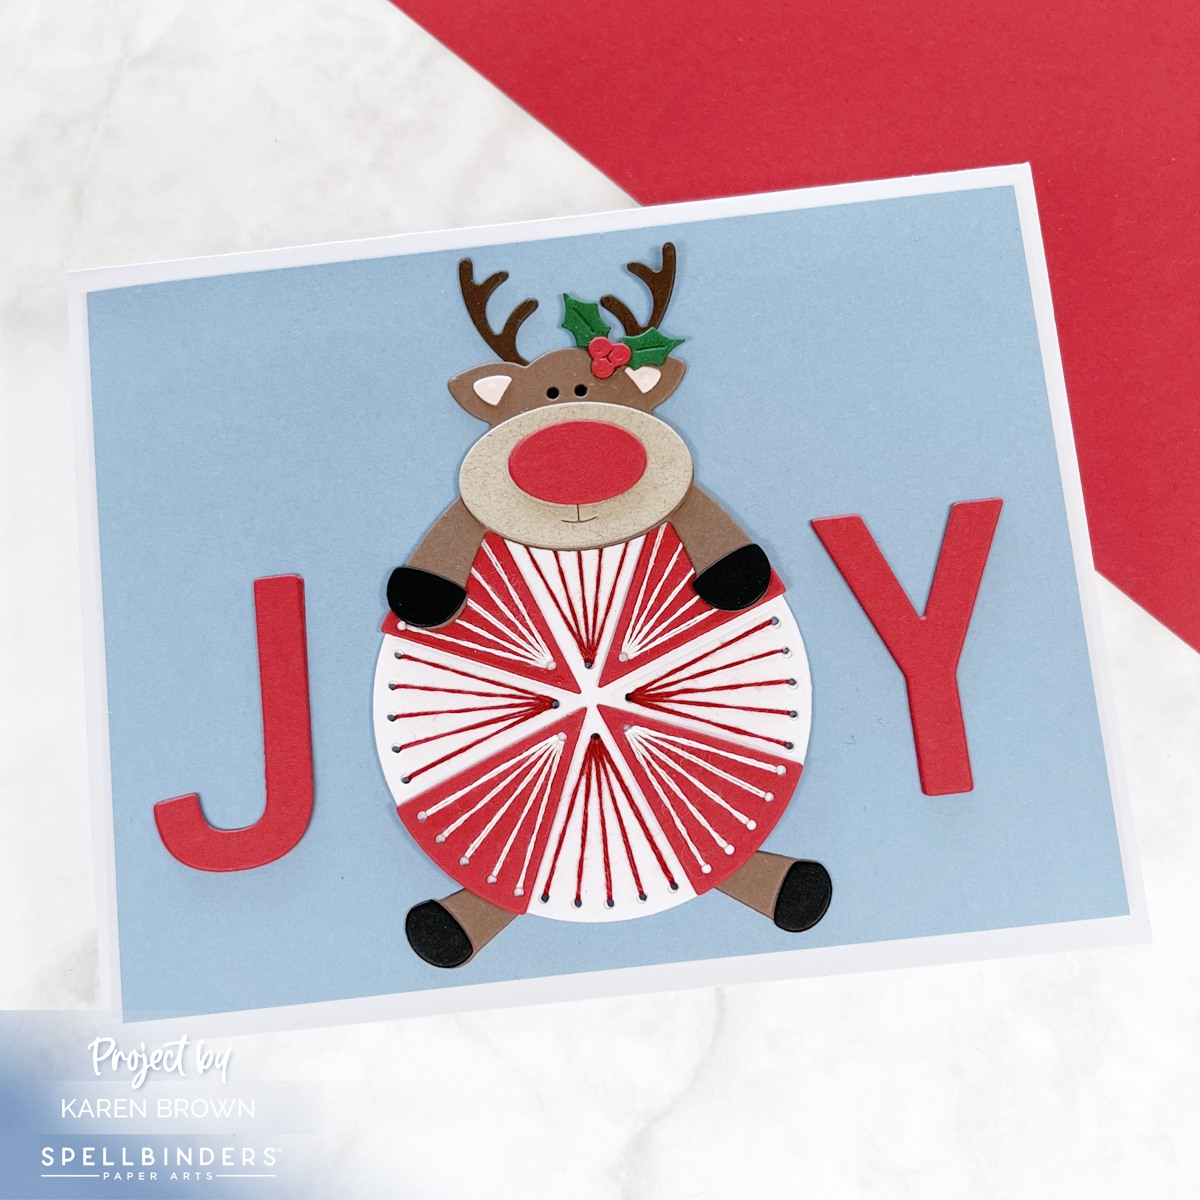
I started with a Cascade blue background to give my card a crisp winter feel. The stitched peppermint takes center stage: alternating red and white cardstock wedges stitched with contrasting thread—red stitches on the white wedges and white stitches on the red wedges. The result is a bold, candy-like design that feels dimensional and playful.
🦌 The Reindeer
Of course, no holiday peppermint is complete without a reindeer! I gave my prancer a bright red die cut nose to turn him into Rudolph, and I positioned him sprawled out across the peppermint as if he’s hanging on for dear life. It makes the whole card feel lighthearted and full of energy.
🎄 The Sentiment
Here’s where the fun twist comes in: the stitched peppermint doubles as the “O” in the word JOY. I die cut a bold J and Y (included in the kit) from the same red cardstock as the peppermint so the word stretches across the entire card front. The peppermint pulls double duty as both candy and sentiment—an easy way to make your design more impactful.
✂️ Stitching Details & Supplies
I stitched with two strands of embroidery floss and recommend keeping thread taut but not tight for smooth stitches. For those new to stitching dies, I’ll be linking to my favorite stitching accessories and tools so you can jump right in.
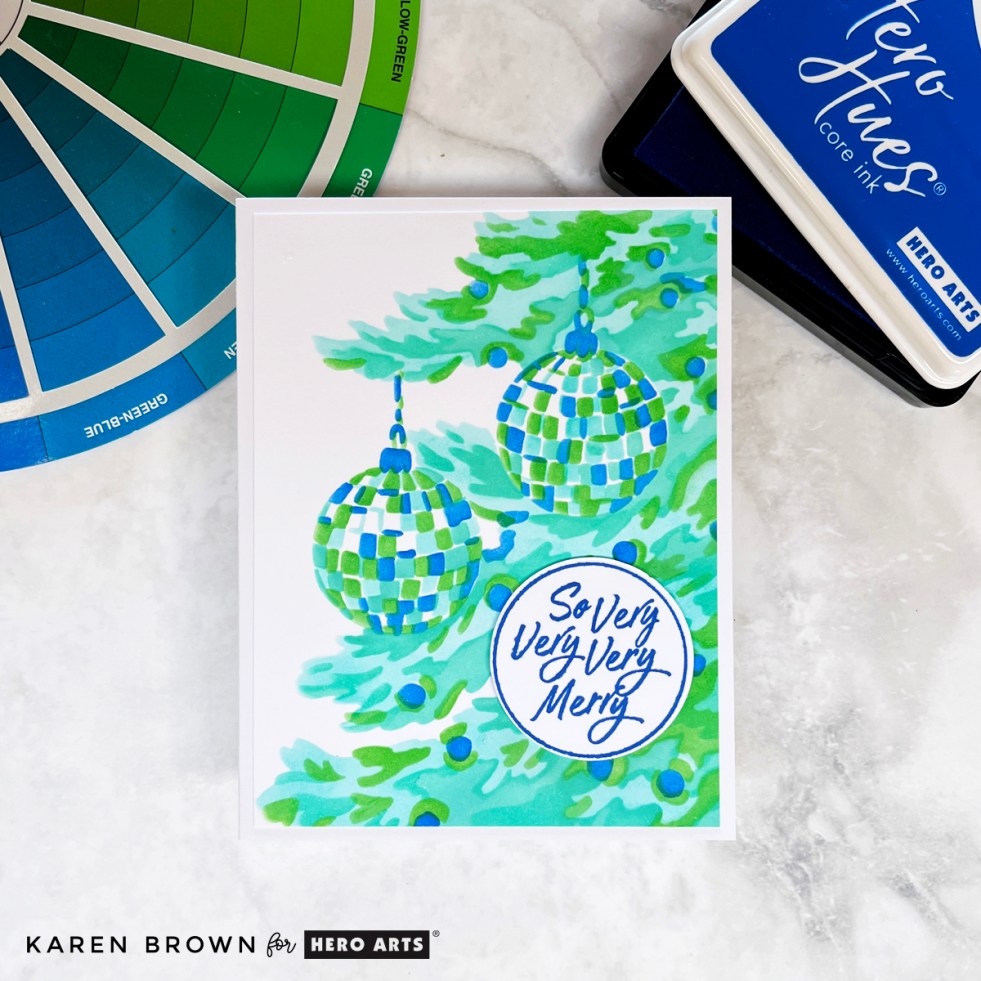
I couldn’t resist creating one more card with the October 2025 Release—this time featuring the Layering Stencil: The Tree. This gorgeous four-layer stencil creates a close-up view of a Christmas tree filled with ornaments, and it was such a joy to blend.
You can see my other October Club Kits Cards HERE.
I chose analogous colors (neighbors on the color wheel) for a soft, harmonious look in shades of greens, aquas, and blues:
Using Deluxe Smooth White Cardstock made the ink blending go on like butter, and as always with Hero Arts stencils, the layers lined up perfectly.
For the sentiment, I used the “So Very Very Merry” circular stamp and coordinating die from the October Card Kit, stamped in Indigo ink. The deep blue ties the whole design together beautifully.
This card has already gone into my holiday stash, ready to be mailed in December!
Today I’m sharing a playful Christmas elf card that combines bold colors, a cheeky sentiment, and a versatile foiled background. Even better—I filmed the entire process so you can craft along step by step.
I have a list of key supplies used below the video.
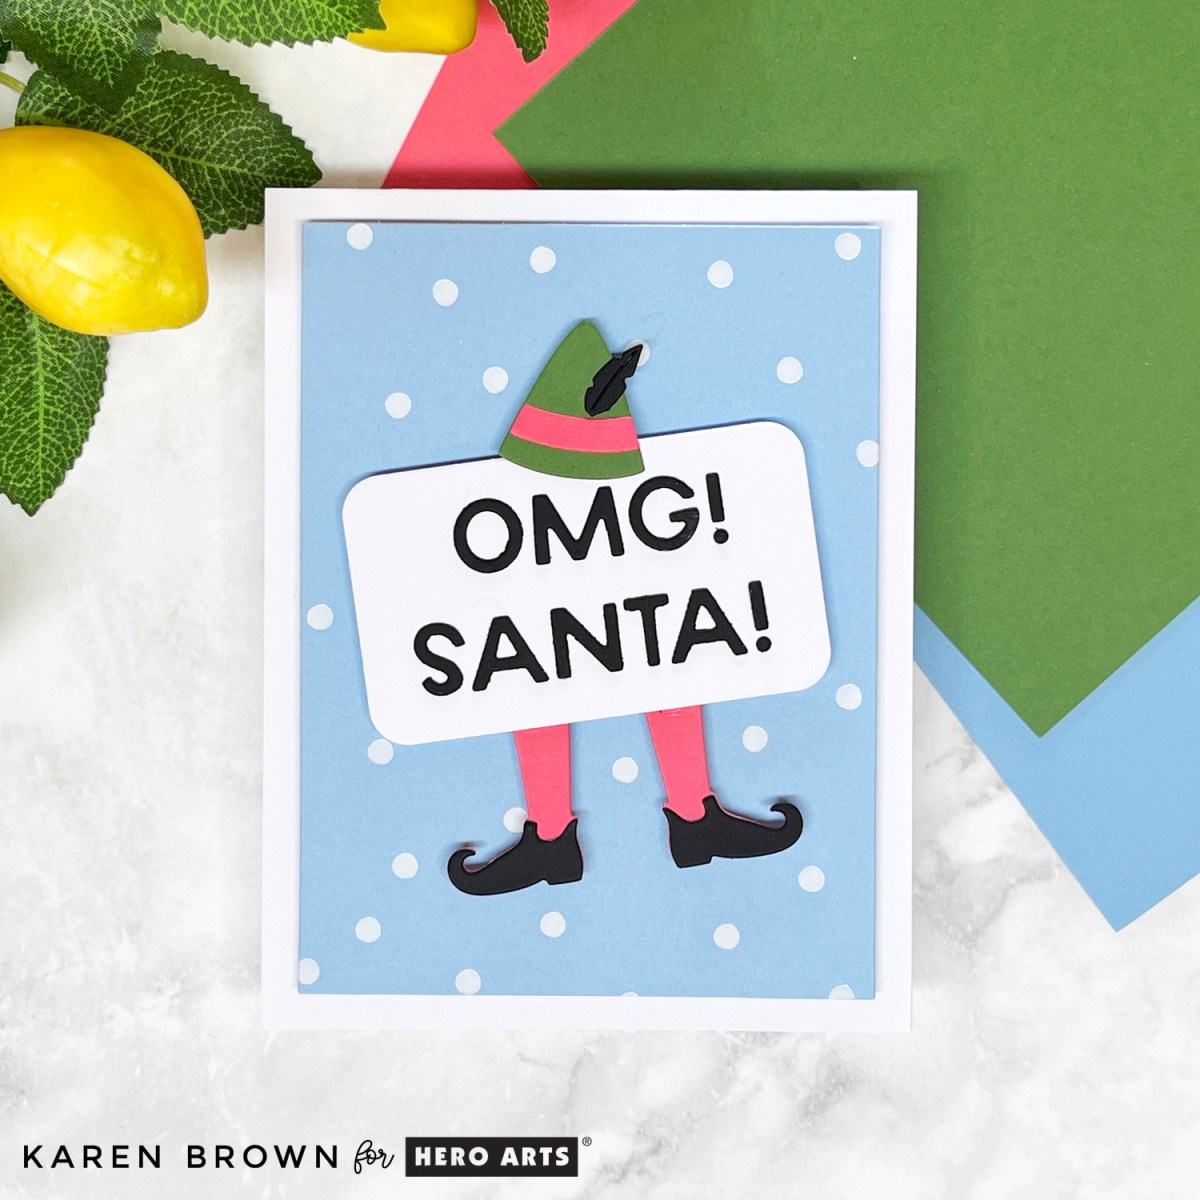
I started with the Hero Arts Celebration Press Plate (part of the Yule Fuel Collection). I love how versatile this plate is—it looks like snowflakes when foiled in white but could also become a confetti background in bright colors. For this project, I went snowy, since my elf needed a winter wonderland to stand in.
The Sassy Elf
Next came my focal point: a die cut elf from the Yule Fuel Collection. He’s cheeky, a little silly, and absolutely festive. To give him personality, I used ColorWheel Cardstock in:
Cascade (blue)
Dahlia (pink)
Fern (green)
The mix of colors makes him bold and fun—perfect for standing out against the snowy background.
The Cheeky Sentiment
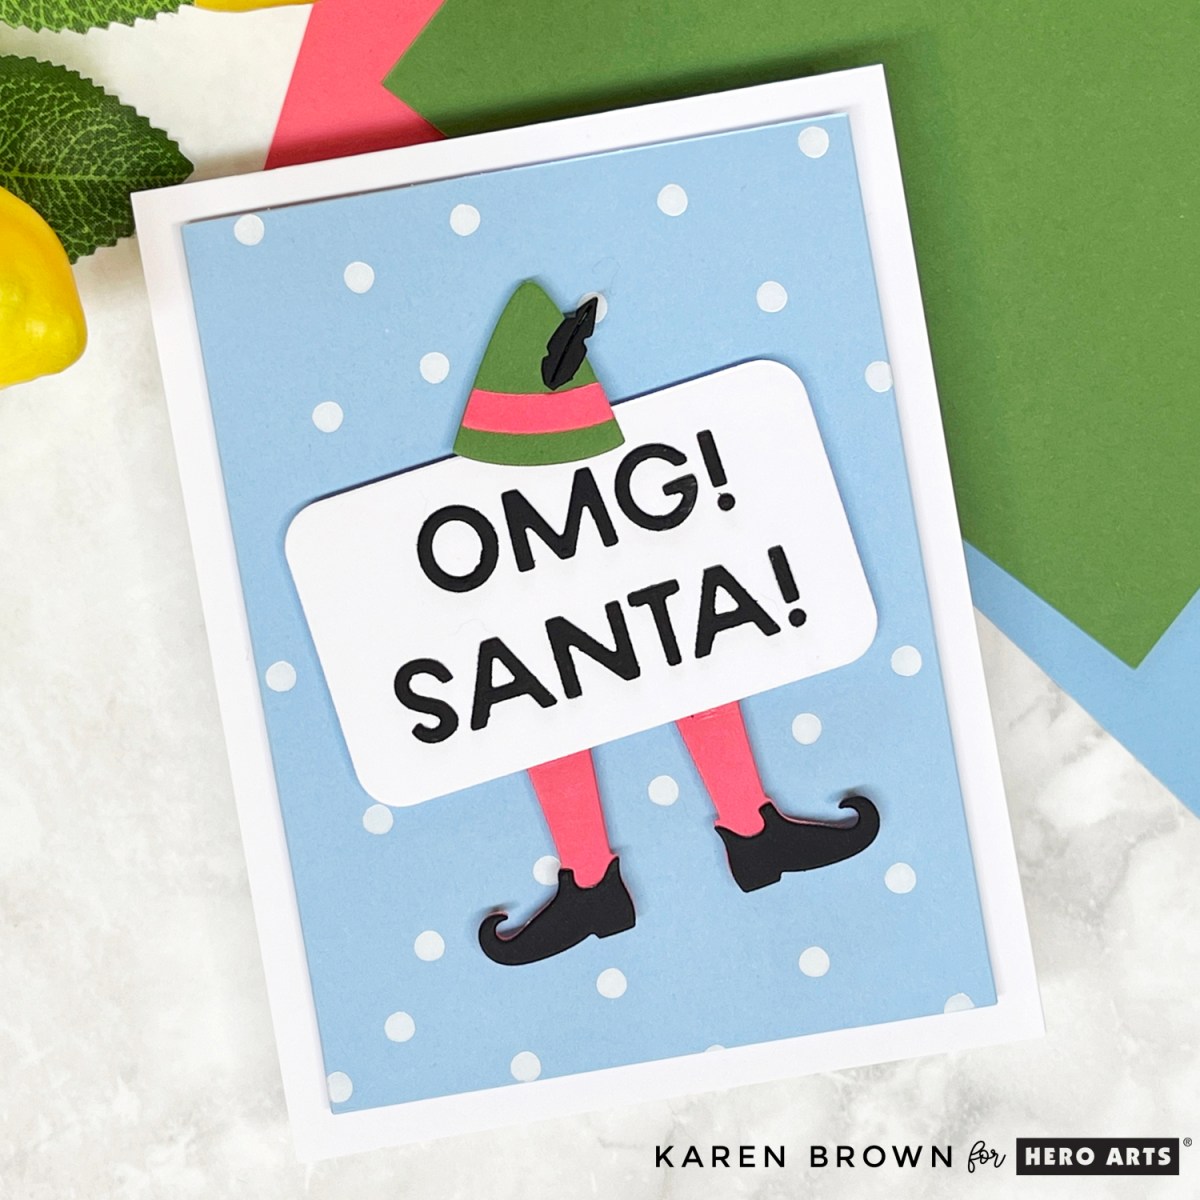
Every good elf needs a punchline, and this one couldn’t be better: “OMG! Santa!”
The die cut letters are crisp, bright, and perfectly straight across the card front (in the video, I share my favorite tip for gluing letters evenly every time).
Watch the Video Tutorial
And in my video, I show you:
Exactly how I foiled the Celebration Press Plate
How to glue tricky die cut letters so they’re straight and evenly spaced
My step-by-step process for putting the whole card together
One of my favorite things about cardmaking is building little worlds with die cuts. The Spellbinders October 2025 Club Kits are perfect for creating playful, outdoor winter scenes full of joy, color, and personality. Today I’m sharing two companion cards I made using the Die of the Month Kitand the Large Die of the Month Kit—both with matching colors and snowy backdrops.
At the bottom, I’ll also walk you through a few of my favorite tips for planning and arranging die cut scenes.
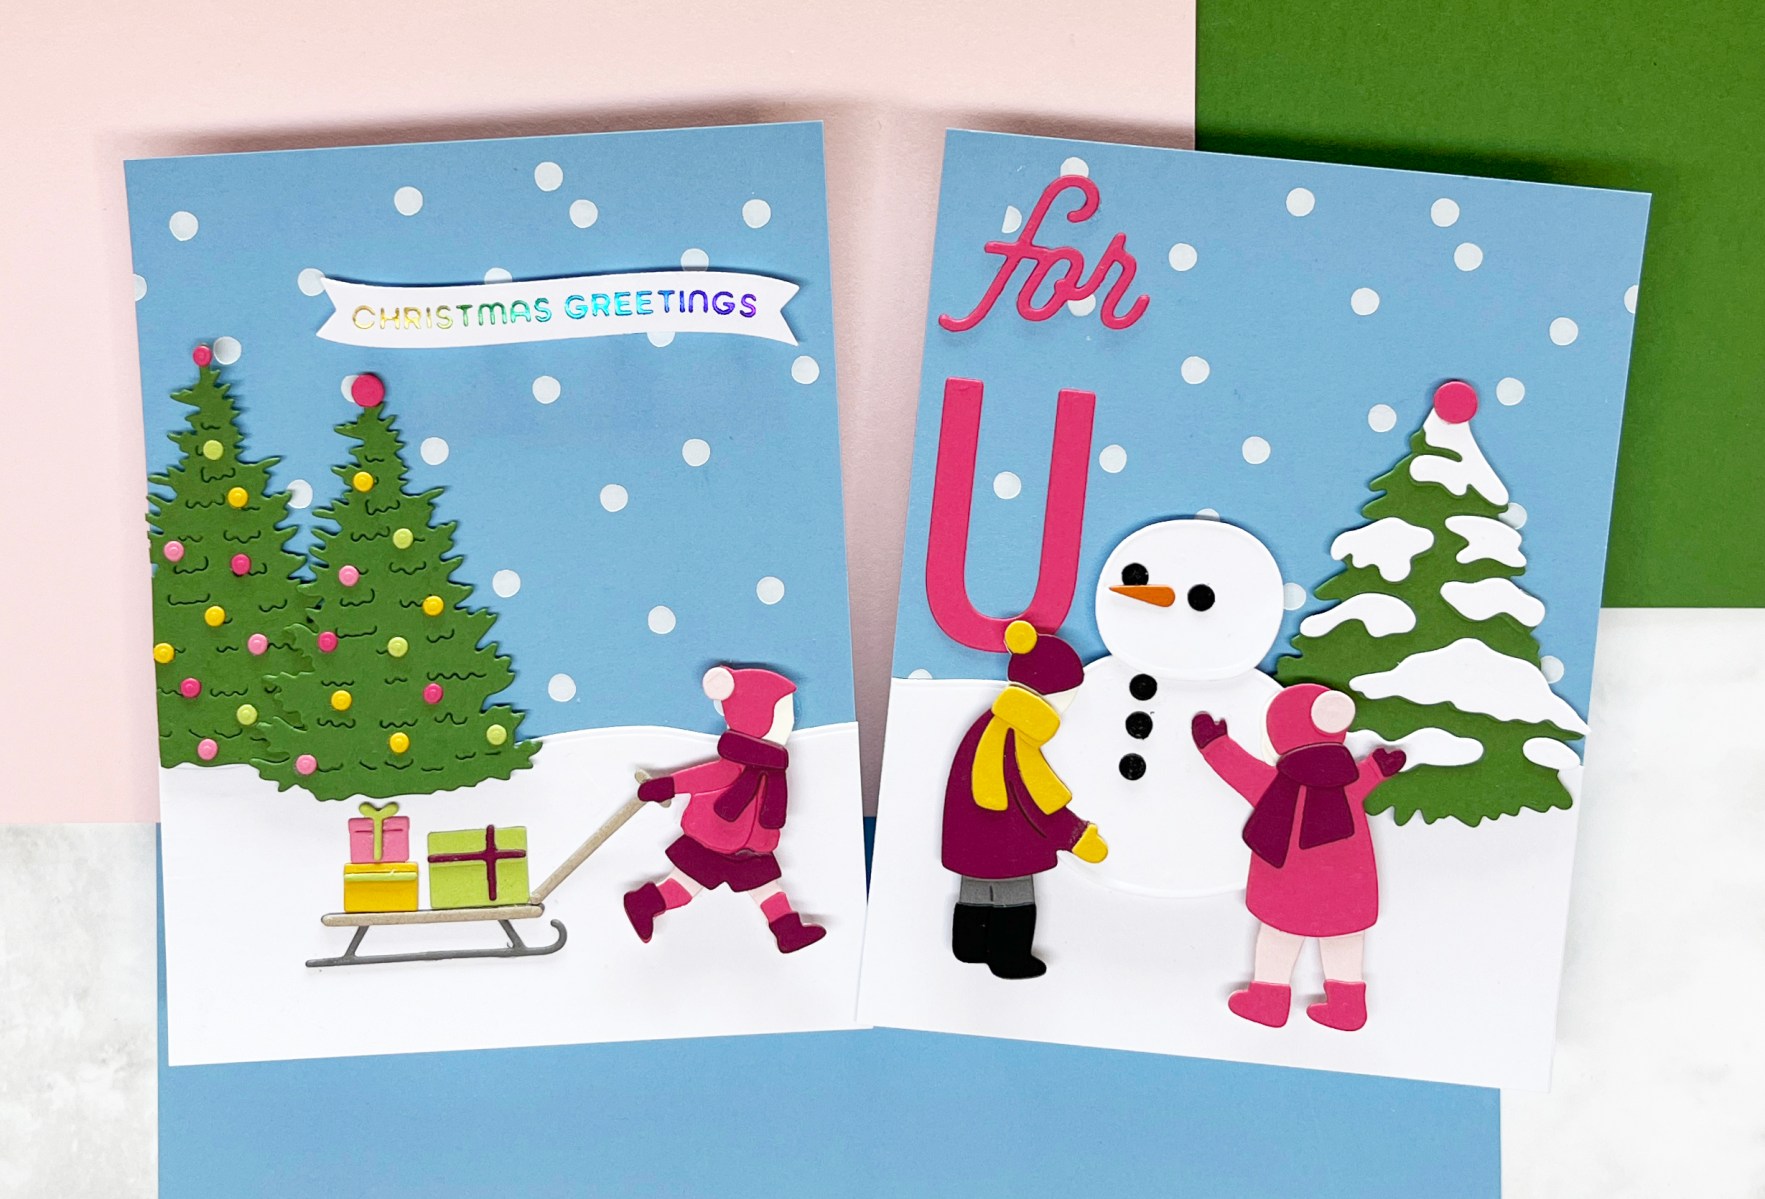
Sled of Gifts (Large Die of the Month)
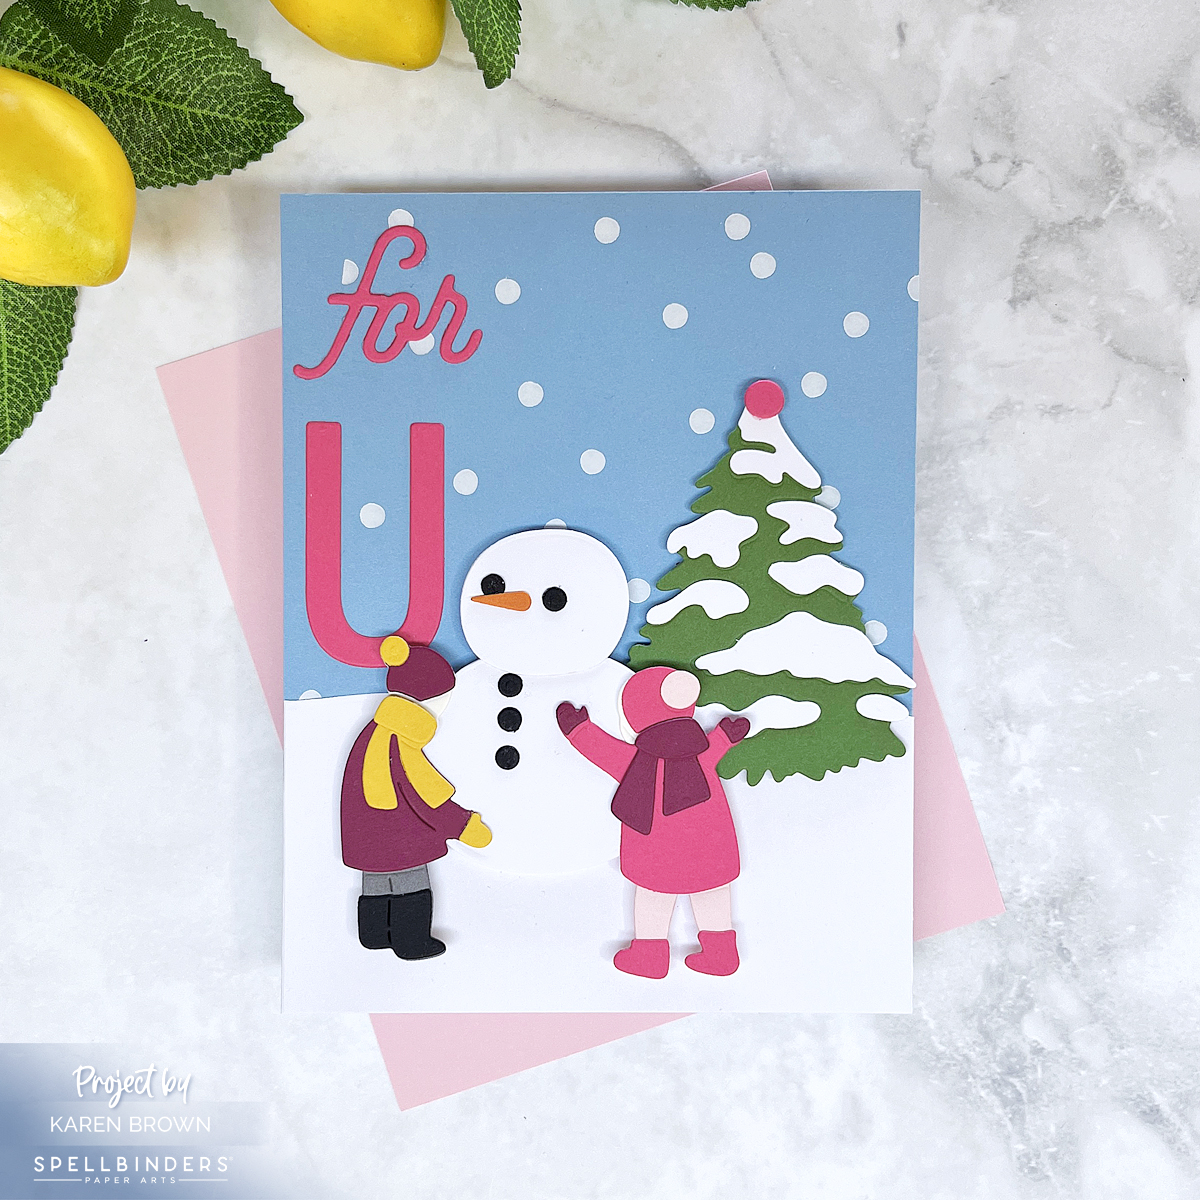
I started with the Large Die of the Month Kit, creating a cheerful winter scene of a little girl, pulling a sled piled high with gifts. To set the stage, I added two decorated Christmas trees with colorful ornaments.
For the sentiment, I combined a scripty “for” with a giant U (both from the October Caboodle Bonus Gift), both die cut in hot pink. Together, they form a bold, playful greeting.
This card has a storybook charm and pairs perfectly with the sled design.
📝 Tips for Arranging Die Cut Scenes
Here are five simple steps I use whenever I build a die cut scene:
Plan Colors First: Choose your key colors. For these cards, I used blue gray, hot pink, and fern green as my anchors. White cardstock provided snowy contrast.
Die Cut All Elements: Having all the pieces ready makes it easier to plan your layout.
AssembleEach Element: I use Bearly Art glue and a Crystal Katana jewel pickerto precisely assemble my elements. Once they are fully assembled, it is much easier to determine exactly where I want to place each component.
Mock Up Layouts: I arrange several versions, take quick photos, and then choose the most balanced design.
Construct Your Scene: I like to use glue, foam squares and craft foam to complete my card.
These tricks make arranging die cut winter wonderlands more fun and less stressful.
It’s time for the Hero Arts October 2025 Release Blog Hop, and this month’s theme is Merry Era! I had so much fun creating two festive cards that sparkle and shine in very different ways.
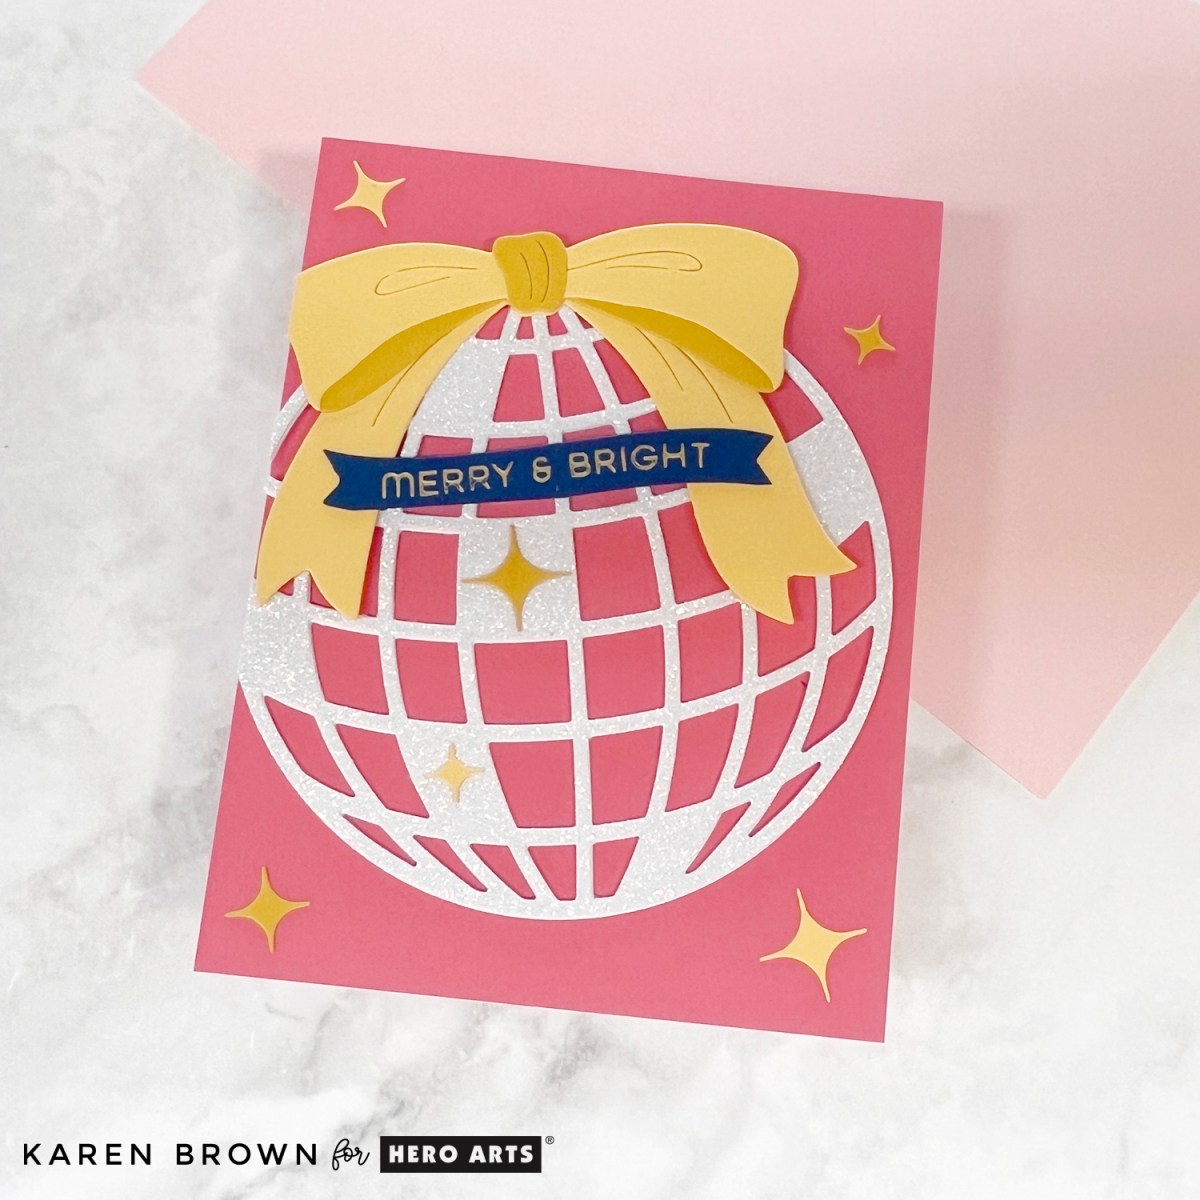
Glittery Pink Christmas Ball
For my first card, I reached for the “Have a Ball” Die Set from the October 2025 Card Kit. I wanted a sparkly look, so I die cut the large Christmas ball twice from white glitter cardstock for extra stability. My card base is Dahlia cardstock (included in the kit) which makes the ornament pop.
💡 Design tip: This die set would work beautifully for New Year’s cards too!
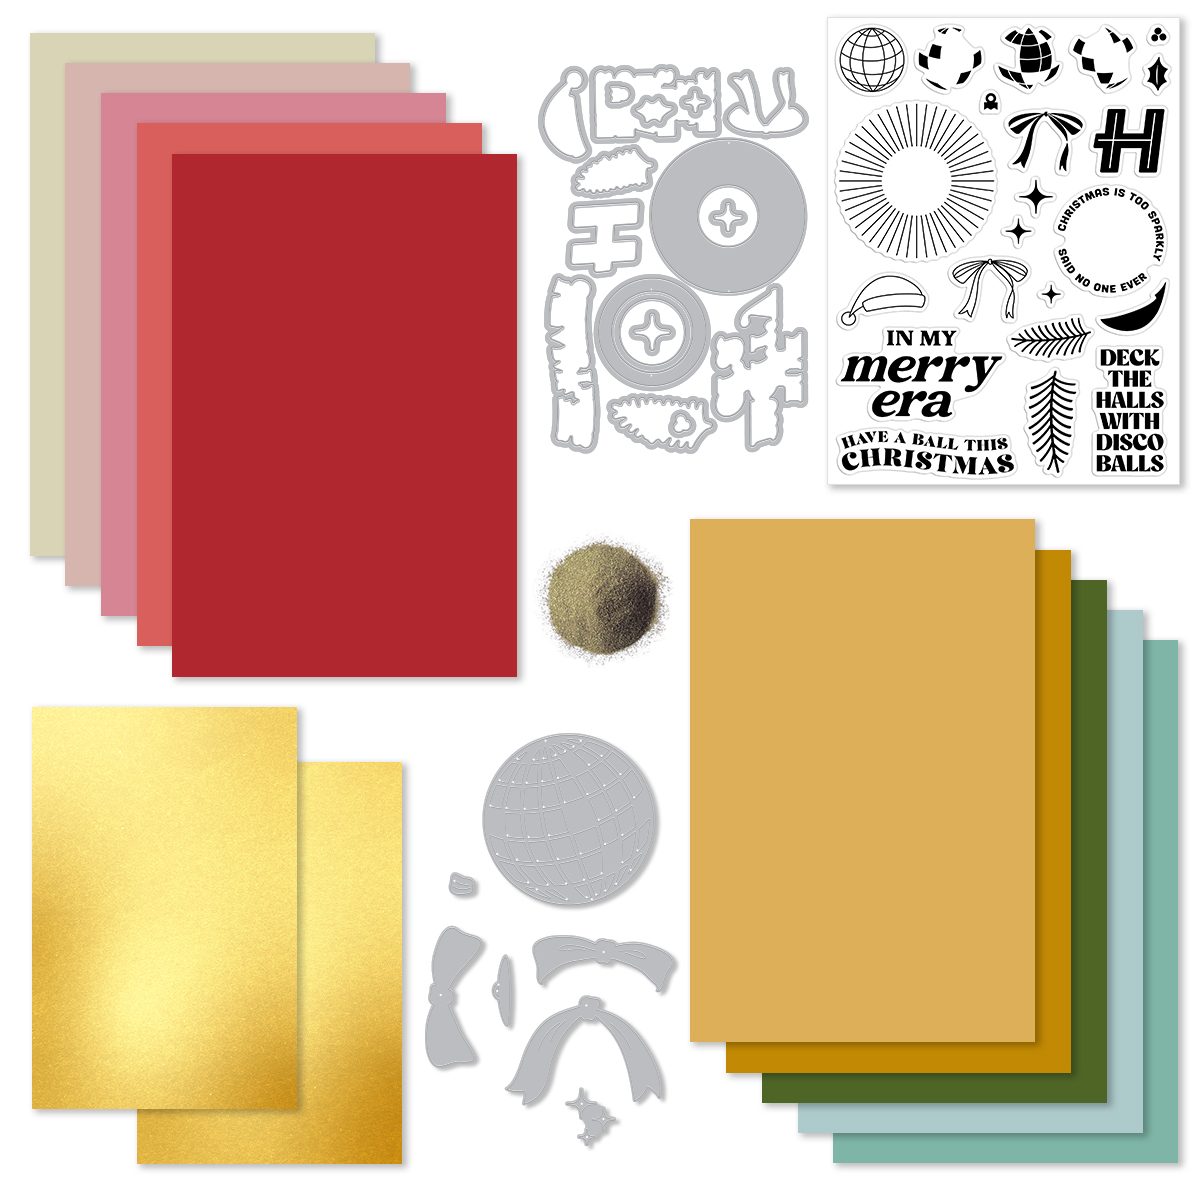
What’s Included in the Kit?
• Deck the Halls with Disco Balls 6×8 Stamp Set • Deck the Halls with Disco Balls Coordinating Dies • Have a Ball Die Set • Gold Embossing Powder .5 oz • 10 Sheets of Cardstock- 1 of each color, 5.5″ x 8.5″ • Two Sheets of Gold Matte Paper, 5.5″ x 8.5″
Receive a FREE beautiful Merry Everything Die Set when you purchase The Whole Studio!
Hero Arts has many different Monthly Kits that you can subscribe to including:
The WHOLE Studio – All 5 Kits (a 40% savings: $130 subscription + Free Shipping)
For my second card, I used the Twinkle Lights Fancy Dies. I die cut the string of Christmas lights from gold paper (included in the kit) and then added pops of color by cutting the bulbs from colorful cardstock scraps.
The combination of shiny gold strings, bright bulbs, and the bold sentiment makes this card full of Christmas cheer.
>>> Click HERE. to see my other October Card Kit Cards.
GIVEAWAY
Hero Arts will give away a $50 gift card, drawn from the comments left across the hop. Enter by Sunday, October 5th at 11:59pm PT, and the winner will be announced on the Hero Arts blog the following week. Leave a comment on all stops for more chances to win!
Along the way, I’ll walk you through 4 tried-and-true tips that will make your holiday cardmaking easier, more enjoyable, and more beautiful.
Tip 1: Use Quality Cardstock
The foundation of any good die cut is quality cardstock. Thin or flimsy paper isn’t substantial enough for die cutting. For this project, I used Spellbinders’ Color Wheel Cardstock—which is heavyweight, smooth, and cuts like butter.
Together these created a vibrant, cheerful, and slightly unexpected holiday palette.
Tip 2: Swatch Your Cardstock
Having your cardstock organized and swatched makes choosing colors so much faster. I’ll link HERE to a post where I go into detail on how I keep my swatches handy and easy to use.
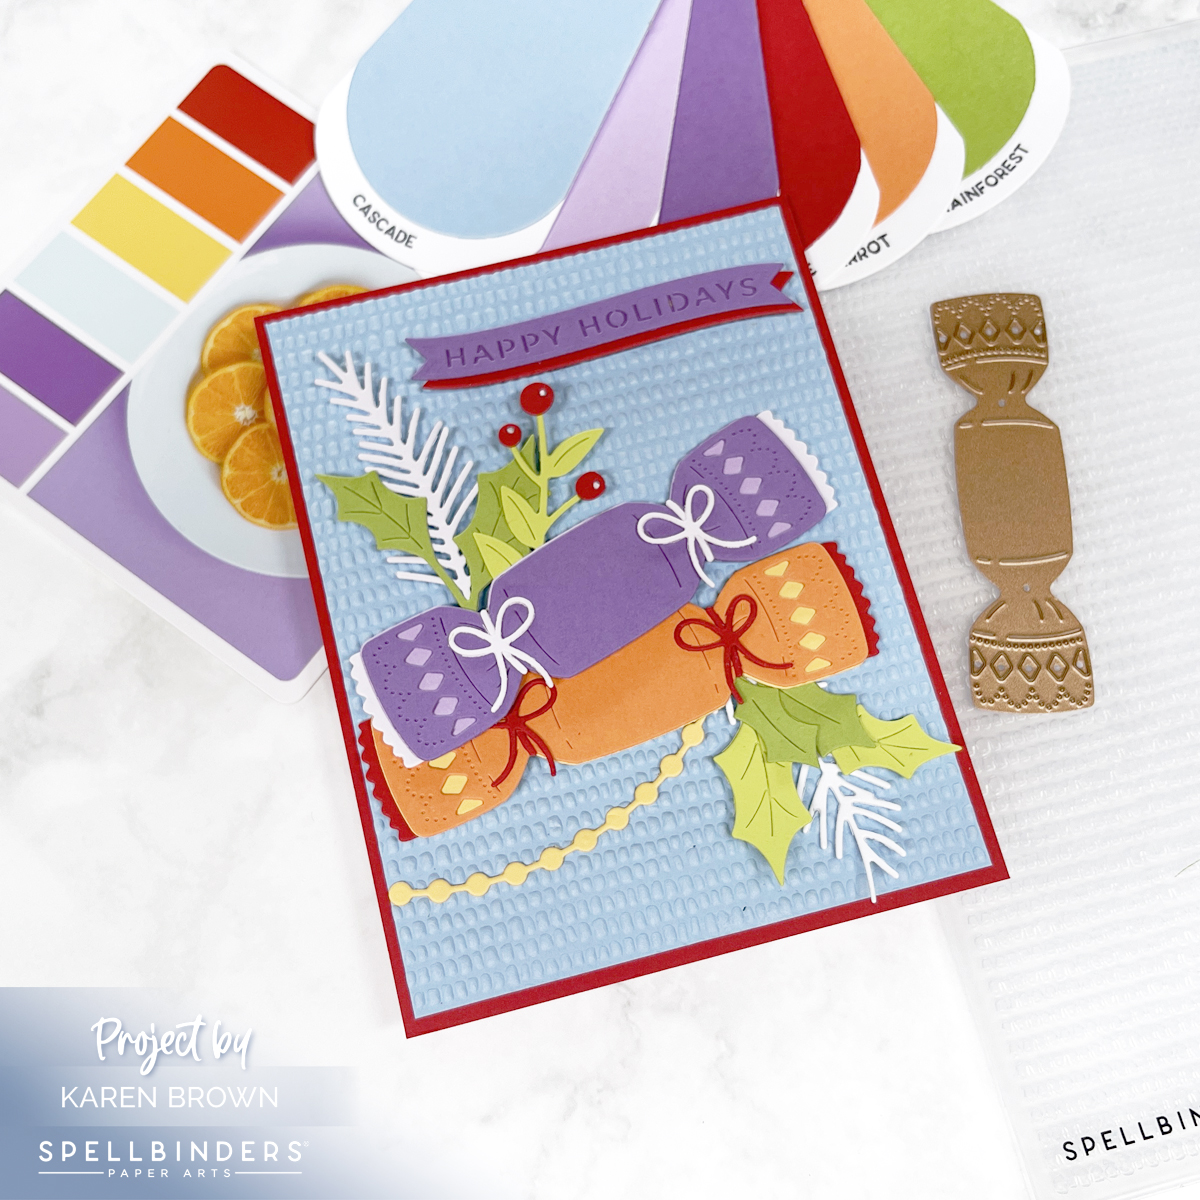
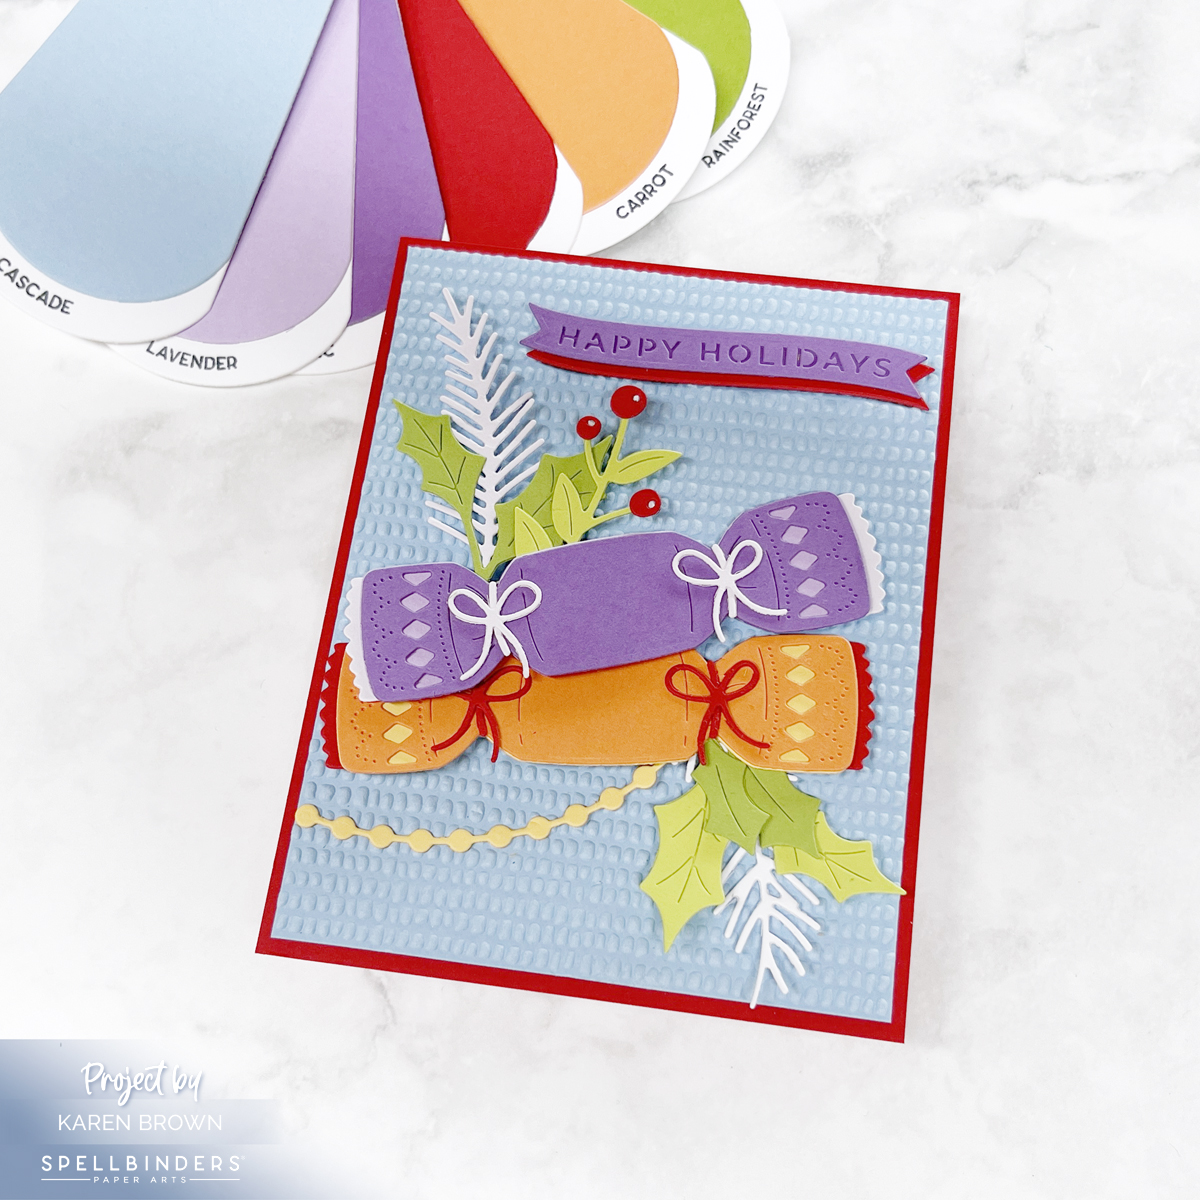
For this project, I flipped through my swatches until I landed on the perfect non-traditional holiday mix. Seeing them side by side helped me visualize how the colors would work layered on the Christmas cracker.
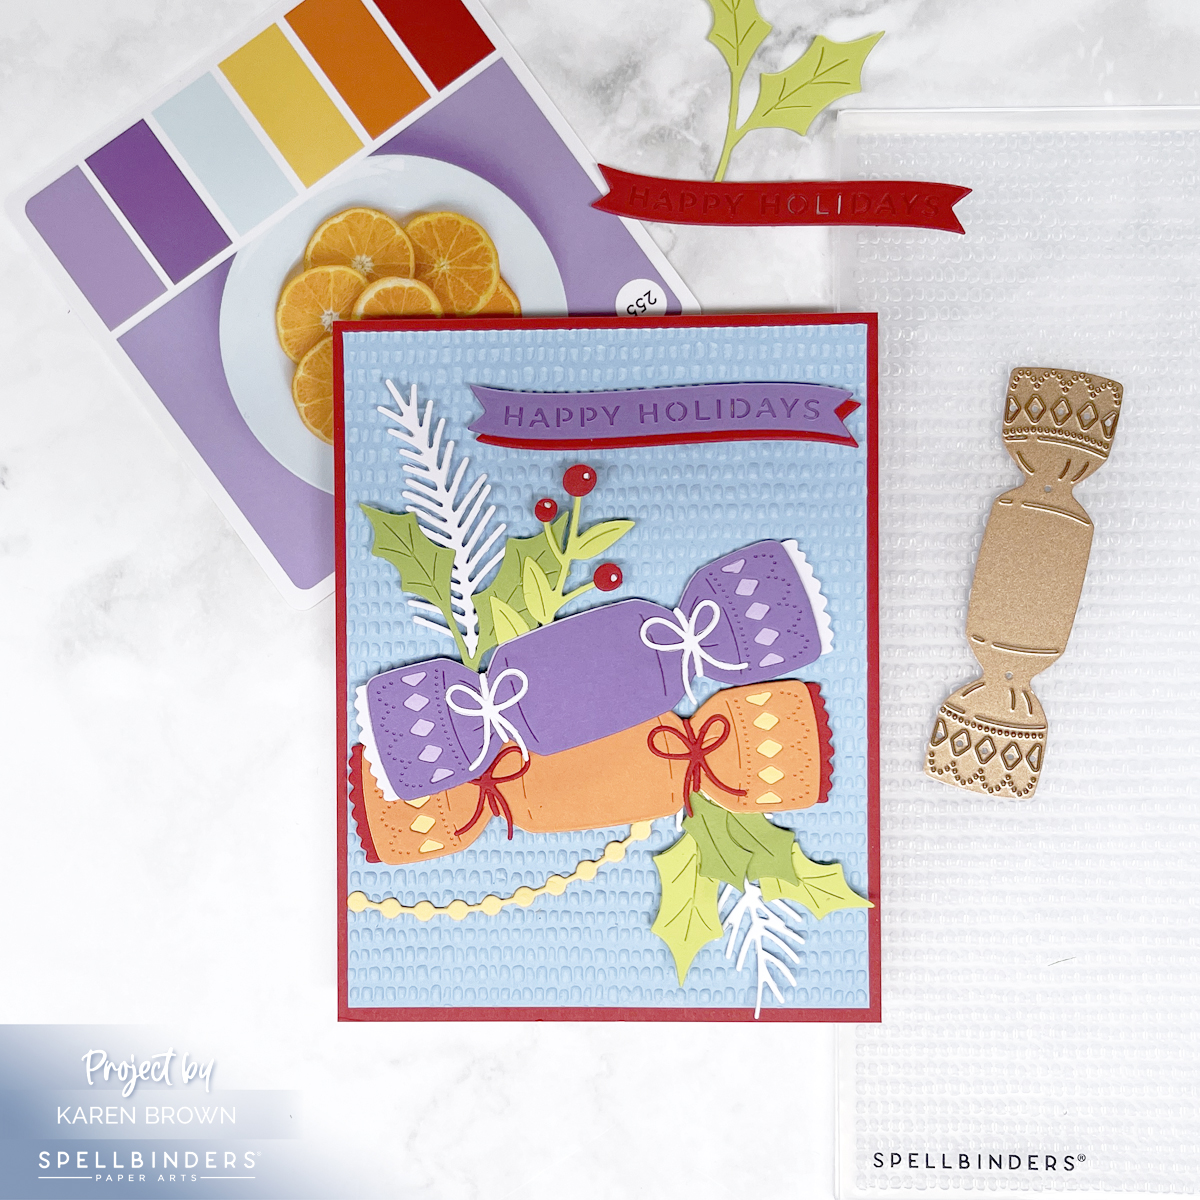
When in doubt, let a color system do the heavy lifting! For this card, I turned to Color Cubes Volume 2, specifically palette card #252, which inspired the purple, red, orange, yellow, blue color mix. I also own Volume 1. You can find the Color Cubes BundleHERE.
I’ll also link to a previous blog post that features Spellbinders’ Color Deck System, another fabulous way to spark ideas when you feel stuck or want to try something different.
Click HEREif you’d like to see another Christmas Card using the same #252 Color Cubes palette card.
Tip 4: Add Texture and Dimension
Flat die cuts are nice, but texture and lift make a card pop. For this background, I embossed a panel with the new Dimpled 3D Embossing Folder—a subtle yet impactful pattern that catches the light beautifully.
I also used foam squares behind some of the cracker die cuts to add depth and shadow. Craft foam also works great, especially on larger die cuts. The best glue for smaller die cuts is Bearly Glue. I love the fine nozzle! Simple details like these can make your handmade card feel polished and professional.
Choosing the right colors for your handmade cards can feel like a creative puzzle—fun but sometimes a little overwhelming. Whether you lean toward classic Christmas colors or love a bold non-traditional palette, color selection sets the tone for your entire project.
Today, I’m sharing two recent cards using the Spellbinders July 2025 holiday releases, and both were inspired by two different color systems: the Color Cubes and the Spellbinders Color Deck System. Each approach helped me craft a distinctive look—from rustic purple barn stars to pastel hot cocoa mugs. Let’s dive into the color magic!
The Barn Star is a beautiful layered die cut—mine has a deep purple top layer with delicate flourish cutouts over a lavender base. I added die cut lavender greenery and an orange accent for contrast. The background features a BetterPress Script Text Platepressed in Thistle Reactive Ink on white watercolor paper (yes—it worked beautifully even without BetterPress ink!).
This card includes a little of everything: ✔ Die cutting ✔ Bold Colors ✔ BetterPress background ✔ Glimmer Hot Foiled sentiment
With Color Cubes, you can search by Color, Keyword or Collections. For this card I looked at cards that had the color orange and used the keyword “fruit”. Card #255 was just the non-traditional look I was going for!
Color tip: Don’t be afraid to break the “holiday rules” with color. Purple and orange may not scream Christmas—but together they create a rustic, modern, and cozy vibe.
Cocoa Cups – Inspired by the Spellbinders Color Deck
My second card showcases Spellbinders’ beautiful Color Deck System and Color Deck Bundle, specifically the Holiday Expansion Pack. These 5″ x 4.5″ cards are packed with inspiring palettes—each one practically begging to be turned into a card!
I paired this with Spellbinders’ Color Swatch Petal Stack, which helped me identify and swatch my main colors. The cardstock came from the Color Wheel Sampler: 🌸 Chiffon 🎀 Tutu 🌞 Beeswax 💧 Cascade 🌿 Lavender 🌸 Orchid 🍂 Fawn 💜 Mulberry 🌌 Cosmic Sky
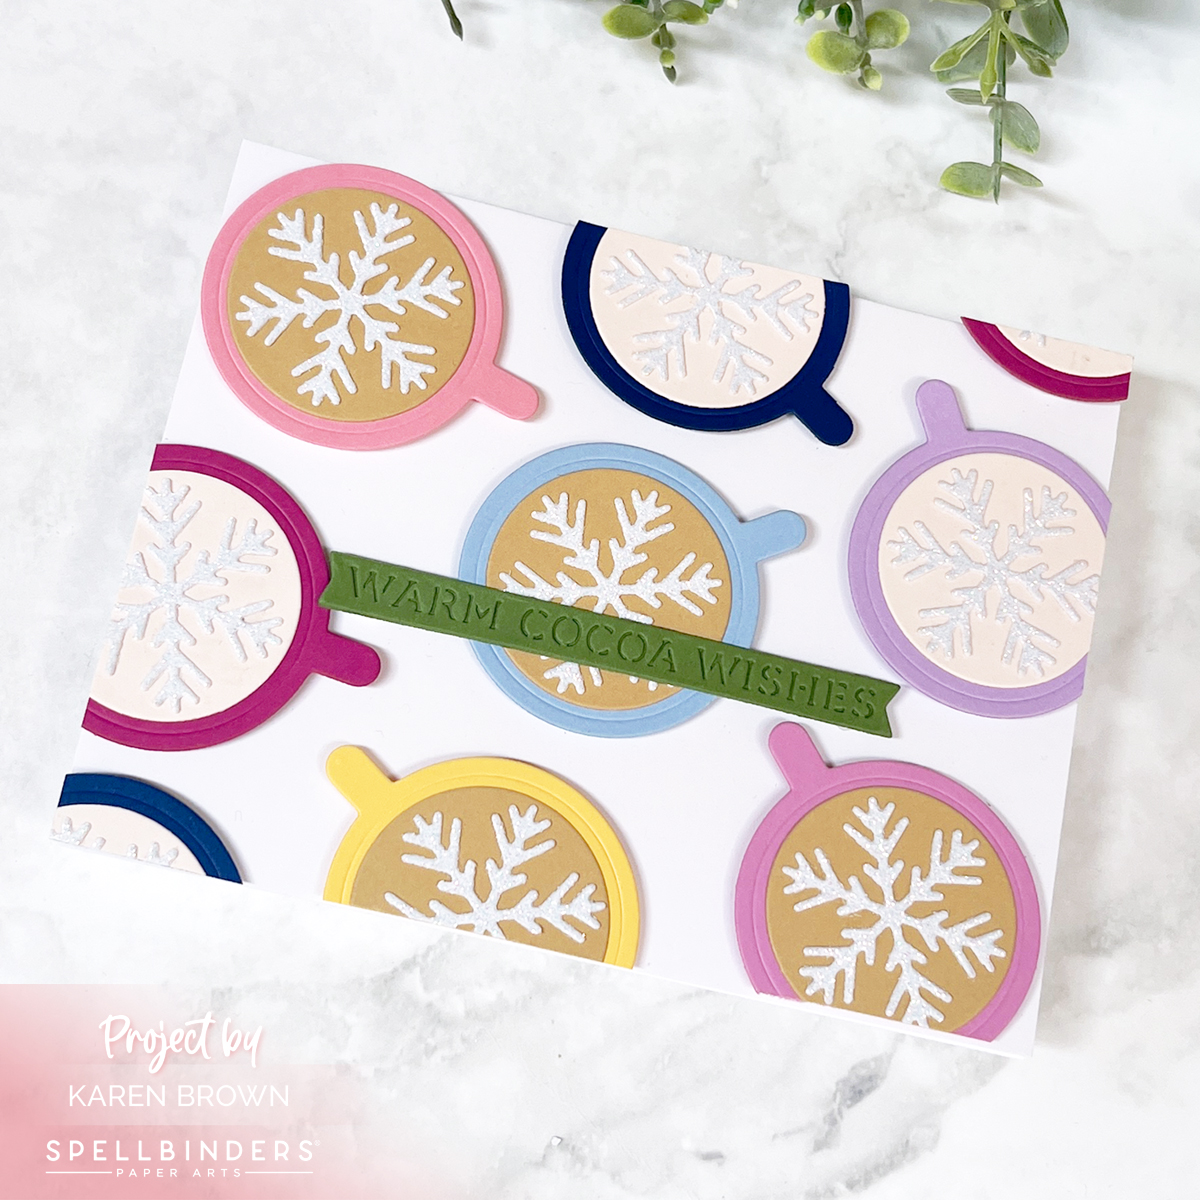
My layout features a pattern of repeating die cut cocoa mugs (from the July 2025 Large Die of the Month Kit) in these pastel shades, each topped with a sparkly glitter snowflake. It’s a playful winter card that also works perfectly for a cozy coffee theme year-round!
Color tip: Using a pre-designed color system (like Spellbinders’ Color Deck or a sampler set) takes the guesswork out of color combos. It’s especially helpful when mixing a lot of hues on one card.
🧠 Other Color Selection Tips:
🎨 Google Image Search Search terms like “Christmas color palettes” or “winter pastel colors”, then switch to the “Images” tab. Seeing real-life examples can help spark ideas.
🎨 Color Wheel Strategies
Analogous Colors: Colors next to each other (e.g., blue, teal, green) for a harmonious look.
Complementary Colors: Opposites on the wheel (e.g., purple + yellow) for bold contrast.
🎨 Neutrals When in doubt, mix brights with soft neutrals like kraft, white, cream, or gray for balance.
Whether you’re swatching, color-scheming, or just winging it, choosing colors can be one of the most satisfying parts of cardmaking. Try something unexpected—you might just love the results!
It’s Christmas in July, and the Spellbinders July 2025 Club Kits are brimming with cozy, colorful holiday cheer! This month’s kits are full of winter charm—perfect for kicking off your holiday cardmaking early. I had such a blast creating with these kits, and I’m excited to share four festive cards with you today.
Card 1 – Large Die of the Month: “Warm Cocoa Wishes”
Spellbinders Large Die of the Month Kit had me smiling from the start. I created a festive card featuring a rainbow of die cut cocoa mugs, each one topped with glittery snowflakes and arranged in a playful display across the card front. The mugs have adorable little handles—some hanging over the edges for a casual, cozy feel.
Each mug is a different bright color, bringing a fun and modern twist to the wintery theme. The sentiment “Warm Cocoa Wishes” ties everything together. This card feels like a cheerful hug in mug form!
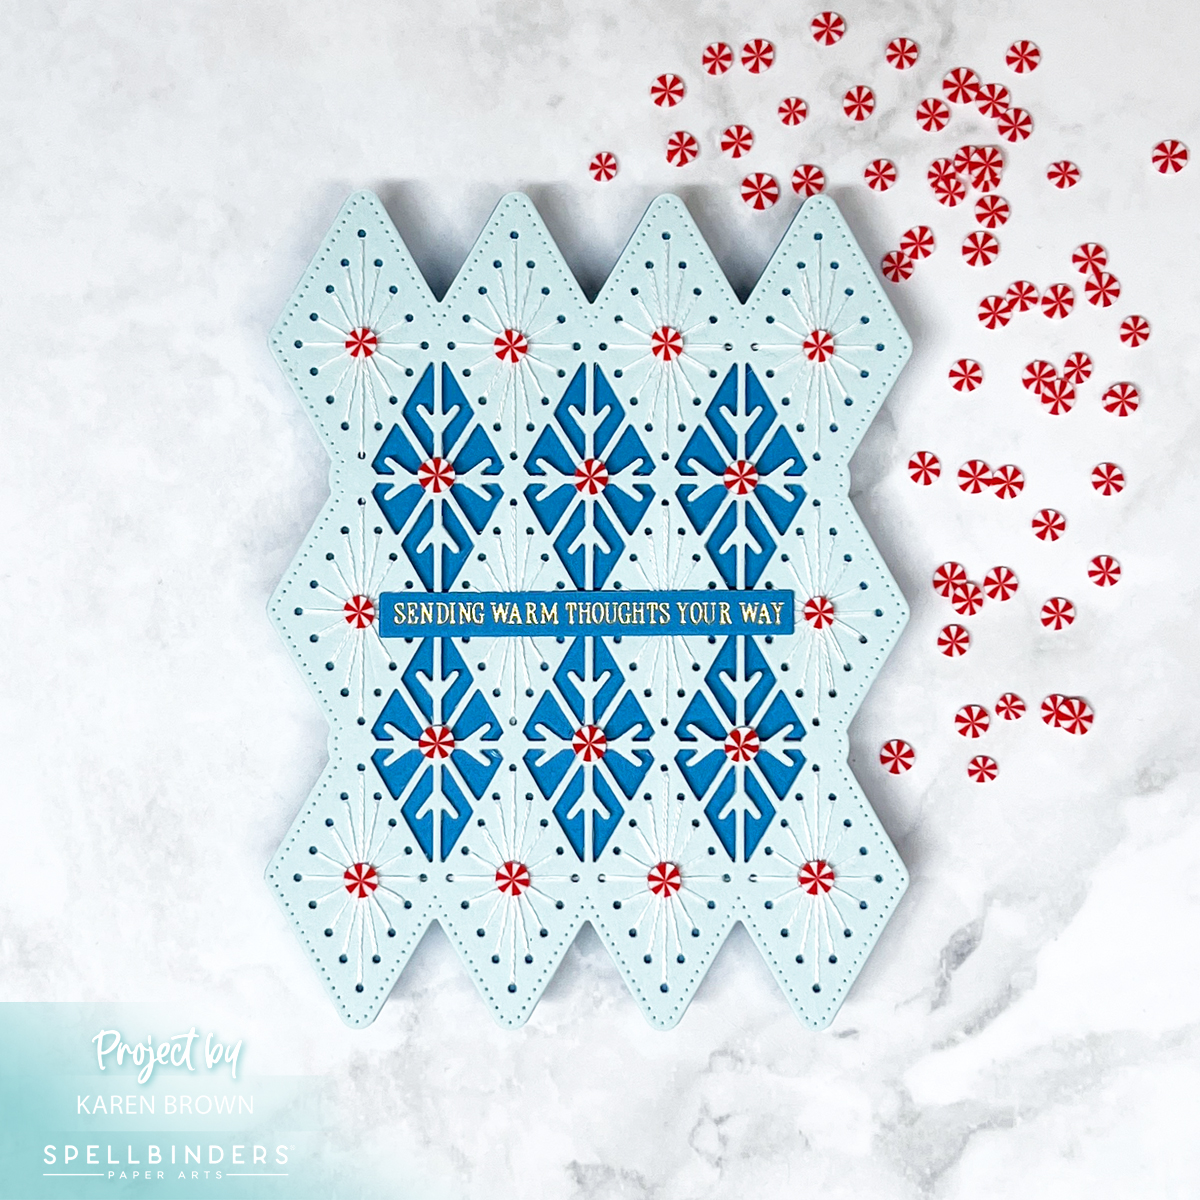
Card 2 – Stitching Die of the Month: Peppermint Diamonds
The Stitching Club this month features a lovely geometric diamond design that reminded me of snowflakes and vintage quilting. I stitched the design on a frosty blue overlay using two strands of white floss. Underneath, a teal base peeks through, adding subtle contrast.
For embellishments, I added peppermint candies for a sweet holiday touch. A foiled gold glimmer sentiment—“Sending Warm Thoughts Your Way”—adds shine and warmth. This card would be perfect tucked in with a winter care package.
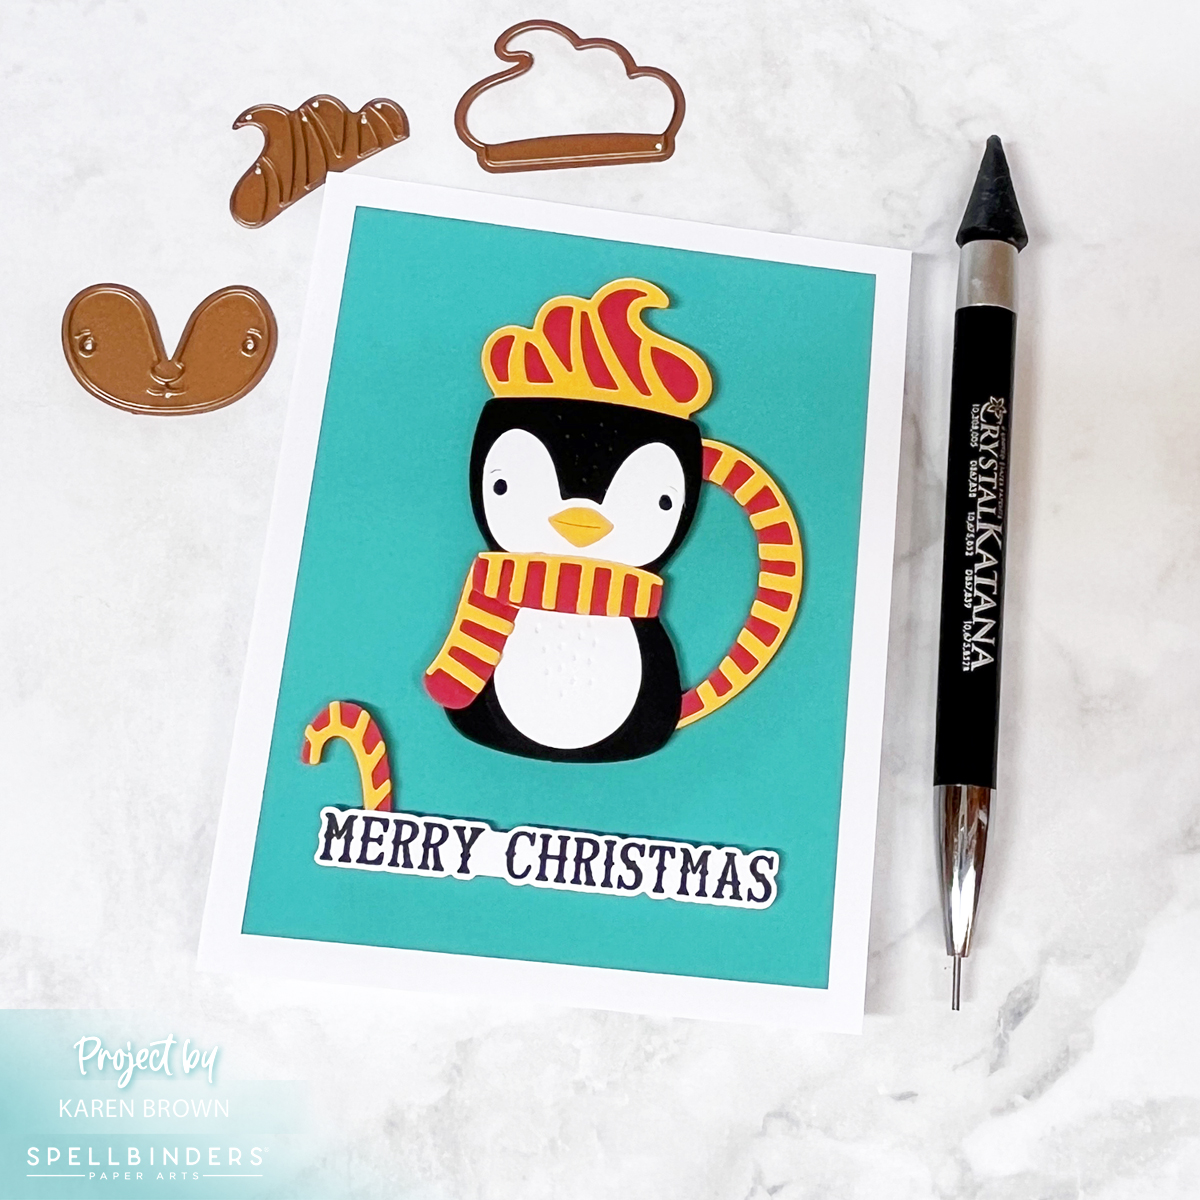
Card 3 – Die of the Month: Penguin Mug
Next up is the absolutely adorable Spellbinders Small Die of the Month Kitpenguin mug die. I went bold with my color palette to create a graphic, eye-catching card. The black and white penguin sits against a rich Teal Topaz background, with accents of Wild Berry (hot pink) and Saffron (yellow) for a fun pop.
The whipped cream topper adds texture and playfulness, and a bold “Merry Christmas” sentiment finishes it off. This little guy is equal parts charming and striking—a new favorite!
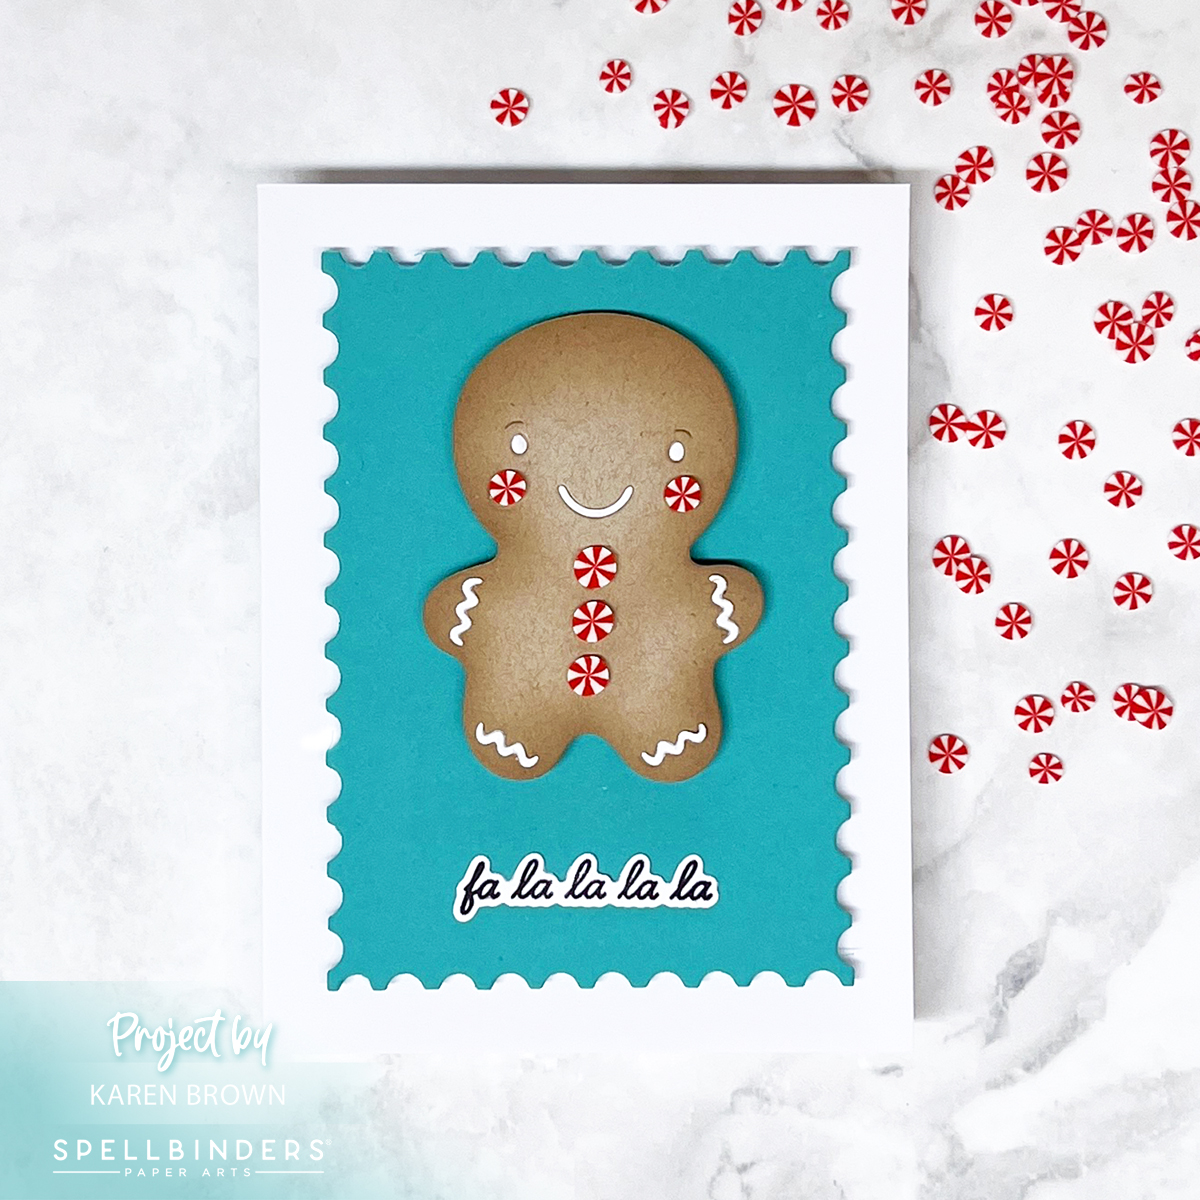
Card 4 – Bonus Caboodle: Gingerbread Man Postage Card
And finally, I couldn’t resist using the Caboodle Bonus Gift—a gingerbread man die that’s almost too cute to handle. I gave him white piped icing details, and the peppermint cheeks and buttons add whimsy and color.
He’s layered on a Teal Topaz nesting postage stampdie cut background, mounted on a clean white A2 base. The sentiment “Falalalala” adds just the right festive flair to finish off this cheerful design.
Each of these kits brought something fresh and delightful to my crafting table this month. Whether you’re a cocoa-lover, penguin fan, or peppermint enthusiast, there’s something in July’s kits to spark your holiday creativity.
Which one is your favorite? Let me know in the comments—and don’t forget to grab your kits before they melt away!
In this post/video, we’re spreading our creative wings and sharing three unique ways to stencil butterflies that’ll make your cards flutter with charm. From bold and dramatic to soft and dreamy, these techniques will have your projects soaring to new heights! 🦋✨
The butterfly outline is layer one and then there are 3 additional detail layers to add on top to customize your projects. I show you how to use all three top layers in the video.
I thought it would be fun to make some non-traditional Christmas cards featuring butterflies AND pastel colors. I always love to stretch my supplies beyond the predictable!
I also think the duo pictured above would make great Get Well, Thinking of You or Sympathy cards.
Let Your Creativity Soar
And, I had to make at least one traditional green and red Christmas butterfly card. I stenciled with Fresh Lawn and Cherry Ink, matted with Crimson cardstock and added a sentiment from the Swirly Christmas Tree Bundle.
With just a stencil and a splash of creativity, you can bring butterflies to life in endless, colorful ways. So, go ahead—spread your crafting wings, experiment with colors, and let your cards shine as bright and beautiful as a butterfly in full flight. Happy stenciling! 🦋✨