I have exciting news to share — I’ll be joining Hero Arts for Craft Lounge LIVE #4! 🎉
This is my second time hanging out in the Craft Lounge, and I had such a great time last summer that I’m thrilled to be back again. If you love crafty inspiration, laughs, and a creative party atmosphere… mark your calendar!
Craft Lounge LIVE #4 📅 Saturday, November 8, 2025 ⏰ 12:00 PM PT 🎥 Streaming LIVE with The Hero Arts FaceBook Group: Hero Arts Collective
Who’s Crafting With Me?
I’ll be creating alongside some fabulous Hero Arts teammates:
Natasha
Michelle
Karen (that’s me!)
Channin
We’ll be crafting with The Best Gift Ever Collection, sharing projects, festive inspiration, and plenty of crafty cheer. This collection is so versatile and works year round!
Oh — and did I mention… 🎄 We’ll be wearing ugly sweaters! We hope you’ll wear your ugly sweater too! 🤣 So come ready for creative fun, holiday spirit, and at least one questionable sweater choice.
…..and there is a giveway too!
🎁 Join the Fun!
Bring your coffee, cocoa, or holiday mocktail, settle into your craft lounge, and come chat LIVE with us. I can’t wait to hang out and make some holiday magic together! ✨
👉 Hope to see you there — and be sure to say hi in the chat!
I’m so excited to be part of CASE Me A Christmas Card 2025! My talented crafty friend @michelle_lupton invited me to join this year’s creative lineup, and I was thrilled to say yes. This fun annual event features ten creative hops throughout October—two on YouTube and eight on Instagram—where cardmakers CASE (Copy And Selectively Edit) cards from one another.
To join the fun, create your own Christmas card inspired by one from the hop and upload it via Inlinkz on Michelle’s blog. You can also win prizes from amazing sponsors just by participating or leaving comments on the hop posts!
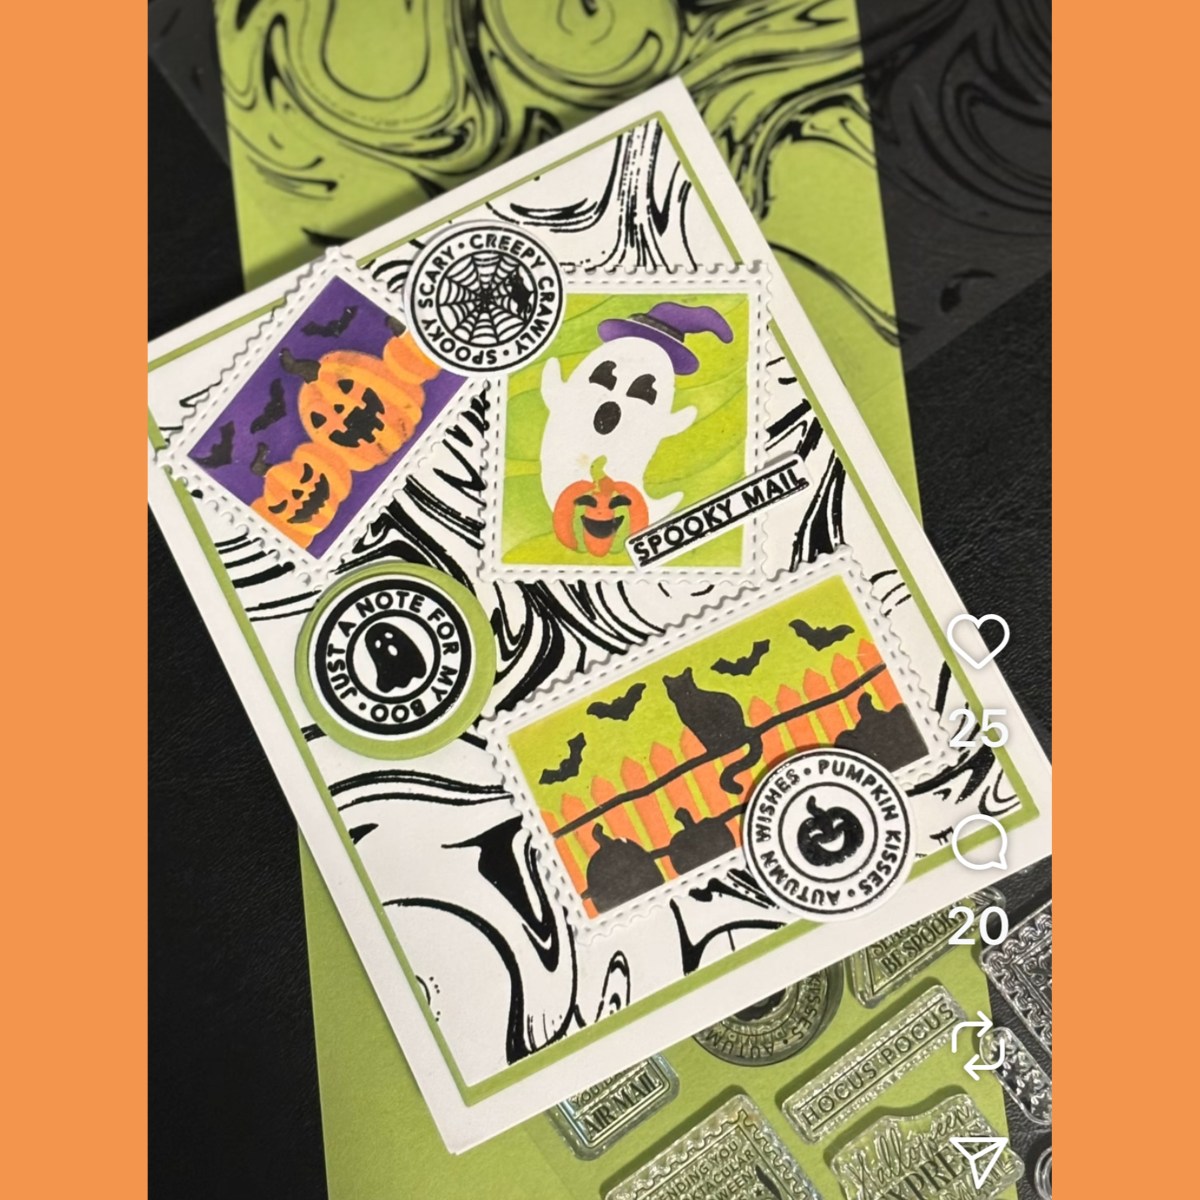
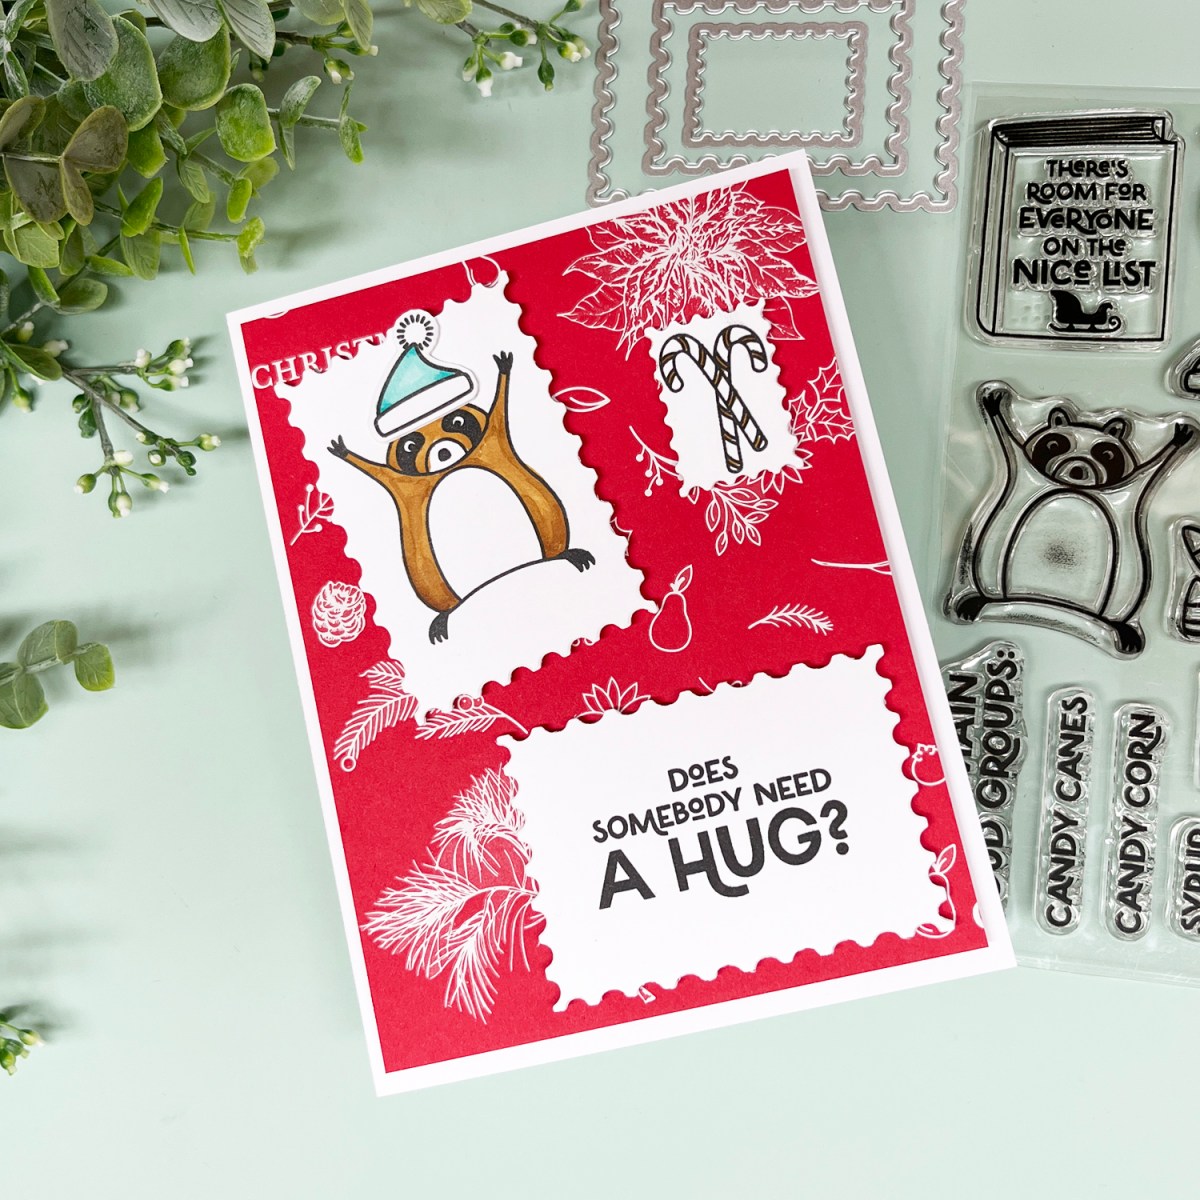
I’m part of Hop #9 and am CASEing the wonderful @expressivepaper – Kathy Pisupati. Kathy created an absolutely adorable Halloween card that I just had to reimagine as a Christmas design!
Kathy’s Halloween Card:
My Card Details
I was inspired by Kathy’s use of postage stamp dies (always a favorite of mine) and her clever background. Instead of stenciling, I used one of my other go-to products—Hero Transfers—to create my own twist.
I stamped an adorable raccoon reaching for a hug, paired with the perfect sentiment: “Does Somebody Need a Hug?” My color palette is limited to Christmas red, white, and small dabs of aqua and tan, which gives the card a striking and dramatic look while keeping it silly, fun, and a little bit heartwarming. I also think it’s a great option for masculine cards this holiday season!
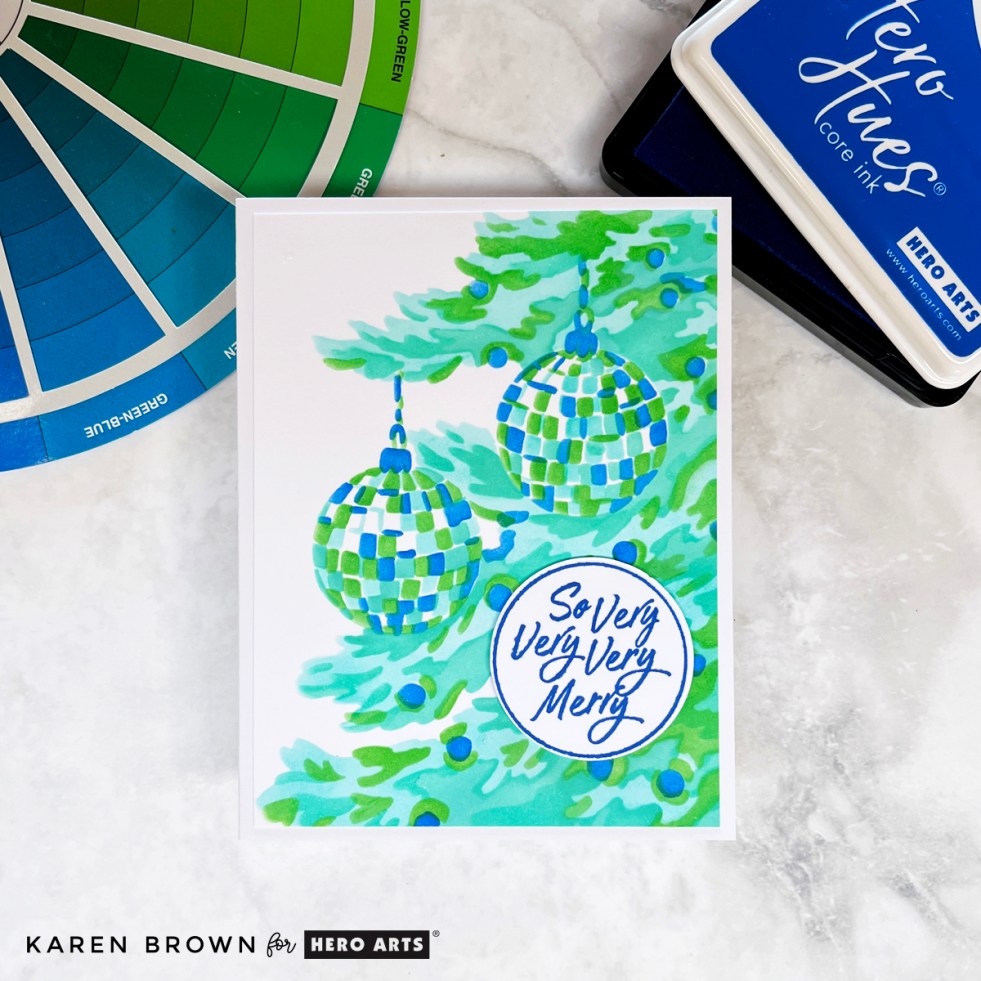
I couldn’t resist creating one more card with the October 2025 Release—this time featuring the Layering Stencil: The Tree. This gorgeous four-layer stencil creates a close-up view of a Christmas tree filled with ornaments, and it was such a joy to blend.
You can see my other October Club Kits Cards HERE.
I chose analogous colors (neighbors on the color wheel) for a soft, harmonious look in shades of greens, aquas, and blues:
Using Deluxe Smooth White Cardstock made the ink blending go on like butter, and as always with Hero Arts stencils, the layers lined up perfectly.
For the sentiment, I used the “So Very Very Merry” circular stamp and coordinating die from the October Card Kit, stamped in Indigo ink. The deep blue ties the whole design together beautifully.
This card has already gone into my holiday stash, ready to be mailed in December!
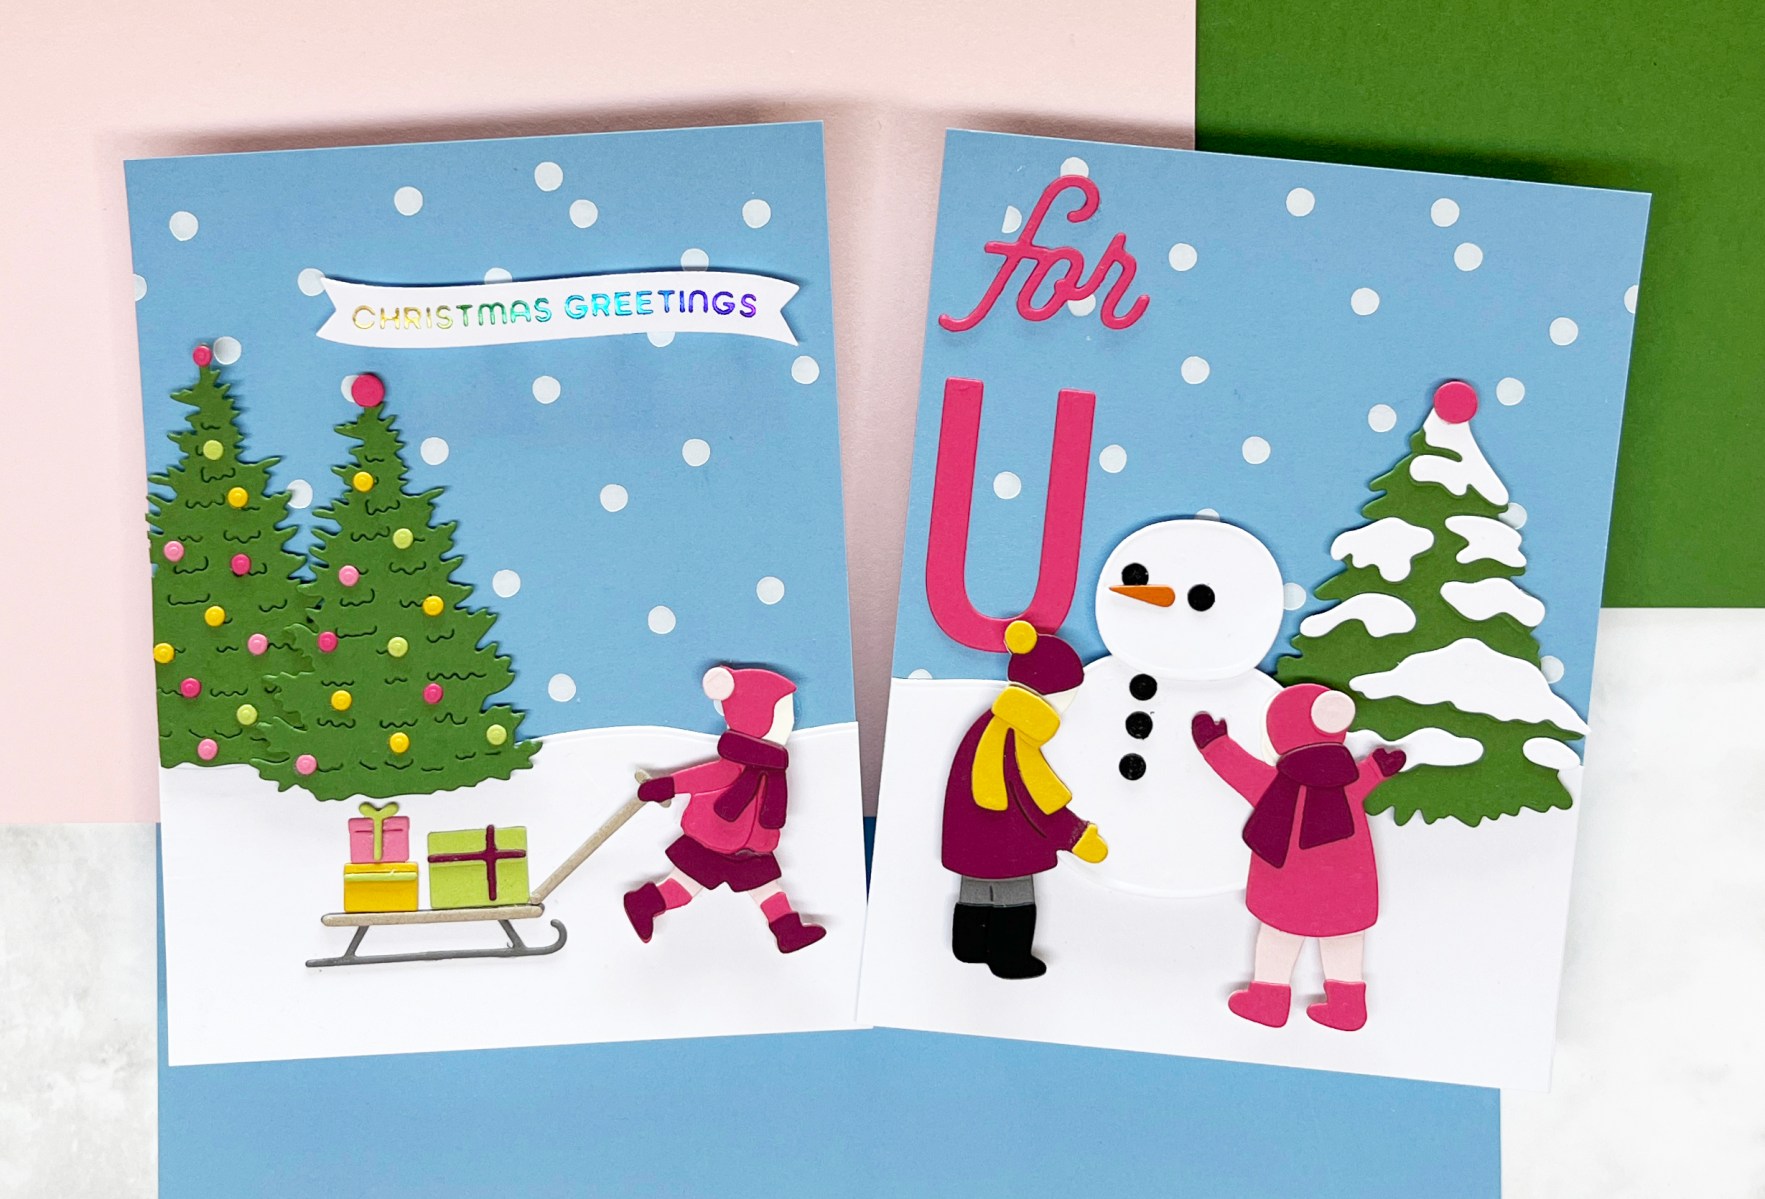
One of my favorite things about cardmaking is building little worlds with die cuts. The Spellbinders October 2025 Club Kits are perfect for creating playful, outdoor winter scenes full of joy, color, and personality. Today I’m sharing two companion cards I made using the Die of the Month Kitand the Large Die of the Month Kit—both with matching colors and snowy backdrops.
At the bottom, I’ll also walk you through a few of my favorite tips for planning and arranging die cut scenes.
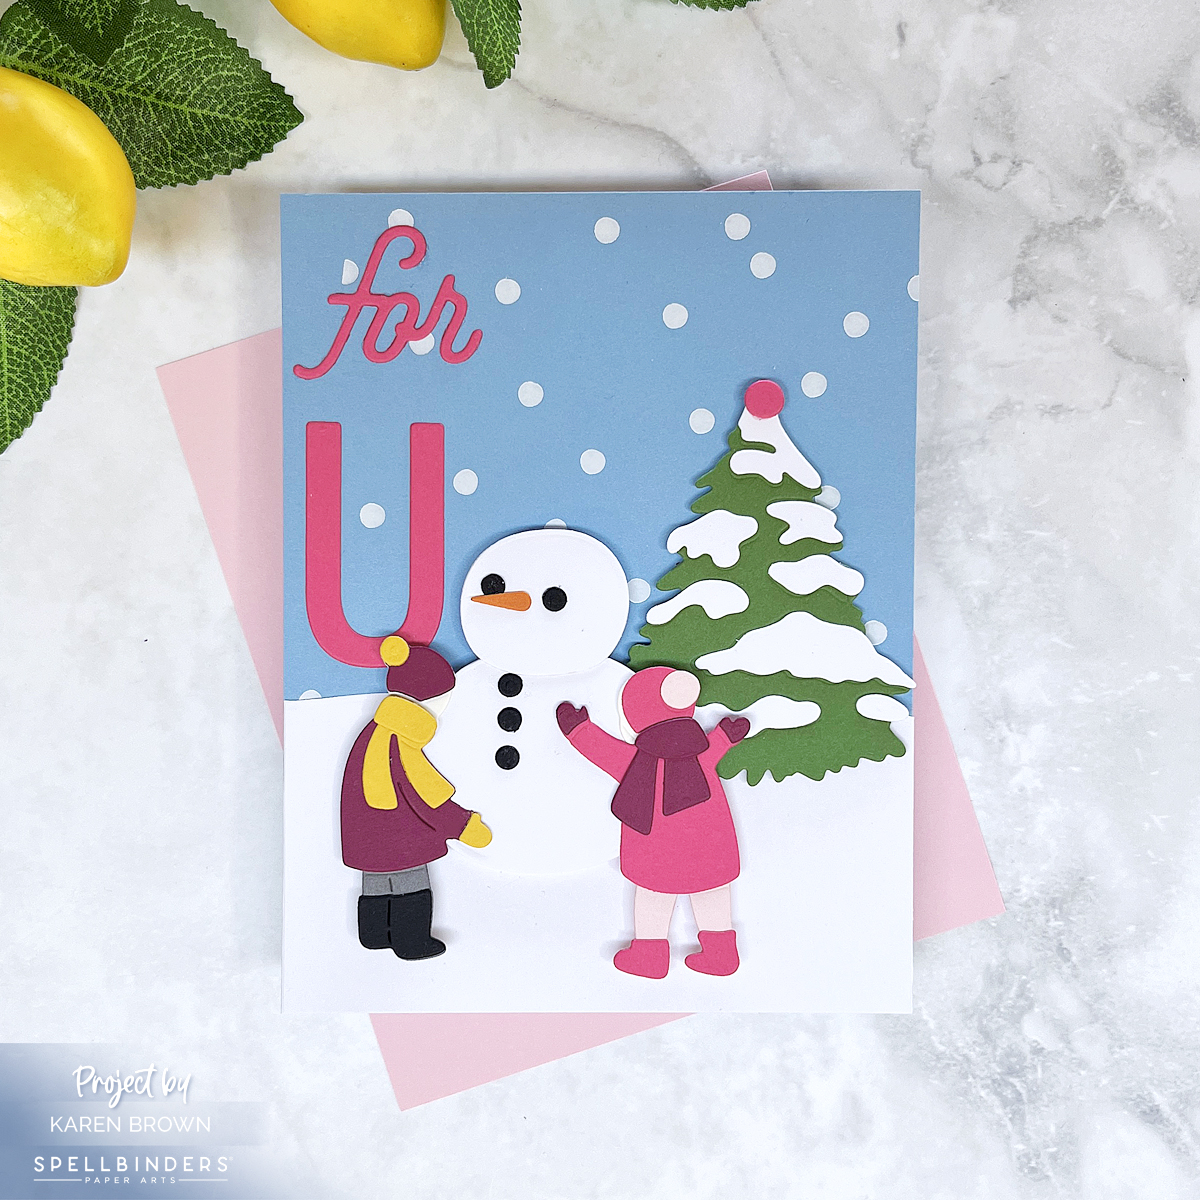
Sled of Gifts (Large Die of the Month)
I started with the Large Die of the Month Kit, creating a cheerful winter scene of a little girl, pulling a sled piled high with gifts. To set the stage, I added two decorated Christmas trees with colorful ornaments.
For the sentiment, I combined a scripty “for” with a giant U (both from the October Caboodle Bonus Gift), both die cut in hot pink. Together, they form a bold, playful greeting.
This card has a storybook charm and pairs perfectly with the sled design.
📝 Tips for Arranging Die Cut Scenes
Here are five simple steps I use whenever I build a die cut scene:
Plan Colors First: Choose your key colors. For these cards, I used blue gray, hot pink, and fern green as my anchors. White cardstock provided snowy contrast.
Die Cut All Elements: Having all the pieces ready makes it easier to plan your layout.
AssembleEach Element: I use Bearly Art glue and a Crystal Katana jewel pickerto precisely assemble my elements. Once they are fully assembled, it is much easier to determine exactly where I want to place each component.
Mock Up Layouts: I arrange several versions, take quick photos, and then choose the most balanced design.
Construct Your Scene: I like to use glue, foam squares and craft foam to complete my card.
These tricks make arranging die cut winter wonderlands more fun and less stressful.
It may be mid-summer, but it’s never too early to get a head start on your holiday cardmaking! I’m kicking off Christmas in July with two cheerful and candy-colored designs using the brand new Candy Cane Season Collection from Hero Arts.
This sweet collection is full of playful holiday charm—peppermints, bows, and bold candy cane graphics that are perfect for building quick but eye-catching holiday cards.
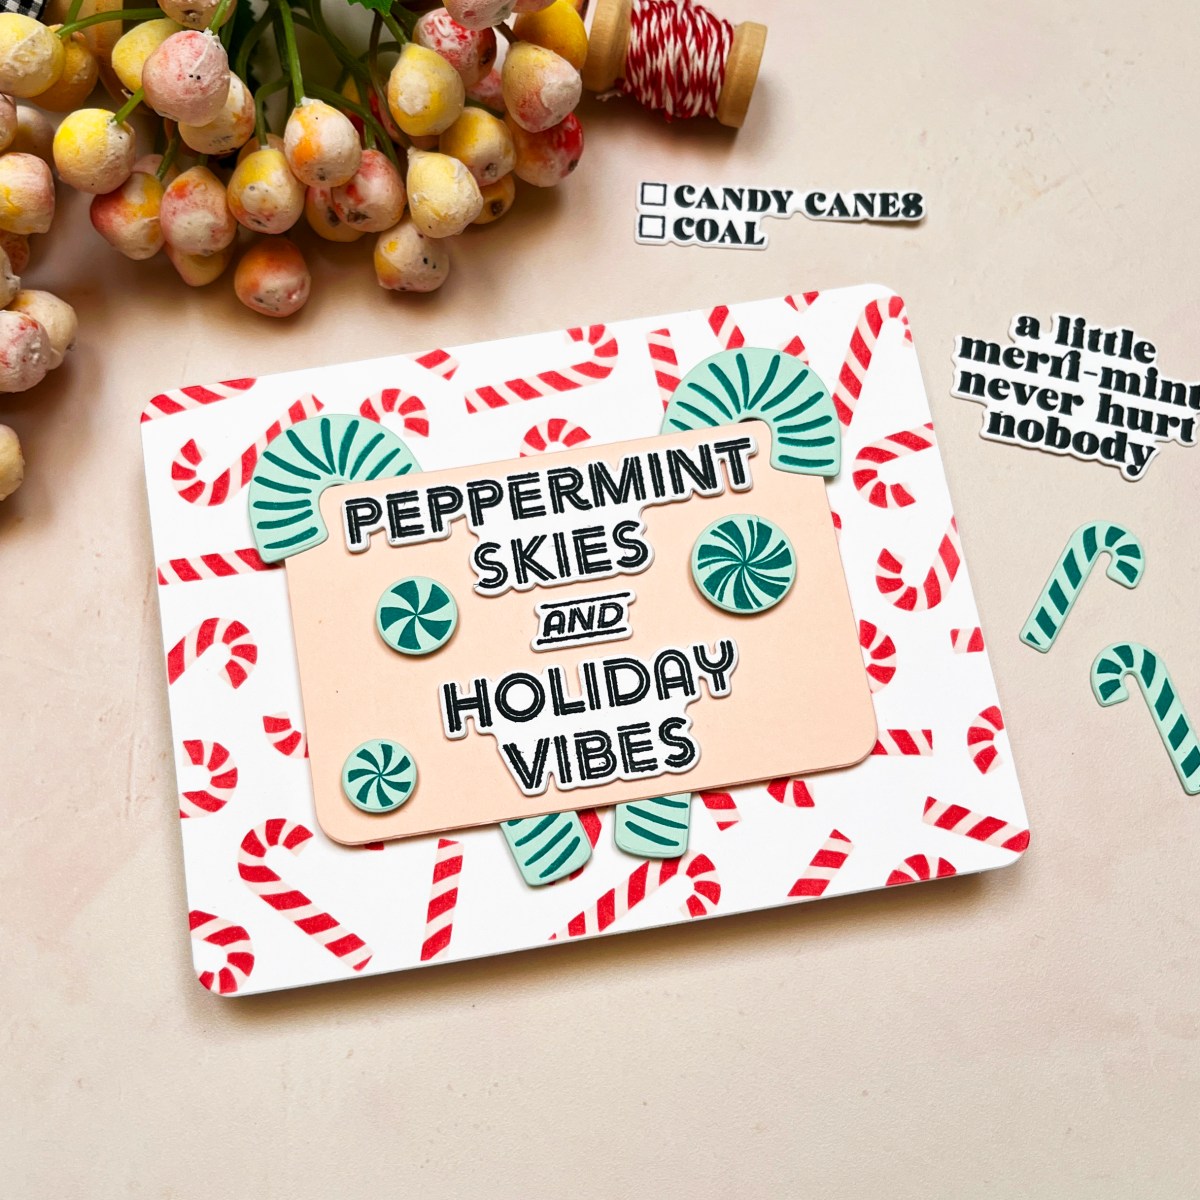
Card 1: Peppermint Skies & Holiday Vibes
My first card is all about peppermint joy! I started by creating a playful red and white background using the Candy Cane Toss Up Stencils and two Hero Arts inks:
Peony
Cherry
This creates the scattered look of candy canes tossed in the air—fun, festive, and full of movement. The sentiment, “Peppermint Skies and Holiday Vibes,” is stamped in black for a bold pop, centered over the background.
To bring in contrast and dimension, I added green candy canes from the Candy Cane Swagset. I stamped them in Pine ink on Mint ColorWheel Cardstock and die cut them multiple times—then did a little crafty engineering to extend the candy canes behind the sentiment strip. By layering extra pieces below the visible canes, they peek out above and below the sentiment, adding height and whimsy to the design.
This card’s theme is peppermint playfulness—and it’s a sweet way to start your stash of holiday greetings!
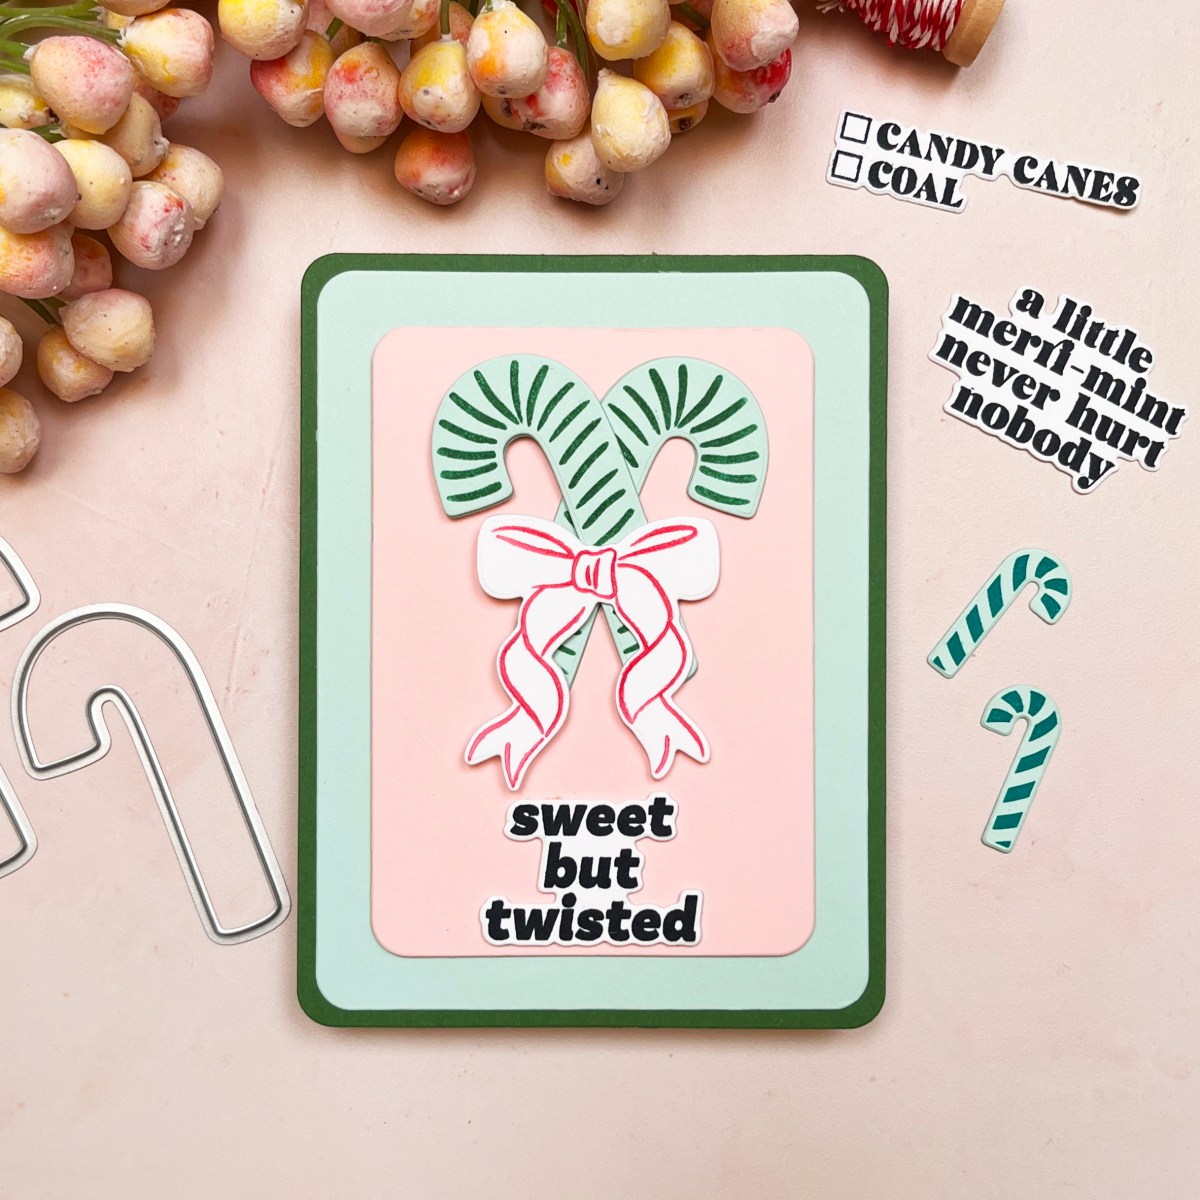
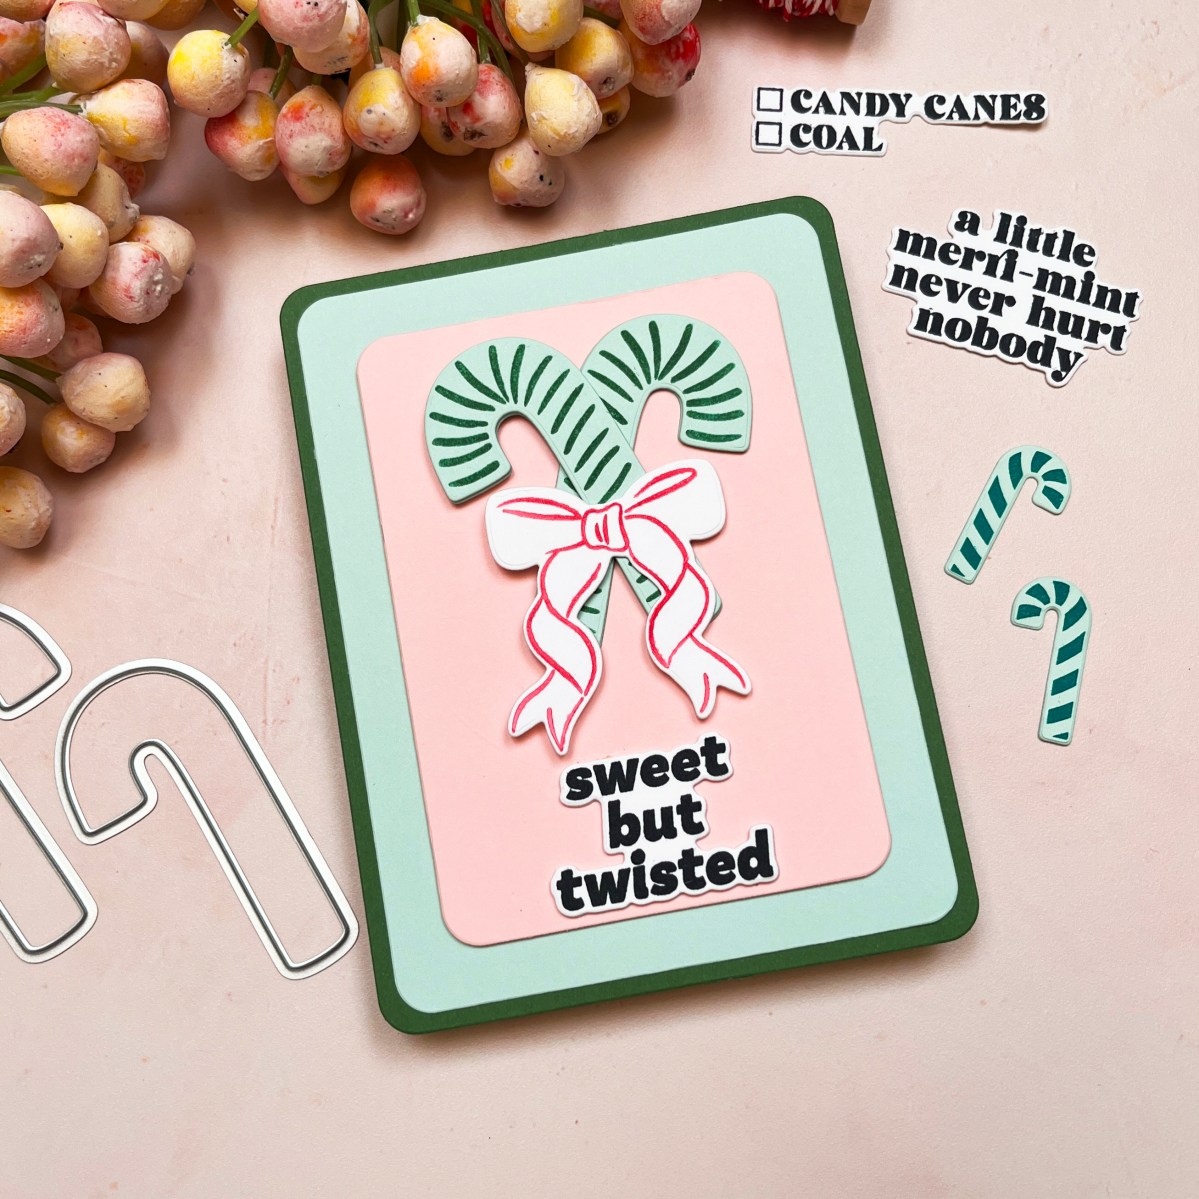
Card 2: Sweet but Twisted
For my second card, I kept the focus on a clean graphic layout featuring crossed candy canes as the main design element.
I used the Candy Cane Swag stamps again, stamping two canes in Pine ink on Mint ColorWheel Cardstock, then crossing them in an “X” shape at the center of the card. I added a red and white bow (stamped in Cotton Candy inkand die cut) to the center, tying the two canes together like a festive wreath.
These colors echo the classic red-and-green palette but with a soft, contemporary twist—perfect for a fun and modern holiday card.
The sentiment “Sweet but Twisted” is from the A Little Merri-Mint Stamp & Die Set, and I think it pairs perfectly with this cheeky little cane design!
Both cards feature cardstock from the ColorWheel Collection, which makes it so easy to mix and match hues while keeping your palette coordinated. And while they use some of the same elements, each card has its own unique personality—one playful and layered, the other bold and graphic.
It’s never too early to dive into the holiday spirit, especially with sweet designs like these. Whether you love traditional candy cane colors or like to mix things up, Candy Cane Season has something merry for everyone!
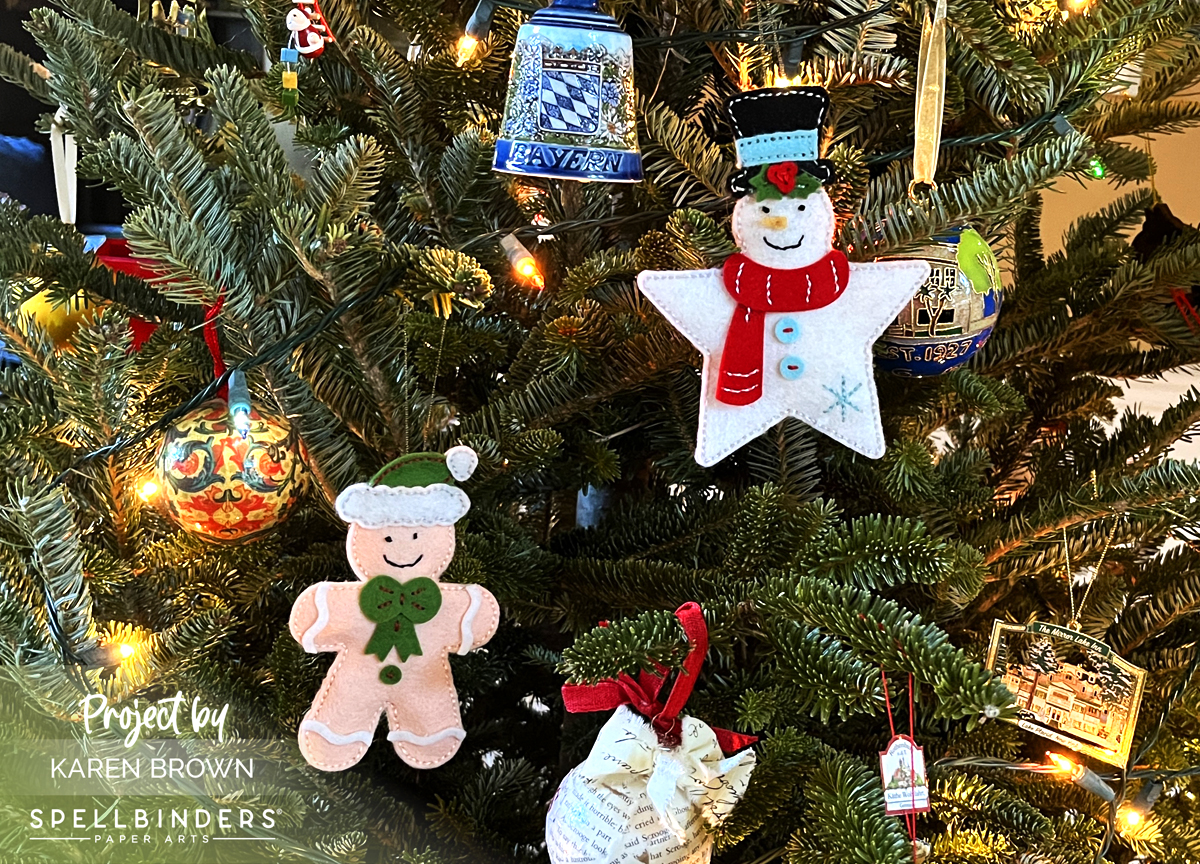
There’s something about handmade ornaments that makes a Christmas tree feel extra special—like it’s dressed in memories and love. This year, why not add a touch of cozy charm to your tree with hand-stitched felt ornaments? Today, I’m sharing how to create two adorable characters: a Snowman Star and a Gingerbread Girl using Spellbinders/Nichol Spohr’s Felt Stitch and Create Kits. These cuties are sure to bring a smile to everyone’s face!
Hand-Stitched Christmas Cheer: Felt Ornaments for Your Tree
Nothing says winter wonderland like a snowman! This star-shaped snowman brings the frosty fun with its dapper hat and a cheery scarf.
I used my Pokey Tool to pop out any remaining felt chads for easier stitching.
I stuffed my ornaments with felt for dimension.
I used the running stitch and three strands of thread for my stitching. Using the running stitch, I went around my felt twice to have continous stitching.
I used a mini hot glue gun to adhere the pieces and accessories that were not stitched on.
To make my hangar, I ran a needle with floss through the back layer of felt and then knotted the floss at the top.
Sweet as can be, this Gingerbread Girl brings a dash of whimsy to your tree. Her hat and bow gives her a festive flair, perfect for the holiday season.
9″ Pro Shears (great for cutting felt…and anything else in your craft room)
These felt ornaments are keepsakes that I will hang on my tree year after year. They would also make wonderful gifts for family and friends. Happy Holiday!
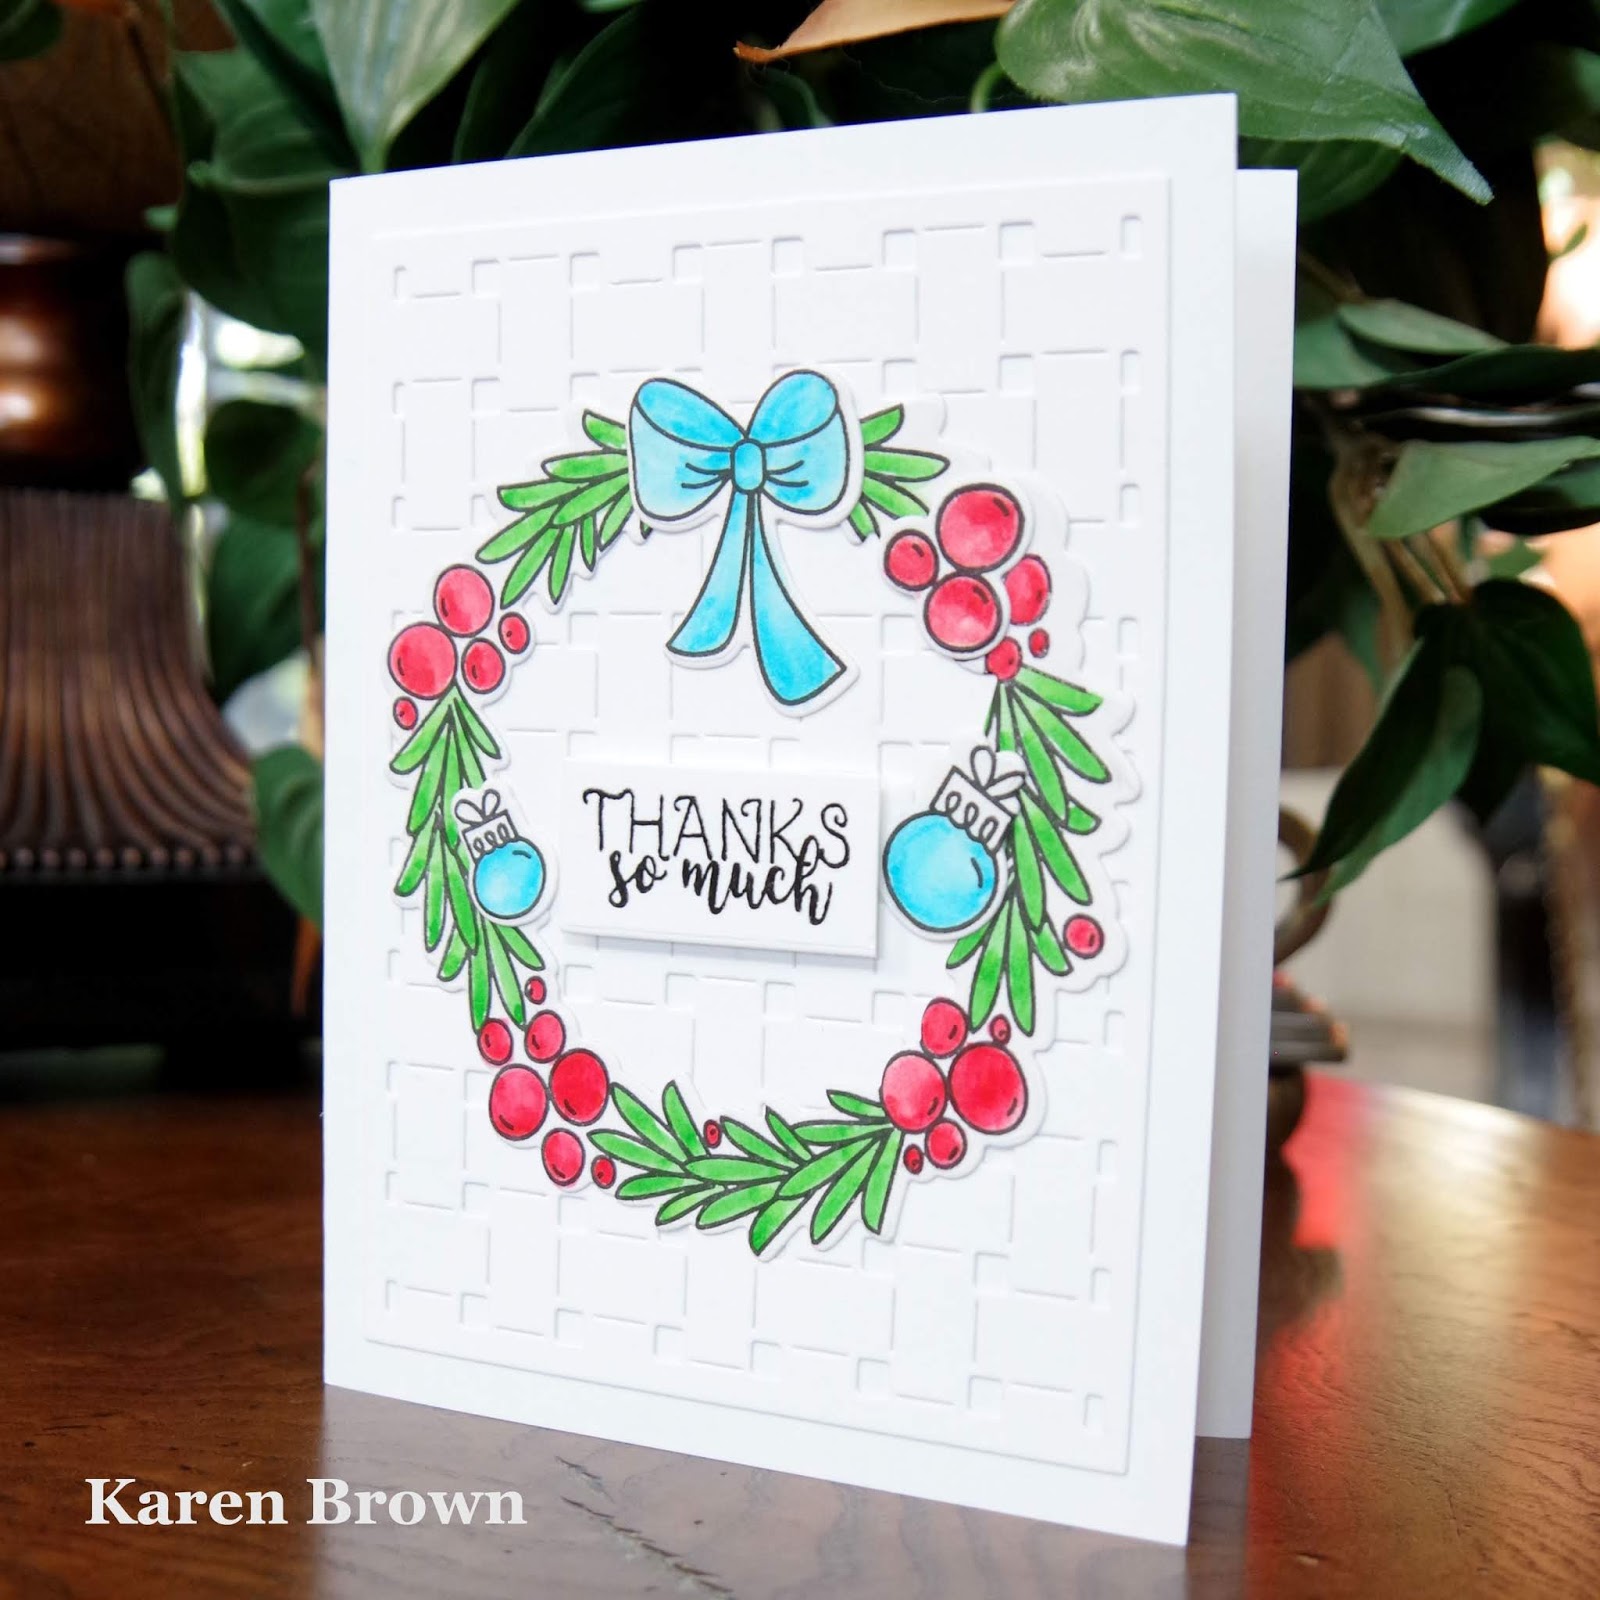
Hello and welcome. This week we are making \”feminine\” cards at the Watercooler Wednesday Challenge. Talented Helen is our hostess.
I wanted to do a pretty thank you card so I started by stamping, coloring and die cutting this favorite wreath. I wanted a subtle white on white backdrop so I die cut a basket weave panel and affixed to an A2 card base. I love the pretty little sentiment which I heat embossed.
Supplies:
Avery Elle – Festive Wreath stamps and dies
Frantic Stamper Basket Weave die.
Bristol Cardstock
Zig Clean Clear Markers (May Green 47, Pale Green 45, Lt. Carmine Red 21, Red 20, Light Blue 36, Cobalt Blue 31).
I am trying to stay ahead so I began creating my holiday thank you notes. The idea for this card came to me over several days. I won a challenge this summer and the prize was a gift certificate to Visible Images. I selected several stamp sets and thought it would be fun to do a modern card using some of the circles and spheres that came in the sets. Aqua and red are perfect for this time of year.
I embossed all the images in silver on watercolor paper and used just two watercolor hues. I changed the shades by adding more water to the areas I wanted less intense, so while I had just two colors on my pallet, I had several pools of aqua and red in varying shades to work from. I added a strip of aqua to the edge to accent the colors. I love the shine and shimmer from the silver embossing powder.
I am entering this card in the following challenges:
Color Throwdown #519 Challenge I got my color inspirations from this challenge. I had been pondering aqua and apple green, but when I saw this challenge I knew I wanted to use red and aqua.


 and Frantic Stamper Basket Weave die")