Hot Foiling · Video

VIDEO: Zodiac Birthday Cards Made Easy with Hot Foiling (Pisces & Aquarius)

Pisces and Aquarius zodiac hot foil cards shown side by side, featuring bold graphic designs and personalized color palettes.

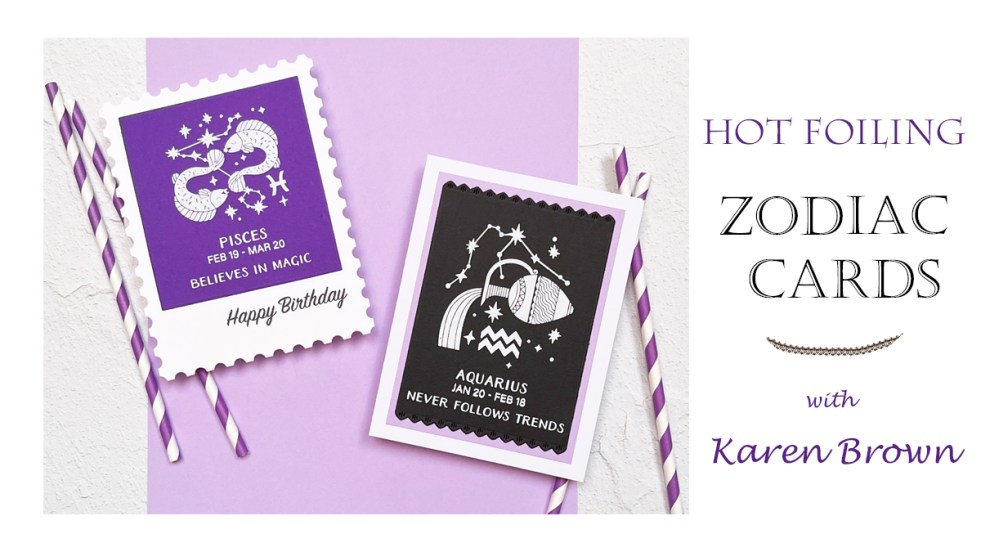
Some card ideas grab your attention… and others stick with you. With my birthday coming up this month (hello, Pisces ♓), I found myself completely drawn to Spellbinders’ Block Print Zodiac Seriesa coordinated collection of 12 BetterPress and Glimmer Hot Foil kits, one for each zodiac sign. These kits create bold, graphic, and deeply personalized cards that feel anything but generic, and they’re fast enough to make even when time (or motivation!) is limited.

To kick things off, I’m sharing my Pisces and Aquarius Zodiac cards, along with a quick 2-minute hot foiling video that shows exactly how I foiled my Pisces panel using the Glimmer Hot Foil System. If you’ve ever wanted a refresher on hot foiling—or you’re considering adding a Glimmer system to your craft room—this post is for you.

Watch the Hot Foiling Process (2 Minutes Flat!)

Or Watch on YouTube HERE.

I created a short, two-minute video that focuses only on the hot foiling process for my Pisces card. This isn’t a full card tutorial—sometimes you just want to see how the Glimmer system works, how the foil transfers, and that satisfying reveal moment.

In the video, you’ll see:

  • How I foil the Pisces plates using white foil
  • The reveal of the finished foiled panel
  • A peek at the completed card design

These Zodiac cards are very fast to assemble once the foiling is done, which makes them perfect for batching or last-minute cardmaking.

Why Zodiac Cards Are Such a Brilliant Cardmaking Idea

Handmade cards created with Spellbinders Block Print Zodiac BetterPress + Foil plates that are excellent masculine cards.

There are 12 Zodiac kits, each designed around a specific sign, and every kit includes:

  • A zodiac graphic plate (Pisces features two fish)
  • A two-line plate with the zodiac name and date range
  • A tagline plate (Pisces: Believes in Magic)
  • A placement guide so lining everything up is foolproof

If you owned all 12 kits, you could easily create a year’s worth of birthday cards—perfect for anyone and everyone. These cards are especially wonderful for masculine birthdays, which we all know can be a challenge. They’re bold, graphic, and customizable without being overly fussy.

Because the plates don’t say Happy Birthday, they’re also perfect for:

  • Birthday thank you notes
  • Just-because cards
  • Personalized notes acknowledging someone’s personality or “cosmic identity”

Nothing generic here.

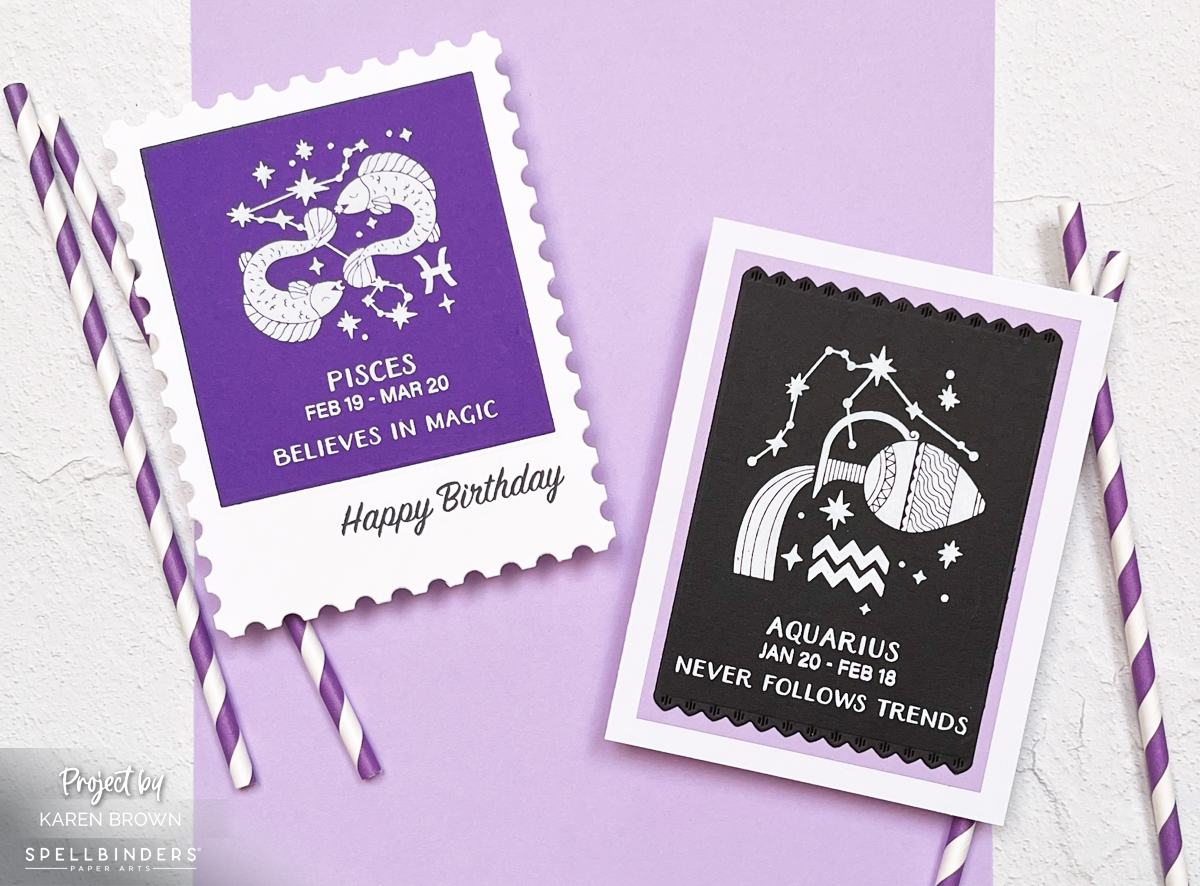
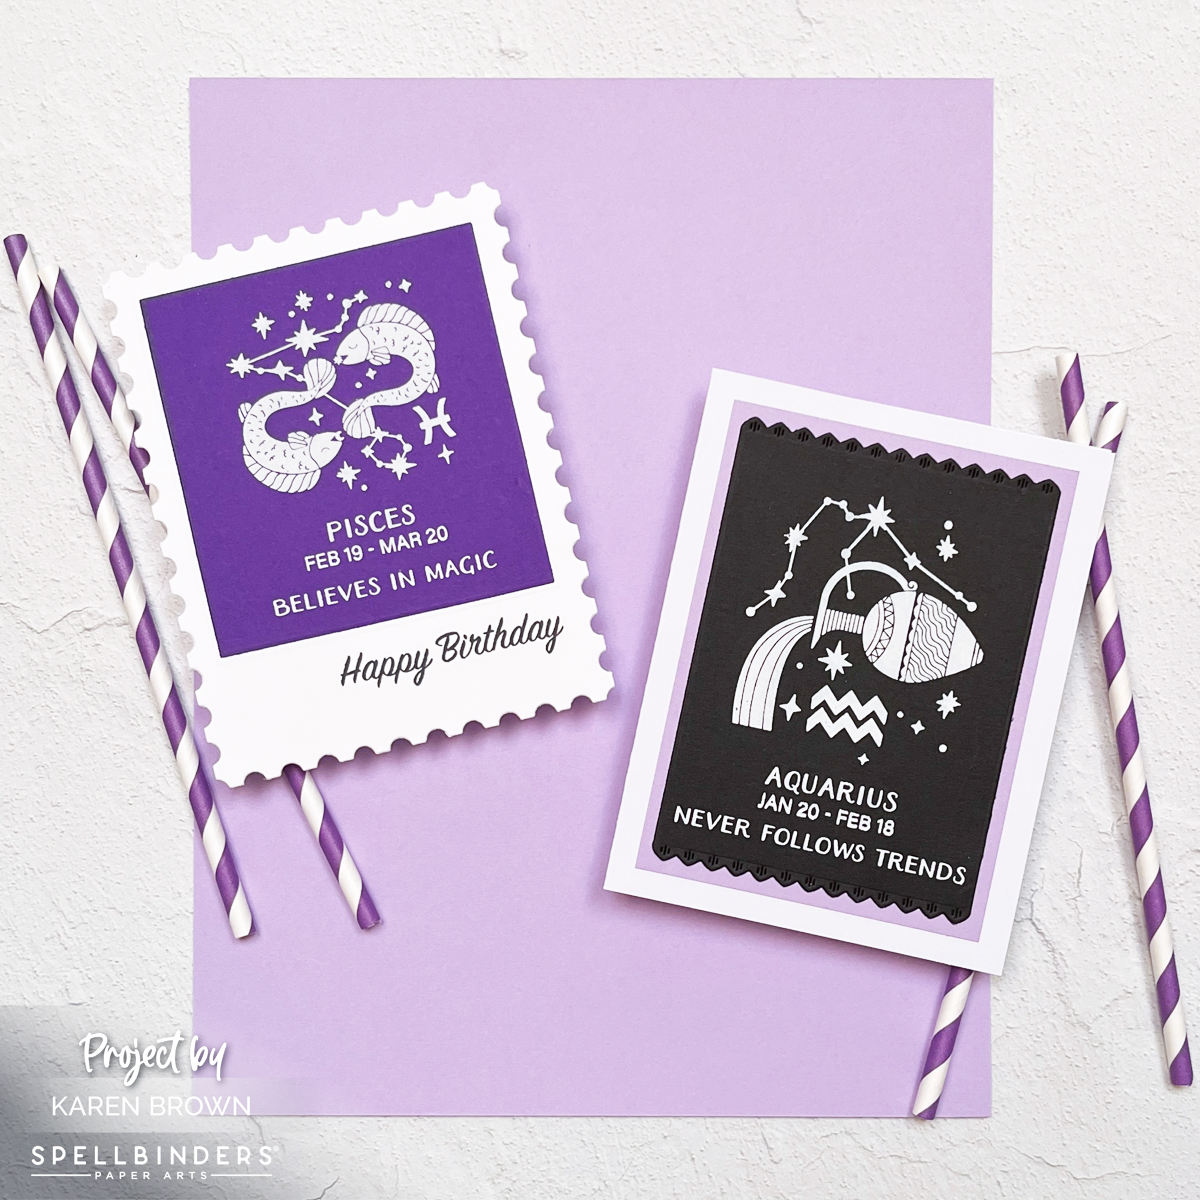
Pisces Card: Birthstone Color + Polaroid Style Design

Handmade Pisces zodiac birthday card hot foiled in white on purple cardstock with a postage stamp edge frame and polaroid-style design.

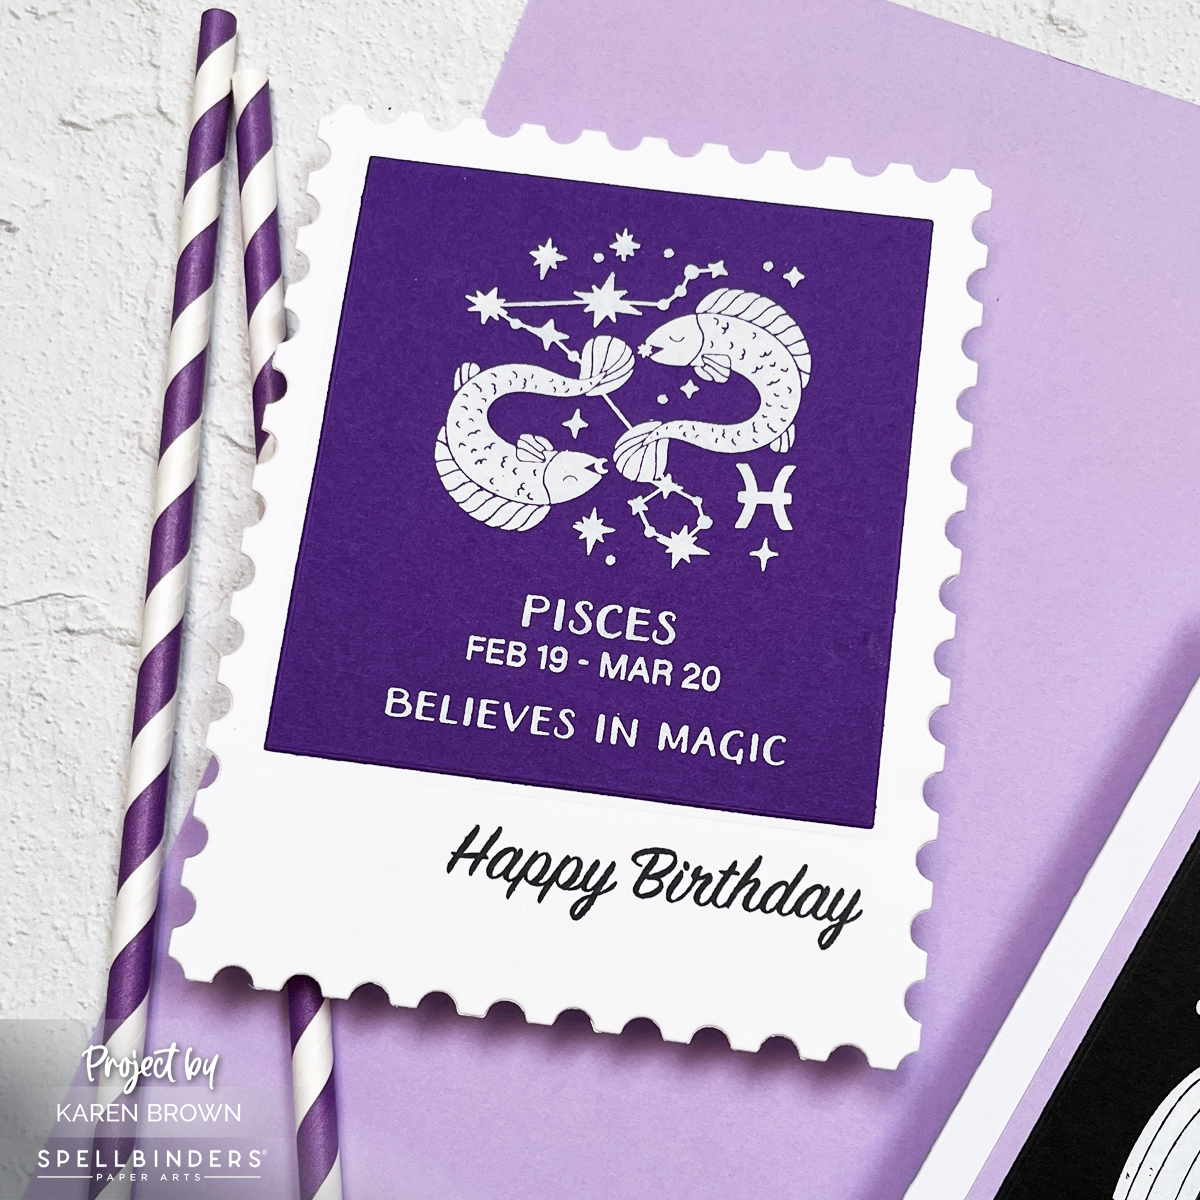
For my Pisces card, I chose purple cardstock, inspired by my February birthstone, amethyst. I hot foiled the design in crisp white foil, which creates such a striking contrast against the rich purple background.

To finish the card:

  • I die cut the foiled panel using a postage stamp / polaroid-style frame from the January 2026 Spellbinders Large Die of the Month
  • The purple foiled panel becomes the “photo” portion of the polaroid
  • The white frame adds softness and a classic touch
  • I stamped a small scripty happy birthday sentiment along the bottom of the frame

The result feels clean, modern, and personal all at once.

Pisces is often described as creative, artistic, and imaginative—which made me smile. I frequently dream about cards or wake up with ideas I can’t wait to try, so this kit felt especially fitting.

Aquarius Card: Night Sky Drama with White Foil

Aquarius zodiac card hot foiled in white on black cardstock, framed with a rectangular die cut for a night sky inspired look.  Masculine Birthday card.

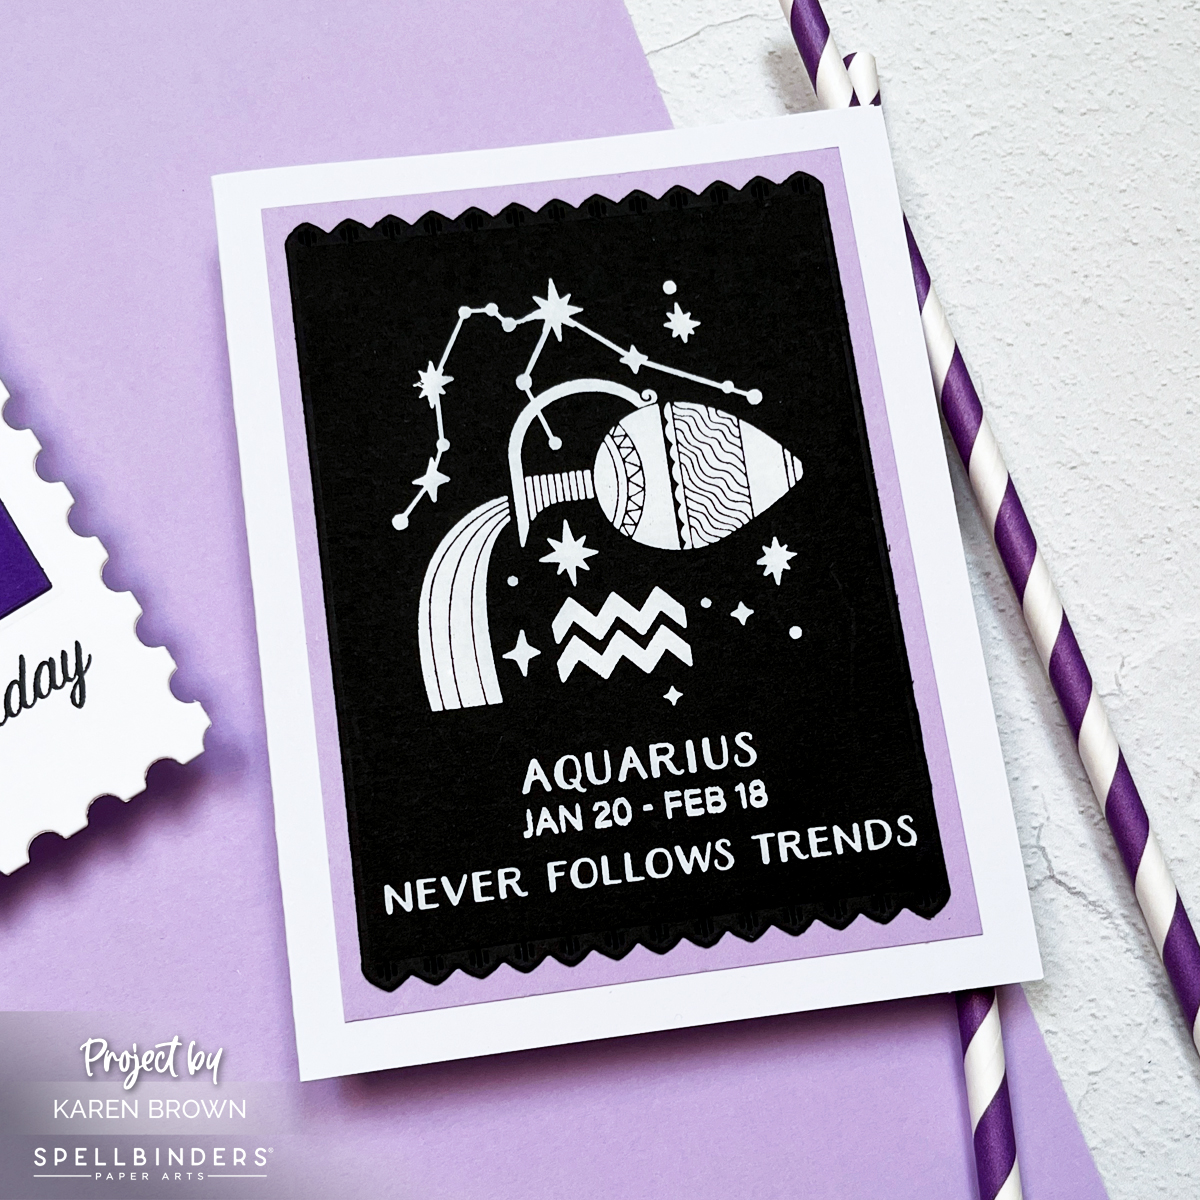
For my Aquarius card, I leaned fully into the zodiac theme and created a night-sky inspired design. I hot foiled the plates in white foil on Pitch Black cardstock, which feels dramatic, graphic, and timeless.

The foiled panel was framed using dies from an older Spellbinders Die of the Month kit, keeping the focus on the bold foiling and strong contrast. This card is simple, striking, and would be perfect for:

  • A masculine birthday
  • A modern astrology lover
  • Anyone who appreciates clean design

Why I Love These Zodiac Kits (And Think You Will Too)

What really stands out to me is how customized and thoughtful these cards feel. You can:

  • Use a recipient’s favorite color
  • Choose cardstock based on birthstones
  • Keep designs bold and graphic or soften them with frames and layers
  • Mass produce cards efficiently without sacrificing style

They’re quick, versatile, and incredibly satisfying to make.

Supplies Used:


More Hot Foiling Inspiration

If you enjoy hot foiling techniques, here are a few related projects you might like:

  • Fast & Easy Glimmer Background Card – In my Christmas Elf card, I used white foil on pale blue cardstock to create a snowy, wintery background. This post includes a full video tutorial.
  • One Plate, Two Techniques: BetterPress vs Glimmer – One of my most popular posts from 2025, where I used the Scattered Shells plate to show how dramatically different results can be depending on the technique.

Both are great examples of how much versatility you can get from hot foil plates.


Final Thoughts

If you love scene-building, you’ll definitely want to check out my Sneaker Bouquet scene card tutorial.

These Spellbinders Block Print Zodiac kits make it incredibly easy to create cards that feel meaningful, personal, and polished—without a lot of time or effort. Whether you’re making a birthday card, a thank you note, or stocking up on cards for the year, zodiac cards are a smart, evergreen addition to any cardmaker’s repertoire.

And if you’ve been curious about hot foiling, don’t forget to watch the 2-minute Pisces foiling video—sometimes all it takes is a quick refresher to spark new ideas.

BetterPress · cardmaking · Die cutting

Handmade Winnie the Pooh Cards with Spellbinders Classic Pooh Baby Collection

3 Winnie the Pooh theme handmade cards for baby showers and birthdays.

There’s just something timeless about Winnie the Pooh. The gentle illustrations, the sweet stories, and the nostalgia make Pooh-themed projects extra special—and the newly released Spellbinders Classic Pooh Baby Collection captures that magic beautifully.

For today’s post, I created three handmade cards using this collection. Two are perfect for spring baby girl showers, and the third is a rustic birthday card with a mixed media twist. Even though the themes are different—Baby, Maps, and Pooh—they all celebrate the charm of the Hundred Acre Wood.

Card One: A Sweet Baby Shower Card from the Hundred Acre Wood

Handmade baby shower card featuring the Hundred Acre Wood BetterPress map from the Classic Pooh Birthday Collection, softly watercolored and accented with a die-cut high chair and pink  card base.

This first card absolutely stole my heart. I started with the Hundred Acre Wood BetterPress Plate, which features a detailed map of Pooh Corner—home to Pooh, Piglet, Tigger, Kanga, and friends.

I pressed the plate using my BetterPress LetterPress System and black ink onto a Bisque BetterPress A2 panel, then added soft color using Zig Watercolor Markers and a damp brush. This simple watercolor technique adds just enough storybook charm without overwhelming the delicate map details.

To give the card a baby theme, I added a die-cut high chair from the Baby Accessories Die Kit, layering it on a soft vellum die cut. The sentiment, “How do you spell LOVE?”, comes from the new Sweet Sentiments BetterPress Sentiment Set and feels just right for a baby shower.

I finished the card by mounting everything onto a pink watercolor card base, creating a soft, dreamy look that’s perfect for welcoming a baby girl.

Side-by-side photo of two handmade baby shower cards using the Classic Pooh Birthday Collection Baby Accessories dies, one featuring a BetterPress map and high chair, the other a pink stroller design.

Card Two: A Traditional Pooh Baby Shower Card with a Stroller

Pink baby shower card with a die-cut stroller, postage-style background created with the Spellbinders January 2026 Large Die of the Month, and vintage-inspired embellishments.

For my second baby card, I leaned into a more classic baby shower style, again using the Classic Pooh Baby Accessories Die Kit This one features a pink die-cut stroller (pram) accented with sweet sticker embellishments from Simple Stories Vintage Flower Shoppe.

The background is one of my favorite elements—it was created using this month’s Spellbinders Large Die of the Month Kit. The postage/polaroid-style frame makes such a versatile card base and is a true cardmaking staple. If you don’t already subscribe to this kit, it’s a fantastic one to try—I’ll link to my Hummingbird Delight post where I used the full kit.

This card feels timeless, gentle, and perfect for a traditional baby shower. I also have a photo showing both baby cards together (above), highlighting how different they can feel while still using the same Pooh collection.

Same Map, Two Completely Different Looks

Side-by-side comparison of two BP343 Hundred Acre Wood BetterPress map cards—one soft and pink for a baby shower, the other rustic and masculine with mixed media details.

One of my favorite things about this project is seeing how versatile the Hundred Acre Wood BetterPress Plate really is. In one card, it’s soft, pink, and perfect for a baby shower. In another, it’s rustic, layered, and mixed media inspired.

Card Three: A Rustic Pooh Birthday Card with Mixed Media

Handmade Winnie the Pooh 100 Acre Wood birthday card with an aged mixed media map background created using ink smooshing, brown splatters, and a navy “Let’s Celebrate” sentiment.

My third card takes the Hundred Acre Wood BetterPress Plate in a completely different direction. This one has a more rustic, slightly masculine vibe, making it ideal for birthdays beyond baby cards. This is one of my favorite crafting machines and here are my 9 tips, tricks and insights to the BetterPress process.

I created the background using an ink-smooshing technique with three shades of brown ink. After spritzing with water, I dipped a Bisque BetterPress panel into the ink and let it soak for about a minute (see two photos below) . Once dry (or heat set), I flattened the panel under a weight. I then used my BetterPress LetterPress System to press the map into my smooshed background.

Cardmaking process photo showing ink smooshing and the completed rustic background.

To add even more depth, I:

  • Ink blended darker browns around the edges
  • Added splatters using brown acrylic ink and a fan brush

My preference is to use color-coded blending brushes for ink blending. I find my brushes last longer since I only use one ink colorfamily on each brush.

BP343 Spellbinders The Hundred Acre Wood BetterPress rustic map birthday card

The result is a beautifully aged, mixed media map background. I mounted the panel onto a navy card base and added a bold navy “Let’s Celebrate” sentiment using the Hero Arts Hooray Birthday Cover Plate.

This card is heading to a friend who loves Winnie the Pooh, but it would also work wonderfully as a masculine birthday card.

I’ve included a photo (above) showing both map cards side by side, and I love how different they feel—even though they started with the exact same plate.

Key Products Used:

You might also be interested in the 14 tools that I use most often in my craftroom.

Why I Love Creating with Classic Pooh

👉 My past Winnie the Pooh Die Cut Card and BetterPress Winnie the Pooh Card have always been reader favorites, and it’s easy to see why. Pooh designs feel personal, nostalgic, and meaningful—whether you’re creating for a baby, a birthday, or someone who simply loves these classic characters.

👉 I’ll be linking to my Pooh & Piglet die-cut card from last year, which is still one of my most-loved projects. If you missed it, be sure to check it out for even more Pooh inspiration.