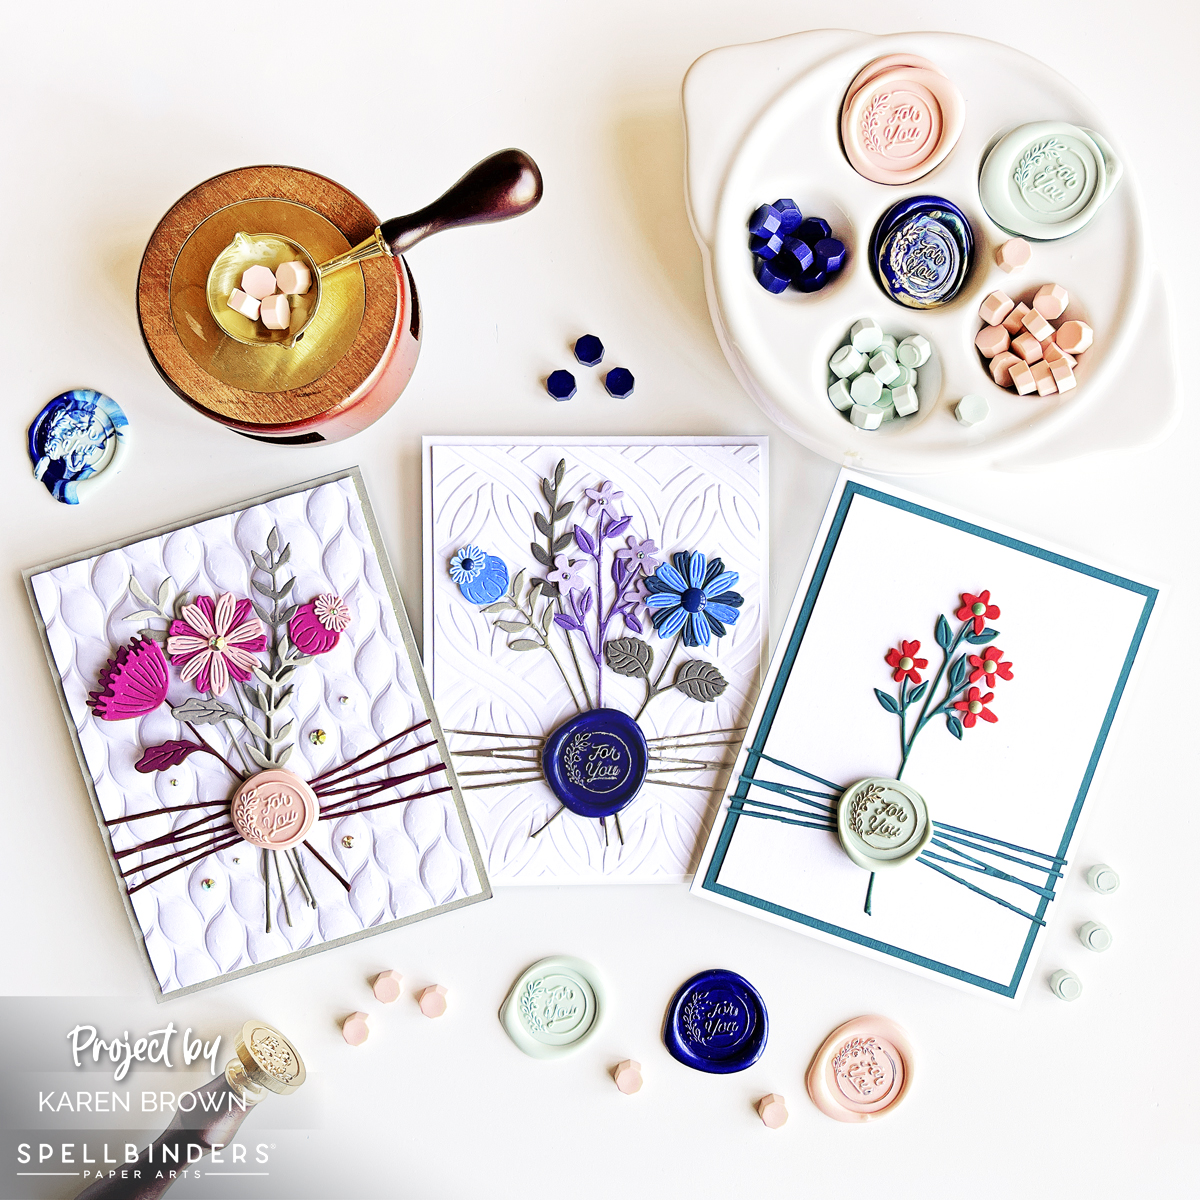
My Husband gave me Spellbinders Wax Seal Starter Kit for Christmas, and I have been having SO much fun! I also received a Platinum 6 Die Cutting Machine and I have to say I loved the results!
In today’s post, I used three beautiful new wax bead colors: Pistachio, Velvet Rose and Ink.
Tutorial + 18 Tips and Tricks for Making Wax Seals:
- With a Sharpie marker, I put a dot on my seal so it was easy to keep track of where the top of the design is.
- I read that it helps reduce soot if you trim your tea candle wick, so I did this.
- I put 4 beads in the warming spoon and it took 2 minutes to melt.
- I poured the wax and found it is easy to make a circle pattern, but I do like seals that aren’t perfectly round.
- Don’t press the seal into the wax, just gently position and allow gravity to work.
- After experimenting, I found that if I wanted a thicker, more button like seal you should pour the wax and then wait 15-30 seconds before gently dropping the seal into the wax. The card with the pink seal was done this way.
- If you like a thinner seal with a higher rim then place the seal immediately after pouring.
- I found if I used just my thumb and pinky or middle finger that I was better able to center the seal more precisely.
- I left the seal in the wax anywhere from 15 to 90 seconds. The time didn’t seem to matter and no wax was ever left on the seal itself.
- I also found it helps to move your pours around on the silicone mat so you don’t get warm spots on your work surface.
- I also let my seal cool in between pours.
- If you don’t like a seal, you can remelt it.
- You can mix colors for a lovely marbled look. I really love the blue and green combination that I made which is shown in the upper left of the first photo. I also love blue and gold together and you can see two with that combination in the upper right corner on the blue card.
- You can add flakes, glitter or pearls to the melted wax.
- I used a paper towel to clean the spoon when changing wax colors.
- I used a Decocolor marker on some of my seals (see the card with the green seal). I have Gold but wish I had bought silver too. Just lightly go over the raised ridges.
- I experimented using Posca Pens too. They work, but I did like the result of the Decocolor markers better. The navy wax seal was highlighted with a silver Posca.
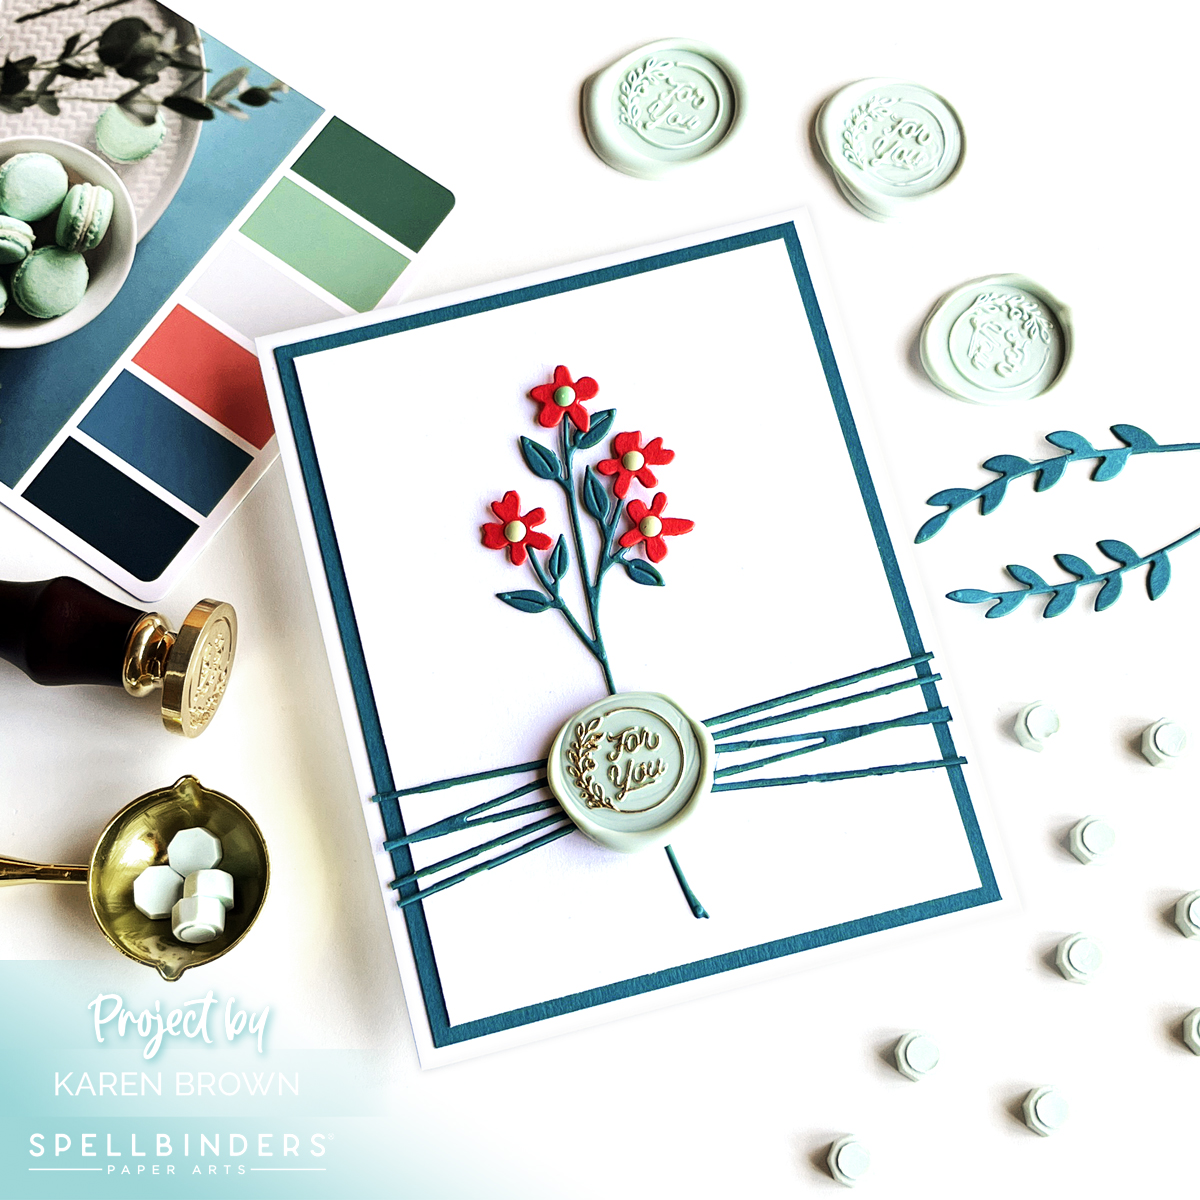
- I love the Sealed Twine Die for a perfect twine look every time!
Each seal is so beautiful and unique!
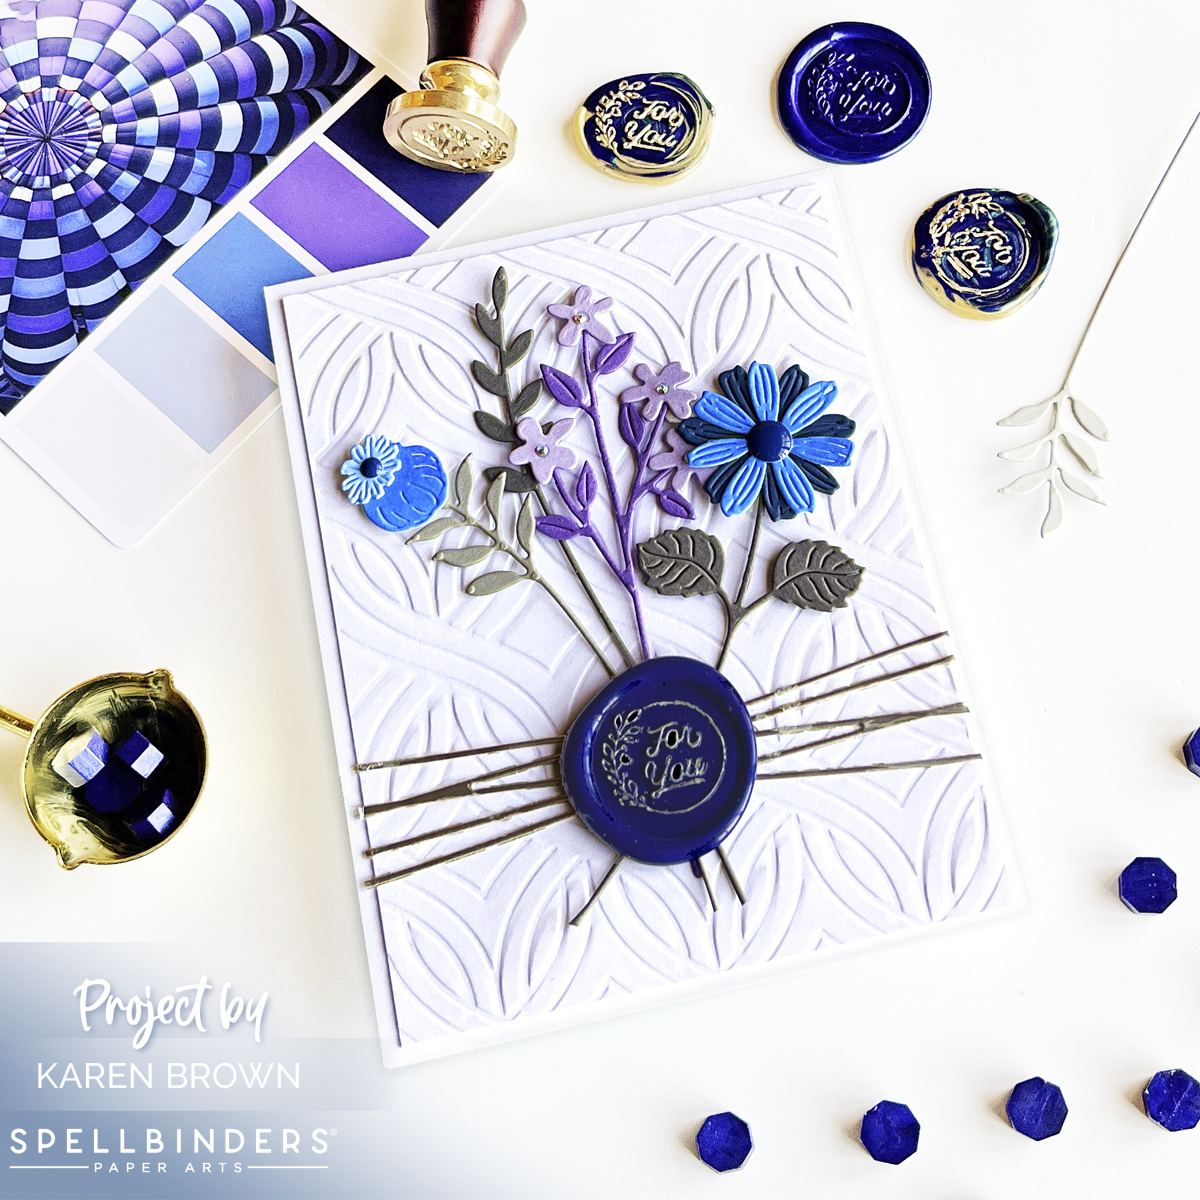
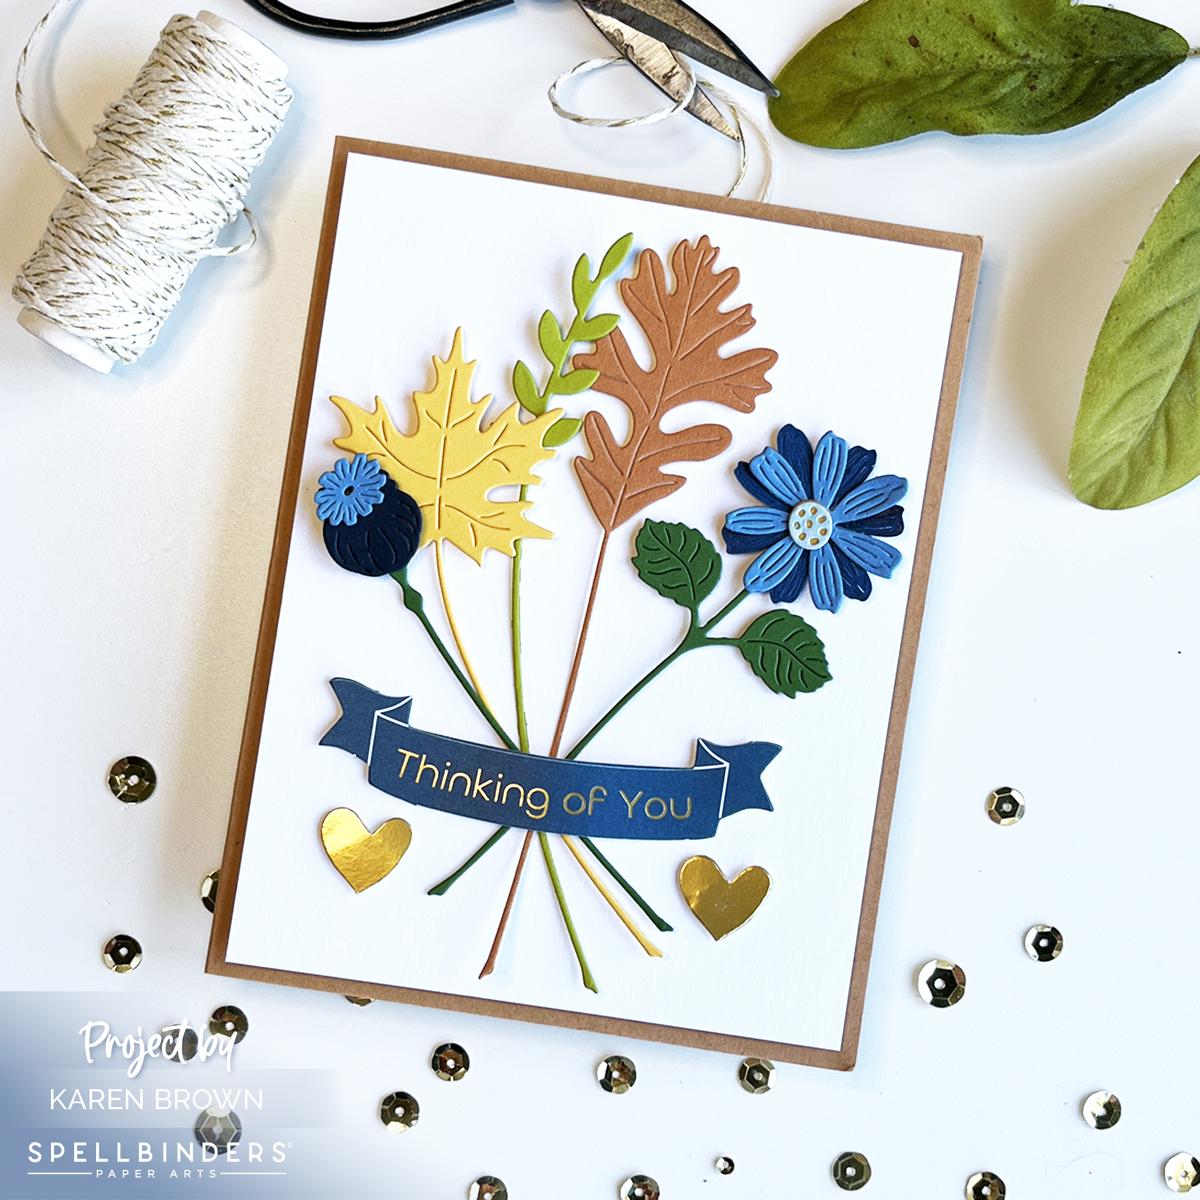
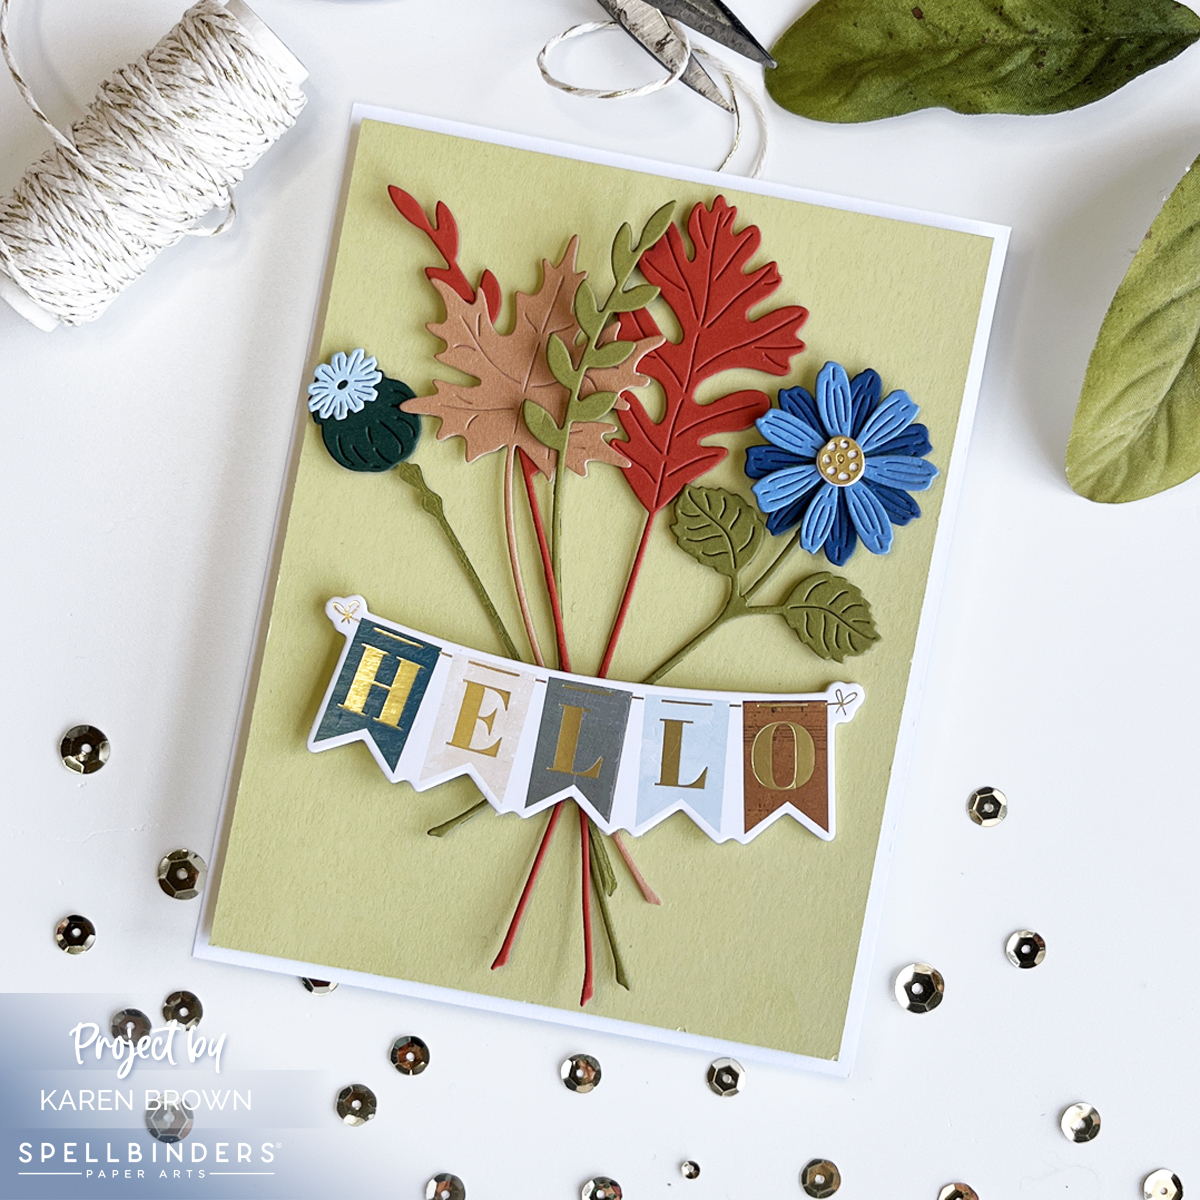
Once, my seals were made, I got out two favorite die sets – Sealed Wildflower, and Autumn Sealed Sprigs – and started creating my floral designs. I also used the Sealed Twine die on all of my cards.
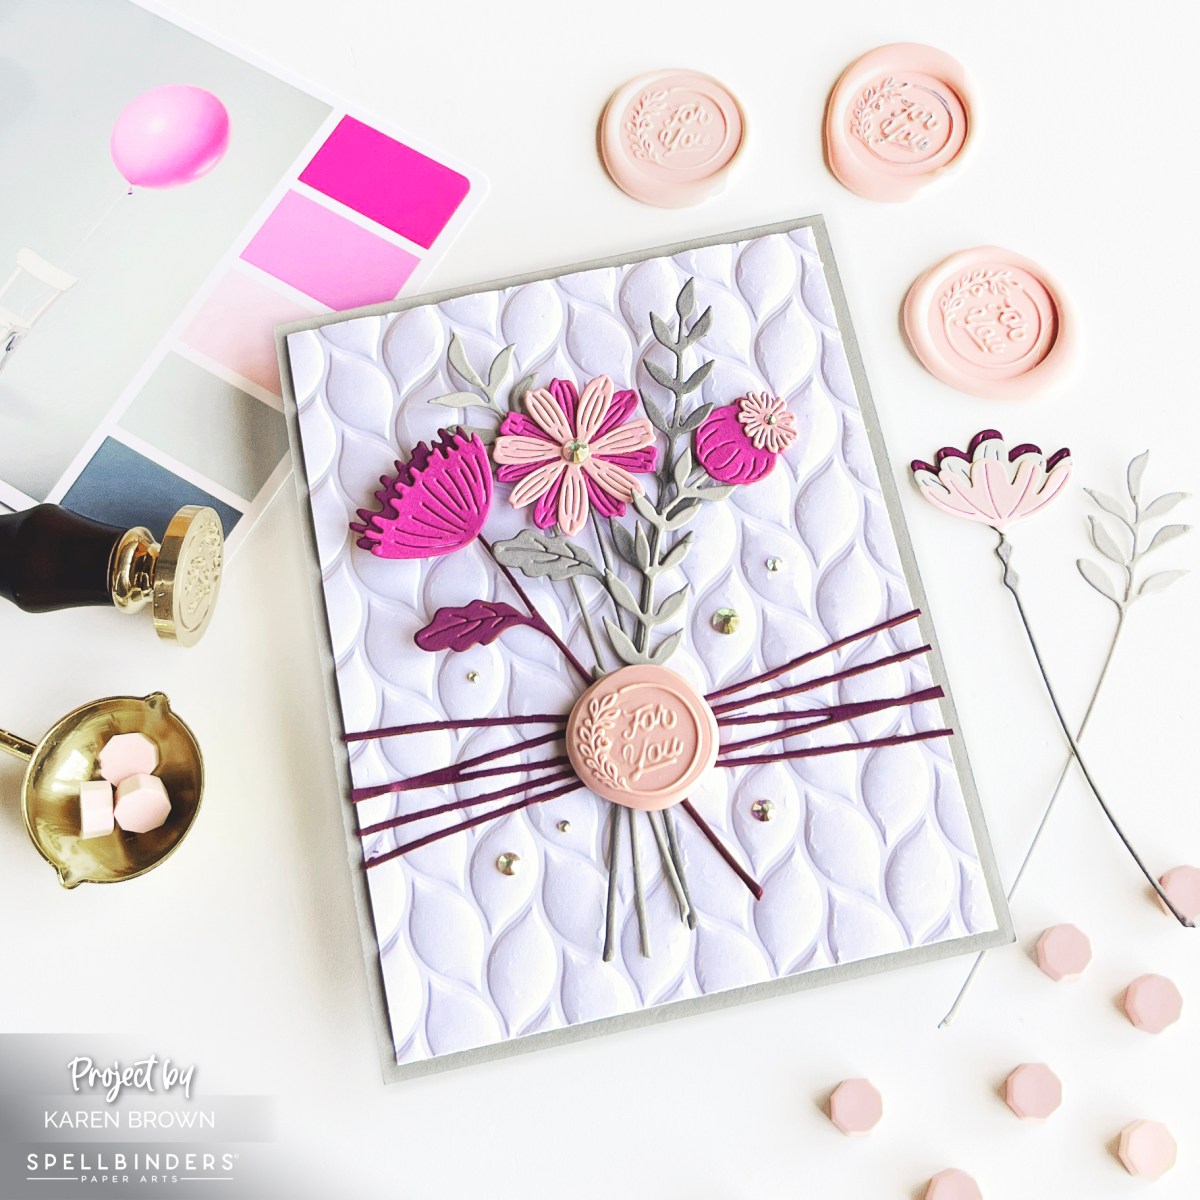
For two of my cards I embossed a background panel for added interest.
I’ve enjoyed my Wax Seal Kit so much that I signed up for the Wax Seal of the Month Kit.
Thanks for stopping by!
Karen