cardmaking · papercrafting

Spellbinders Die Cut Dogwood Blossom Card

Spellbinders Susan's Garden Favorites Dogwood Card.

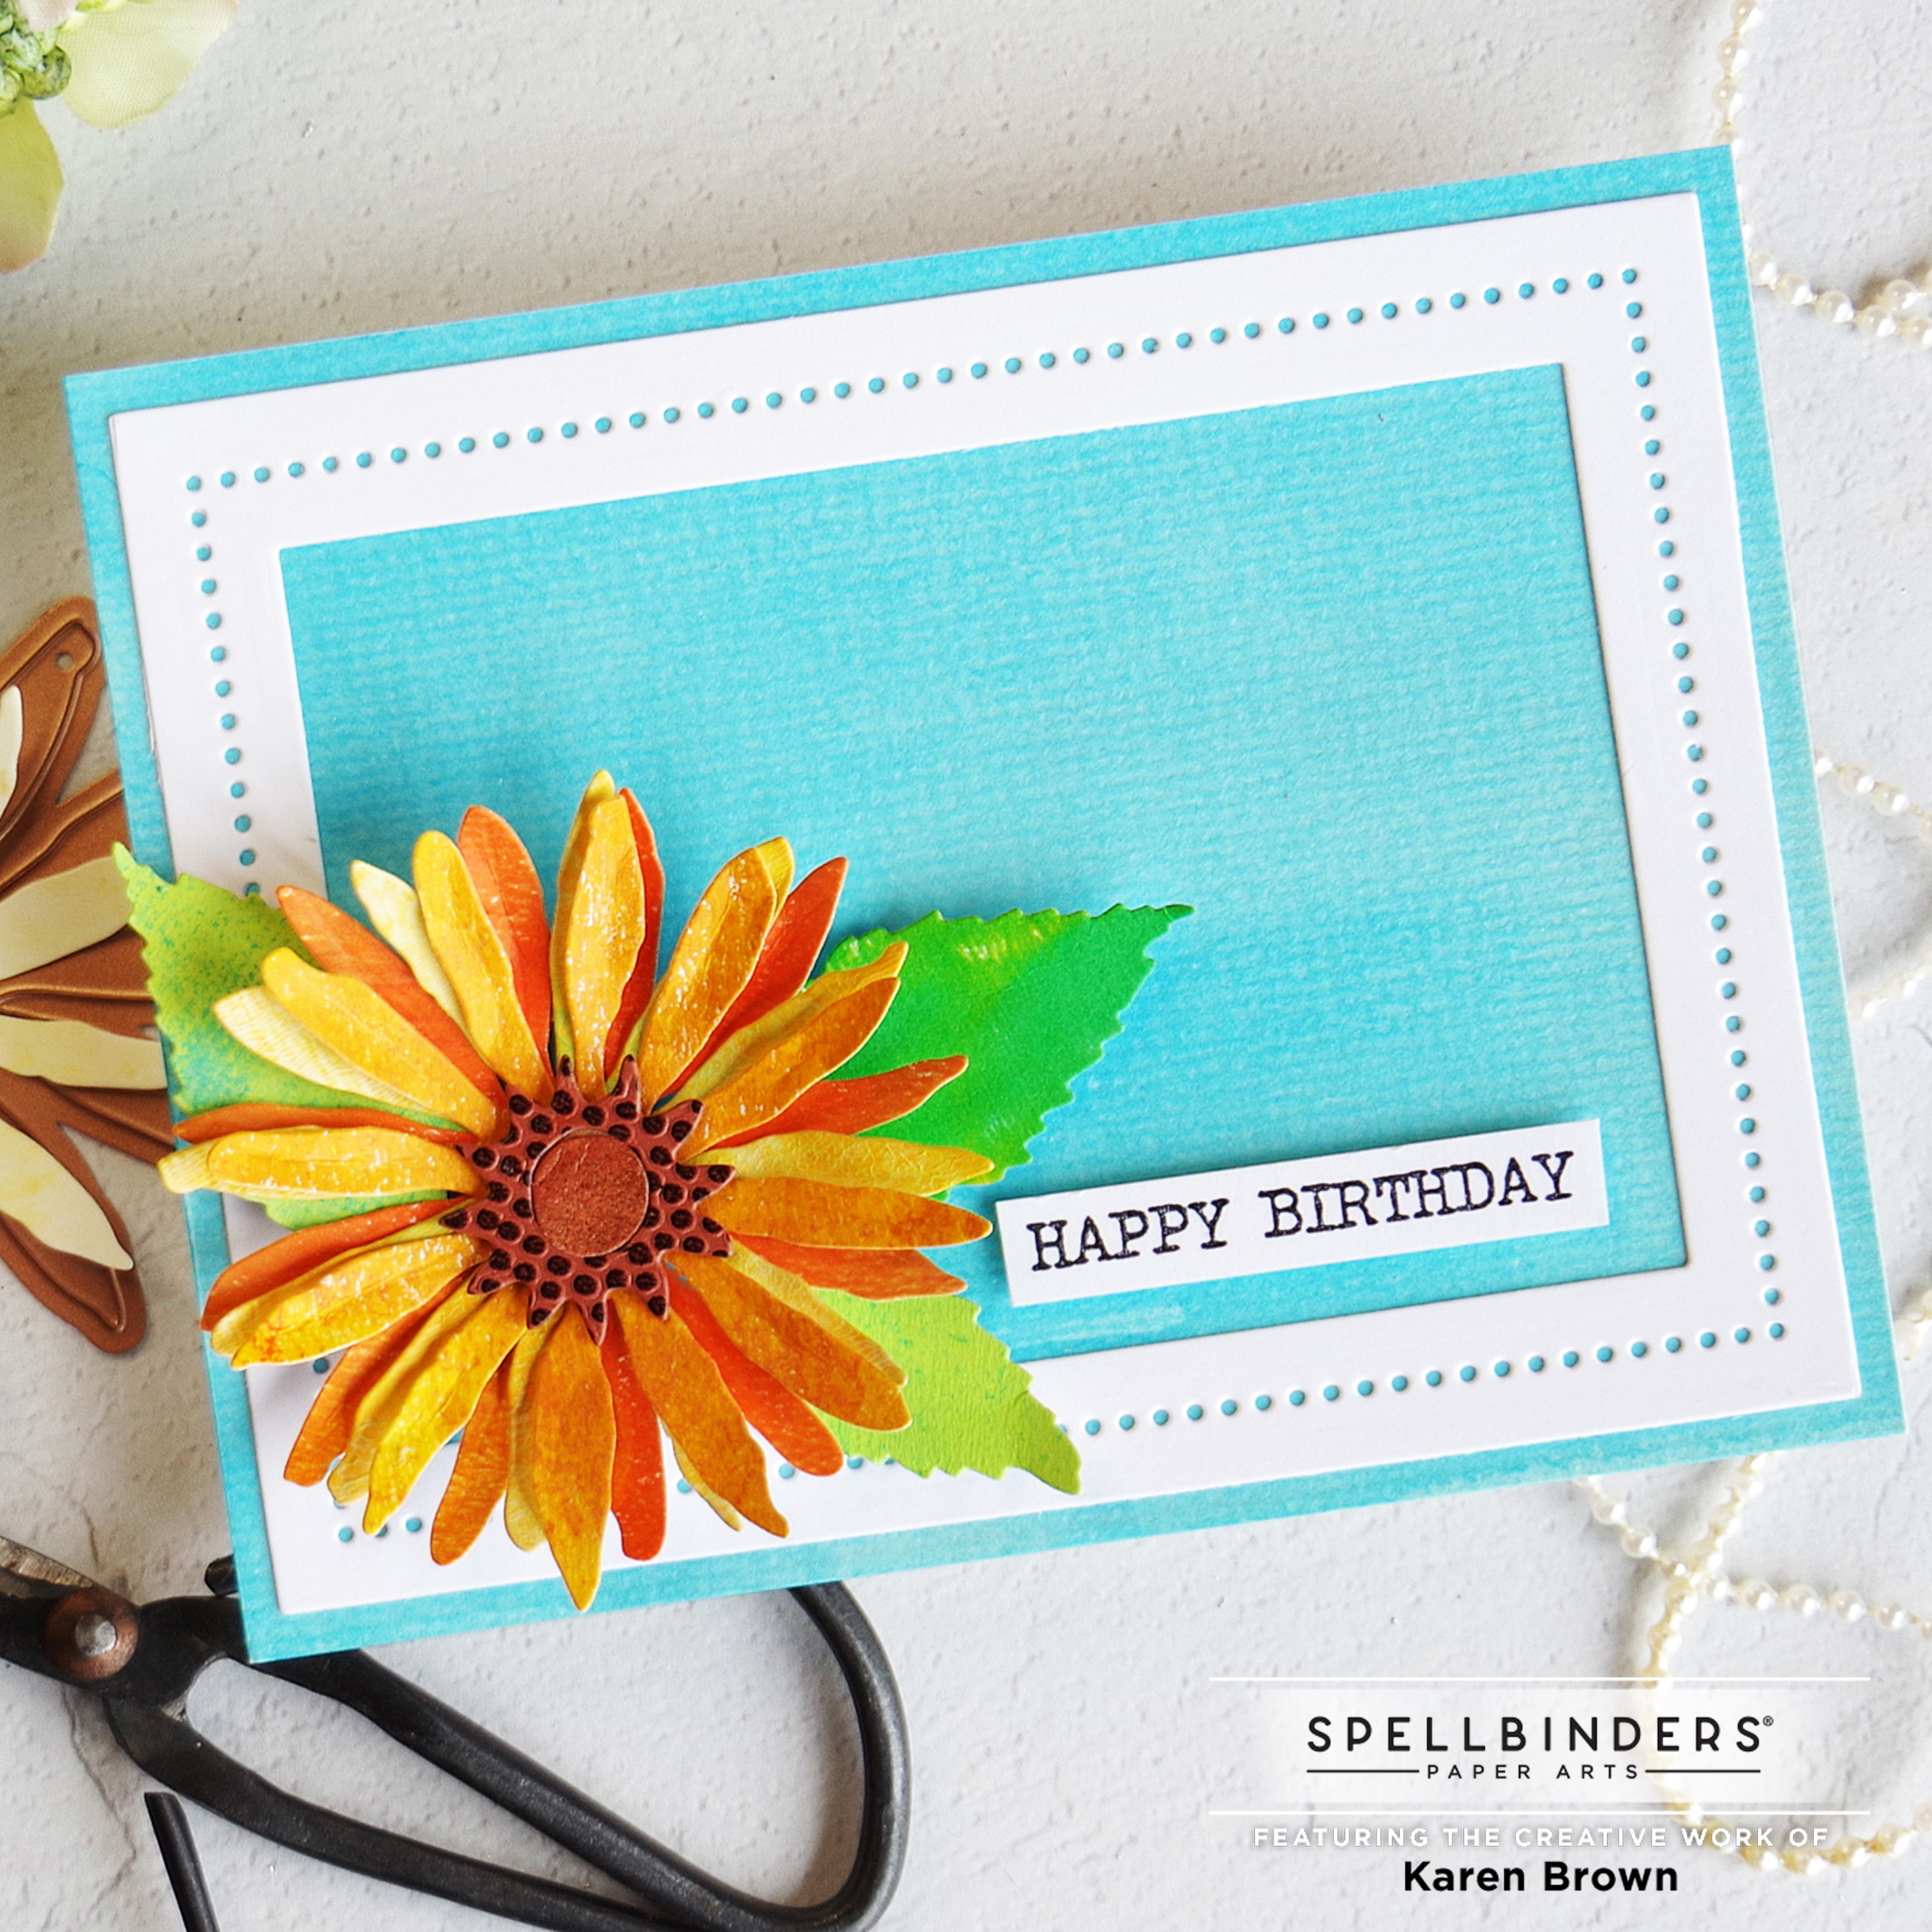
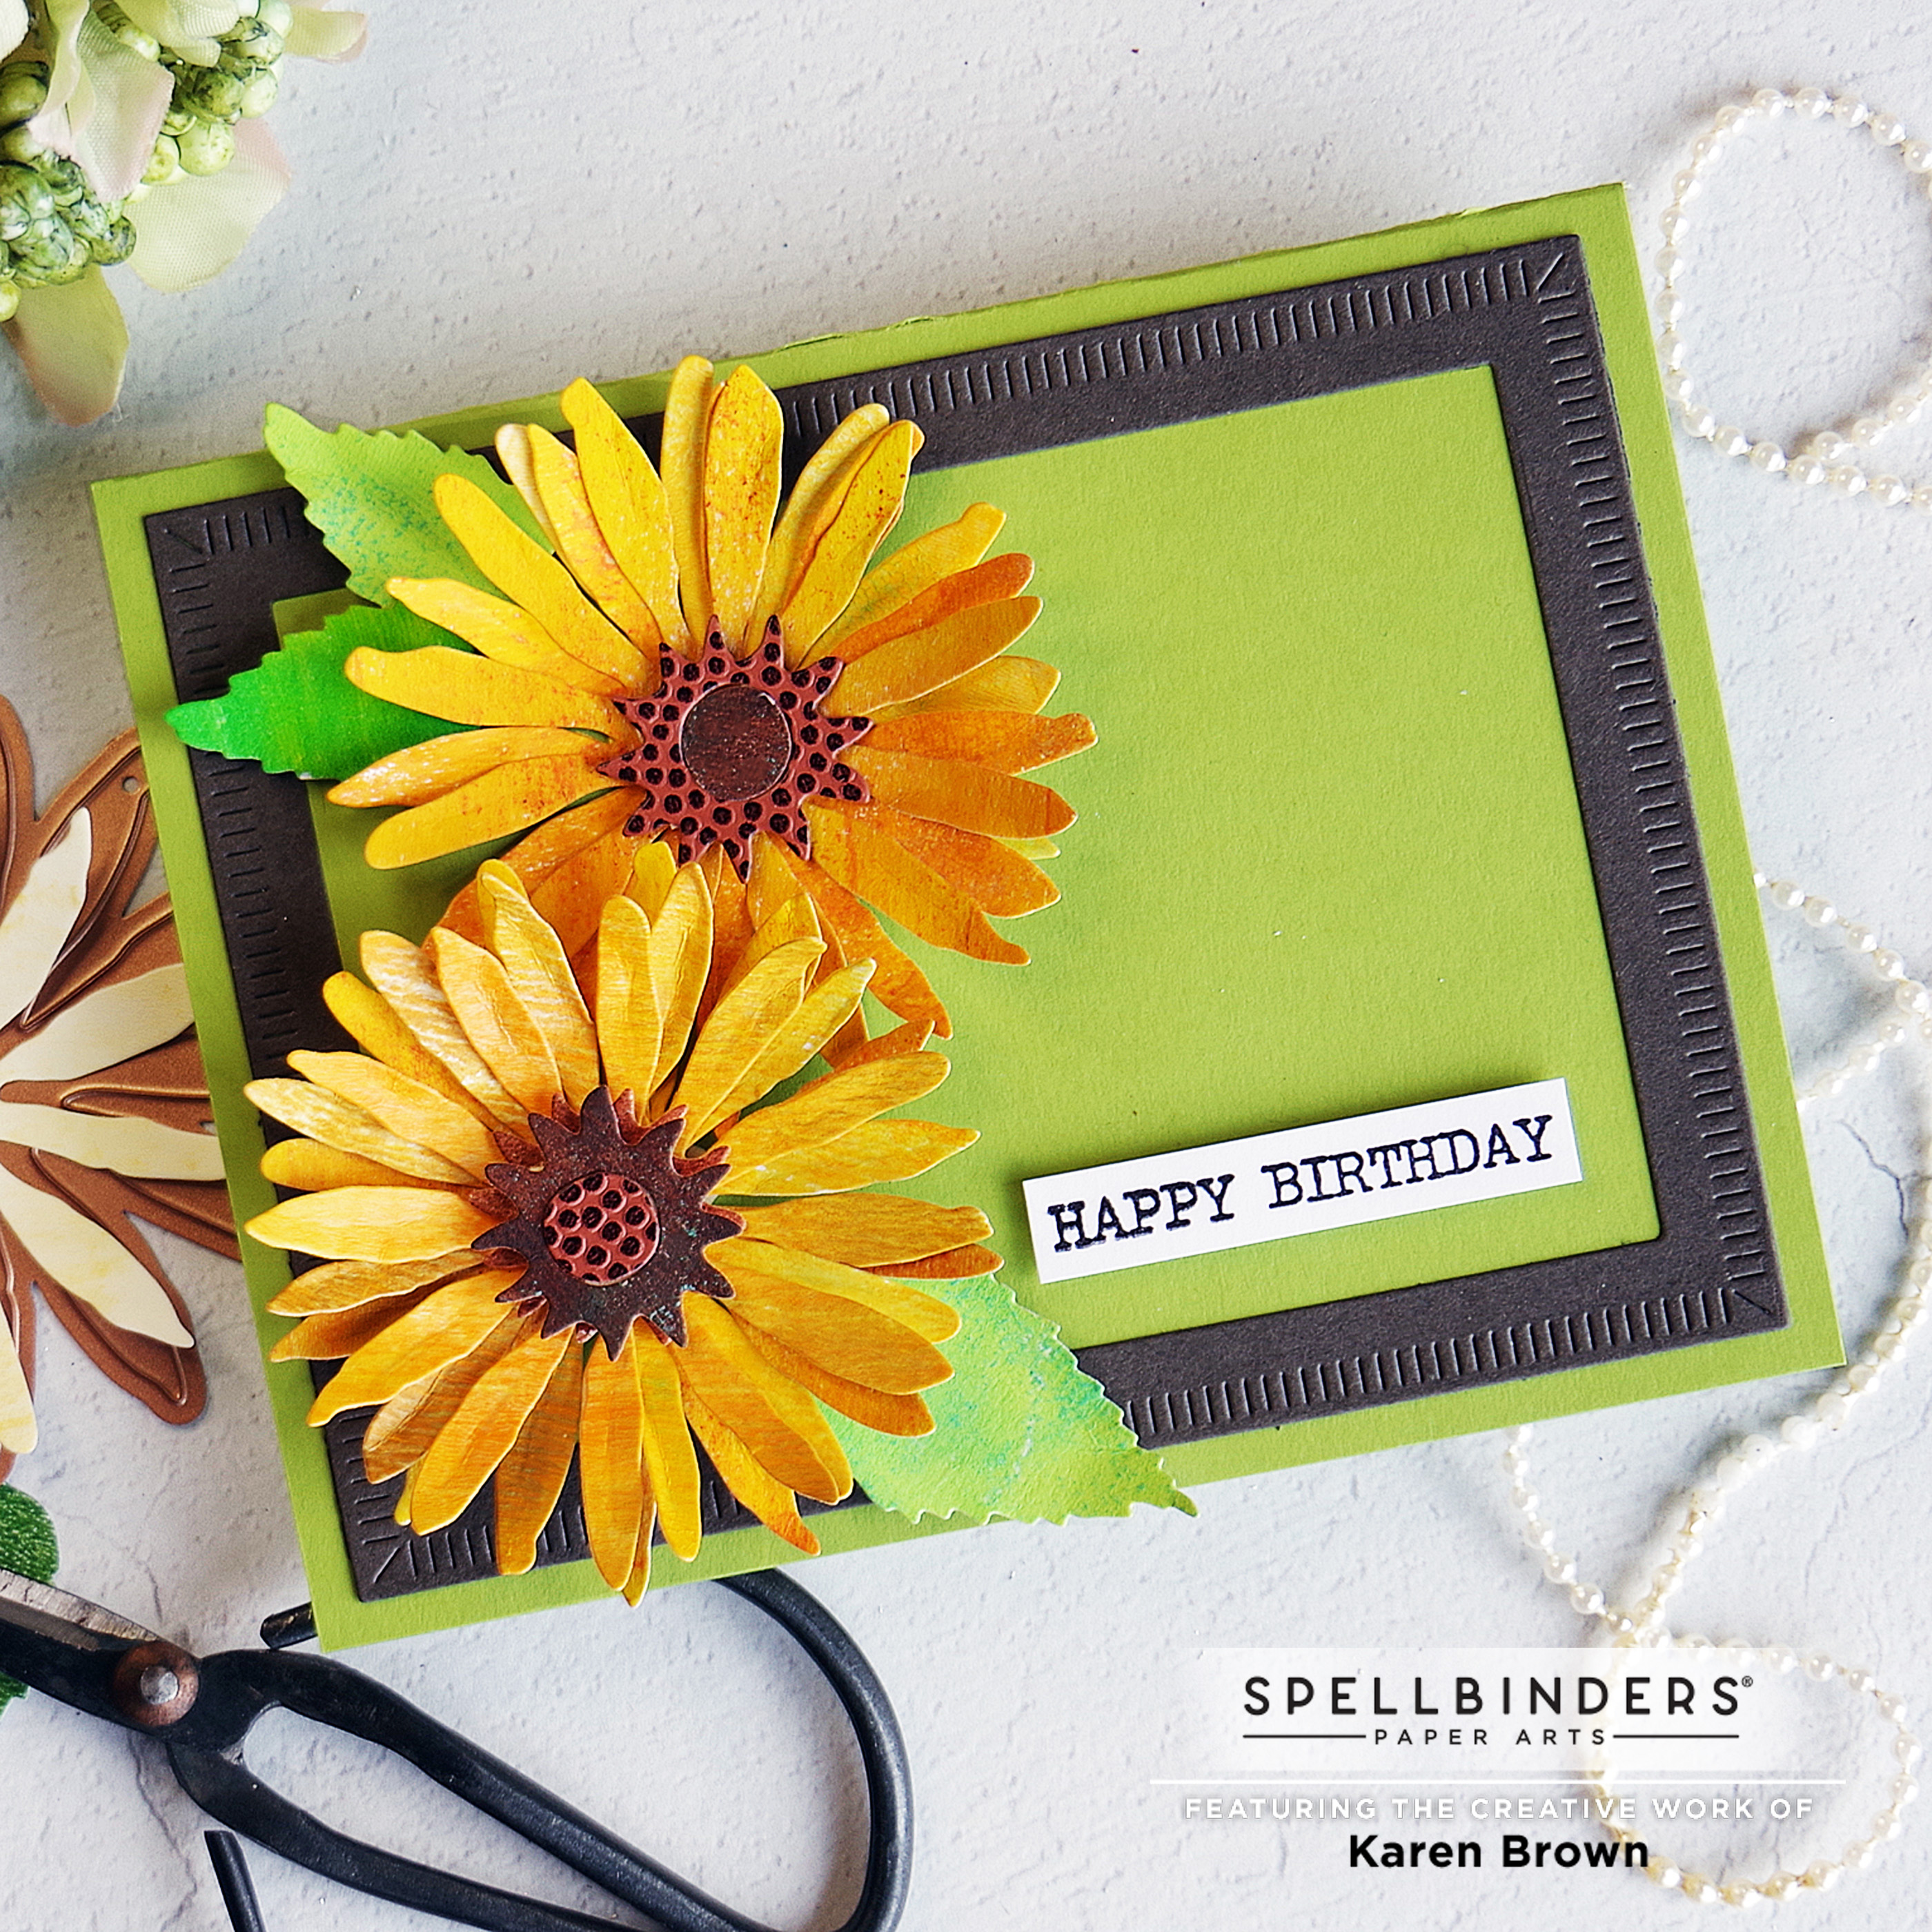
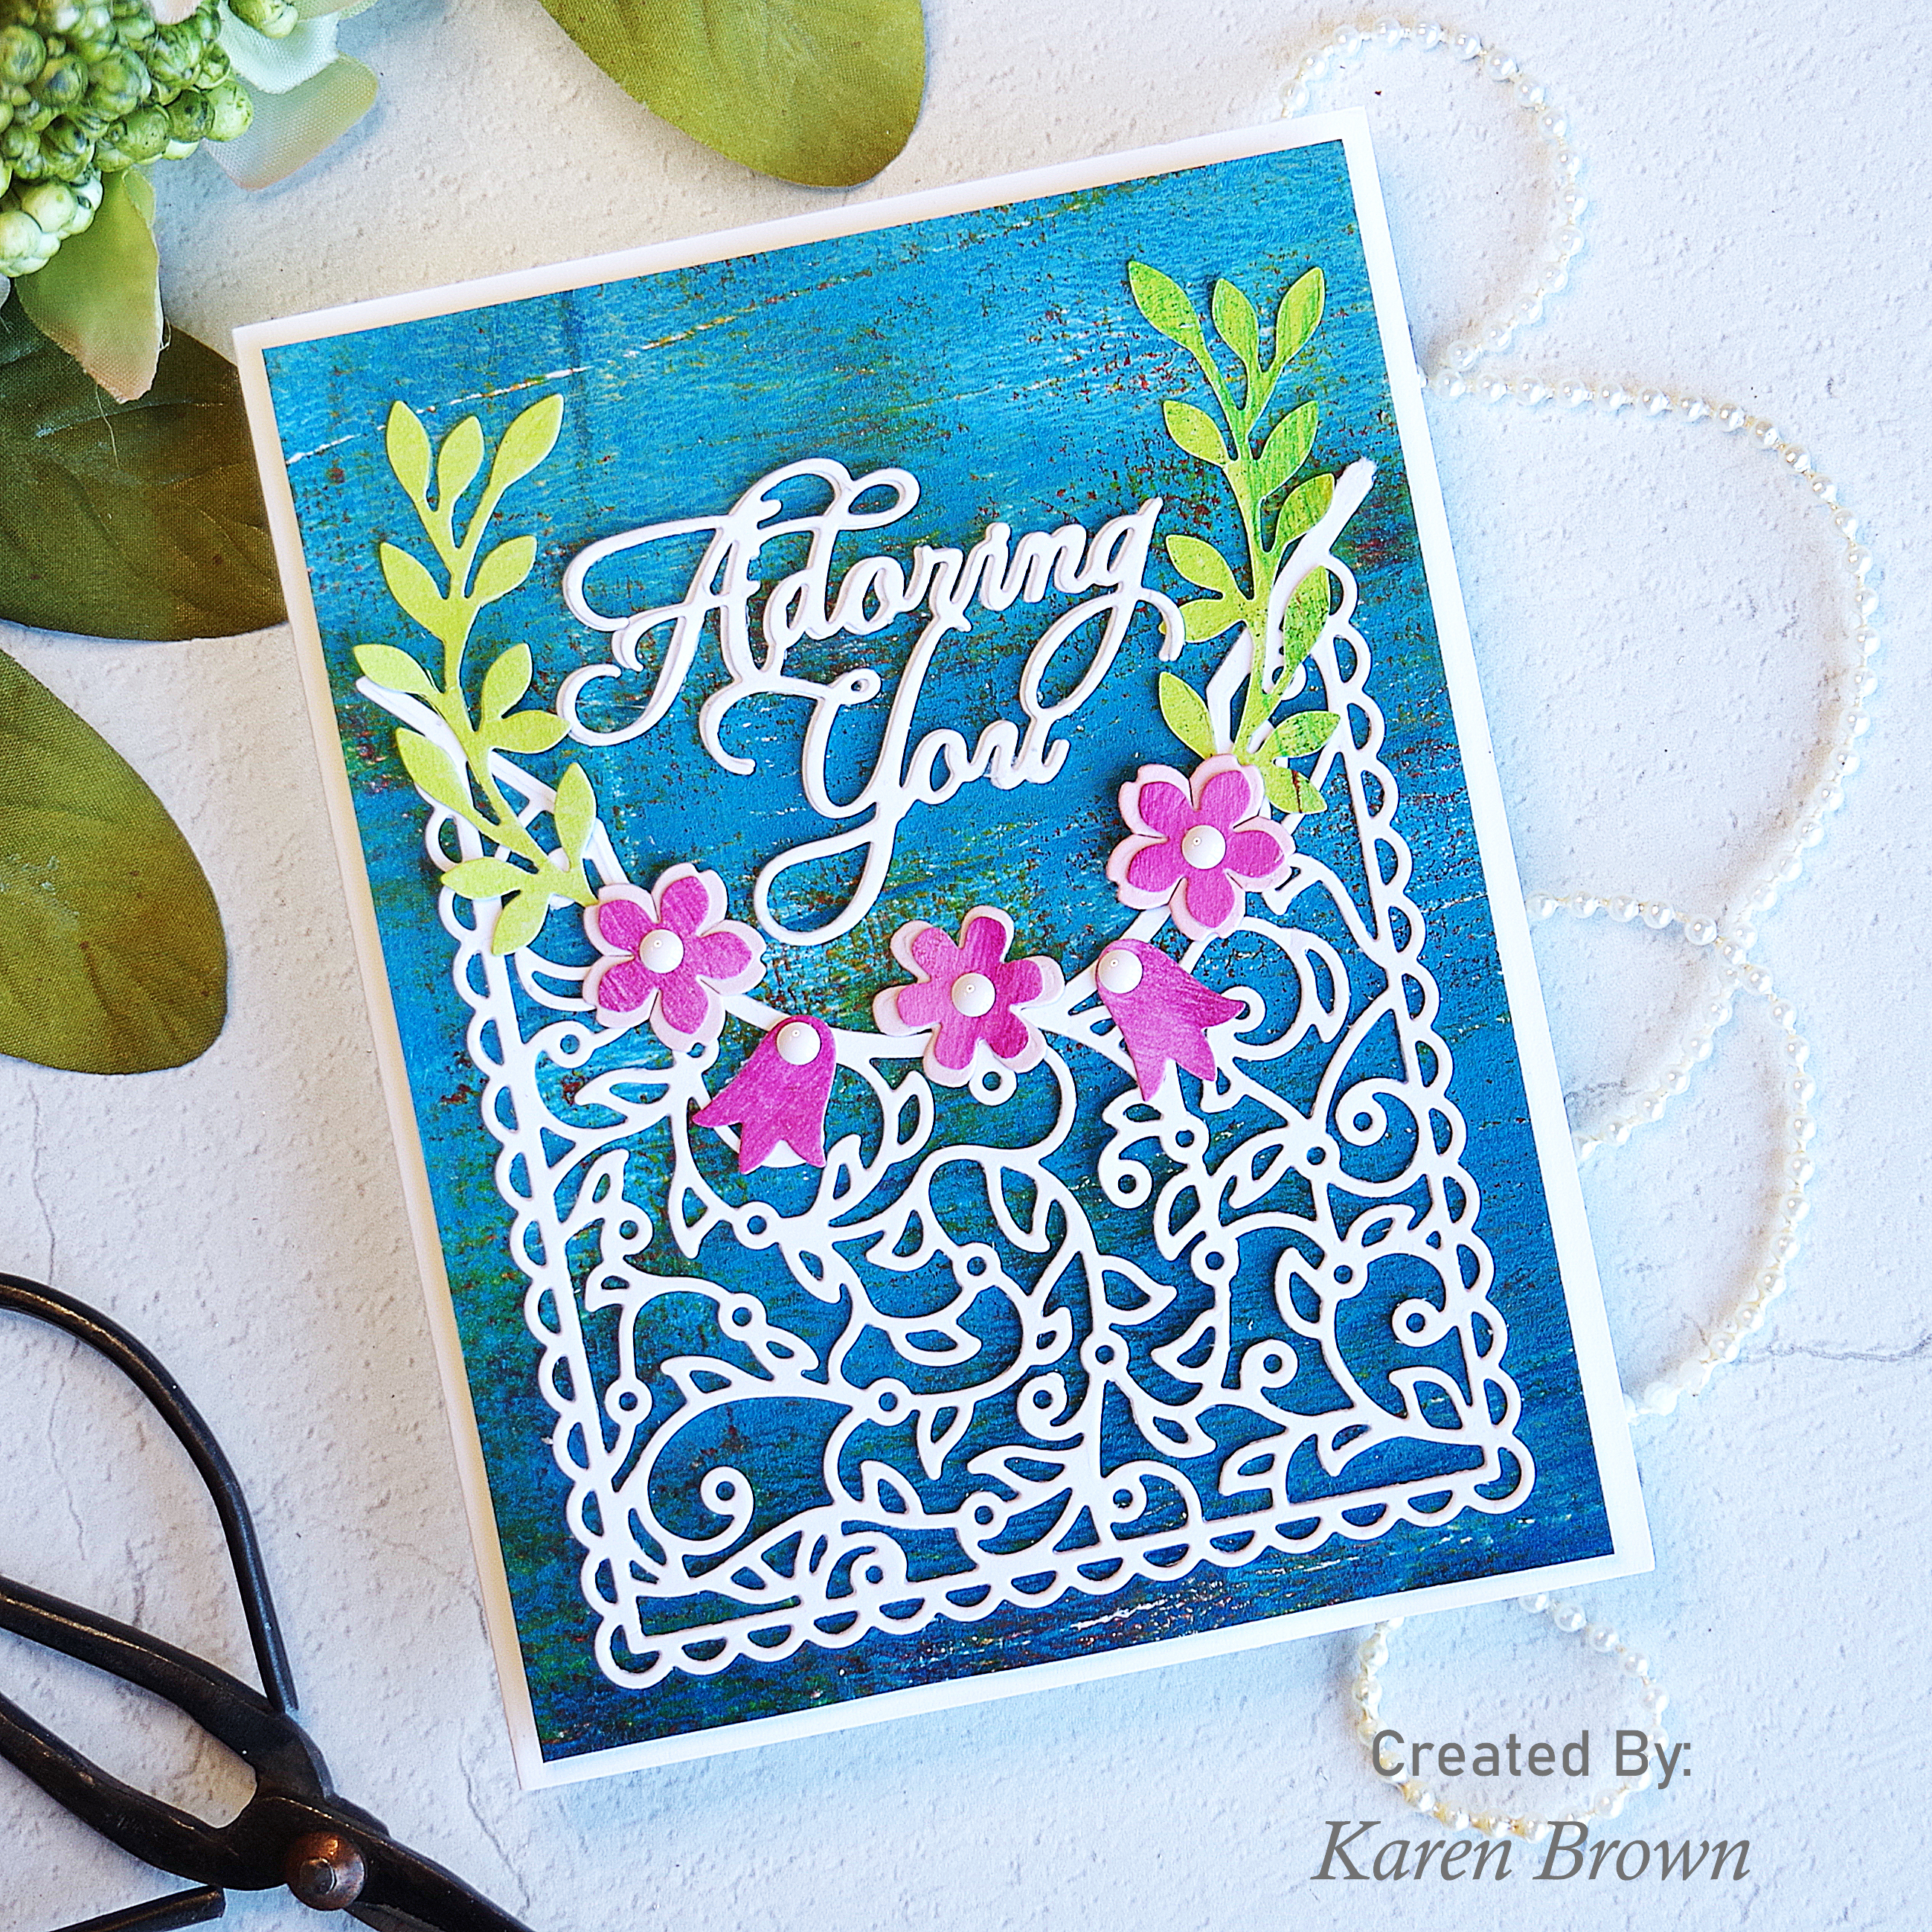
I just love bright happy colors and I think they pair so well with Spring cards. Today I am sharing two Dogwood themed cards from Spellbinders new collection called Susan’s Garden Favorites.

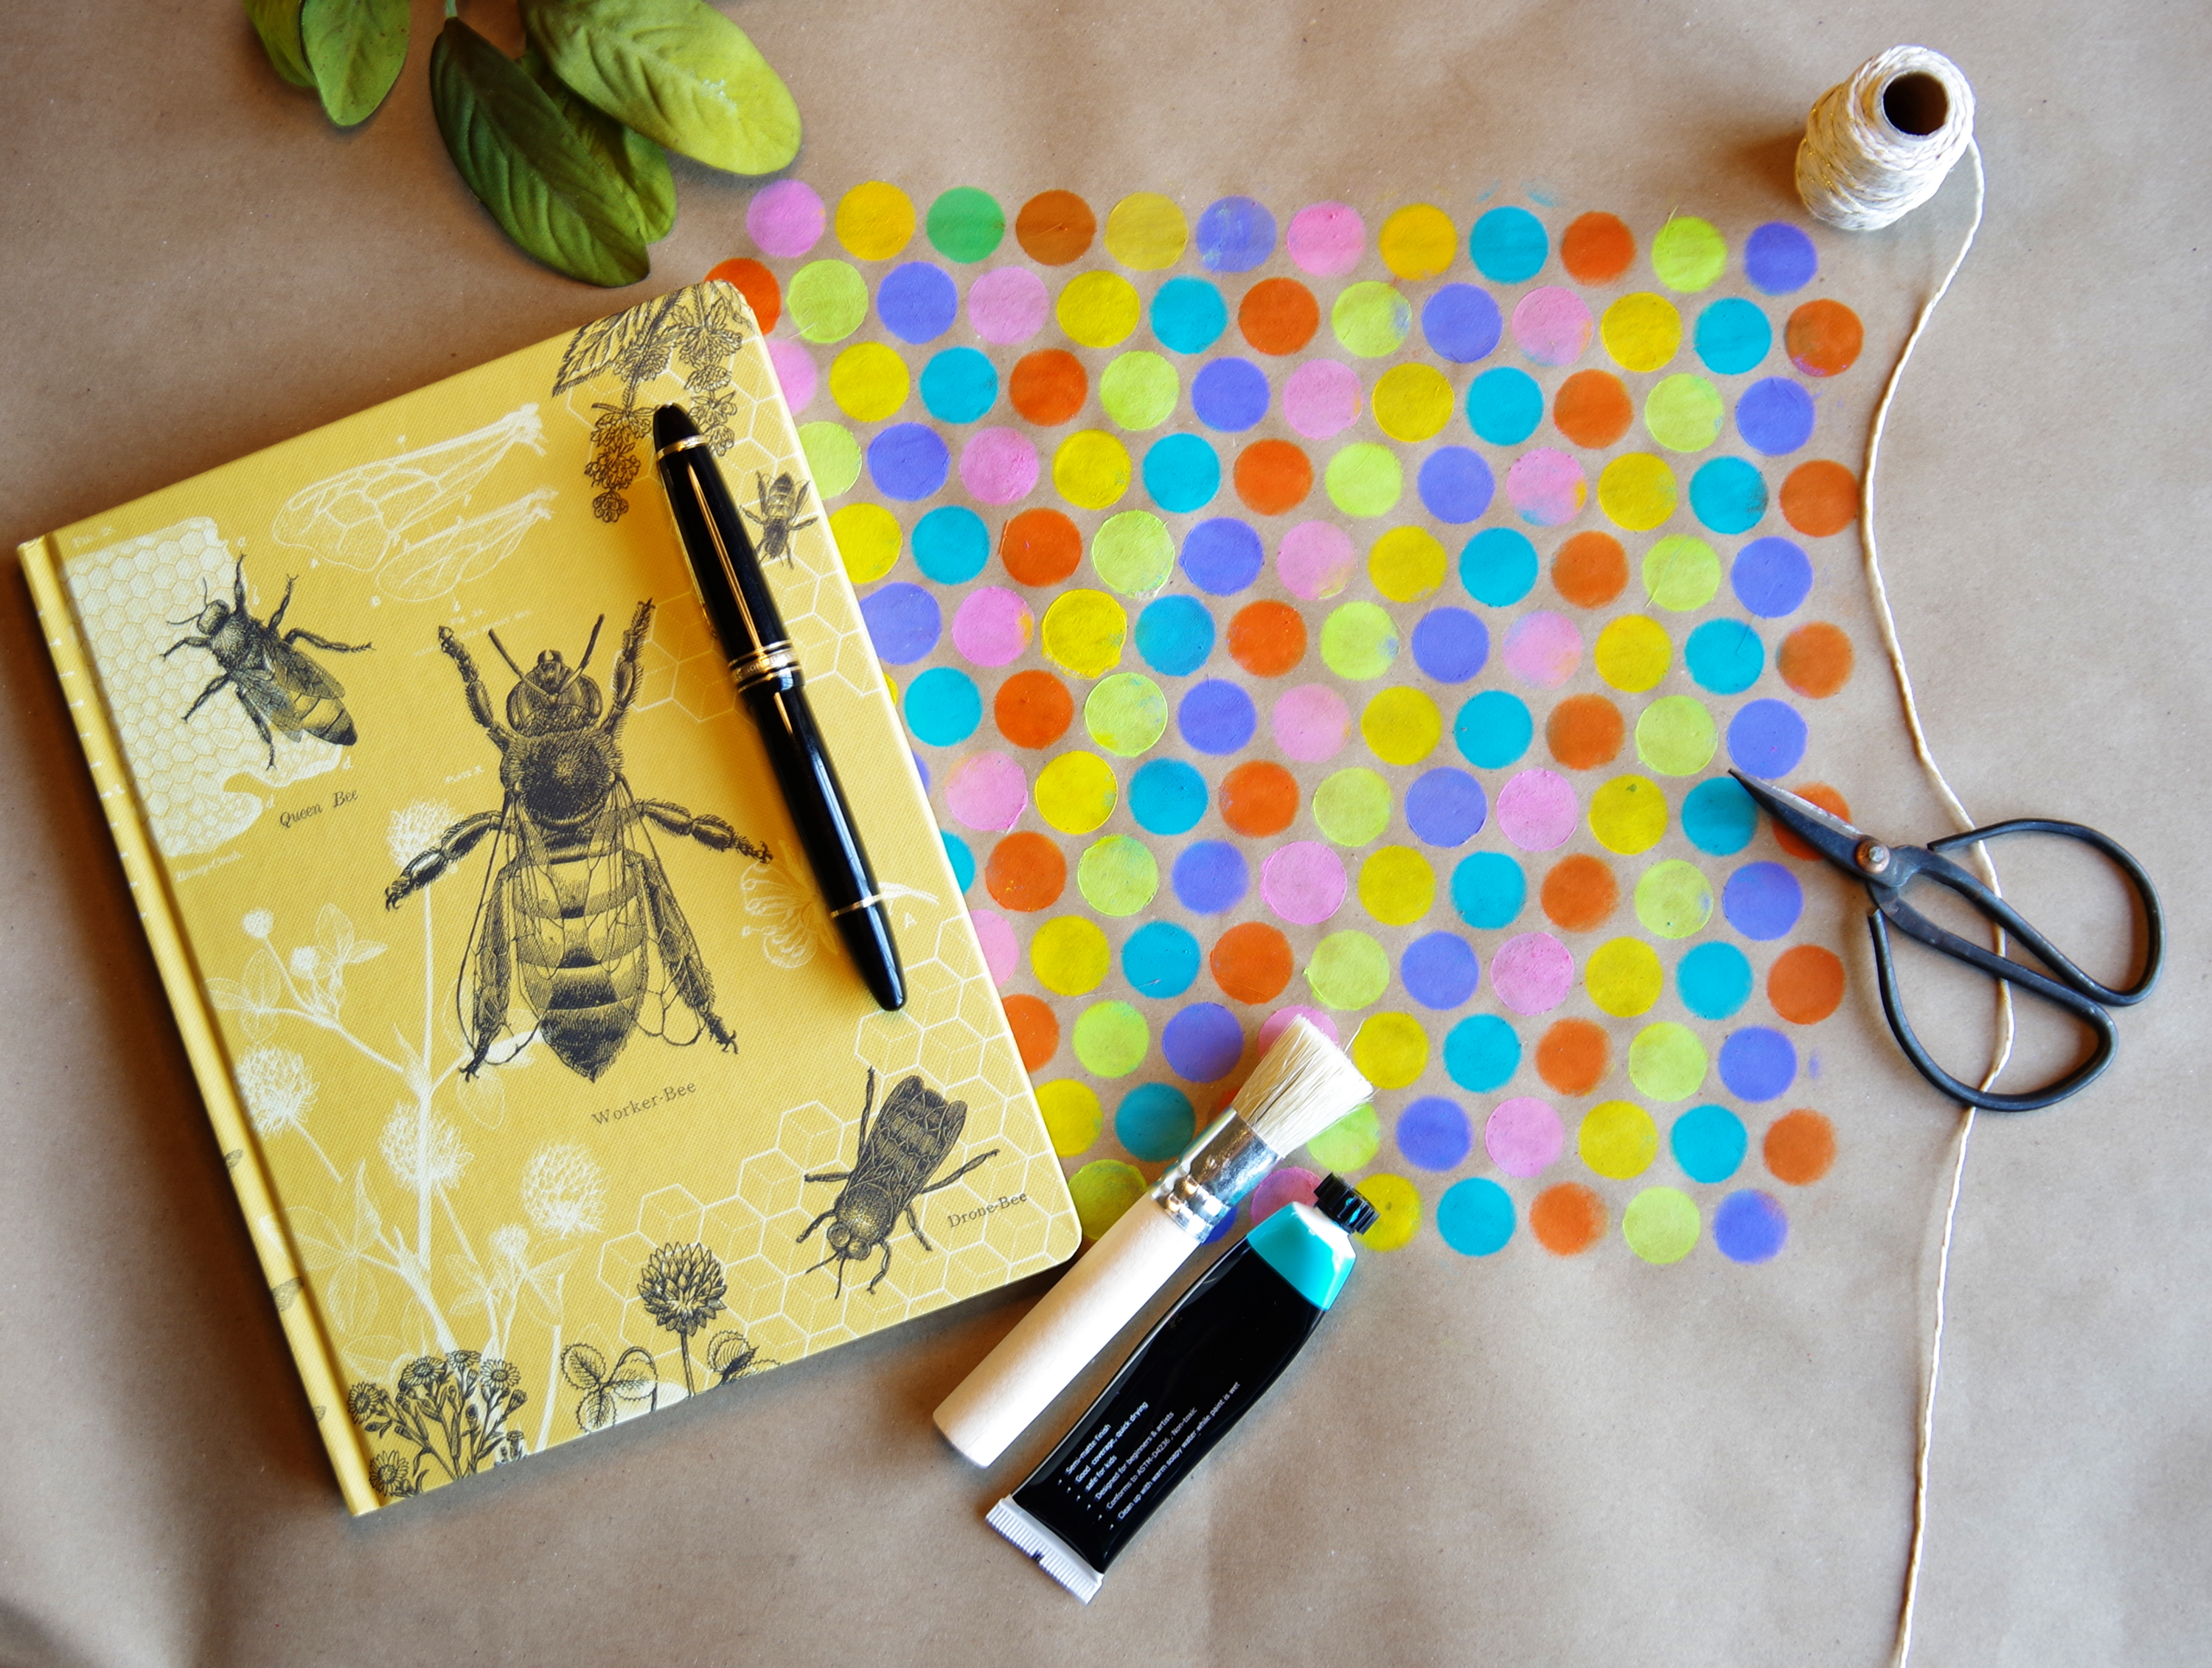
DIY Glitter Paper Background

My Process:

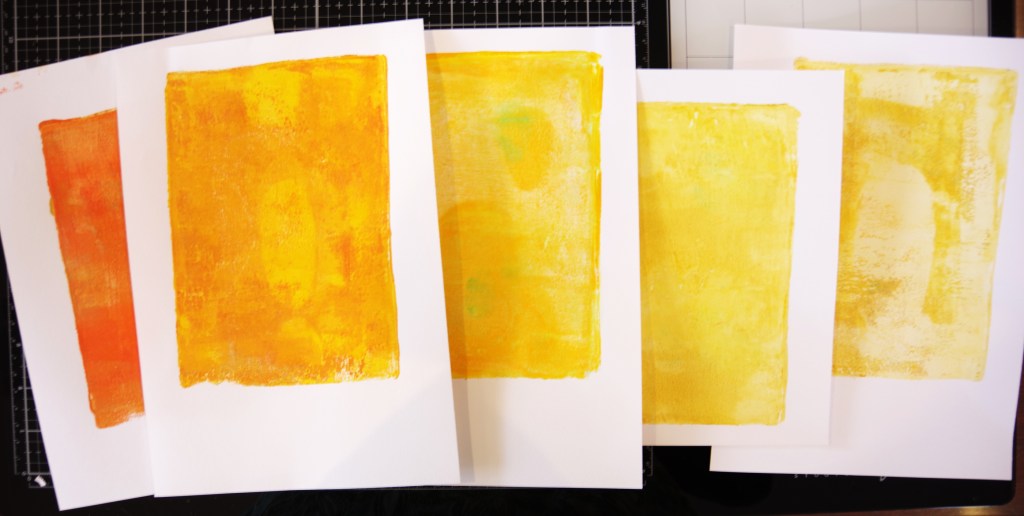
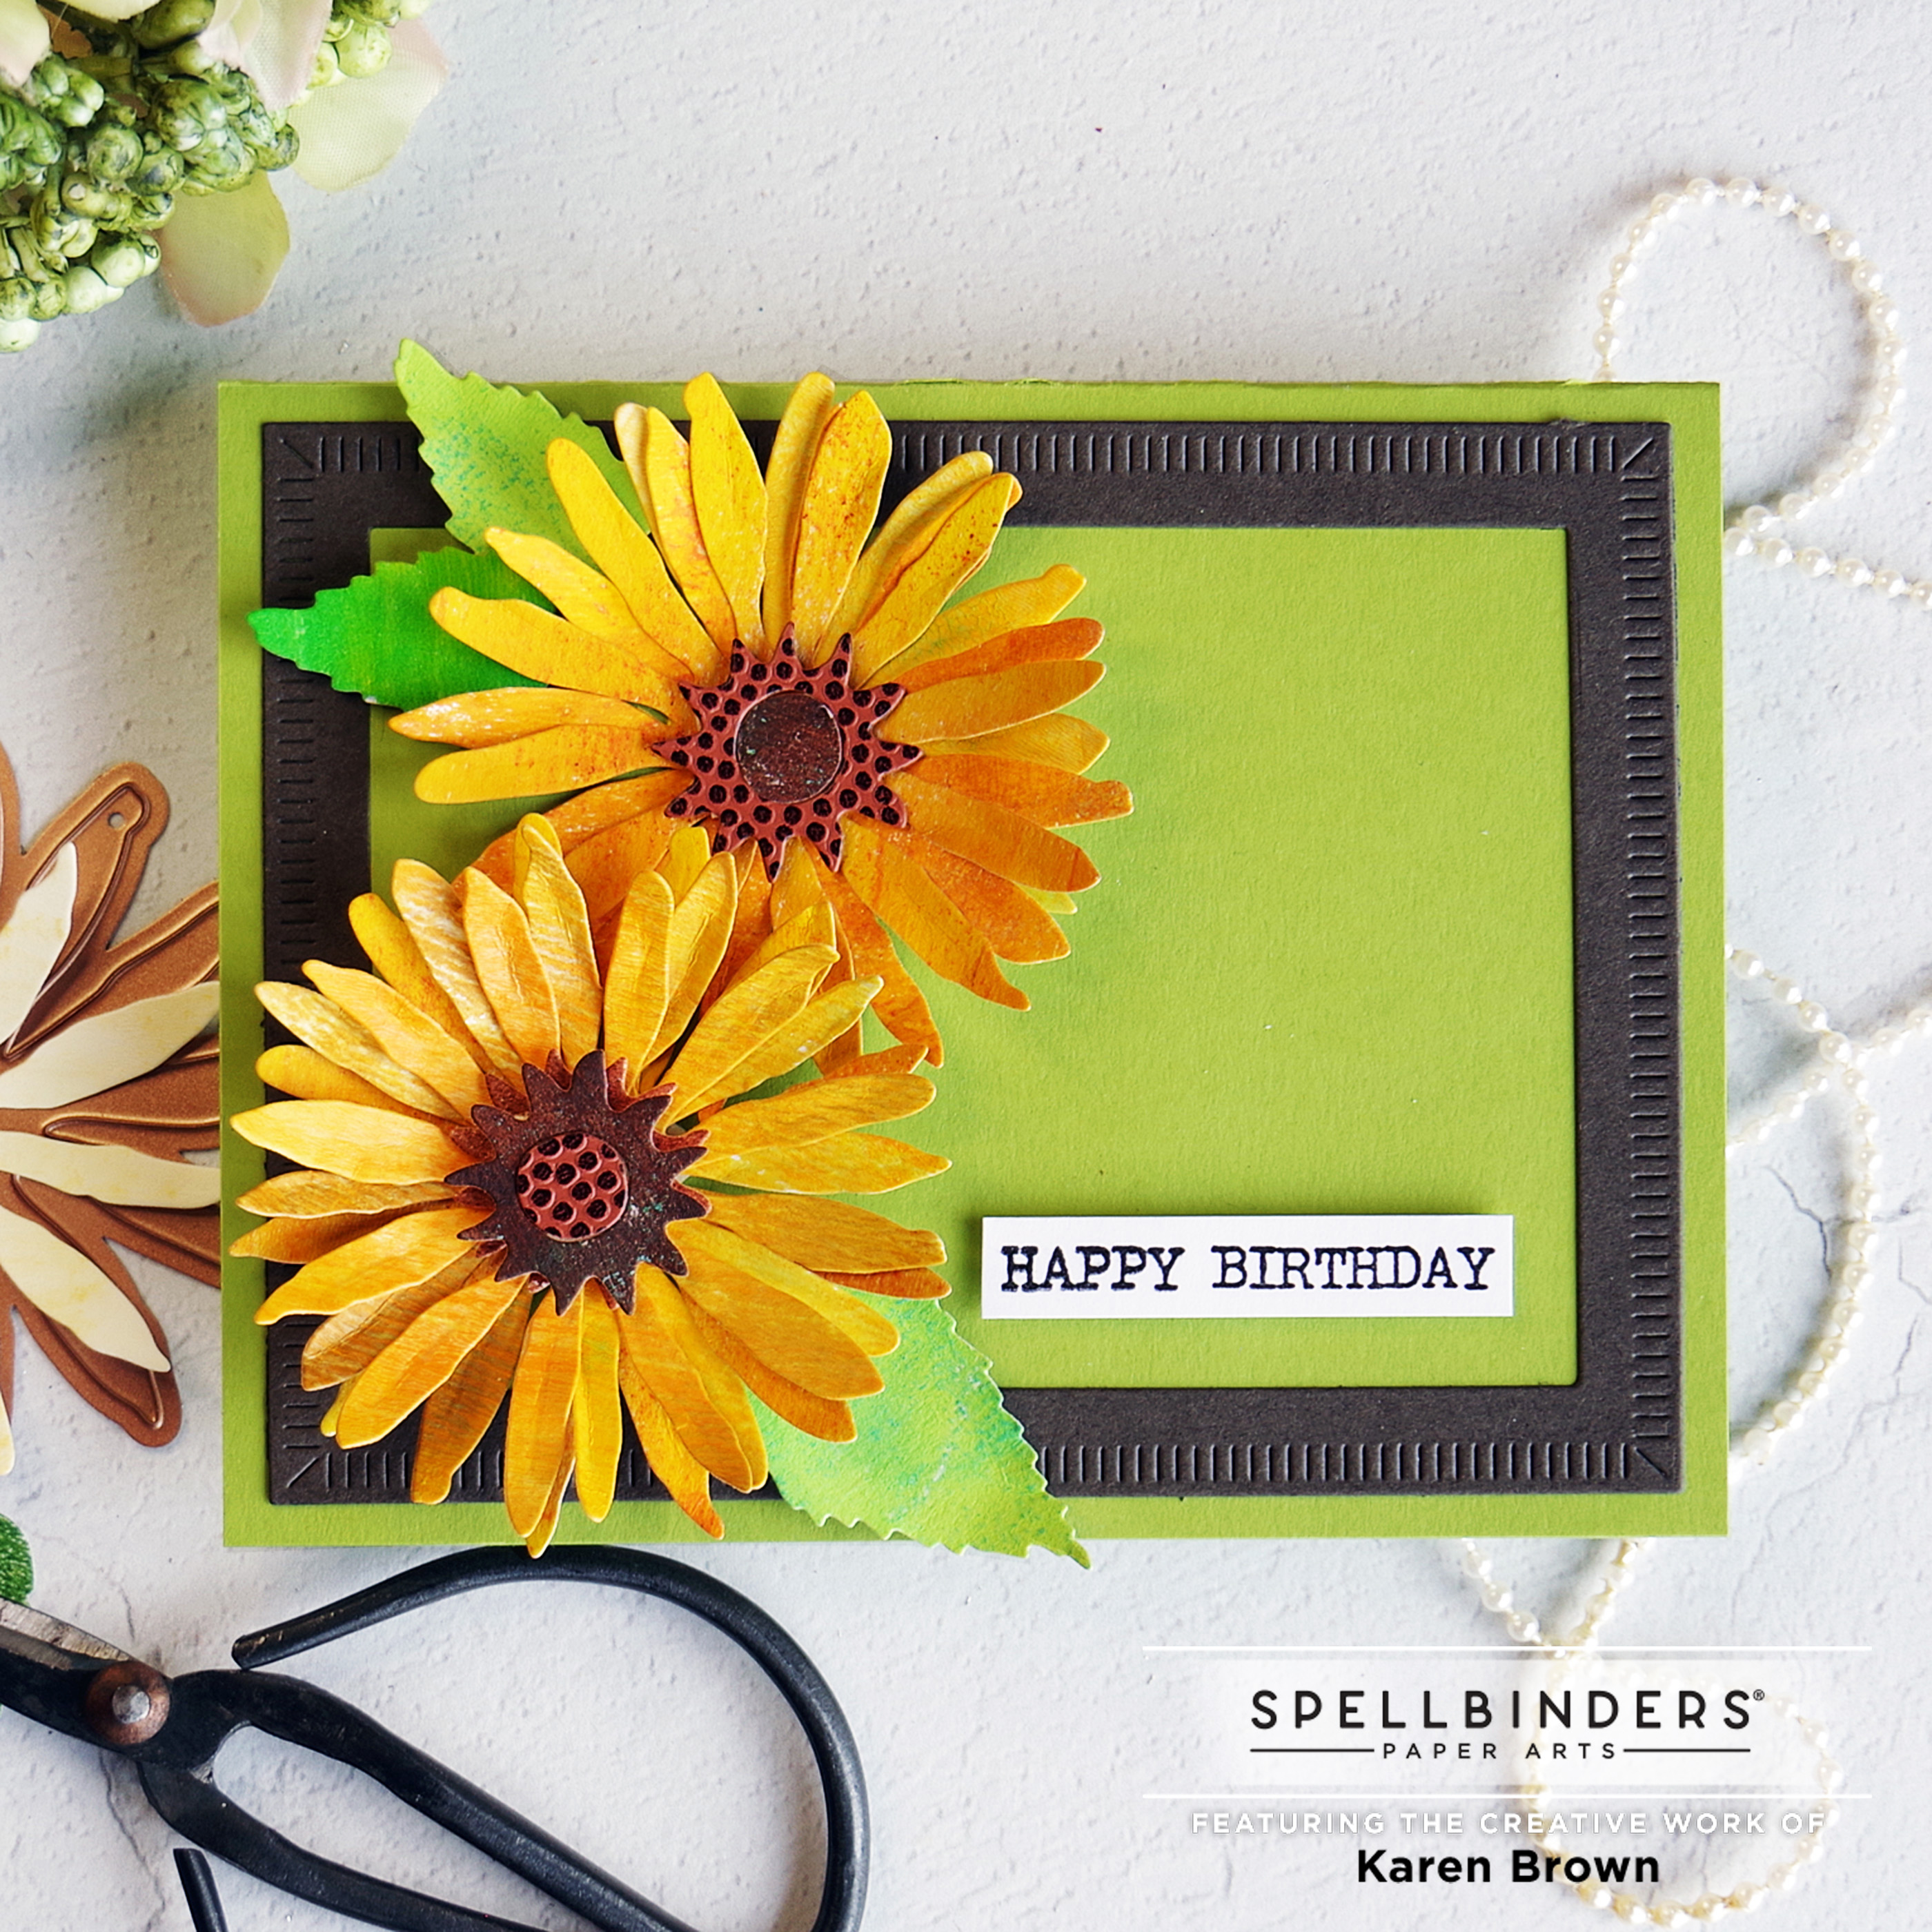
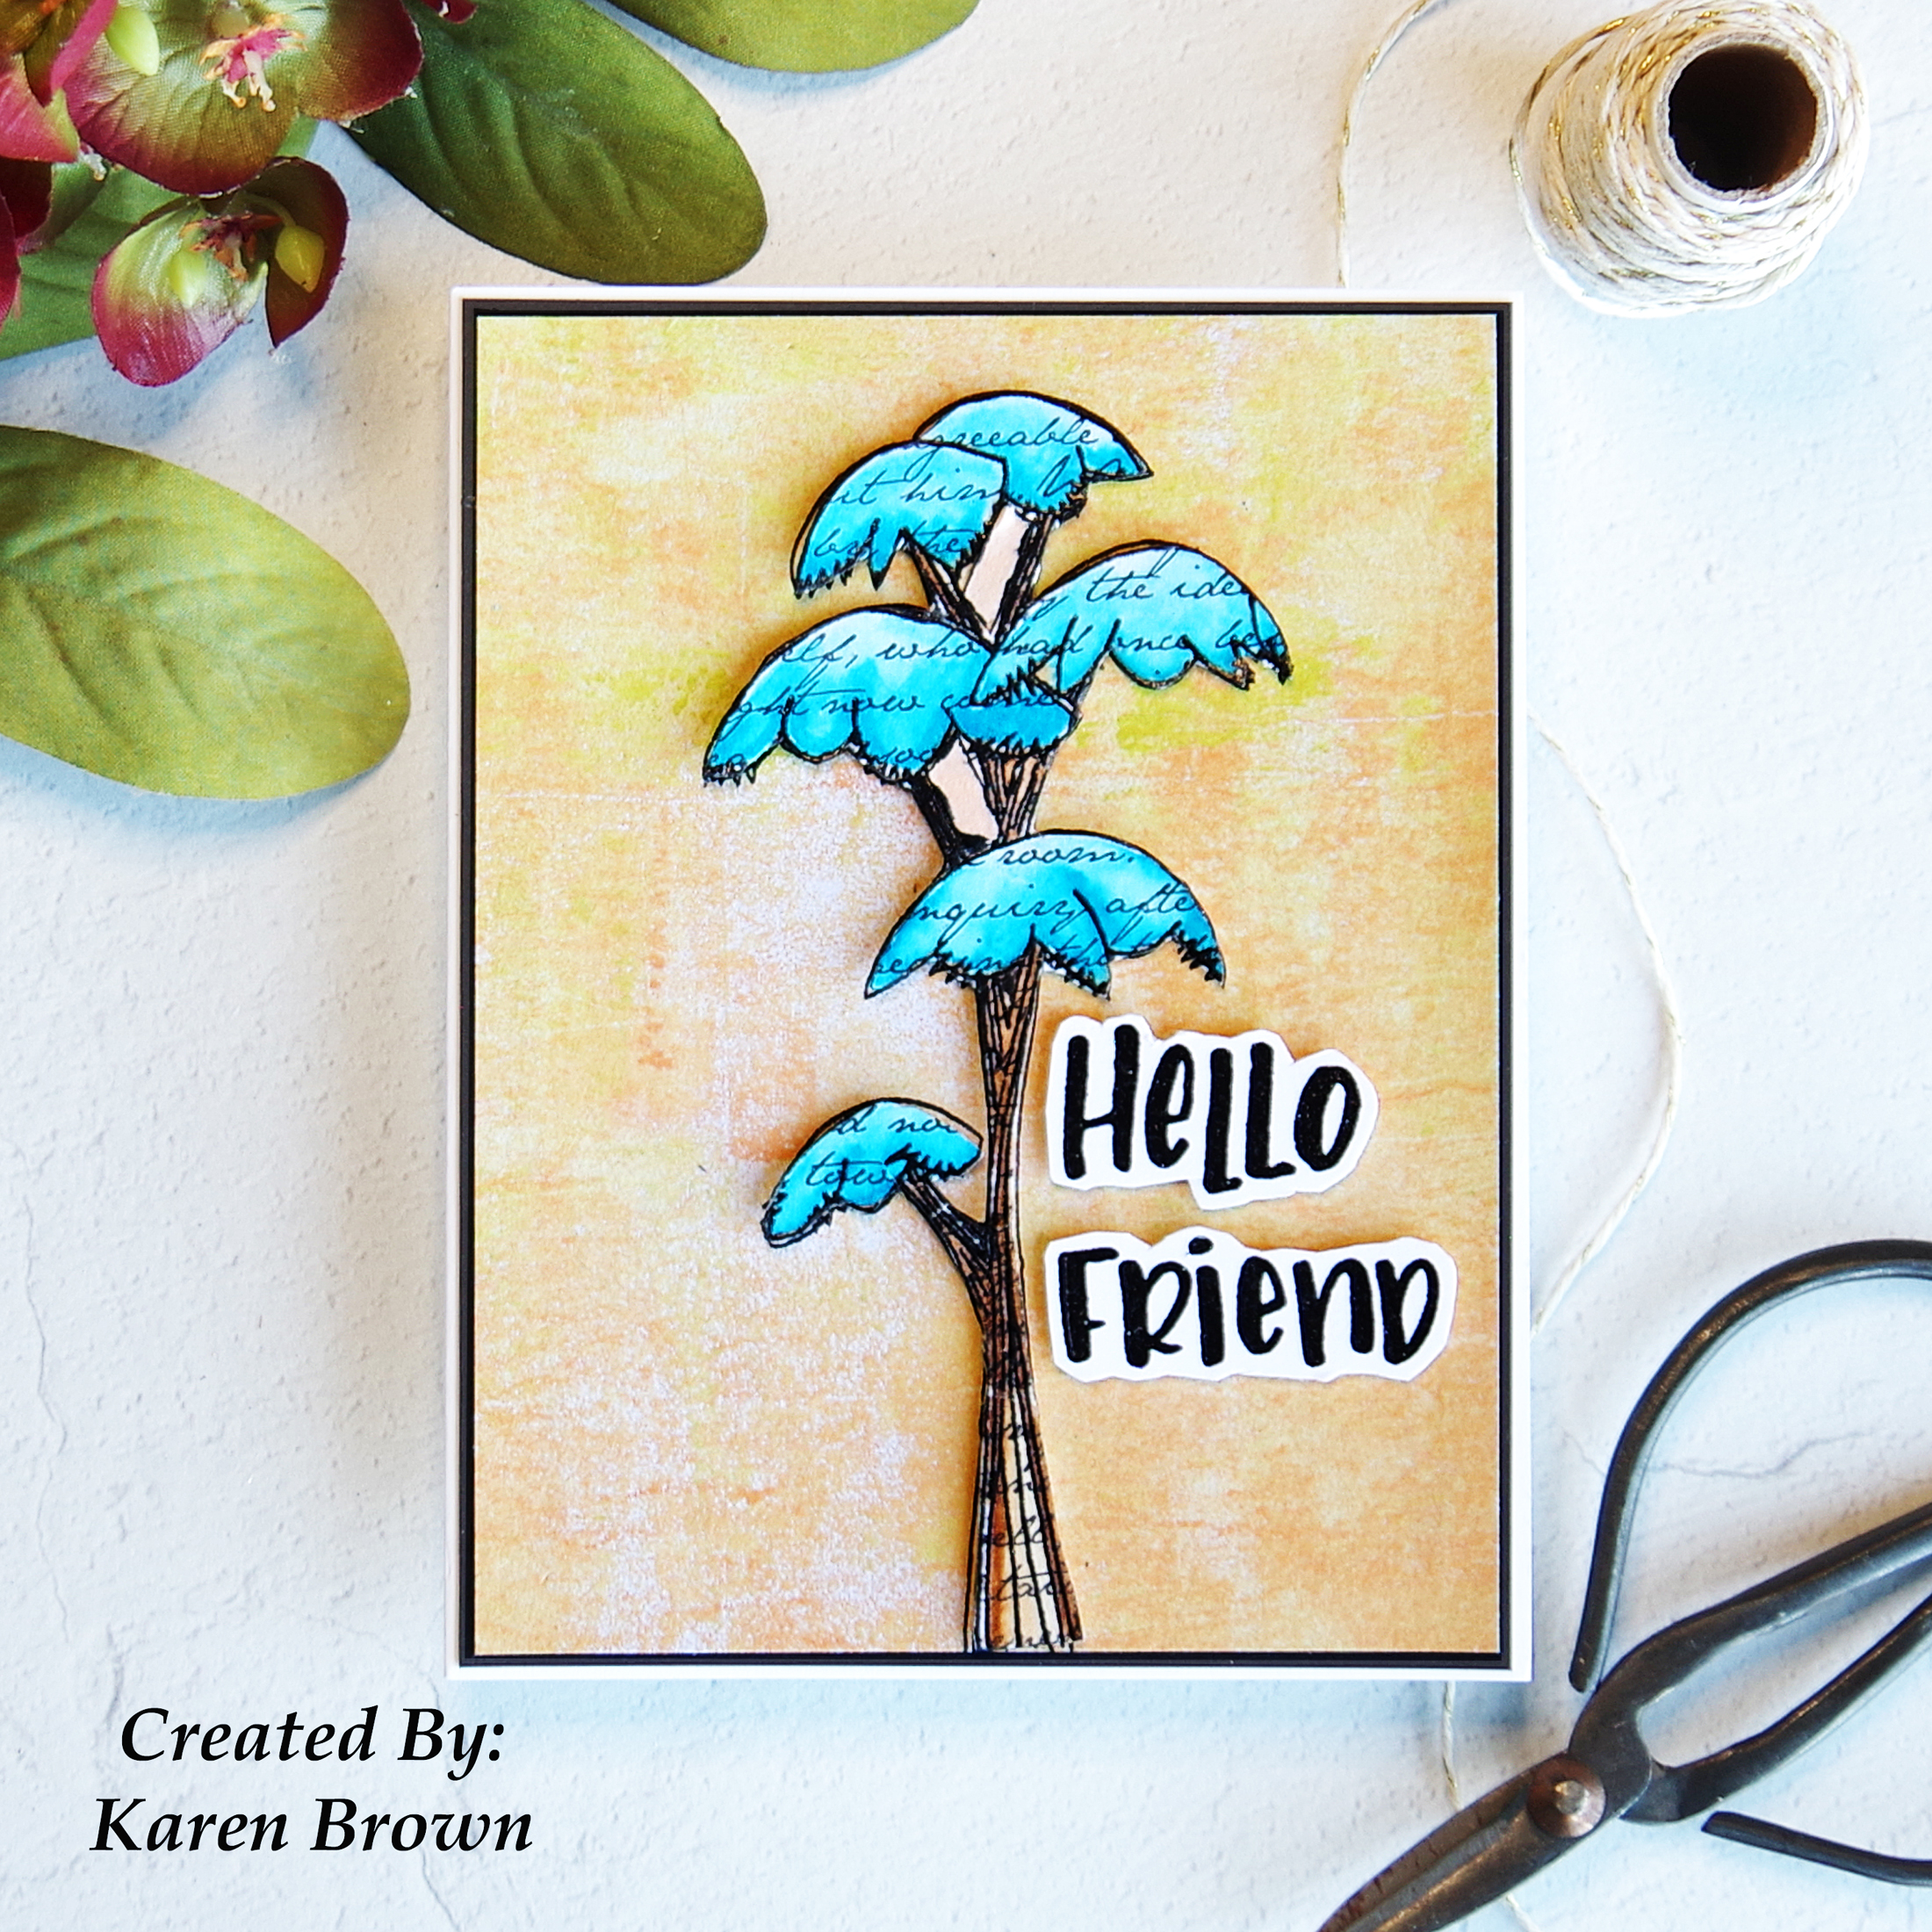
  • I started by making pale pink and green Gel Press prints for my flowers and leaves. The branch is cut from a copper gel print because I thought brown was too plain.
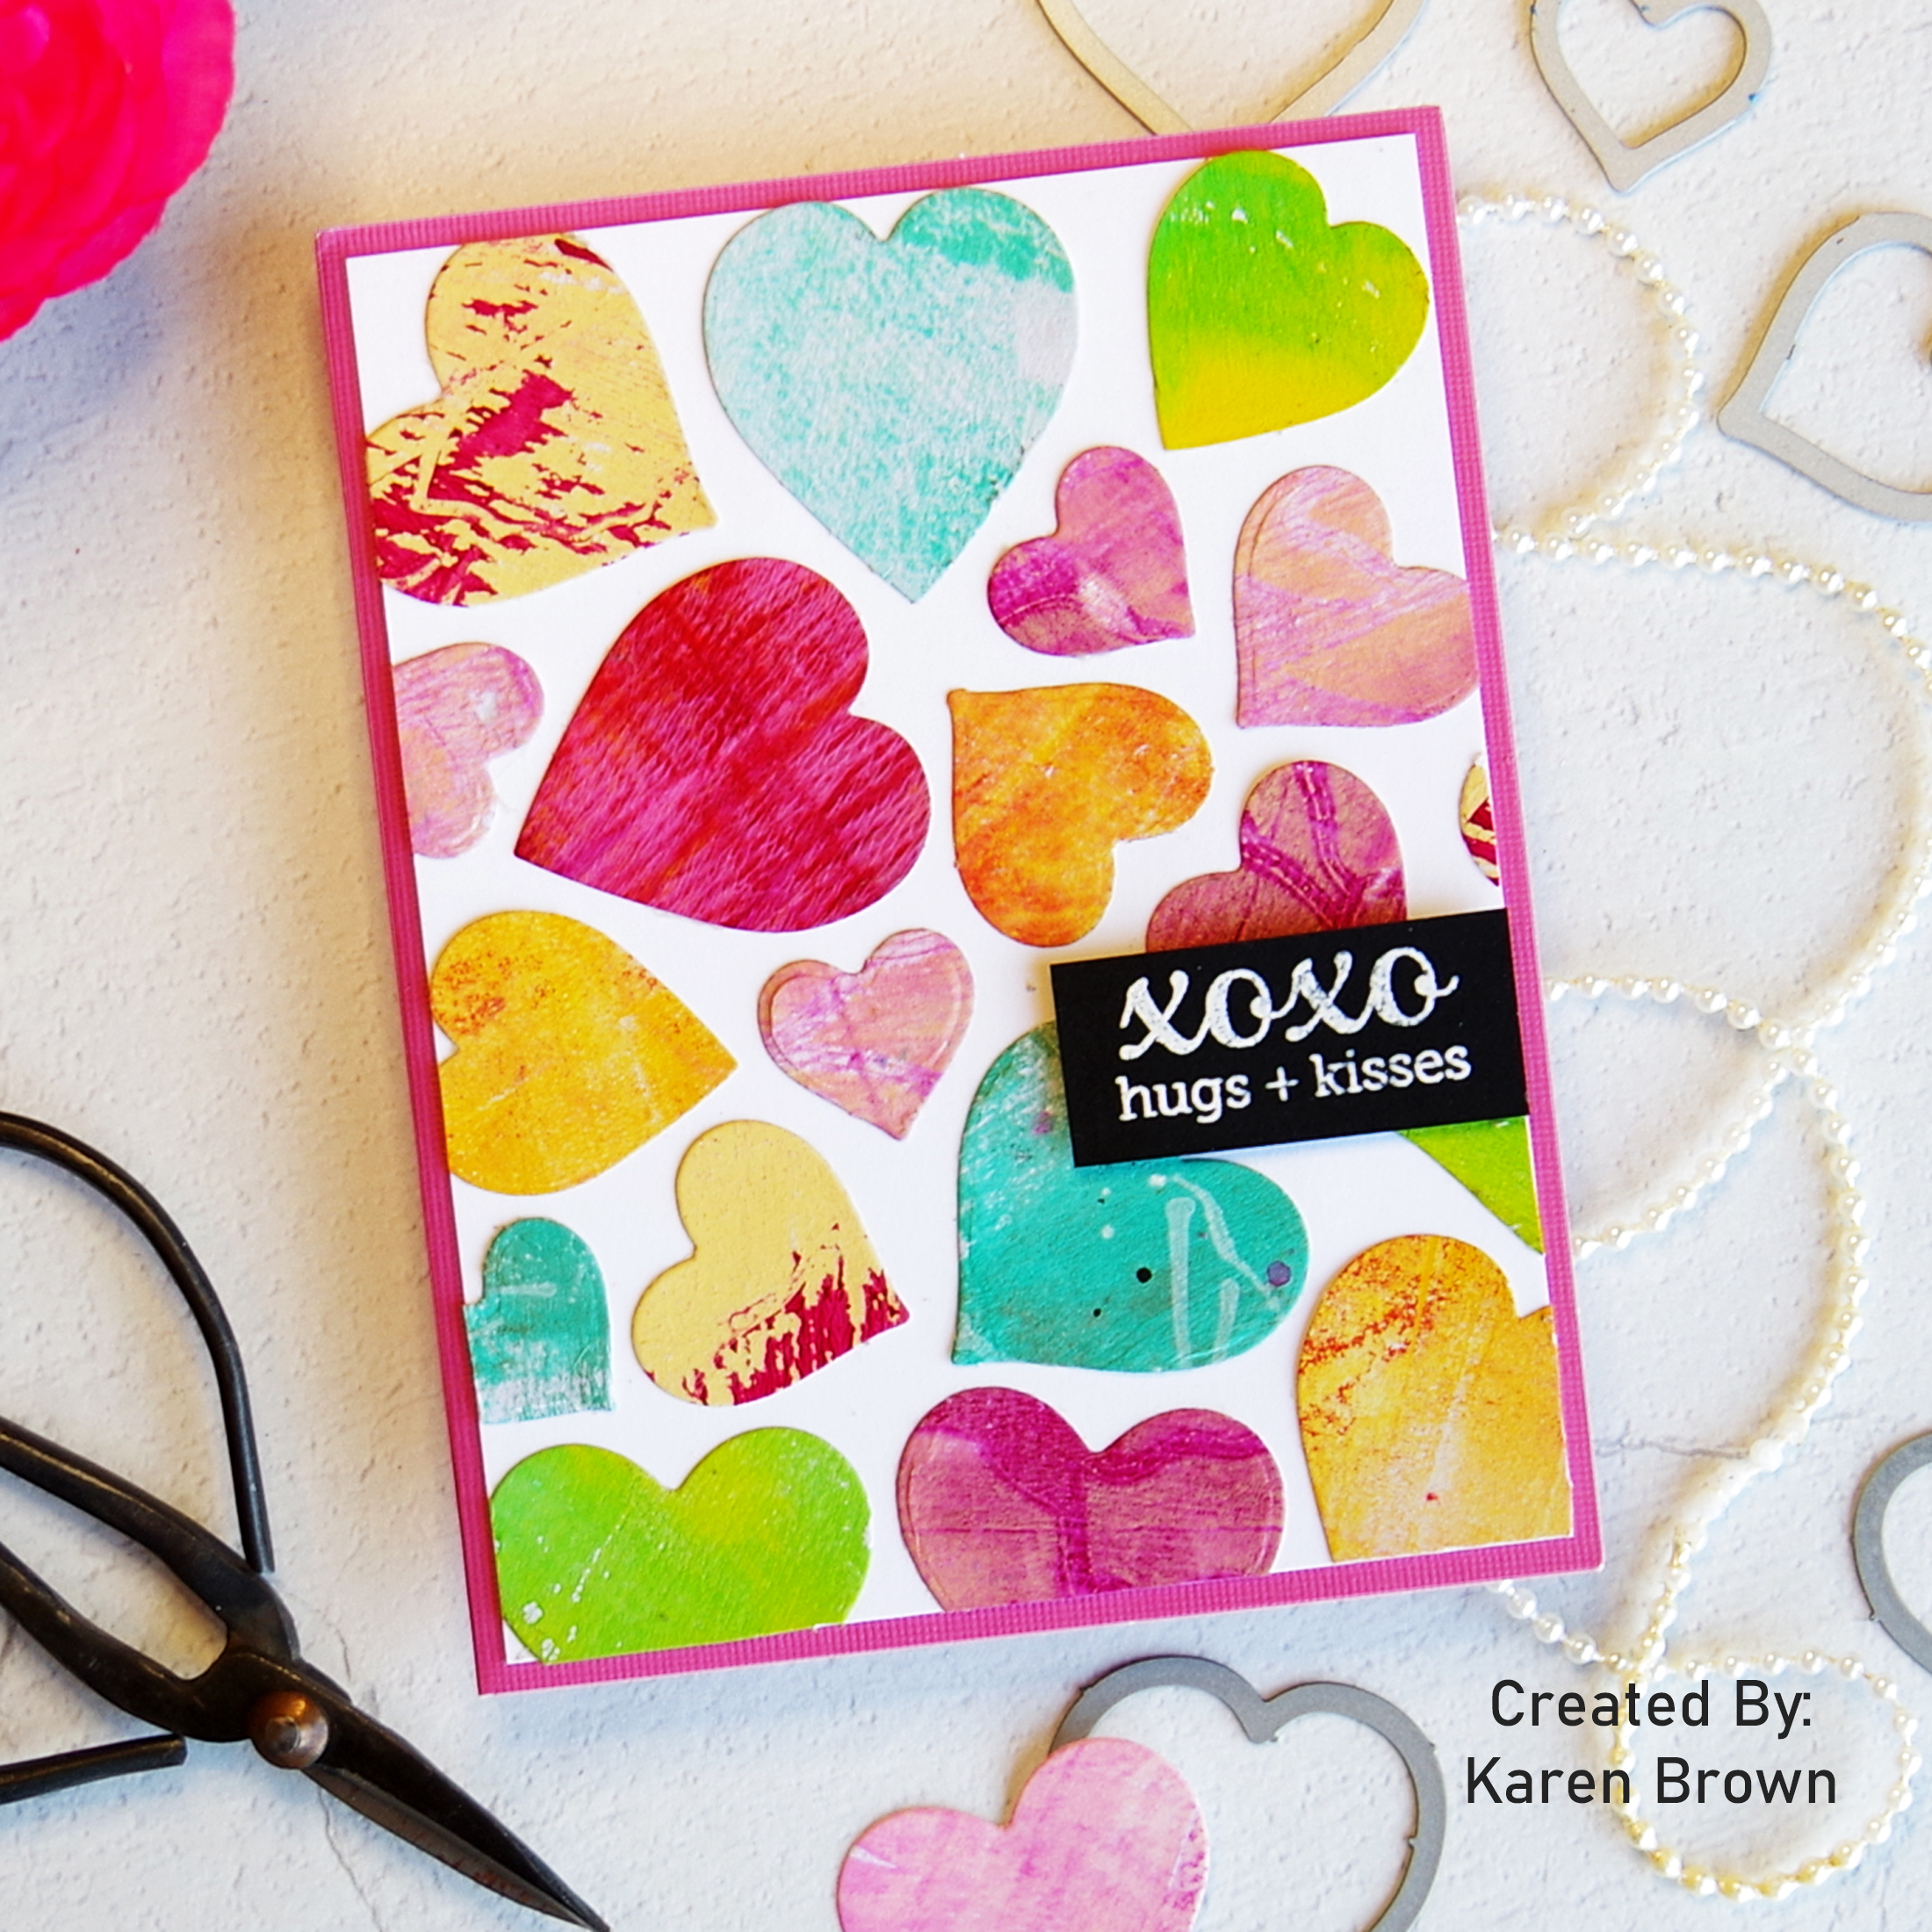
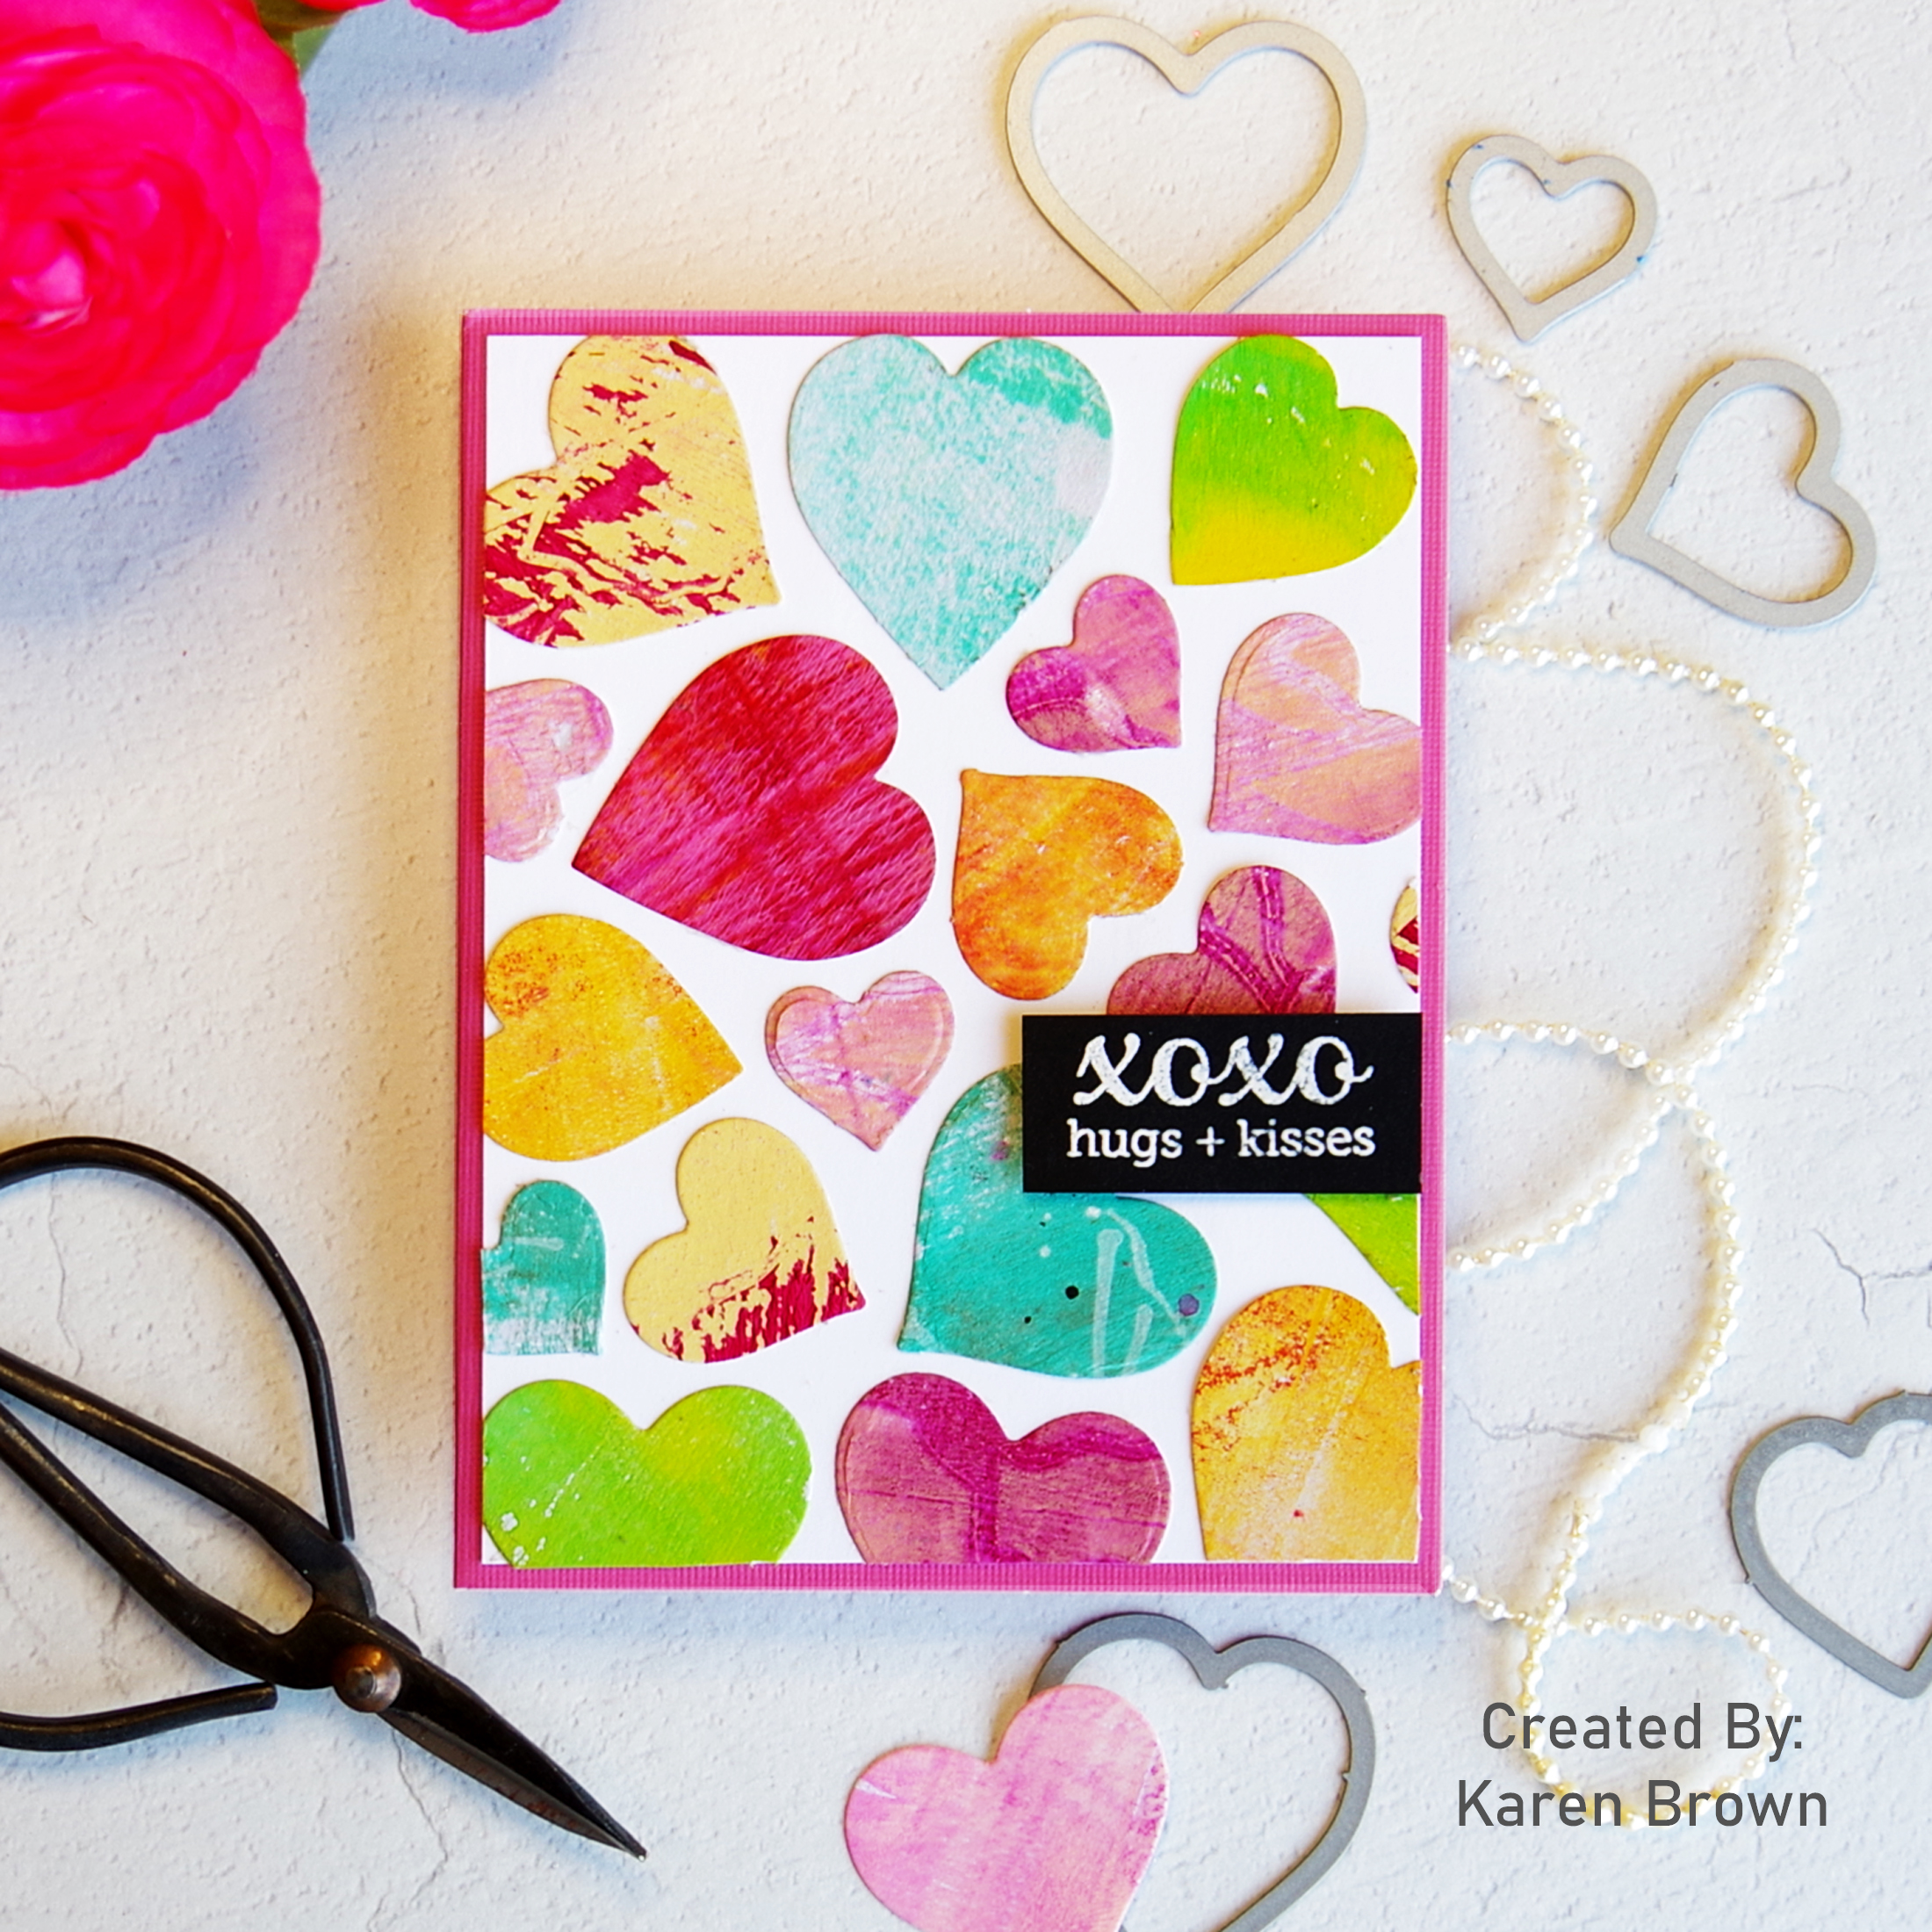
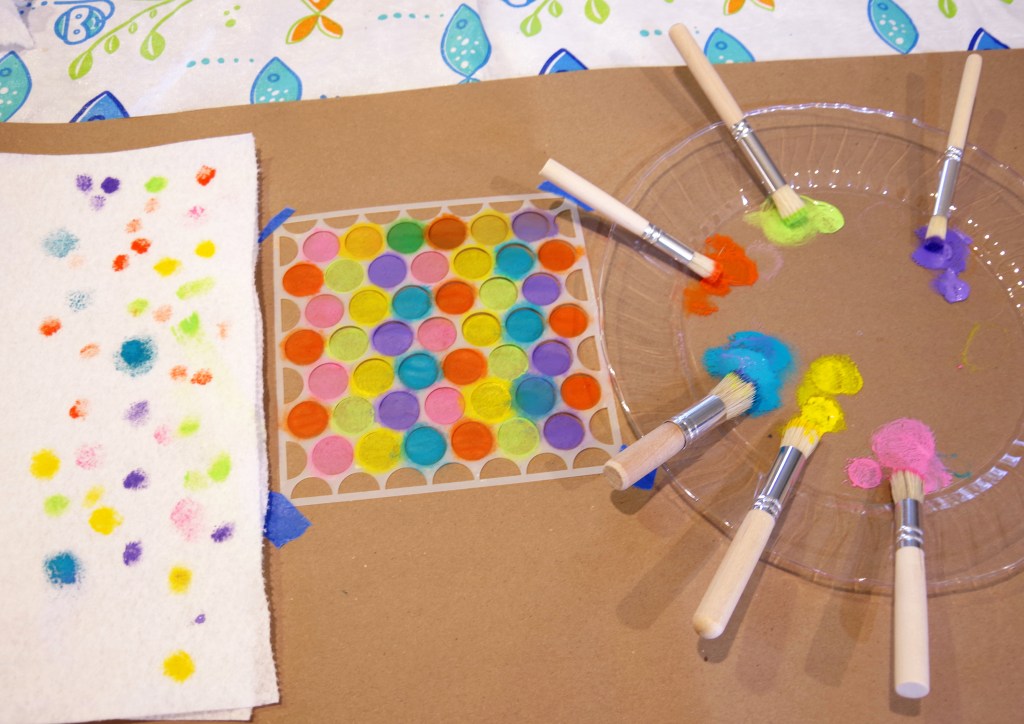
  • I also wanted a bright fun background so I made my own glitter paper. First, I taped some watercolor paper to a hard board and brushed water over the surface. Then I mixed Salty Ocean and Mermaid Lagoon Distress Inks with Shimmer Spray (no water was added) and I painted it on the watercolor paper. I wanted an intense color so I applied three layers but I didn’t bother to let it dry in between. The background is so pretty in person but its hard to see the sparkle in the photos so I added a quick video below.
  • I die cut the blooms/leaves and then, using a bone folder, I molded and shaped them.
  • The flower center is an enamel dot.
  • I wanted to anchor the background so I die cut a frame using Spellbinders Essential Rectangles from 80 lb. cardstock.
  • I assembled the card with liquid glue (frame) and foam tape for the leaves, blooms and sentiment.
Quick Video to Show the DIY Glitter Paper
Die Cut Dogwood Blossom Card with DIY handmade glitter paper background.

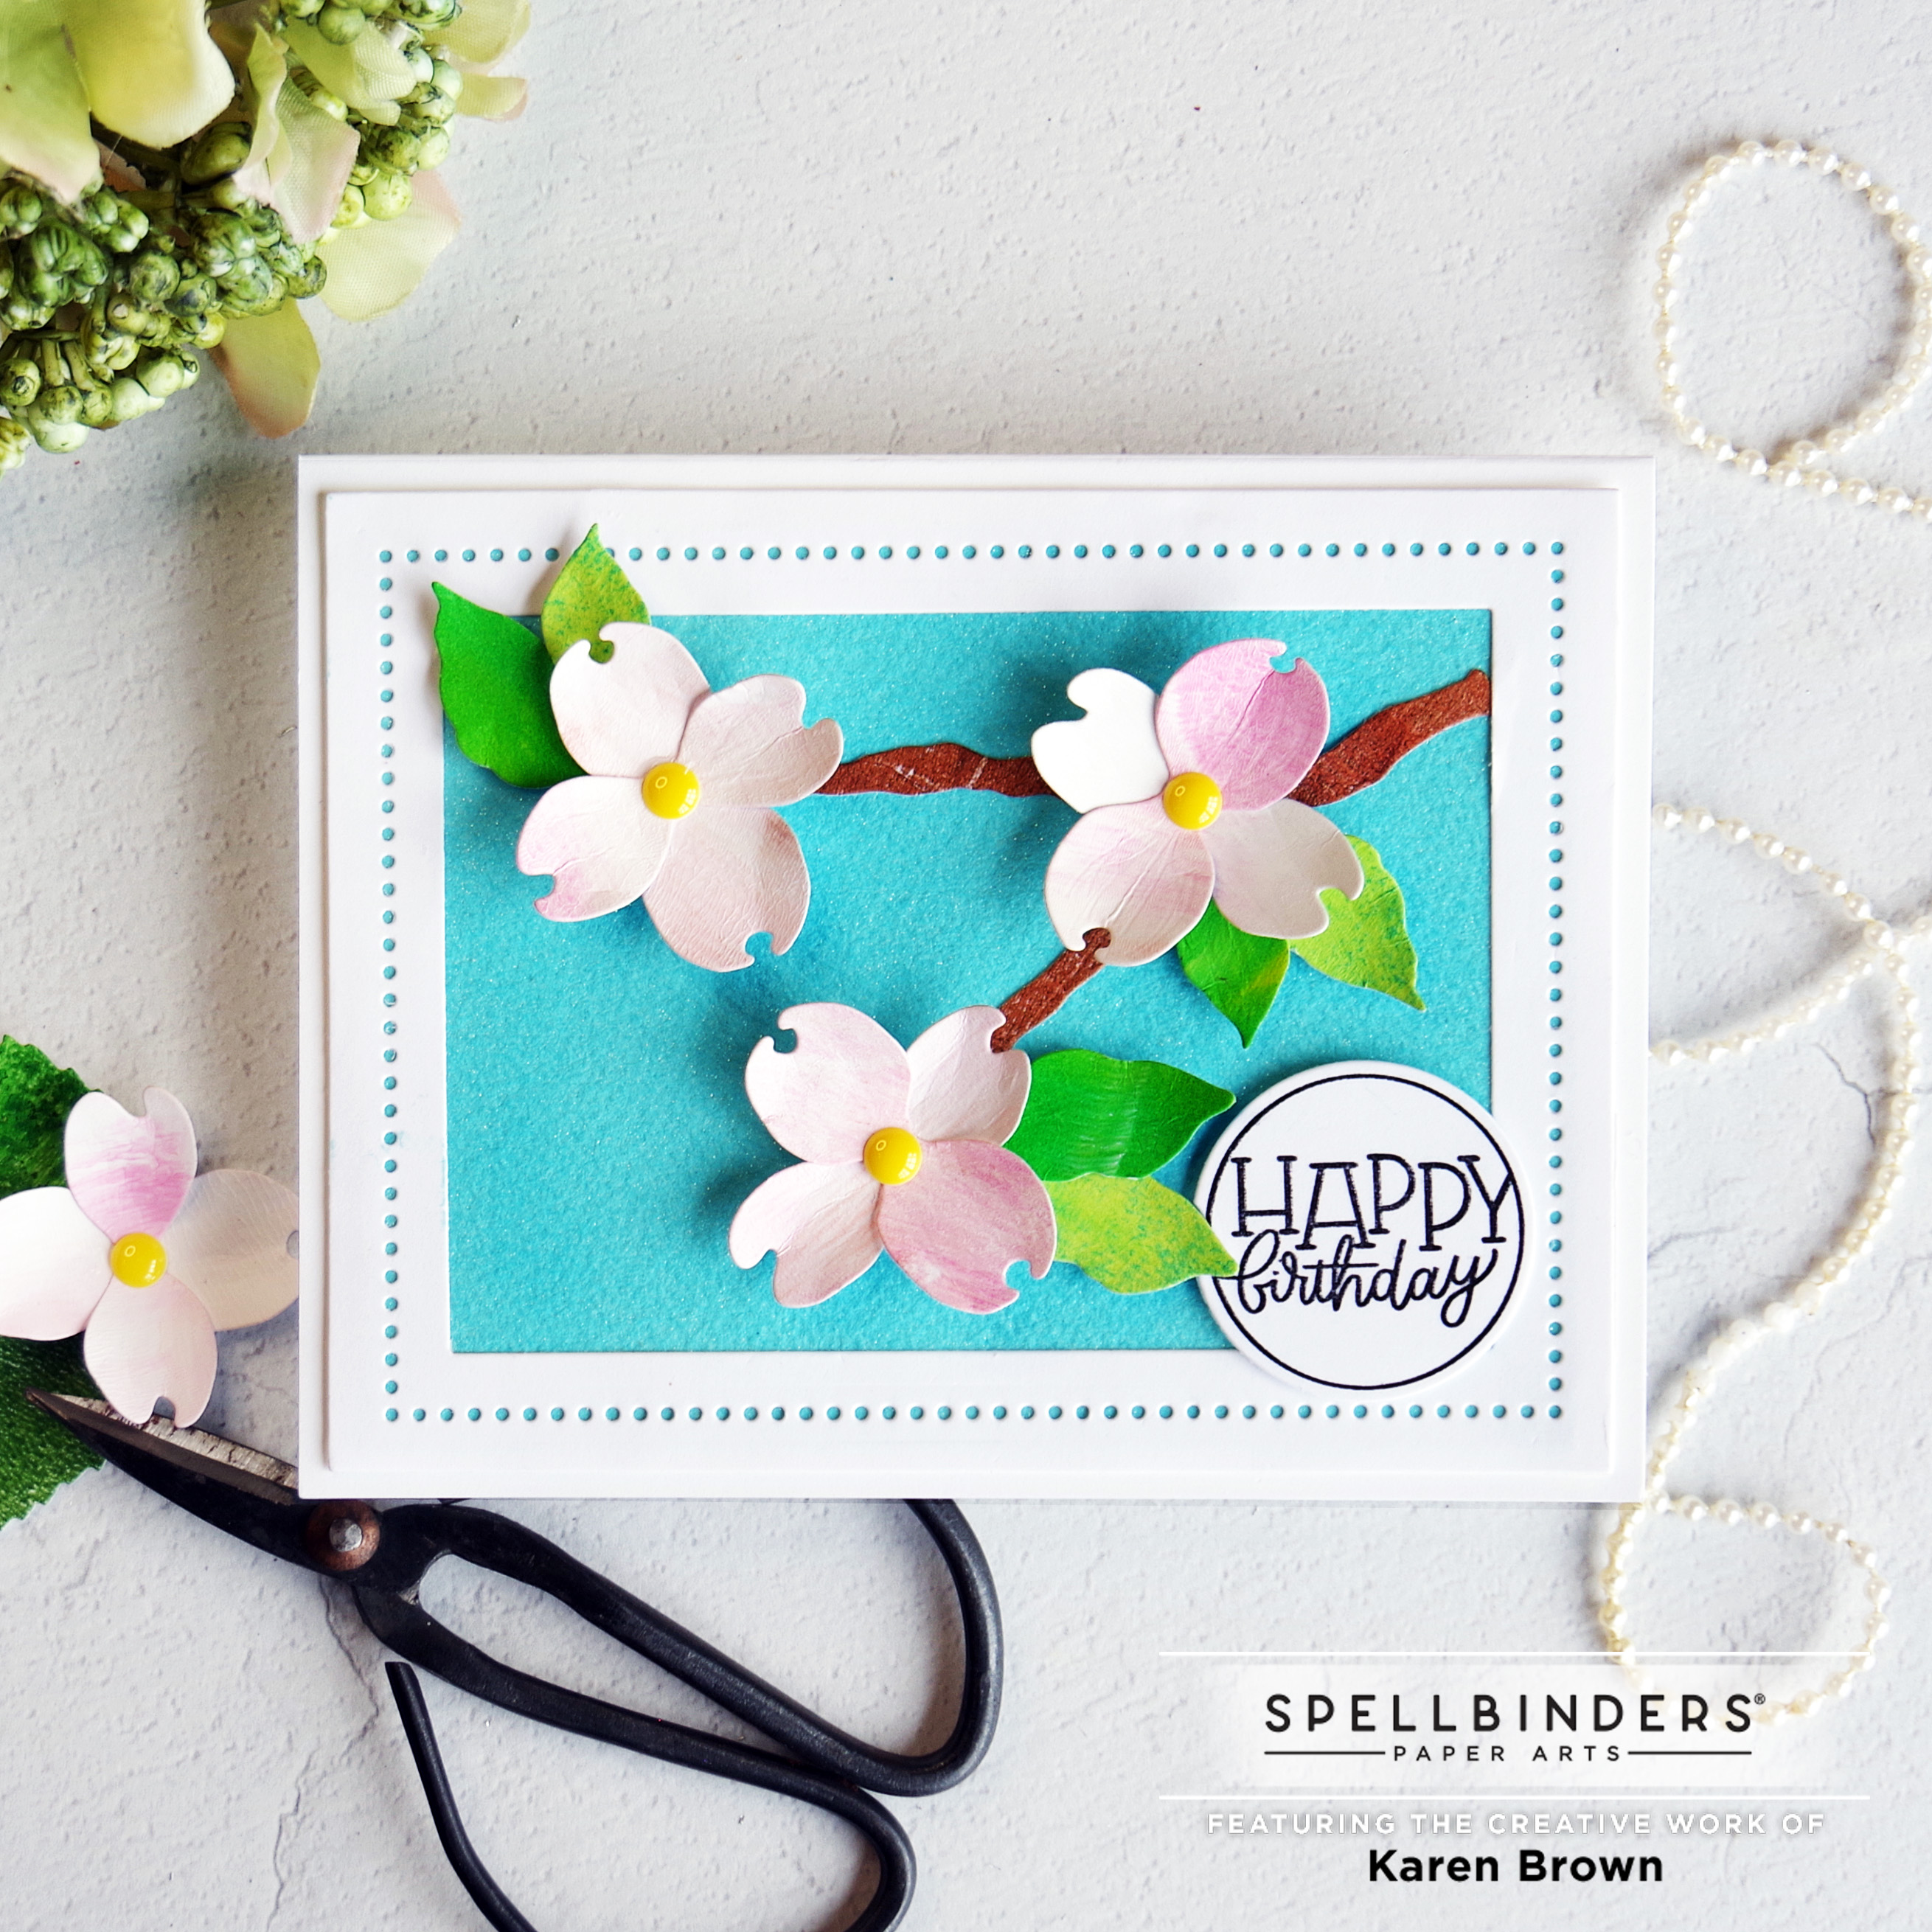
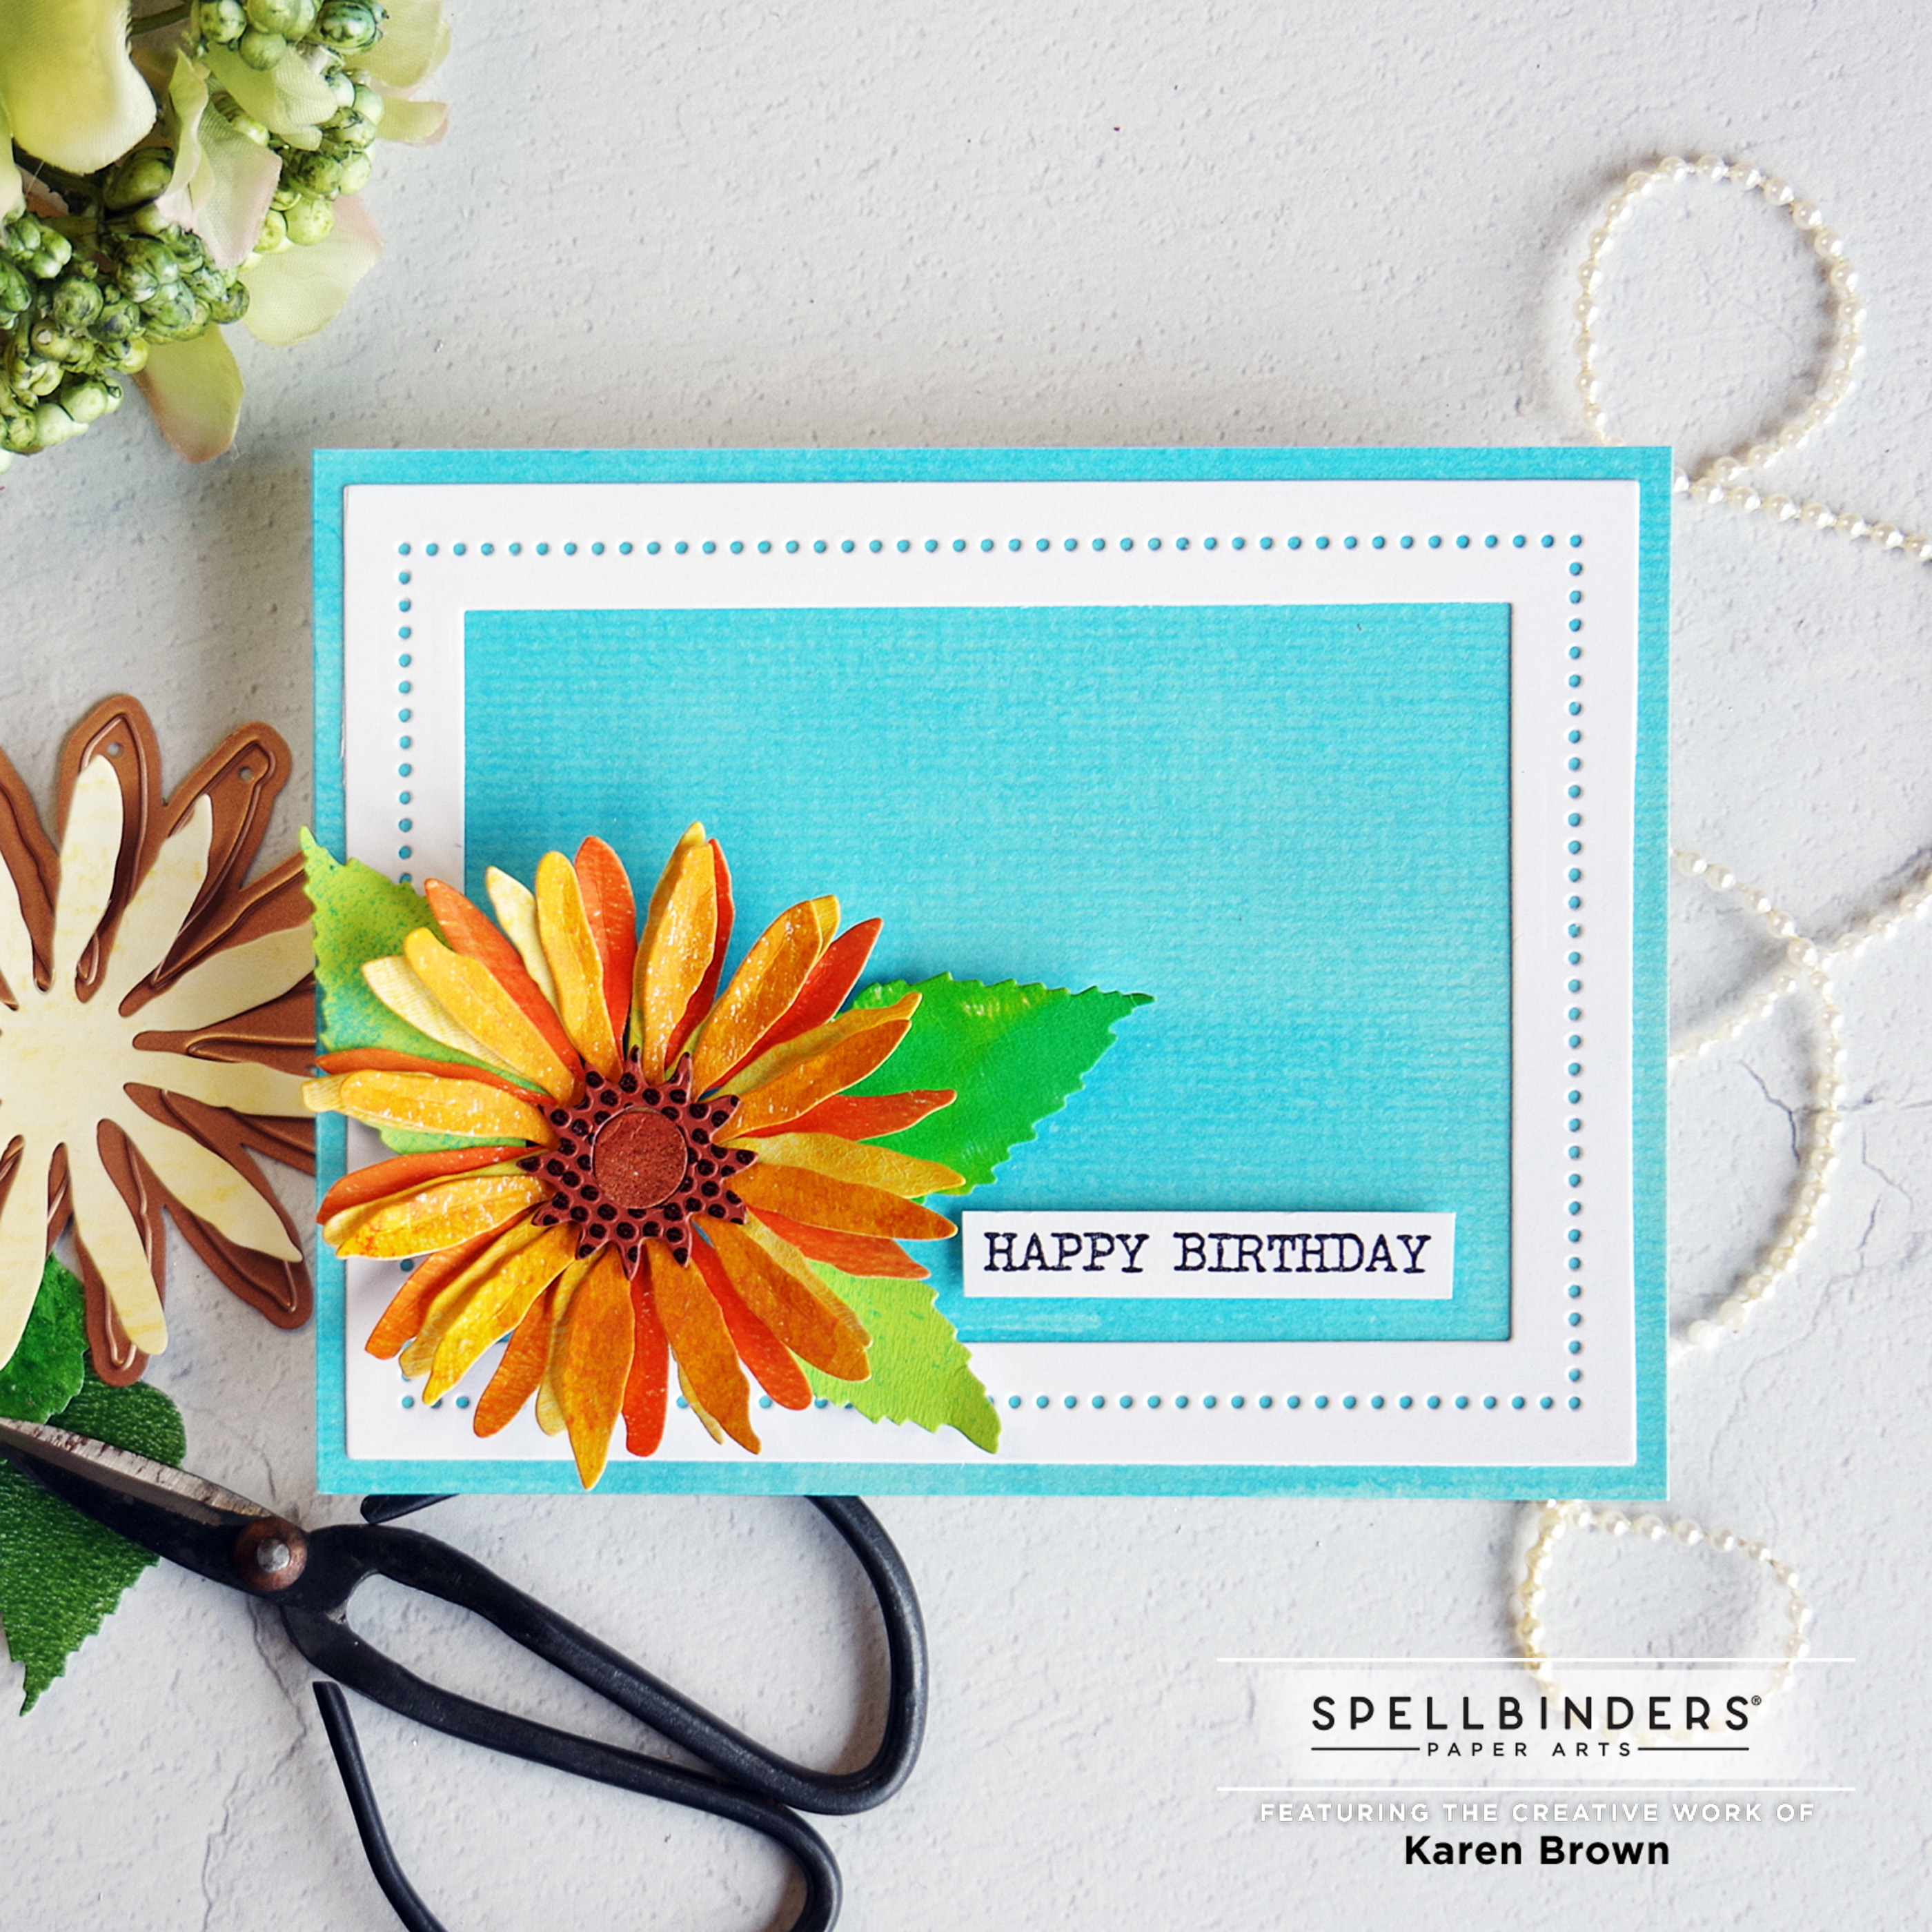
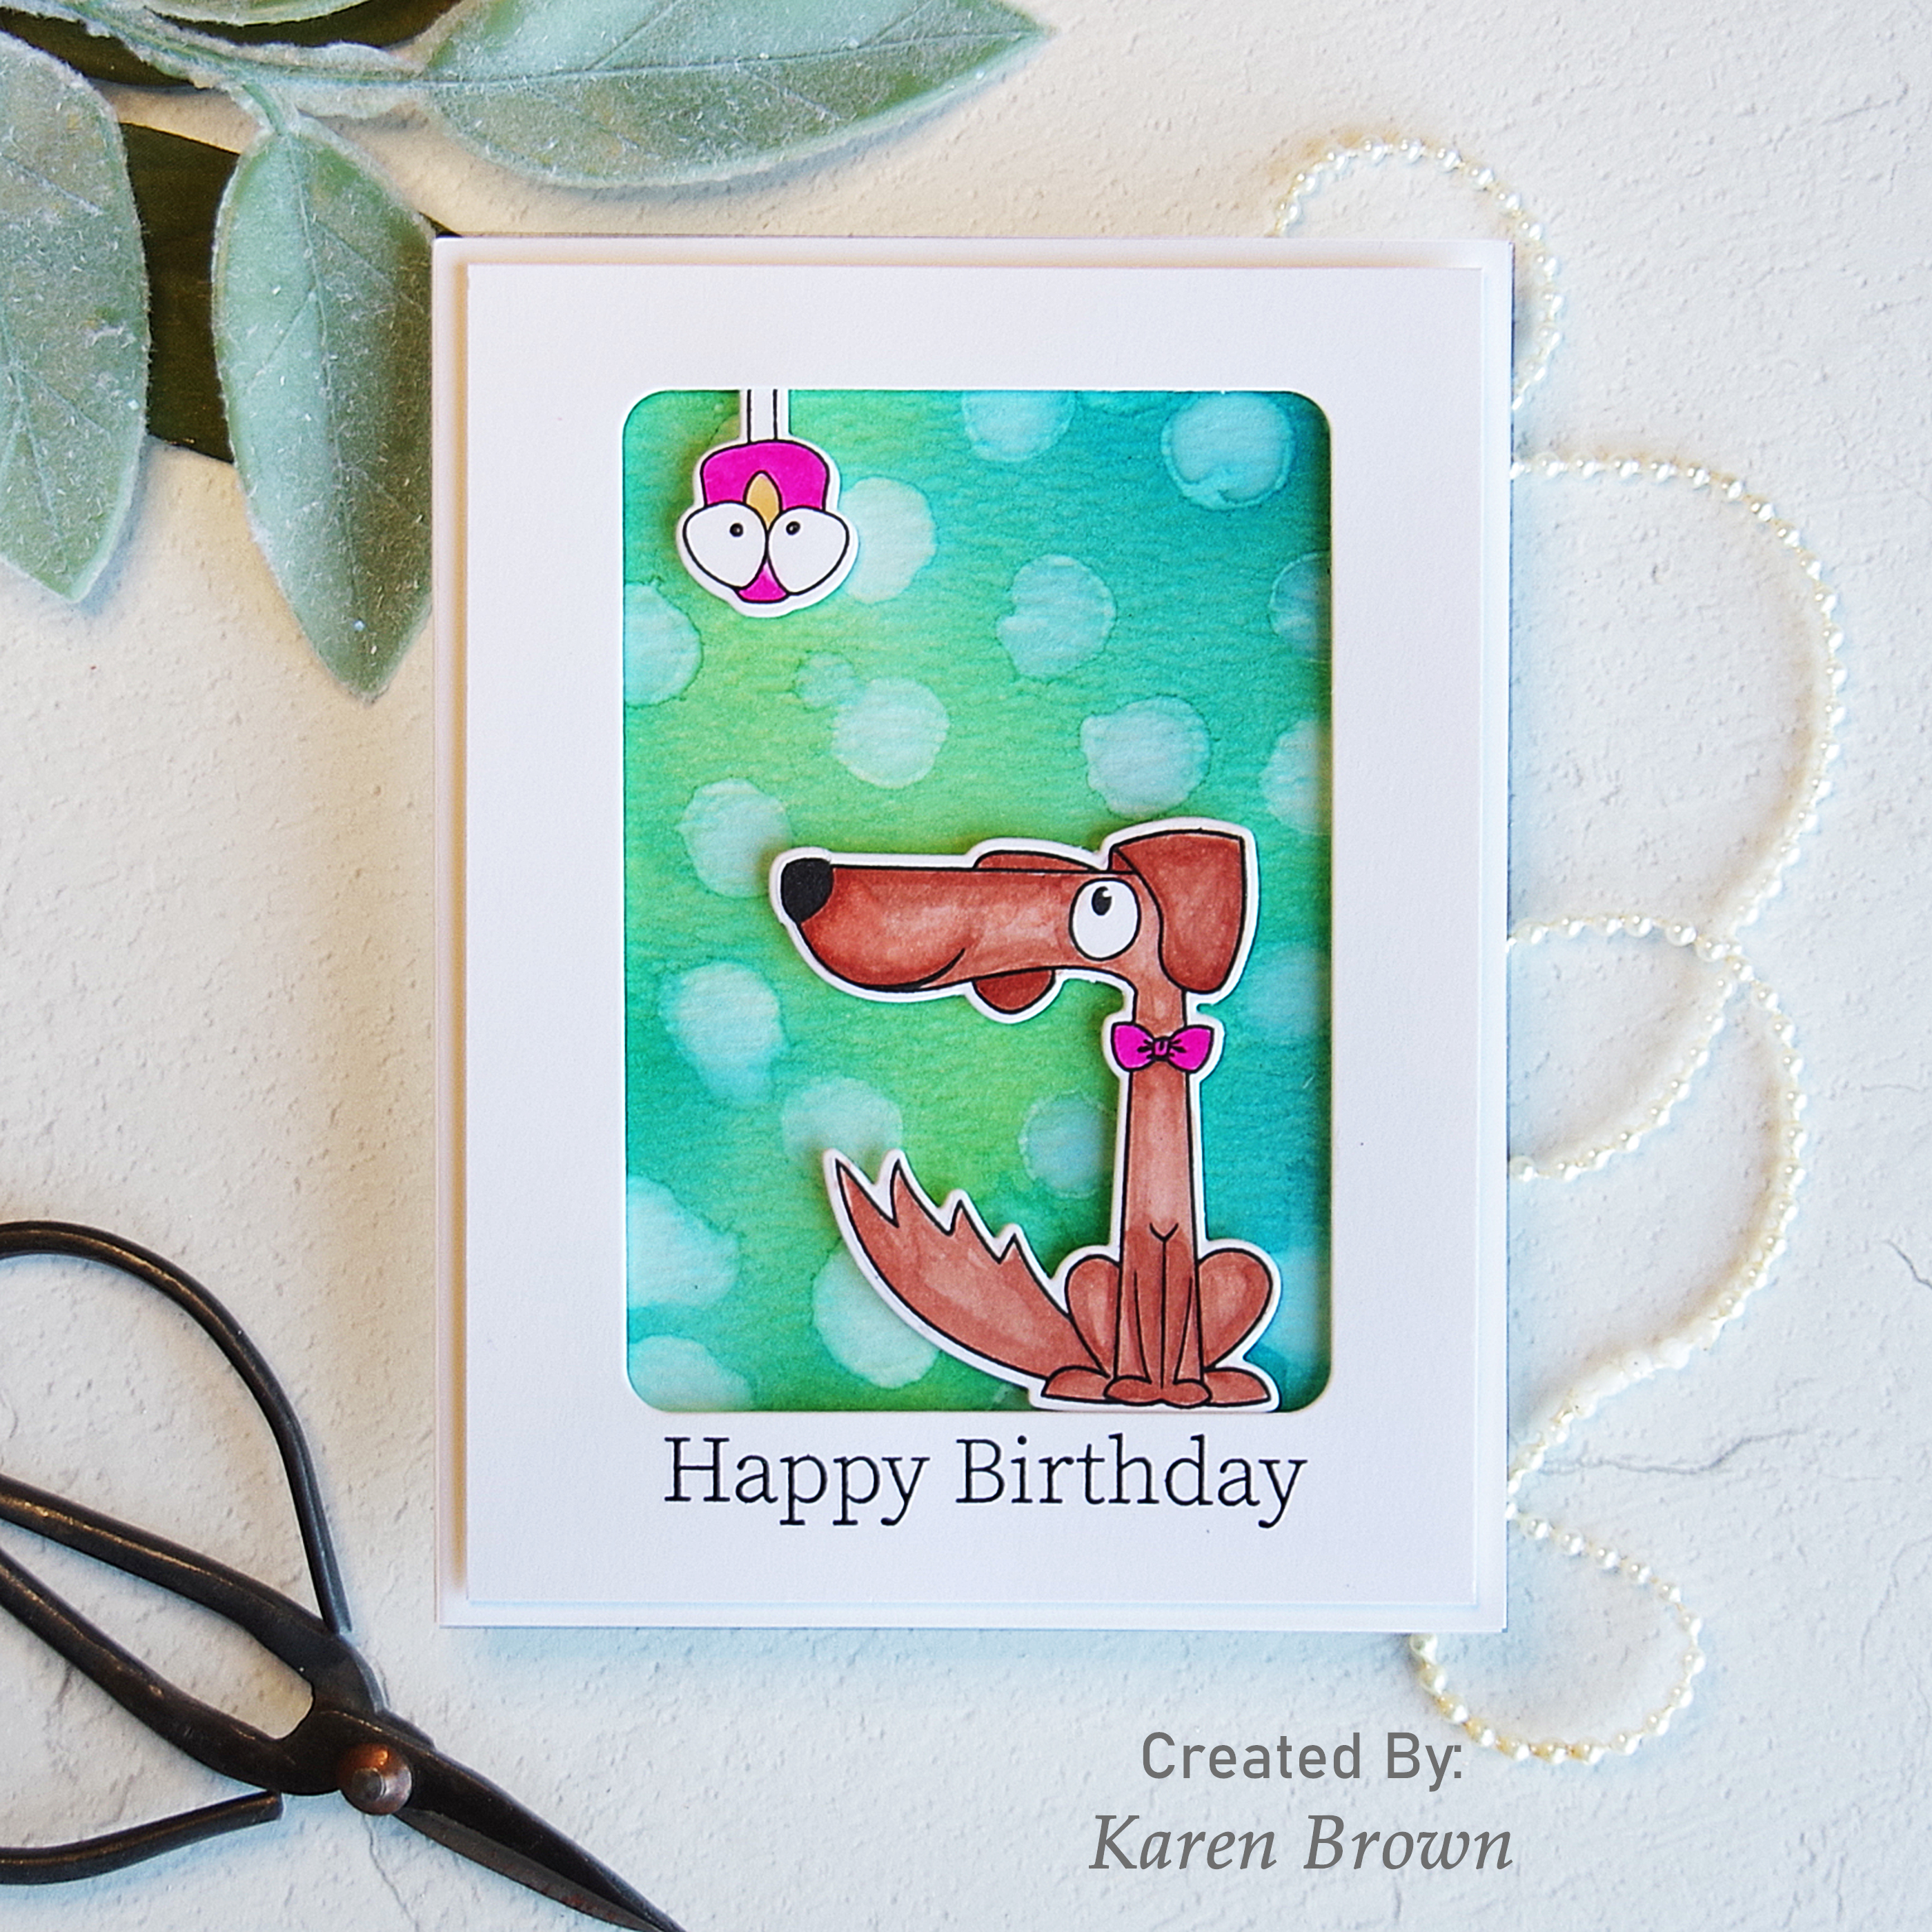
I changed the position of the branch on the second card and also let the background peek around the edges of the frame.

Die Cut Floral Card + Gel Press Prints

The shimmer is so much prettier in person. I think when I post to Instagram I will do a little reel so you can see the sparkle better.

Using Gel Press Prints in die cutting + How to Make DIY Glitter Cardstock

Thanks for stopping by!

Karen

cardmaking · papercrafting

Spellbinders Die Cut Sunflower Card

A die cut card using Spellbinders Sunflower from Susan's Garden Favorites Collection.

Who is ready for spring? I’ve been working on some bright sunny birthday cards featuring Spellbinders Susan’s Garden Favorites Collection. Today I chose the beautiful Sunflower and Ladybug die set for my two cards.

My Process:

  • I started by making a bunch of yellow and green Gel Press prints for my flower and leaves. I’ve inlcuded a photo of some of my prints below.
  • I also wanted a bright fun background so I taped some watercolor paper to a hard board and brushed water over the surface. Then I mixed Salty Ocean and Mermaid Lagoon Distress Inks with Shimmer Spray (no water was added) and I painted it on the watercolor paper. I wanted an intense color so I applied three layers but I didn’t bother to let it dry in between. The background is so pretty in person but its hard to see the sparkle in the photos.
  • I die cut the bloom three times for each sunflower. Using a bone folder I shaped the blooms and leaves.
  • The flower center is die cut from and a brown gel press print and a specialty “football” paper that has the texture of a football
  • I wanted to anchor the background so I die cut a frame using Spellbinders Essential Rectangles from 80 lb. cardstock.
  • I assembled the card with liquid glue (frame) and foam tape for the leaves, blooms and sentiment.
Spellbinders die cut Sunflower + Essential Rectangles frame

I think the result is a bright happy card!

Spellbinders Susan's Garden Favorites Sunflower + Gel Press Prints.

I love these sunflowers so I made a second card with a few modifications:

  • I made an A2 card from yellow green cardstock.
  • The frame was die cut from brown cardstock.
Die Cut Sunflower Card

I am so pleased you stopped by! I always love to read your comments, so if you have a moment, let me know what you think.

Karen

cardmaking · papercrafting

Fun Masculine Birthday Card

A humorous masculine card featuring Photoplay Fetch and Simon Says Stamp Stacking Animals.

This card is for my future son-in-law. Masculine cards can be difficult and my go-to for men is fun and whimsical. I achieved that by using two old favorites: Photoplay Fetch combined with Simon Says Stamp Stacking Animals. I love that bird!

My Process:

  • I started by stamping the silly dog and bird, then colored them with Copics and lastly die cut them.
  • The background is both fun and vibrant. I ink blended distress ink onto watercolor paper and then I “bleached” circles for a bokeh look. For the bleaching, I took a circle stamp, painted water on with a paint brush and then stamped the circle onto my background.
  • I then made a frame using Altenew’s Rounded Rectangle Dies and stamped my sentiment.
  • I assembled using lots of foam tape.
Photoplay Fetch  + Simon Says Stamp Stacking Animals bird for a dog themed birthday card.

The “Fetch” Dog Stamp is also available on Amazon:

Photoplay Paper PhotoPlay Photopolymer Stamp-Fetch,

Thanks for stopping by today!

Karen

cardmaking · papercrafting

Simple Square Grid Mixed Media Card

Using Gel Press Paper Scraps in Cardmaking

I had so much fun creating this card and it required minimal supplies.

  • I started by selecting colorful leftover gel press scraps and then I used a 1 1/2” square die to cut my elements. You could easily use a paper trimmer to cut the squares.
  • I glued a white cardstock square to the back of each die cut for a more substantial feel and then laid out the squares and came up with my grid. There was no rhyme or reason, I just went the grid that appealed to me visually.

PRO TIP: I selected scraps with a lot of variation to add texture and interest to my card.

cardmaking · papercrafting

Spellbinders Adoring Fleurette Card Builder Dies

Mixed media card using Spellbinders Adoring Fleurette Card Builder dies from the Classically Becca Collection.

Hello! I have a mixed media card I created using Spellbinders Adoring Fleurette Card Builder dies from the Classically Becca Collection.

I started by sorting through my gel press prints. I really liked the blue print for my background and thought pink and green would look great as accent colors. The lattice die is so beautiful and I wanted to show it off so I went for a high contrast look. I like that the lattice die is the focal point of the card.

My Process:

  • The lattice die is both intricate and delicate, so I ran it through my die-cutting machine three times to ensure a crisp clean cut.
  • I die cut flowers and leaves. The tulips are from the this kit and I added flowers and greenery from Spellbinders Petite Floral Potpourri, which is a favorite of mine.
  • I also die cut (2X) the Adoring You sentiment included in this kit.
  • I wanted an A2 card so I cut my background down to 4 x 5 1/4″. I added a layer of craft foam to my card base and then attached my background.
  • Next I layered the elements of my card using the fine tip of Bearly Glue.
  • To finish the card I added enamel dots to the flower centers. I used the lightest color from Shades of Purple. I think enamel dots really help finish a project and they are probably my most used embellishment.
Spellbinders Adoring Fleurette Card Builder kit.

Thanks so much for visiting!

Karen

cardmaking · papercrafting

Making Valentine Card’s With My Xyron Sticker Maker

My daughter bought me a Xyron Sticker Maker for Christmas and I thought it would be fun to make valentines using my new toy.

Easy DIY Valentines

DIY Mixed Media Valentine with die cut hearts using my Xyron Create A Sticker machine

I started by sorting through my Gel Press Prints looking for bright happy Valentine colors. I used my gel prints but you could easily use designer paper too.

Creating Valentines with my Xyron Create a Sticker machine.

Using a variety of sizes, I die cut a bunch of hearts and then ran them through my Xyron and found it both fun and easy.

I then cut the stickers apart and laid them out on my card panel.

Making stickers with my Xyron Create A Sticker machine

I wanted the placement balanced in terms of varying the colors and sizes of hearts. Then I just peeled off the stickers and applied! I trimmed off the portion hanging over the edge of the panel and then adhered to an A2card base. This would be so fun to do with kids too.

Easy DIY Mixed Media Valentine using handmade heart stickers + great to make with kids.

I finished off the card by adding a simple heat embossed sentiment.

I enjoyed the sticker making process and will definitely be using my new Xyron again soon. Thanks for stopping by!

Xyron Create-a-Sticker, 5″, Sticker Maker, Machine, Permanent Adhesive (0501-05-10A)

Karen

papercrafting

DIY Stenciled Gift Wrap

DIY Stenciled Gift Wrap using Altenew stencils.

Hello everyone, Karen Brown here! This post is on the Altenew Mixed Media blog and I also wanted to post it on my site as well.

I am so excited to show you how I created my stenciled DIY gift wrap. I love wrapping gifts and wanted to make some custom packaging for my daughter’s birthday and I knew Altenew stencils would be perfect for my projects. I spent an enjoyable afternoon creating the paper and wrapping my gifts. I used three favorite Altenew stencils: Bubble Wrap, Mega Bloom and Leaves and Berries.

How To DIY Stenciled Gift Wrap

HOW I CREATED MY GIFT WRAP:

  1. I had two colors of kraft paper plus a Gable Box in my craft room so I used them as the base for my projects. I sorted through my Altenew stencils and picked three that I thought would be beautiful on gift wrapping:
  2. I used painters tape to adhere my stencil to the kraft paper.
  3. I selected six bright fun shades of acrylic paint and squirted a dollop of each onto a plate. Using a stencil brush, I dipped the brush into the paint and then dabbed the brush on a paper towel. Too much paint on the brush will result in smeared stenciling. Next, using a circular motion, I applied the paint through the stencil opening. I went both clockwise and counter clockwise. I found the smaller brushes worked better than the larger sizes and I used one brush for each color.
  4. On the Bubble Wrap project, after I filled the stencil, I carefully lifted up my stencil and lined it up and filled it three more times so I would have a big enough sheet to cover the journal I was going to wrap.

PRO TIPS:

  • I found using high-contrast colors made for bright fun wrapping. I selected colors that stand out from the kraft background.
  • The stencils work best when when the paint is not too wet. I loved working with it right before it dried out.
How to Stencil Your Own Gift Wrap.

My daughter wanted a new journal so I made the Bubble Wrap paper specifically to wrap this cute bee themed gift. All it needed was a simple twine bow.

DIY Stenciled Gift Wrap using the Altenew Bubble Wrap Stencil and acrylic paint.
Bubble Wrap Stencil

The finished package is so happy and fun!

Stenciling with the Altenew Mega Bloom Stencil.
Mega Bloom Stencil

This Gable Box was very quick to create and the Mega Bloom stencil makes for a big showy design.

How to Make Your Own Gift Wrap with Stencils and acrylic paint
Mega Bloom and Leaves and Berries Stencils

I really enjoyed creating this custom gift wrap and I hope you found some inspiration. I love reading your comments so if you have a moment, let me know what you think about the gift wrap. Thanks for stopping by!

Karen

cardmaking · papercrafting

Mixed Media Collage Style Valentine Cards Made With Gel Press Prints

Mixed Media Gel Press Collage Valentine with die cut hearts

Valentine’s Day is coming up so I thought it was time to get busy and start creating. I love making gel press prints and thought this year it would be fun to make a batch of collage style valentines. Each one is embellished with die cut hearts.

Valentine made with Gel Press Prints + Die Cut Hearts

My process was the same for each card:

  • I flipped through my gel press prints and pulled out some fun, busy, messy designs.
  • I added paint splatters and stamping to some of the gel prints.
  • I also used some book pages and added stamping and ink blending with stencils.
  • I tore pieces off the prints and played around with layouts. For each, I left the top left corner for my sentiment.
  • I used UHU glue stics to adhere the torn pieces to cardstock. This glue works great! It dries quickly and fully adheres so there was no need for liquid glue.
  • Using my silicone shaper brush, I applied a thin layer of gesso to the top left corner of the card and along the seams of the torn prints. I also added a watercolor wash to these areas.
  • I die cut hearts in a variety of sizes from brightly colored gel prints and then distressed the edges with Frayed Burlap Distress Ink and a finger dauber. I glued these down to my panel.
  • I added +s, dashes and doodles with Inktense pencils, Gel Pens, Posca Acrylic Pens and distressed the edge of the card panel with Frayed Burlap Distress Ink and a finger dauber.
  • I added a quick stamped sentiment, framed with black cardstock and added to an A2 card base.

Masculine Valentine made with gel press prints and die cut hearts.

The card above has more neutrals which I thought would be perfect for my husband.

Mixed Media Valentine with die cut hearts

I like the two stencils I used on the gel press prints for the card above.

DIY Mixed Media Valentine card ideas
My Valentine Quartet

These collage style valentines were SO fun to make! And, since they have a messy casual look, mistakes actually add to the appeal.

I’ve linked to some of the products I used below:

Uni Posca PC-5M White Colour Paint Marker Pens 2.5mm Medium Bullet Tip Nib Writes On Any Surface Metal Wood Plastic Fabric Glass Stone (Pack of 1)

Gel Press Gel Printing Plate 5″x7″ 10810

UHU Stic – 0.29 oz / 8.2g Clear Glue Stick – Pack of 3

Derwent Inktense Pencils 24/Pkg, Colors may vary

Liquitex 104004 BASICS Gesso Surface Prep Medium Tube, 8.45-oz

Sakura 38369 10-Piece Blister Card Glaze 3-Dimensional Glossy Ink Pen Set, Assorted Color

Ranger Tim Holtz Distress Ink Pad, Frayed Burlap

Barvotti Silicone Color Shaper Brush (Mottler) – a Flat Sharp-Edged Flexible Tool to Apply, Move and Remove Acrylic Paints and Water Based Medium with Precision – A Studio Essential 1 Inch Wide

Bachmore Drawing Pad 9X12”(98lb/160g) 100 Sheets Mixed Media, Watercolor, Acrylic Art Pad for Sketching, Ink Sketchbook, Coloring in Multi-Media Top Spiral Notebook, Micro-Perforated, Heavy Weighted

Acrylic Paint Set, Caliart 52 Vivid Colors (22 ml/0.74 oz) Craft Paints Supplies for Artists Kids Students Beginners, Canvas Ceramic Wood Fabric Rock Painting Supplies, Rich Pigments Non Toxic Paints

Tombow 62191 MONO Multi Liquid Glue, 0.88 Ounce, 1-Pack. Multi-Purpose Glue with Dual Tip Dispenser for Precise to Full Coverage Application

Thanks so much for stopping by!

Karen

cardmaking · papercrafting

Altenew Educators “New Favorite” Blog Hop and Linky Party + Giveaway

DIY paper weaving handmade card using Altenew Garden Trellis die as a base.

Hello everyone, Karen Brown here and I am so happy you are “hopping” with The Altenew Educators! This Altenew hop is all about “new” and I am so excited to show you a technique new to me…paper weaving.

Paper Weaving + Card Making

It is a little gloomy outside so I wanted to make a bright fun project that incorporated paper weaving. I cut my paper strips and then sat by the fire doing my weaving. I think I am already for Spring to arrive!

Hand made paper weave card using rainbow strips and Altenew's Garden Trellis die as a base.

My Process:

  • I die cut the base for my weaving using Altenew’s Garden Trellis Cover Die.
  • I selected 8 colors of cardstock and cut 1/4″ strips with my paper trimmer. I then cut one end of each strip into a point so that it would be easier to weave.
  • In rainbow order, I wove all the strips going one direction and then wove the cross pieces.
  • I die cut Altenew’s Simply Hello sentiment three times from black cardstock and then glued them together for a substantial looking sentiment.
  • I cut a frame using Altenew’s Rounded Rectangles Die and I think the frame really finishes off the card.
  • With a paper trimmer, I trimmed the woven panel down and then glued it to the card base. I adhered the frame with foam tape and added the sentiment.
DIY instructions for making a handmade paper weave card.

I had a strip of paper weaving left over so I made a quick “Two-fer” Bonus card. The sentiment is Birthday Greetings and the two windows were cut with the die from the Mini Paintbox. I also added three enamel dots to the white space.

paper weaving DIY handmade cards.

Prizes:

$130 in total prizes! Altenew is giving away a $20 gift certificate to 3 lucky winners and a $15 gift certificate to 4 winners! Please leave a comment on the Altenew Card Blog and/or each designer’s blog post on the blog hop list below by 01/09/2022 for a chance to win. 

There’s MORE! What’s a hop without YOU?! We have included an Inlinkz at the Altenew blog for you to enter your gorgeous Altenew “New Favorite” creations. We will pick one of our favorite handmade creations from those who joined the linky party and they will receive a $10 Altenew gift certificate!

Altenew will draw 7 random winners from the comments left on each stop of this blog hop and announce the winners on the Altenew Winners Page on 01/10/2022.

Hop list:

Altenew Blog

Virginia Lu

Pam Boedeker

Nancy Souza

Nandini Karmarkar

Bridget Casey

Karen Brown You Are Here! 🙂

Neha Aggarwal

Lana Taber 

Terri Marie Koszler

Helen Kalb

Joylita Dsouza

Teri Stokes

Rosie Neustaedter

Irina Fonina

Nenette S. Madero

Ann Taylor

Susan Stagno 

Annemarie Caister

Didn’t you just love Bridget’s “Hugs” card? Neha is next with some lovely creations.

I really enjoyed weaving this card and I hope you found some inspiration. I love reading your comments so if you have a moment, let me know what you think about my project. Thanks for stopping by!

Karen

cardmaking · papercrafting

Paper Artsy Mixed Media Cards

Paper Artsy Whimsical Tree Mixed Media cards.

Happy New Year! I recently received a lovely package from Paper Artsy and had a fun day in my studio. I created two cards with slightly different takes. Both cards have gel press print backgrounds made with Paper Artsy’s Fresco Finish Chalk Acrylic paint. This was my first time using Chalk Acrylics and I think the end result is beautiful. I used Hey Pesto green, Butternut orange and white for both backgrounds.

For the cards, I stamped and heat embossed the Paper Artsy tree on watercolor paper and colored them with watercolor markers. I then fussy cut the images. The sentiment is Ranger Letter It: Greetings.

Paper Artsy Whimsical Tree with Fresco Finish Chalk Acrylic Background

For this first card, I also stamped the tree with a script background stamp to enhance the whimsical feel. The card background was stamped with the tree and then my fussy cut panel was added with foam squares for a nice dimensional feel.

Paper Artsy Fresco Finish Gel Print background in Hey Pesto green and Butternut Orange.

For this second card I went for layers. I stamped the tree directly onto the gel print, then added the fussy cut tree on top using foam squares. I also stamped and watercolored a third panel and then fussy cut four aqua segments. These four pieces were adhered on top, so that in some places, the tree has three layers of dimension. I hope you can see that from the photo above.

Paper Artsy Whimsical Tree with Gel Press Print background

Multi-Media Collage Companion Card

Multimedia Gel Press Collage Card with Paper Artsy Chalk Acrylic  and stamps.

I had some gel press prints leftover and decided to make a quick collage card. I tore off three pieces of paper (you can see the same green top right and orange bottom edge) and glued it to my panel (3.5″ x 4.75″) with UHU Gel glue stick. This glue stick works amazingly well, I didn’t need to use any liquid medium. I added some gesso, lots of stamping, paint splatters, dots-dashes-coloring (with Inktense pencils). On the top left corner I applied gesso, then did a bit of loose messy watercoloring plus the sentiment.

Paper Artsy Chalk Acrylic Paint and stamps on a multi-media gel press collage card.

Thanks for stopping by!

Karen