Cardmaking Kit · Die cutting · stitching

Spellbinders March 2025 Club Kits – Two Cards, Endless Creativity!

Die Cut handmade cards created with Spellbinders March 2025 Club Kits.

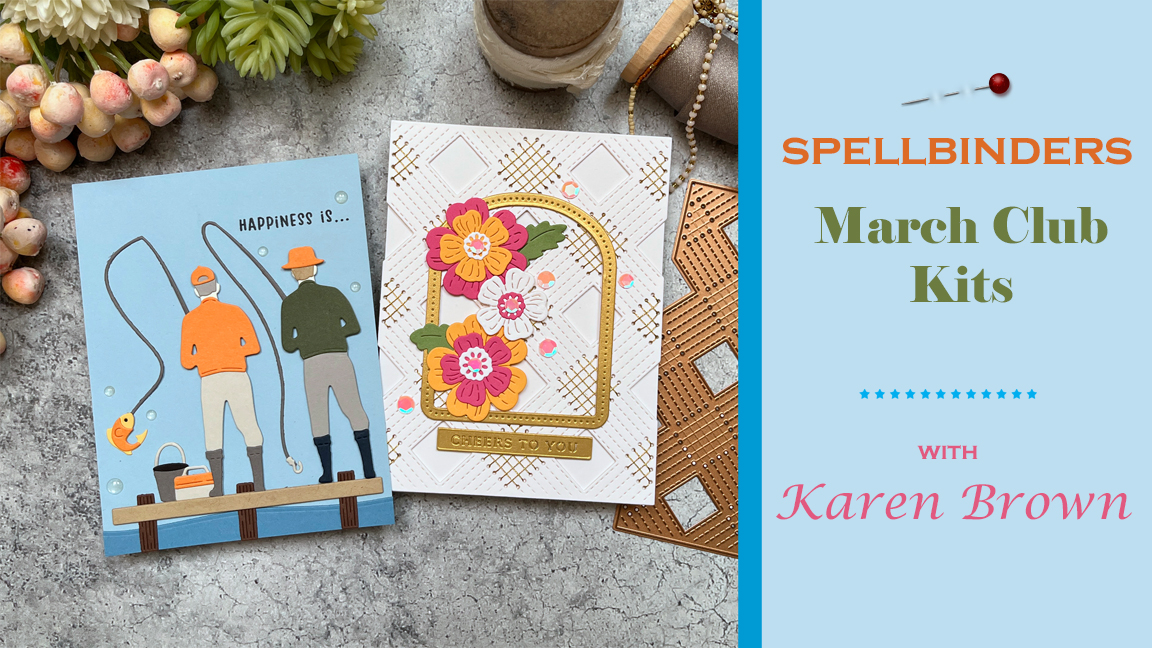
March is here, and with it comes Spellbinders’ March 2025 Club Kits, featuring some truly exciting club kits! This month, I crafted two very different—but equally fun—cards: one celebrating the great outdoors and another bringing stitched floral elegance to life. Let’s dive in!

Kits Used Today:

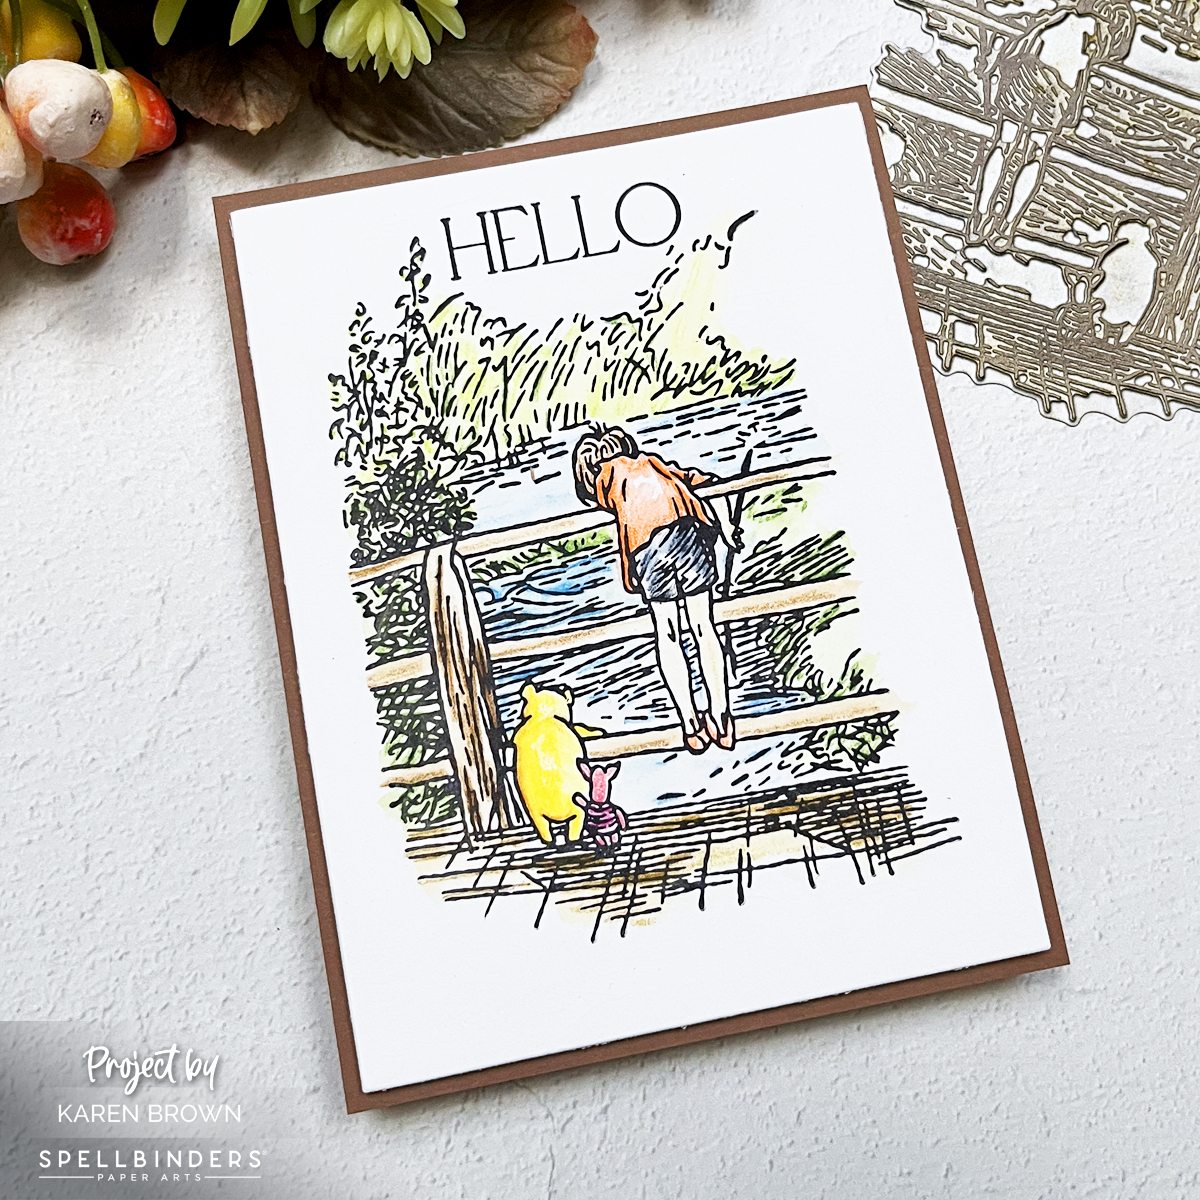
Card 1: A Fishing Adventure

Masculine fishing theme die cut card using Spellbinders March 2025 Small Die of the Month Kit.  Two men are fishing on a dock, there is a "caught" fish on a line and the colors are primarily blue with the men wearing orange and green shirts and hats.

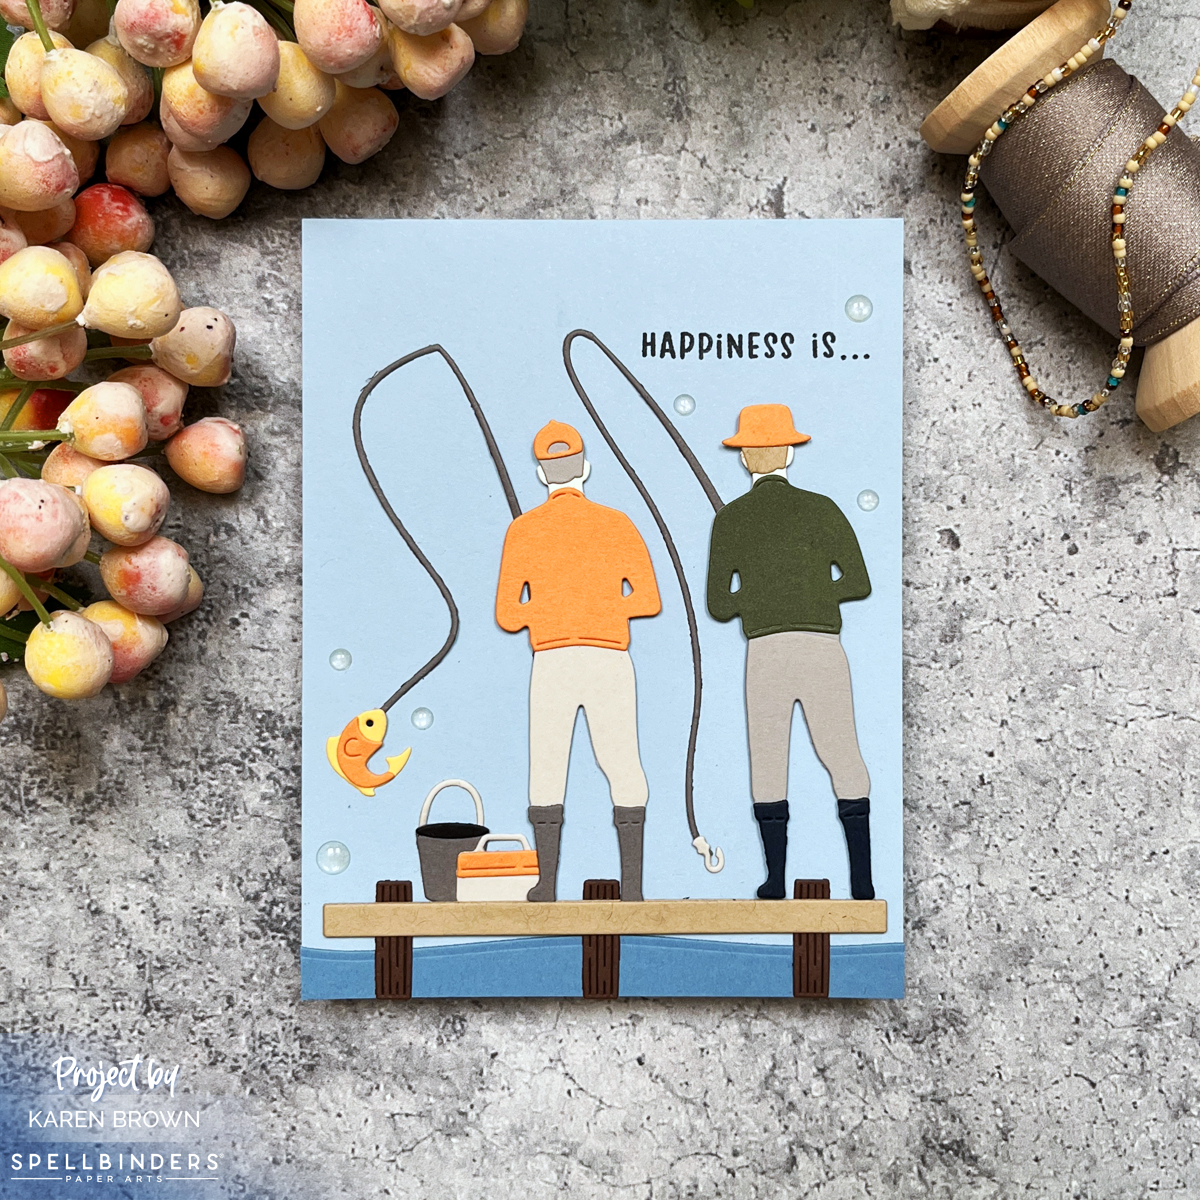
For my first card, I used the Die of the Month Club Kit – Fairways and Fish Tales, a perfect choice for masculine cards. This set brings all the charm of a peaceful fishing trip, complete with fishing rods, tackle boxes, and two friends casting their lines from a dock.

Since my husband is a fly-fishing enthusiast, this card is especially meaningful. The “Happiness is…” sentiment captures the joy of a day spent on the water. The color palette leans into lovely blues, accented with pops of orange and green, giving the scene a fresh and lively look. If you’re looking for a kit that’s perfect for the men in your life, this one is a winner!

For assembly, I used Bearly GlueFoam Squares and Craft Foam. To finish, I added some Clear Enamel Dots to simulate water splashes.

Handmade die-cut card featuring two male friends fishing on a wooden dock with fishing rods, tackle boxes, and a 'Happiness is...' sentiment. The color scheme is blue with pops of orange and green.

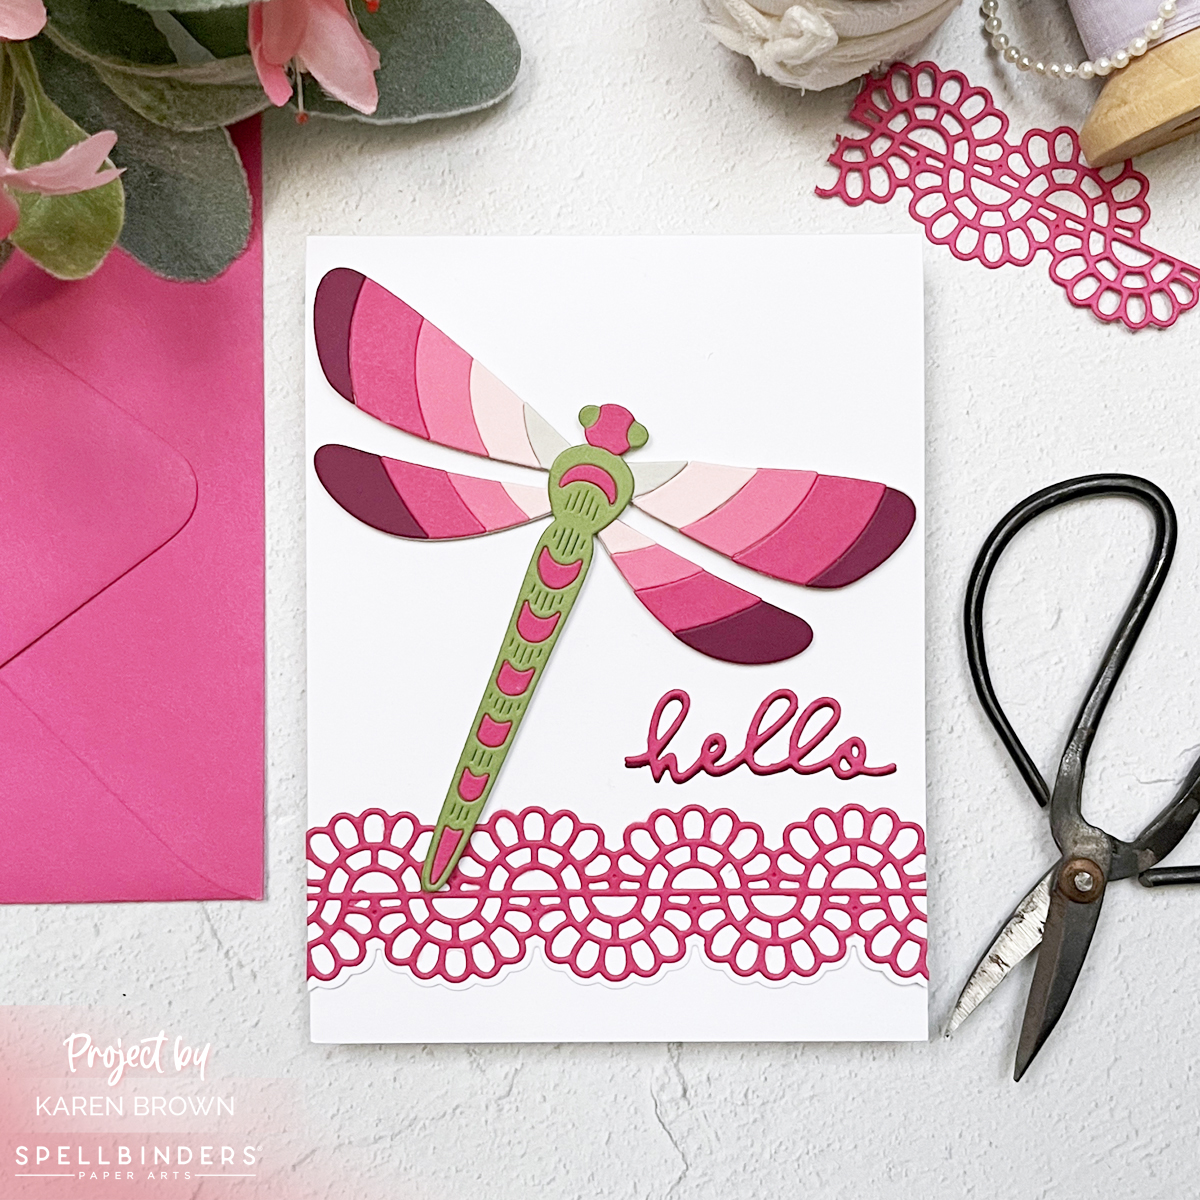
Card 2: Floral Elegance with Stitching & Die Cuts

Elegant handmade stitched card with a gold-threaded white background and die-cut flowers in pink, orange, and white, accented with gold detail.  Created with Spellbinders March 2025 Stitching Die and Large Die Club Kits.

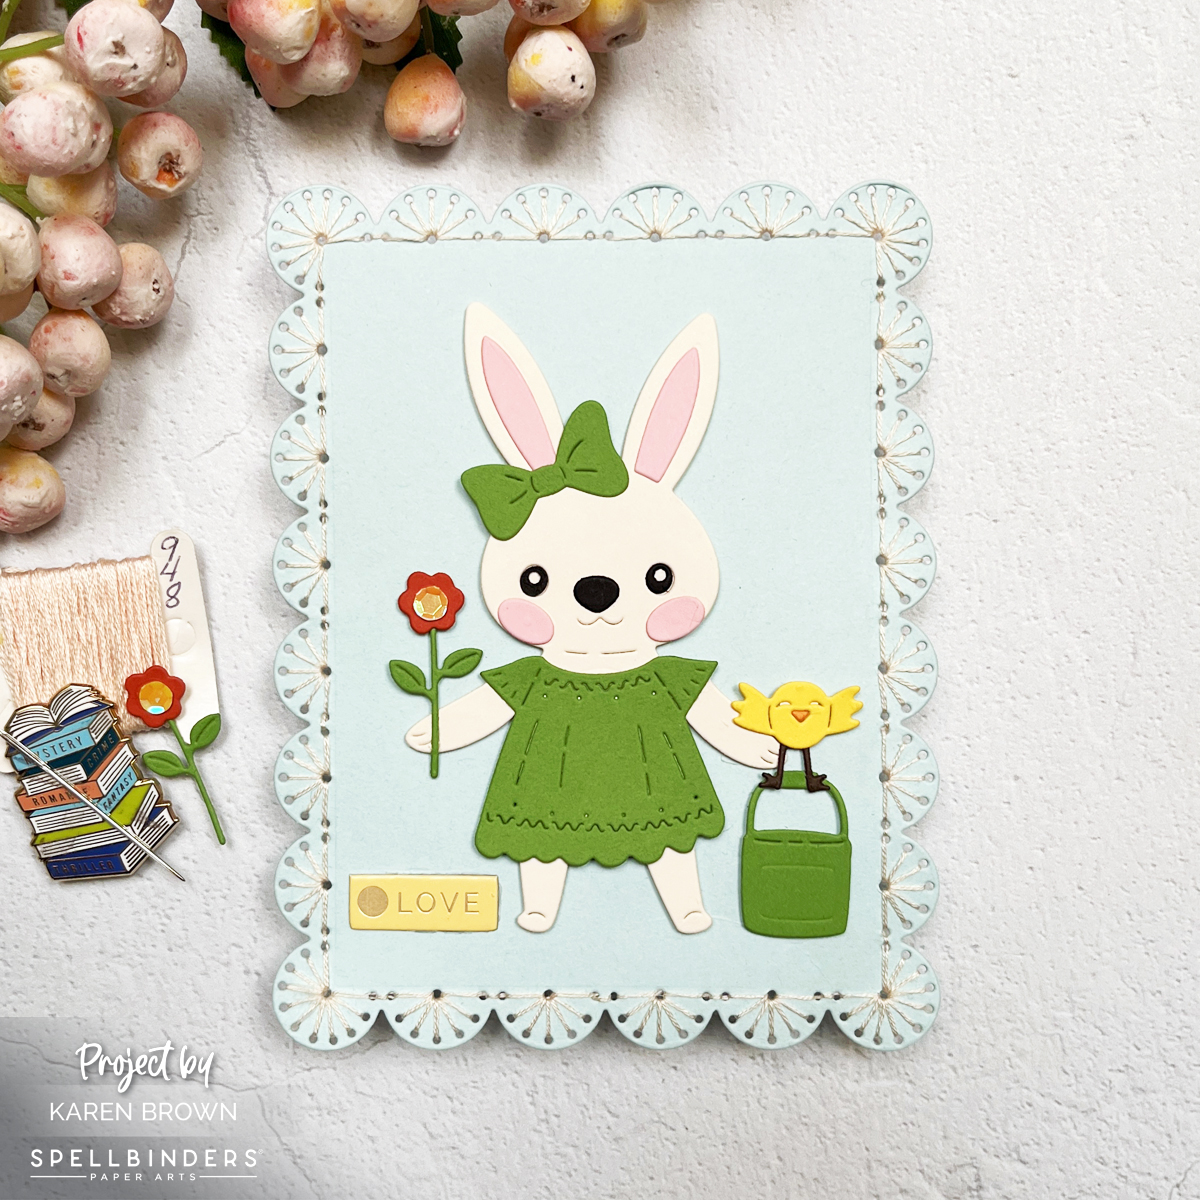
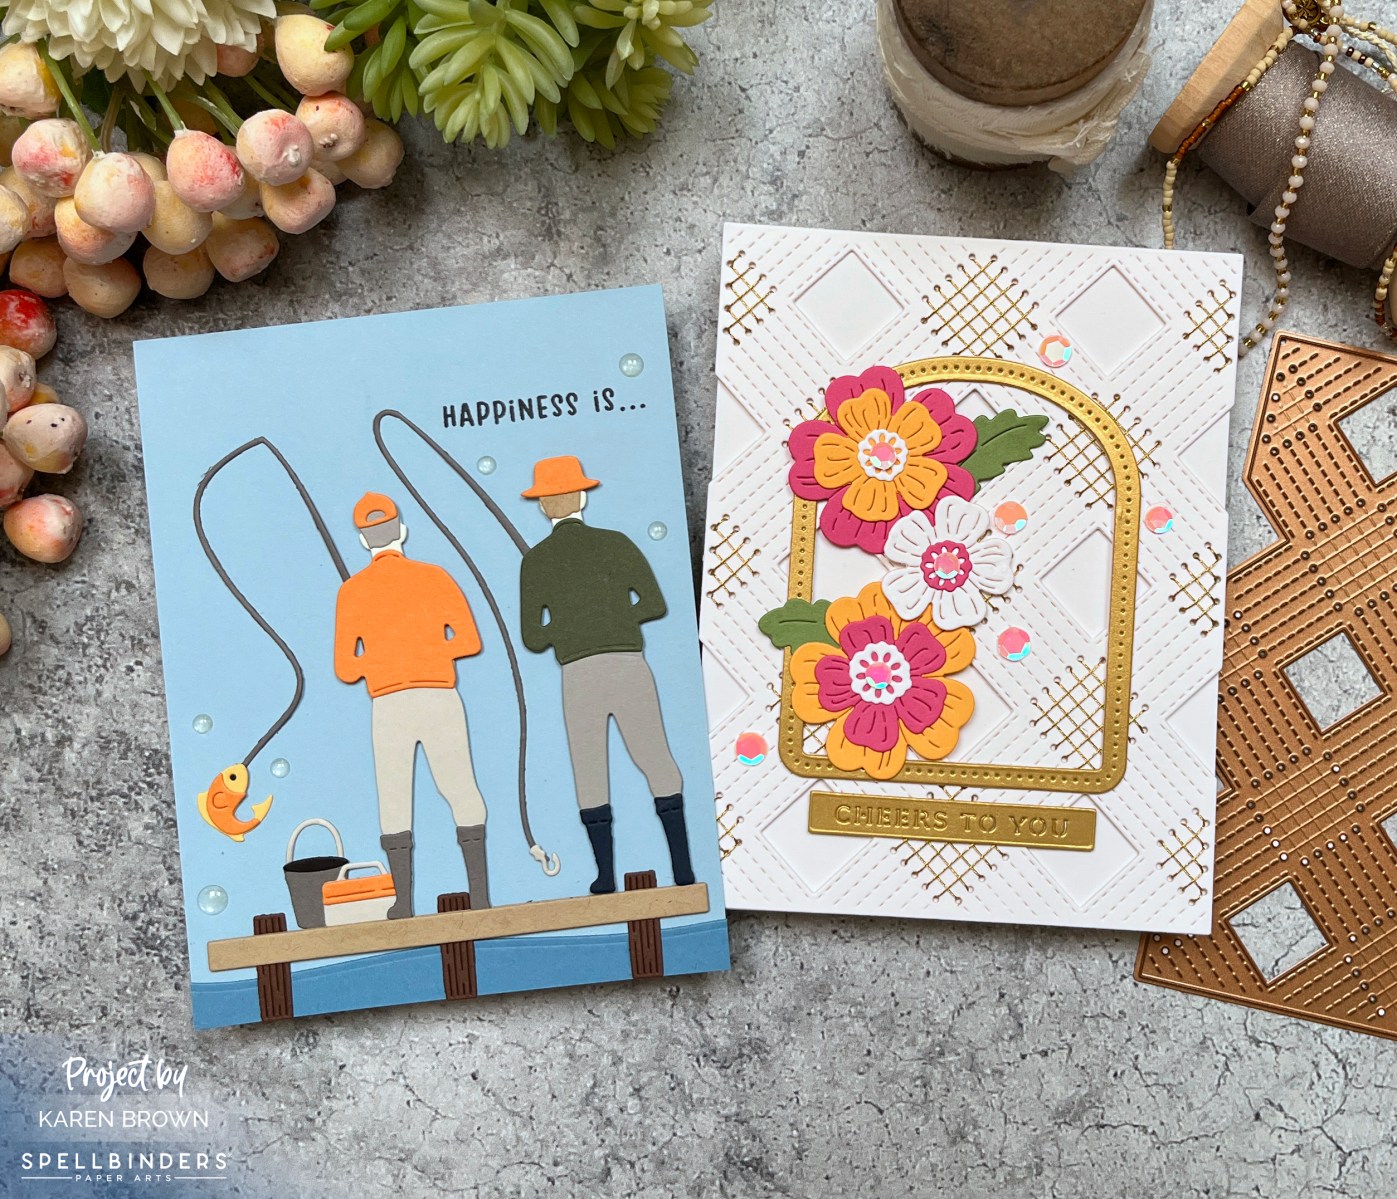
For my second card, I combined the Stitching Club of the Month Kit with the Large Die of the Month, which offers three design options: floral, dog, and dinosaur. I chose the floral dies and paired them with the intricate stitching background for a stunning, textured effect.

The stitching panel was cut from white cardstock and hand-stitched with gold thread, giving it a luxe feel. Then, I added die-cut flowers in pink, orange, and white, accented with gold, to create a truly elegant design. Stitched cards always have that “WOW” factor, and this one is no exception—handmade beauty that recipients love!

One thing I love about the stitching die background is that it’s just as beautiful unstiched. I plan to use it that way in the future for a more subtle yet equally stunning effect.

Notes About This Card:

Two beautiful handmade and die-cut cards created with Spellbinders March 2025 Club Kits.

Helpful Links:

Final Thoughts

March’s Spellbinders release has something for everyone—whether you’re crafting for the outdoorsman in your life or making a stitched masterpiece. Which of these styles speaks to you the most? Let me know in the comments!

Die cutting · papercrafting · Video

VIDEO HOP | Bold Floral Die Cutting | Hero Arts

Bold colors, layered florals, and die-cutting magic—this card has it all! In this post, I’m sharing how I used the Hero Arts Small and Large Floral Layering Fancy Dies to create a vibrant, dimensional floral card with a striking meadow green background.

Welcome to a burst of bold color and creative inspiration! In my latest video, Bold Floral Die Cutting, I’m excited to share how I created a vibrant, layered floral card that’s both eye-catching and easy to make. This post is part of a fun Video Hop, so be sure to check out the other amazing creators linked below.

You can watch the video below or HERE on my YouTube Channel.

The Supplies That Make It All Happen

For this project, I used the Hero Arts Small and Large Floral Layering Fancy Dies from their new Friendship Blossoms Collection. These dies are incredibly versatile, offering a mix of intricate floral designs that layer beautifully to create dimension and texture. The combination of the small and large dies allowed me to build a dynamic floral arrangement that feels lush and full of life.

Crafting the Bold Floral Card

"Bold floral handmade card featuring die-cut coral, soft pink, navy, and white flowers layered on a rich meadow green background, with a 'Have a Lovely Day' sentiment

In the video, I start by selecting my color palette, focusing on bold, contrasting shades that complement the meadow green background. Then, it’s on to die cutting—lots of it! I show how to layer the floral die cuts to add depth and interest, arranging them into a cohesive design. Finally, I assemble the card, finishing with the sentiment “Have a Lovely Day” for a cheerful touch.

Handmade Floral card with Bold Layered Die-Cut flowers on a striking green background using Hero Arts Small and Large Floral Layering Fancy Dies

Join the Video Hop!

This video is part of a fun video hop featuring talented creators sharing their unique takes on cardmaking. I’d love for you to:

Handmade Die Cut floral card in Meadow Green, Coral, Papaya Orange, Peony Pink, Nautical Blue and Dove White Cardstock.

Thank you for stopping by, and I hope you feel inspired to create your own bold floral cards!

cardmaking · Die cutting · papercrafting

Vintage Flower Shoppe Cart | Spellbinders

Handmade square card featuring a die-cut retro French inspired flower cart with a 'Fresh Flowers' sign, filled with coral, pink, blue and white blooms. Baskets of flowers surround the cart, and black enamel dots add detail to the wheels.

Today, I’m sharing a square card featuring the Flower Cart die set from Spellbinders’ Vintage Flower Shoppe collection. With a retro French inspired flower cart, coral, pink, blue and white blooms, and ink-blended details, this project is bursting with charm!

Key Products Used on This Card:

Bringing the Flower Cart to Life

Handmade square card featuring a die-cut retro French inspired flower cart with a 'Fresh Flowers' sign, filled with coral, pink, blue and white blooms. Baskets of flowers surround the cart, and black enamel dots add detail to the wheels.  Dies are from Spellbinders Vintage Flower Shoppe Collection and the Flower Cart Die Set.  S6-253

I fell in love with the Flower Cart die set the moment I saw it—there are so many creative possibilities! For this design, I started by die-cutting all the elements and then ink blending them to add depth and dimension. The soft shading makes the hand cart and baskets of coral, pink, blue and white blooms pop beautifully!

To give the cart a little extra personality, I added black enamel dots as the wheel nuts—a tiny detail that makes a big difference. And of course, the “Fresh Flowers” sign ties everything together with a market-fresh feel.

My completed card is 5 1/2″ x 5 1/2″ and the Teal Topaz background mat is 5 1/4″ x 5 1/4″.

Charming handmade die card featuring a darling flower card surrounded by baskets of colorful flower blooms + a Fresh Flowers sign.

Try It Yourself!

The Vintage Flower Shoppe collection has so many ways to mix and match floral elements. What colors would you use for your dream flower cart?

BetterPress · papercrafting

Ranch-Themed BetterPress Art Projects: Meet Clover and Cotton Ball

Create your own BetterPress framed  and watercolored art pieces of Clover the Cow and Cotton Ball the lamb.

There’s something special about bringing a little piece of the ranch indoors—especially when it comes in the form of charming letterpressed art. Today, I’m excited to share two BetterPress projects straight from my little hacienda, featuring Clover the cow and Cotton Ball the lamb from Spellbinders.

New To BetterPress?

If you’re new to BetterPress or want to refine your skills, check out my previous blog post, “9 Tips, Tricks and Insights for Spellbinders BetterPress Machine,” for helpful advice on how to achieve perfect impressions every time.

Key Products Used in This Post:

Meet Clover the Cow

Spellbinders Clover the Cow watercolored BetterPress Animal Art piece framed to display in home.

Clover isn’t just any cow—she’s inspired by a real-life, flower-munching culprit from my own yard. And yes, she was eating flowers from my garden!

The BetterPress version of Clover captures her mischievous spirit, complete with a whimsical flower wreath perched atop her head.

Inspiration photo for my Cow BetterPress framed art piece.

After BetterPressing Clover, I added soft watercolor washes that brought her to life, highlighting her gentle eyes and the delicate petals in her floral crown. What’s more, the print looks stunning even without the watercolor—just the crisp, tactile impression of the press is beautiful on its own.

Process photo showing my watercoloring technique for colorizing my Spellbinders BetterPress Cow print.

Introducing Cotton Ball the Lamb

Spellbinders Cotton Ball the lamb BetterPress watercolored and framed animal art piece.

Not to be outdone by Clover, Cotton Ball the lamb is equally charming with her own flower wreath. She’s the picture of pastoral sweetness, and the BetterPress captured every curl and detail of her woolly coat. Watercoloring Cotton Ball was a joy, blending soft pastels to match her gentle personality.

Framed with Love

Both prints sit in 4″ x 5″ easel frames that add a touch of ranch-inspired warmth to my home. The textures from the letterpress, the soft watercolor hues, and the rustic frames create an inviting, homey feel that reflects life on my little hacienda.

Try It Yourself

Whether you’re inspired by ranch life or just love the charm of whimsical animal art, BetterPress projects like Clover and Cotton Ball are a joy to create. The prints are beautiful whether you choose to watercolor them or leave them as crisp, letterpressed pieces.

Cardmaking Kit · Die cutting · papercrafting

Spellbinders | Club Kit Cards | February 2025

Spellbinders February 2025 Club Kit Cards:  Large Die of the Month, Small Die of the Month and Stitching Die of the Month die cut handmade cards.

Get ready to fall in love with the Spellbinders February 2025 Club Kits! This month’s releases are packed with charm and creativity, and I’m thrilled to share two whimsical scene cards that will have you reaching for your die-cutting machine in no time.

Easy Stitched Die Cut Bunny Card Full of Charm

A handmade card featuring a die-cut bunny in a spring green dress holding a flower, framed with a stitched border. The background is soft blues and warm yellows, creating a fresh and cheerful scene.  Spellbinders Stitching Die of the Month + Large Bunny Die of the Month.

This first card features the Stitching Die of the Month paired with the Large Die of the Month, creating a darling stitched frame. Inside the frame, a sweet die-cut bunny dressed in a spring green dress steals the spotlight. She’s holding a delicate flower, making this design ideal for Easter, baby showers, or even get-well cards. The soft blues, vivid greens, and warm yellows lend a fresh spring vibe, while the stitched frame adds texture and an elegant touch.

Key Products Used:

Notes About This Card:

Darling Spring die-cut bunny handmade card with hand stitched frame using Spellbinders February 2025 Large Die of the Month  + Stitching Die of the Month Kits.

Step Into Spring with This Floral Shoes Card

 A whimsical handmade card featuring olive green die-cut shoes with blue and olive anklet socks, with bright spring flowers tucked inside. The sentiment reads "Hello."  Spellbinders Small Die of the Month, February 2025.

The second card takes a playful turn with a pair of olive green shoes, complete with stylish blue and olive anklet socks. The Small Die of the Month works its magic, letting you create a unique scene where die-cut flowers are tucked into the patterned socks. You’ll spot the calves of a lady walking confidently into spring, and the sentiment “Hello” ties everything together. Perfect for birthdays, get-well wishes, or just saying hi, this design showcases the versatility of these dies.

Quick Notes About This Card:

  • I started by looking through my patterned paper for some fun “sock material”. I chose this eye-catching circular pattern, but a small floral or plaid would also work great!
  • Once I had my socks, I pulled together other colors that would work well for my scene. I frequently use my Color Cubes when selecting my color palette.
  • I die cut my Small Die Kit components with my Platinum 6 System.
  • I assembled my scene with Bearly Glue, Foam Squares and Craft Foam.
  • The hello sentiment is from my January Small Die of the Month Kit.
  • I cut the buckle and bows from Brushed Gold Cardstock.
Spellbinders February 2025 Small Die of the Month handmade card complete with a pair of shoes, patterned anklet socks and die cut floral blooms.

Helpful Links:

Handmade cards created with Spellbinders February 2025 Club Kits.

Why These Cards Shine

Both cards highlight the magic of die-cutting, with intricate details and stitching that bring each scene to life. Whether it’s the textured frame around the bunny or the whimsical floral shoes, these designs are sure to inspire intermediate and advanced crafters alike.

Cardmaking Kit · Die cutting · Rainbow Colors

Hero Studio | February Release and Blog Hop

Hello, crafty friends! It’s time to shake off those winter blues as we play with the new Hero Studio February Release!

Smile, It’s a Beautiful World

Bright and colorful handmade card with repeating die-cut 'smile' sentiments in rainbow colors, topped with a heat-embossed sentiment."

For my first card, I used the Hero Studio February 2025 Card Kit of the Month, which is packed with fabulous sentiments. My design features repeating die-cut “smile” sentiments in a rainbow of colors, arranged in perfect rainbow order.

How I Made This Repeating Die Cut Sentiment Card:

  • Each sentiment was die cut three times per color, stacked, and glued together for added dimension and impact.
  • I used my favorite Hero Hues Cardstock Colors: Ultra Pink, Papaya, Kiwi, Bermuda, Paradise, Peacock, Amethyst and Cherry.
  • I found the card layout worked best by gluing in the following order: pink, lime, orange, peacock, paradise, bermuda, red, amethyst.
  • To complete the design, I added a heat-embossed sentiment that reads “It’s a beautiful world”, which is also included in this month’s kit. The result is a bright and happy card that’s sure to bring a smile to anyone’s face
Bright colorful die-cut handmade card created with the February 2025 Hero Studio Card Kit.

What’s Inside the February 2025 Hero Studio Card Kit?

February 2025 Card Kit of the Month: Tulips            
               • Tulip HeroScapes Clear Stamp Set, 6” x 8”
               • Circling Clouds Cling Stamp, 6″x 6″
               • Messages Clear Stamp Set, 4″ x 6″
               • 7 Tulip HeroScape Coordinating Dies
               • 4 Word Fancy Dies with Frame Cuts
               • 5 Messages Coordinating Dies
               • 4 Ink Cubes (Thistle, Azalea, Moss, Blue Raspberry

Rainbow color-themed sentiment card showcasing stacked die-cut 'smile' sentiments on a crisp white card.

February 2025 Hero Studio Kits:

The Whole Studio includes ALL 5 of the monthly subscriptions in one discounted bundle. Cling of the Month, Clear + Dies of the Month, Layering Stencil of the Month, Fancy Dies of the Month, and the Card Kit of the Month.

This month, receive a FREE adorable “bug” die set when you purchase The Whole Studio!

Hero Arts has many different Monthly Kits that you can subscribe to including:

A Planter Full of Blooming Delight!

handmade die-cut planter box card featuring wisteria, daffodils, and blue blossoms on a stenciled cobblestone wall background.

The February Fancy Die Kit is a gorgeous planter box brimming with vibrant spring flowers like wisteria, daffodils, and delicate blue blossoms.

How to Create a Cheerful Floral Scene Card:

  • The Kit die cuts are layered with care to create a dimensional, cheerful garden scene.
  • I used Hero Hues cardstock in the following colors: Charcoal, Amethyst, Passion Flower, Iris, Meadow, Periwinkle, Peacock, Mist, Mustard and Papaya.
  • To add texture and interest, I stenciled a Cobblestone background with white Hero Wax, placing it “here and there” for a soft, rustic touch. I love the pearlessence that the wax adds to my project and the crisp white background makes the floral colors—shades of purple, yellow, and blue—pop beautifully.
  • A sweet “My Friend” sentiment (February Card Kit) ties the whole design together, making this card perfect for brightening someone’s day.
  • I added a few Sunset Enamel Dots for flower centers.
Using White Hero Wax to stencil a subtle pearlescent background for a Spring die cut floral card.

These designs are packed with die-cutting fun and stenciled charm, making them perfect for crafters who want to try something fresh.

Two lovely spring die-cut cards in bright fun colors.  One is floral and other has repeating smile sentiment sin rainbow color order.

Join the Blog Hop Fun!

Don’t miss out on the February Blog Hop—a celebration of creativity featuring incredible projects from the Hero Arts Creative Team. Be sure to hop along, leave a comment, and check out the other amazing designs. Who knows? You might just discover your next favorite crafting idea!

Hero Arts will give away a $50 gift card, drawn from the comments left across the hop. Enter by Saturday, February 8 at 11:59pm PST, and the winner will be announced on the Hero Arts blog the following week. Leave a comment on all stops for more chances to win!

Hero Arts
Hero Arts Creative Team:
Seeka
Rosie Lopez
Rachel Kleinman
Natasha Vacca
Natasha Polite
Mindy Eggen
Michelle Short
Michelle Lupton
Lisa Tilson
Karen Brown
Jennifer Kotas
Jeannie Lieu
Charlene Madrid
Channin Pelletier
Anna Mahtani
Special Guests:
Nichol Spohr
Rebecca Keppel
Kelly Taylor


Let’s spread some crafty joy—one handmade card at a time. Happy hopping!

cardmaking · Rainbow Colors · Tutorial

Rainbows & Glitter: Tips on Making Your Own Glitter Cardstock

Tips and Tutorial on how to make a floral rainbow card with a custom tinted DIY glitter cardstock background.

Hi there! I’m so happy to share a card project that combines whimsical charm with vibrant color. If you love crafting as much as I do, you’ll want to stick around for all the dreamy details.

The Star of the Show: A Floral Rainbow

A handmade card featuring a colorful die-cut floral rainbow with fluffy white clouds, set against a sparkling custom glitter cardstock background and a bold scripty 'hello' sentiment

To me, Hero Arts Floral Rainbow and Clouds stamp and die bundle feels like a burst of happiness! I perched my rainbow and clouds on a custom background made of handmade glitter cardstock. By combining blue and green metallic shimmer sprays on watercolor paper, I created a sparkling, ethereal look that mimics a sunny sky. Now, let’s dive into the details of this colorful creation!

Key Products Used:

A colorful handmade card featuring Hero Arts Floral Rainbow stamp and die bundle.

At the heart of this design is a vibrant rainbow that I stamped and brought to life with Copic markers. The colors are rich yet soft, evoking a dreamy vibe that’s both uplifting and playful. After coloring, I used coordinating dies to cut out the floral arc, ensuring clean lines and perfect dimension. It’s not just a rainbow; it’s a celebration of color and joy!

Copic Colors Used: RV02, RV04, RV10, YR02, YR07, Y06, Y08, YG01, YG03, G43, BG11, BG45, B0000, B41, V01, V15

How To Make Your Own Custom Glitter Cardstock

Creative Process Photo: "An in-progress shot of painting blue and green shimmer sprays onto watercolor paper to create a custom glitter cardstock background."

Creating your own glitter cardstock is easier than you think and adds a personalized touch to your projects. Here is how I created my background:

  • I taped a panel of watercolor paper to a hard board and brushed water over the surface with a flat brush. I didn’t saturate the paper, but I did add a light coating of water.
  • Next, I mixed Blue + Shimmer Tone on Tone Metallic Spray with just a hint of Green + Shimmer Tone on Tone Metallic Spray in a paint palette and then painted the mixture on the wet watercolor paper with a damp flat brush. These sprays are very pigmented, so start with a little and add additional spray if you want more intense color, or more water if you want a more muted shade. I applied two layers but I didn’t bother to let it dry in between.
  • I let my shimmer panels dry overnight, but you could speed up the drying with your heat tool.

Experiment with different color combinations to make your custom glitter cardstock truly one-of-a-kind!

A shimmering custom-made glitter cardstock background in blue  green hues, adding sparkle and dimension to the card design.

To finish my focal point, I heat embossed the beautiful scripty “hello” sentiment that is included in the bundle.

Glitter can be tricky to capture on camera, but I hope you can see shimmer and sparkle in this close-up photo.

Close up shot of DIY handmade glitter cardstock to use in cardmaking, papercrafting and scrapbooking.

Who wouldn’t love a little rainbow magic in their mailbox? Let’s keep spreading those handmade vibes, one card at a time! 🌈✨


Cardmaking Kit · Die cutting · papercrafting

Spellbinders | Large Die of the Month Kit | Colorful Floral Card

Hello, hello! Today’s card features Spellbinders Large Die of the Month Kit for January 2025. The Botanical Atrium, is a die-cut lover’s dream with gorgeous floral details, a luxurious gold frame, and a fresh aqua-and-coral palette.

Creating With the Large Die of the Month Kit | January 2025

I used shiny gold cardstock to make the atrium stand out against a crisp white background, and wow—does it ever pop! Inside the frame, delicate coral and aqua florals cascade in a lush arrangement, creating a playful yet refined design. I’ll be using the florals on loads of future cards!

Key Products Used:

It’s a great time to buy paper because Spellbinders is having a Paper Party Sale until January 26th!

Textured Touches: The Brick Background

To add a subtle yet striking detail, I stenciled a brick pattern on the white background using grit paste. Just here and there, mind you—like peeking through a garden wall. This little bit of texture gives the card depth without taking attention away from the gorgeous die-cut elements. It’s understated but oh-so-effective!

January 2025 Papercrafting Kits and Blog Posts

This year, I’ll be creating with 3 Spellbinders Kits each month. I’ve already published two posts that you might enjoy reading:

  1. Hello Gorgeous! Crafting with Spellbinders Die of the Month Kit (Dragonfly)
  2. Spellbinders | Stitching Die of the Month | Ladybug

Helpful Product Links:

If a club did not sell out, you can buy under “Shop Past Clubs”. Past kits are available on the 10th of the FOLLOWING month.

The January Card Kit is both timeless and modern, and is a must-have for your stash. I hope you enjoyed my little creation!

cardmaking · Cardmaking Kit · Die cutting

Hello, Gorgeous! Crafting With Spellbinders Die of the Month Kit | January 2025

Spellbinders January 2025 Die of the Month - Dragonfly - handmade card in gradients of pink with a pop of green.

I’m sharing a colorful and versatile “hello” card featuring the January 2025 Small Die of the Month Kit from Spellbinders. This $15 kit ($27 value) features a stunning die-cut dragonfly, a lovely scripty sentiment, and I added a playful pink Eyelet Scallop Border to complete my card. With gradients of pink and fresh green taking center stage, this card is perfect for any occasion where a cheerful greeting is in order!

Bold, Bright, and Beautiful

A bright and cheerful handmade card featuring a die-cut dragonfly in gradient shades of pink and green, paired with a scripty “hello” and a Scallop Eyelet Border.

By layering gradients of pink and green Cardstock, I brought this little beauty to life, creating dimension and a sense of movement. The result? A dragonfly that feels as light and airy as the real thing.

LINK to Spellbinder’s Small Die Card of the Month Kit.

Tips for Creating the Perfect Dragonfly

  • Choose Gradient Cardstock: Using gradient shades of pink + green gives the dragonfly a cohesive, polished look. I used Hero Arts Cardstocks in Peony, Ultra Pink, Plum and Meadow and added a scrap of fog gray. The border is die cut from Ultra Pink Cardstock.
  • Helpful Tools: I found my Ninja Jewel Picker to be quite helpful in placing my die cuts. I used my 9″ Sheers for trimming the border and my Platinum 6 for all my die cutting.
  • Gluing Order: For the wings, I started gluing the bigger outer pieces and worked my way toward the smaller pieces.
  • Add A Colorful Border and Die-Cut Edge: Die-cut borders in bold colors provide a playful frame that complements the dragonfly and makes your design pop. I used the new Eyelet Scallop Border dies to create an interesting border and edge.
  • Stack the Sentiment: The scripty “hello” sentiment adds a playful and welcoming touch. I added a slightly offset plum hello shadow behind the Ultra Pink sentiment to add some dimension.
  • Keep It Crisp: A white background ensures the colorful elements remain the focal point of the card.

You might also like to read my recent Stitching Club of the Month Post: Ladybug

Bold Bright and Beautiful Dragonfly card crafter using Spellbinder January 2025 Small Die of the Month Kit.

Helpful Product Links:

If a club did not sell out, you can buy under “Shop Past Clubs”. Past kits are available on the 10th of the FOLLOWING month.

Charming Simplicity: The Second Card

Charmingly simple CAS Hello die cut card in hot pink featuring Spellbinders Eyelet Scallop Border S4-1413 from the Vivid Expressions Collection.

For the second card, I focused on creating a minimalist yet striking CAS design. Featuring an Ultra Pink Eyelet Scallop Border and edge, this card radiates charm with its simple yet bold details. The lovely “hello” sentiment (January Small Die of the Month Kit) perfectly complements the intricate border. The crisp white background ensures the vibrant pink tones remain the star of the show. This design proves that sometimes, less is more when it comes to crafting heartfelt greetings!

Why These Cards are So Versatile

Sometimes you need a card that works for just about any occasion, and these dragonfly and scallop border designs fit the bill. Whether you’re saying hi to a friend, sending encouragement or thanks, or just want to let someone know you’re thinking of them, these cards are perfect picks.

Until next time, keep crafting, keep smiling, and keep sending those handmade hellos! 🌸✨


BetterPress · cardmaking

Cozy Little Hello Cards with BetterPress: Winnie the Pooh Scenes

Step into the nostalgia of the Hundred Acre Wood with these Winnie the Pooh-inspired hello cards! Using BetterPress letterpress plates, I crafted three unique designs that bring timeless charm to life. From sepia-toned simplicity to vibrant watercolor scenes, these cards capture heartwarming moments perfect for sending a cheerful note.

Few things evoke a sense of nostalgia and warmth quite like the timeless charm of Winnie the Pooh. Using Spellbinders new Friendly Moments BetterPress letterpress plates, I created three unique hello cards that capture moments from the Hundred Acre Wood. Each design features a distinct artistic style, from sepia simplicity to watercolor wonder, and they’re all perfect for sending a heartfelt note.

If you’re new to BetterPress or want to refine your skills, check out my previous blog post, “9 Tips, Tricks and Insights for Spellbinders BetterPress Machine,” for helpful advice on how to achieve perfect impressions every time.

You might also enjoy reading my recent post: A Birthday Card Full of Whimsy: Winnie the Pooh and Piglet Scene

I have links to the key products at the bottom of this blog post.

Now let’s take a closer look at these enchanting creations!

Duo of Winnie the Pooh BetterPress handmade cards from Spellbinders Classic Pooh Collection.

Card 1: Watercolor Wonder

Hello card showing a colorful Winnie the Pooh and Christopher Robin scene, hand-painted with Inktense Watercolor Pencils over a black BetterPress impression.

I used a heartwarming scene of Christopher Robin and Pooh on the bridge and added a pop of color with Inktense Watercolor Pencils and a damp round paint brush. Pressed with Black ink on Watercolor Paper, the BetterPress impression provides crisp lines that beautifully anchor the soft, vibrant hues of the watercolors. And there was no ink bleeding when watercoloring with the BetterPress Inks! The river sparkles in shades of blue, the bridge has rustic wooden tones, and Pooh’s honey-yellow fur shines against the greenery. The Hello Sentiment is from A Friend Like You set. The card base is Cup O Joe, which is a perfect pairing for this scene. This card is a great way to add touch of whimsy and joy to someone’s day.

Card 2: Sepia Simplicity…So Quick and Easy to Make!
Vintage-inspired Winnie the Pooh hello card featuring Christopher Robin and Pooh on a bridge, pressed with Bark brown ink for a sepia look.

This second card exudes vintage charm with a sepia-inspired look. The scene of Christopher Robin and Winnie the Pooh on a bridge, gazing at a flowing river, is pressed with Bark brown ink for a classic, monochromatic feel. The texture and detail of the BetterPress plate truly shine, creating a design that’s simple yet sophisticated. Paired with a Cup O Joe card base, this card is a perfect nod to Pooh’s timeless stories.

This second card was so quick and easy to create and I think it would make a wonderful set of notecards to give as a gift.

Card 3: Polaroid Nostalgia

Whimsical Winnie the Pooh and Piglet hello card framed in a Polaroid-style die cut and colored with vibrant watercolors.

The third card captures a tender moment of Winnie the Pooh and Piglet walking down a quiet road, their backs turned to the viewer. To frame this scene, I used a Polaroid-style die cut frame and label, which adds a playful, nostalgic touch. After pressing the scene in Black ink onto Watercolor Paper, I brought it to life with Derwent Inktense Watercolor Pencils, creating a soft, storybook aesthetic. The vivid colors and the Polaroid look make this card feel like a treasured memory captured in time.


Key Products Used in the Post:

Each of these Winnie the Pooh cards brings a unique flavor of nostalgia and artistry. Which one is your favorite?