Hello, hello! Today’s card features Spellbinders Large Die of the Month Kit for January 2025. The Botanical Atrium, is a die-cut lover’s dream with gorgeous floral details, a luxurious gold frame, and a fresh aqua-and-coral palette.
Creating With the Large Die of the Month Kit | January 2025
I used shiny gold cardstock to make the atrium stand out against a crisp white background, and wow—does it ever pop! Inside the frame, delicate coral and aqua florals cascade in a lush arrangement, creating a playful yet refined design. I’ll be using the florals on loads of future cards!
It’s a great time to buy paper because Spellbinders is having a Paper Party Sale until January 26th!
Textured Touches: The Brick Background
To add a subtle yet striking detail, I stenciled a brick pattern on the white background using grit paste. Just here and there, mind you—like peeking through a garden wall. This little bit of texture gives the card depth without taking attention away from the gorgeous die-cut elements. It’s understated but oh-so-effective!
January 2025 Papercrafting Kits and Blog Posts
This year, I’ll be creating with 3 Spellbinders Kits each month. I’ve already published two posts that you might enjoy reading:
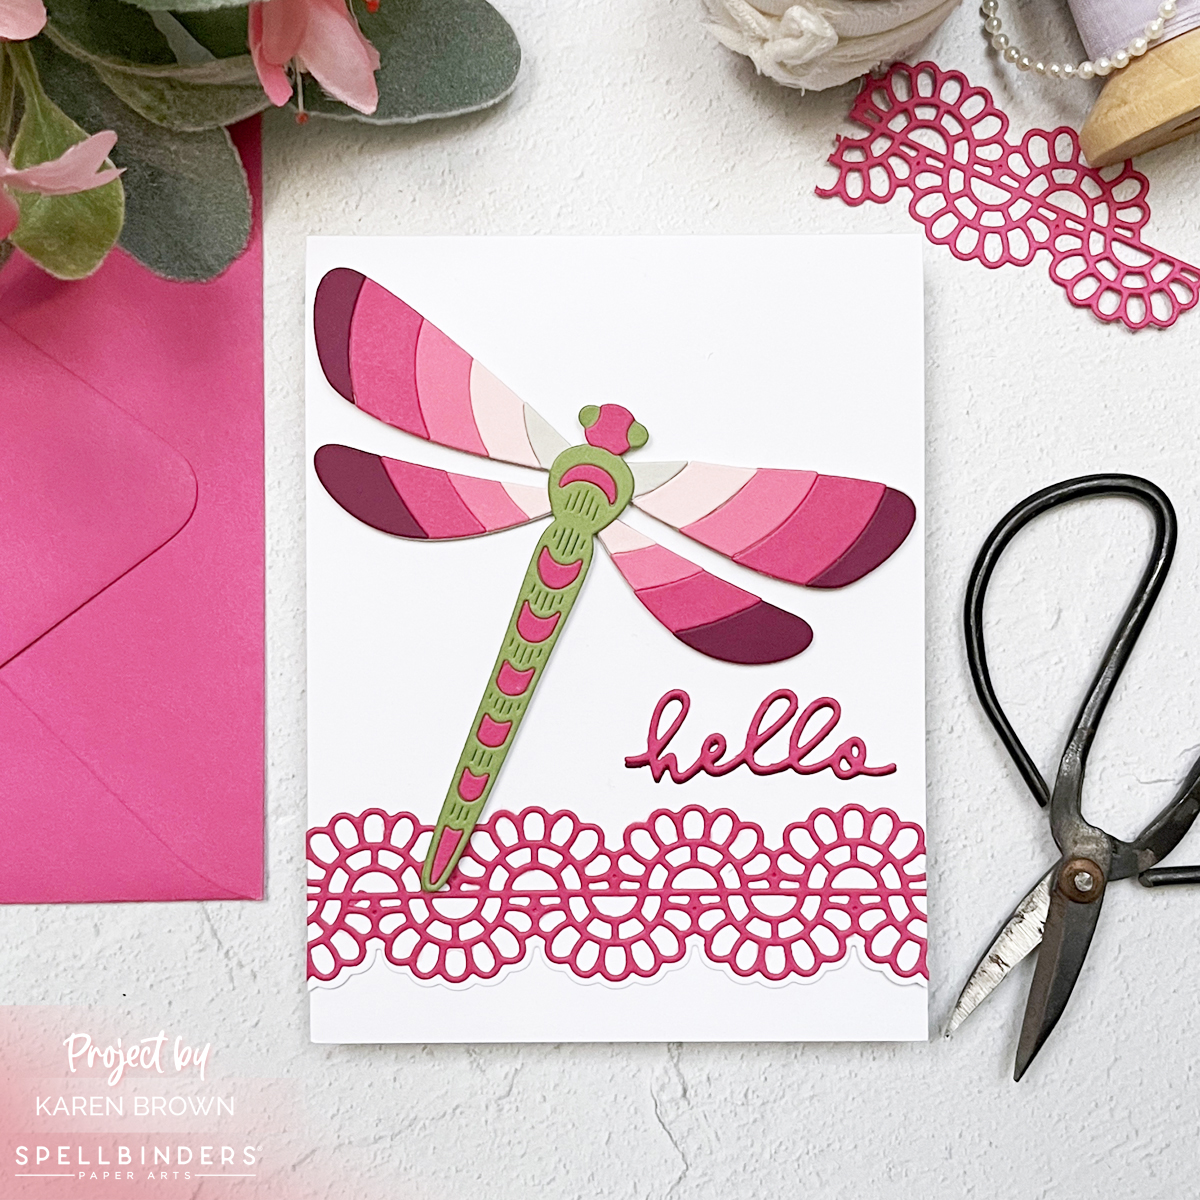
I’m sharing a colorful and versatile “hello” card featuring the January 2025 Small Die of the Month Kit from Spellbinders. This $15 kit ($27 value) features a stunning die-cut dragonfly, a lovely scripty sentiment, and I added a playful pink Eyelet Scallop Border to complete my card. With gradients of pink and fresh green taking center stage, this card is perfect for any occasion where a cheerful greeting is in order!
Bold, Bright, and Beautiful
By layering gradients of pink and green Cardstock, I brought this little beauty to life, creating dimension and a sense of movement. The result? A dragonflythat feels as light and airy as the real thing.
LINK to Spellbinder’s Small Die Card of the Month Kit.
Tips for Creating the Perfect Dragonfly
Choose Gradient Cardstock: Using gradient shades of pink + green gives the dragonfly a cohesive, polished look. I used Hero Arts Cardstocks in Peony, Ultra Pink, Plum and Meadow and added a scrap of fog gray. The border is die cut from Ultra Pink Cardstock.
Helpful Tools: I found my Ninja Jewel Picker to be quite helpful in placing my die cuts. I used my 9″ Sheers for trimming the border and my Platinum 6 for all my die cutting.
Gluing Order: For the wings, I started gluing the bigger outer pieces and worked my way toward the smaller pieces.
Add A Colorful Border and Die-Cut Edge: Die-cut borders in bold colors provide a playful frame that complements the dragonfly and makes your design pop. I used the new Eyelet Scallop Border dies to create an interesting border and edge.
Stack the Sentiment: The scripty “hello” sentiment adds a playful and welcoming touch. I added a slightly offset plum hello shadow behind the Ultra Pink sentiment to add some dimension.
Keep It Crisp: A white background ensures the colorful elements remain the focal point of the card.
You might also like to read my recent Stitching Club of the Month Post: Ladybug
If a club did not sell out, you can buy under “Shop Past Clubs”. Past kits are available on the 10th of the FOLLOWING month.
Charming Simplicity: The Second Card
For the second card, I focused on creating a minimalist yet striking CAS design. Featuring an Ultra PinkEyelet Scallop Border and edge, this card radiates charm with its simple yet bold details. The lovely “hello” sentiment (January Small Die of the Month Kit) perfectly complements the intricate border. The crisp white background ensures the vibrant pink tones remain the star of the show. This design proves that sometimes, less is more when it comes to crafting heartfelt greetings!
Why These Cards are So Versatile
Sometimes you need a card that works for just about any occasion, and these dragonfly and scallop border designs fit the bill. Whether you’re saying hi to a friend, sending encouragement or thanks, or just want to let someone know you’re thinking of them, these cards are perfect picks.
Until next time, keep crafting, keep smiling, and keep sending those handmade hellos! 🌸✨
Happy New Year, crafty friends! Let’s kick off 2025 with something truly special—Hero Studio’s brand-new January Card Kit is here, and it’s all about spreading love and creativity. This kit invites you to explore a world of vibrant designs that celebrate love in every shade. Plus, we’re celebrating with a Blog Hop full of inspiration and a $50 gift card. You can see the entire January Release HERE.
Colorful Die Cut Hearts: Hero Studio January Card Kit of the Month
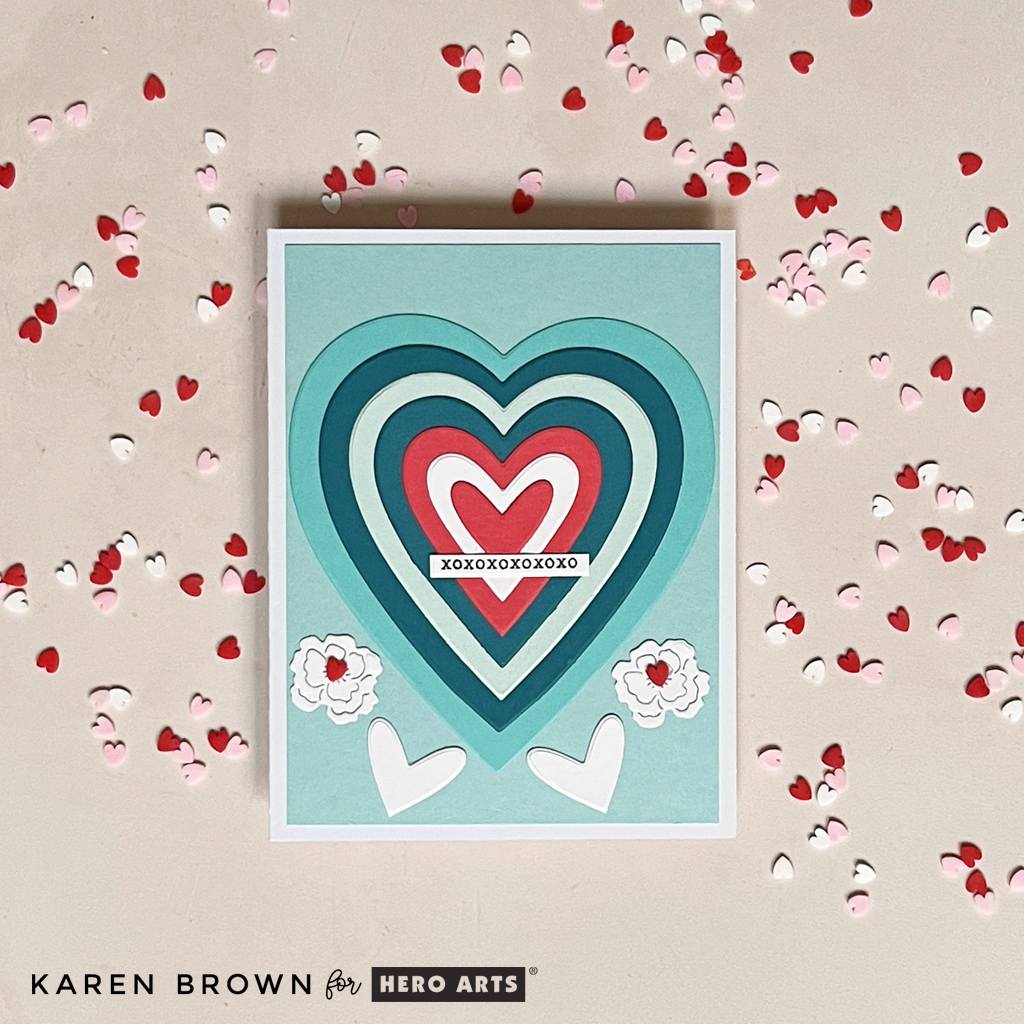
My color palette for the January Kit combines cool teals and aquas with warm pinks, reds, and plums for a luscious duo of cards.
I used the negative, or leftover die cuts, from Card 1 and added a few more hearts to create a second card (below).
What’s Inside the Kit?
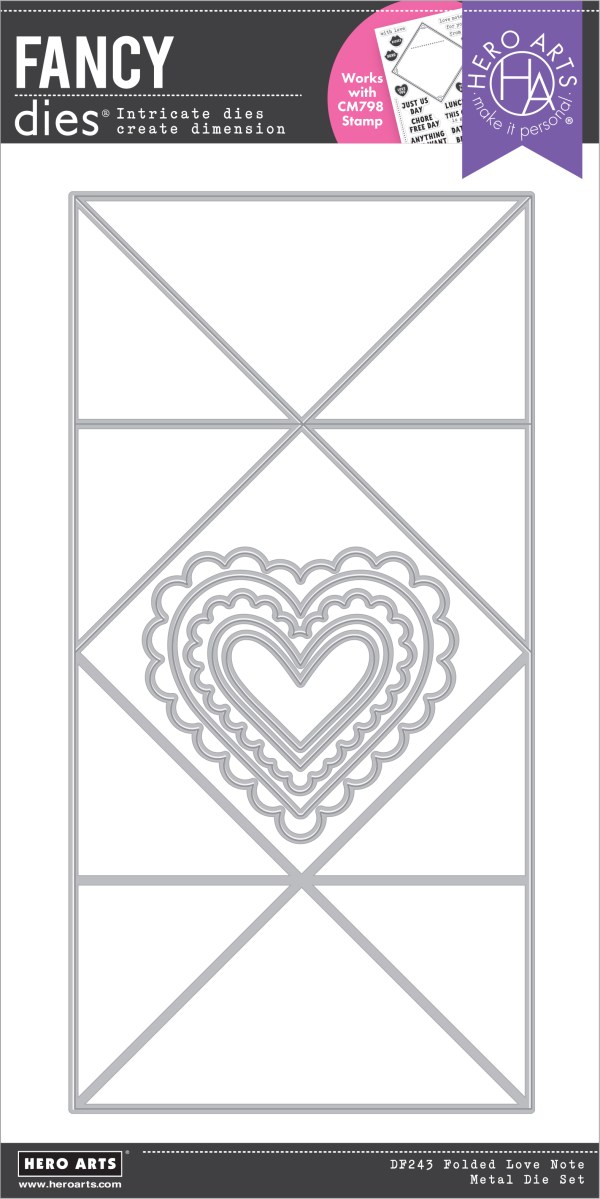
Let’s take a peek inside the January 2025 Kit: • Color Layering Typewriter Clear Stamp Set, 6” x 8”, • Typewriter Messages Clear Stamp Set, 4″ x 6″ • 7 Typewriter Frame Cut Dies • 8 Typewriter Fancy Dies • Nesting Hearts Cover Plate Die • Mini Clay Hearts • 8 Sheets of Cardstock, 5.5″ x 8.5
January 2025 The Whole Studio The Whole Studio includes ALL 5 of the monthly subscriptions in one discounted bundle. Cling of the Month, Clear + Dies of the Month, Layering Stencil of the Month, Fancy Dies of the Month, and the Card Kit of the Month.
Hero Arts has many different Monthly Kits that you can subscribe to including:
The WHOLE Studio – All 5 Kits ($120 subscription + Free Shipping)
Rainbow of Hearts: A Burst of Color | Folded Love Notes Fancy Die Kit
You can craft a unique card using the “Extraordinary Extra” Folded Love Notes. Layer colorful die-cut hearts on the folds to create a dynamic, interactive design…. This is the idea I started with, but once I began die cutting my concept totally changed! I used a vibrant mix of colors from the rainbow and then stacked them on different sized hearts with a high contrast value. I love the end result. All the hearts were cut with dies from the kit. I used Cardstock in the following colors: Arctic, Paradise, Adriatic, Kiwi, Cranberry, Cherry, Plum, Passion Flower, Amethyst, Peony, Papaya, Azalea.
Join the Blog Hop!
Our Blog Hop is your chance to see this kit in action. Some of your favorite crafters are showcasing their takes on the January Release, and trust us—the inspiration is next-level! Hop along, leave comments on each blog for a chance to win a fabulous prize, and pick up tips and tricks to use in your own projects.
The January Card Kit is available now, but supplies are limited. Be sure to grab yours before they’re gone, and join us on the Blog Hop for a chance to win, get inspired, and start 2025 on a crafty high note!
Let me know in the comments—what’s your favorite element in this month’s kit? ❤️
A hand-stitched Valentine card is a beautiful way to show you care. Whether you’re creating it for a friend, family member, or your special someone, adding a touch of stitching makes it both heartfelt and stylish.
Here’s how to make this charming Valentine from scratch! I shot a quick reel that you can watch HERE, or if you prefer, I also included written notes.
Create a Charming Hand-Stitched Valentine in Pink and Gold
I started by die cutting my Stitching Kit pieces with my Platinum 6 die cutting machine. I die cut the pink stitched background twice and glued them together for easier stitching. I used Pink Sand and Dahlia cardstock from the Happy Day Sampler. The mat was die cut from Brushed Gold, which is a real staple in my craft room.
The Love You dies are included in this month’s kit.
Spellbinders has a nice selection of stitching accessories in their shop that you can find HERE. I stitched the tree and base with DMC Gold and 948 threads. I hope you can see the shimmer!
I used thin double sided tape to secure my floss to the die cuts. I like that this tape is easy to hide behind the die cuts and I don’t even bother to take the top release paper off the tape.
Remember to keep your floss taught as you stitch.
When I move from one area to the next, I run the floss through the just finished stitched area to keep the thread secure. This gives a nice look on the finished project.
Don’t stitch with threads that are too long or they are likely to knot.
When I was done, I added a bit of Bearly Glue to the ends so that they would stay in place.
Club members can cancel, upgrade or change clubs from the 1st-5th of each month. Popular Clubs frequently sell out during this period so club members get first dibs on everything.
Club Members get EARLY access to new releases on the 6th!
On the 6th, Clubs become available to non-members.
On the 27th, Club registration closes for the current month.
If a club did not sell out, you can buy under “Shop Past Clubs”. Past kits are available on the 10th of the FOLLOWING month.
If you’re already dreaming of decking your craft room with fresh supplies, Hero Arts December Release is about to paint your world with inspiration! This month’s theme is color, and it’s bursting with playful possibilities. Imagine stamps that bring your designs to life, a fancy circle-shaped die perfect for creating a BOLD striking focal point, and a die-cut box of crayons that’s as whimsical as it is nostalgic. And let’s not forget the butterflies—because no colorful creation is complete without a touch of fluttery elegance. It’s everything you need to make your cards shine brighter.
A Kaleidoscope of Creativity: December’s Theme is “Color”!
A Colorful Recipe for Success: Hero Studio December Card Kit of the Month
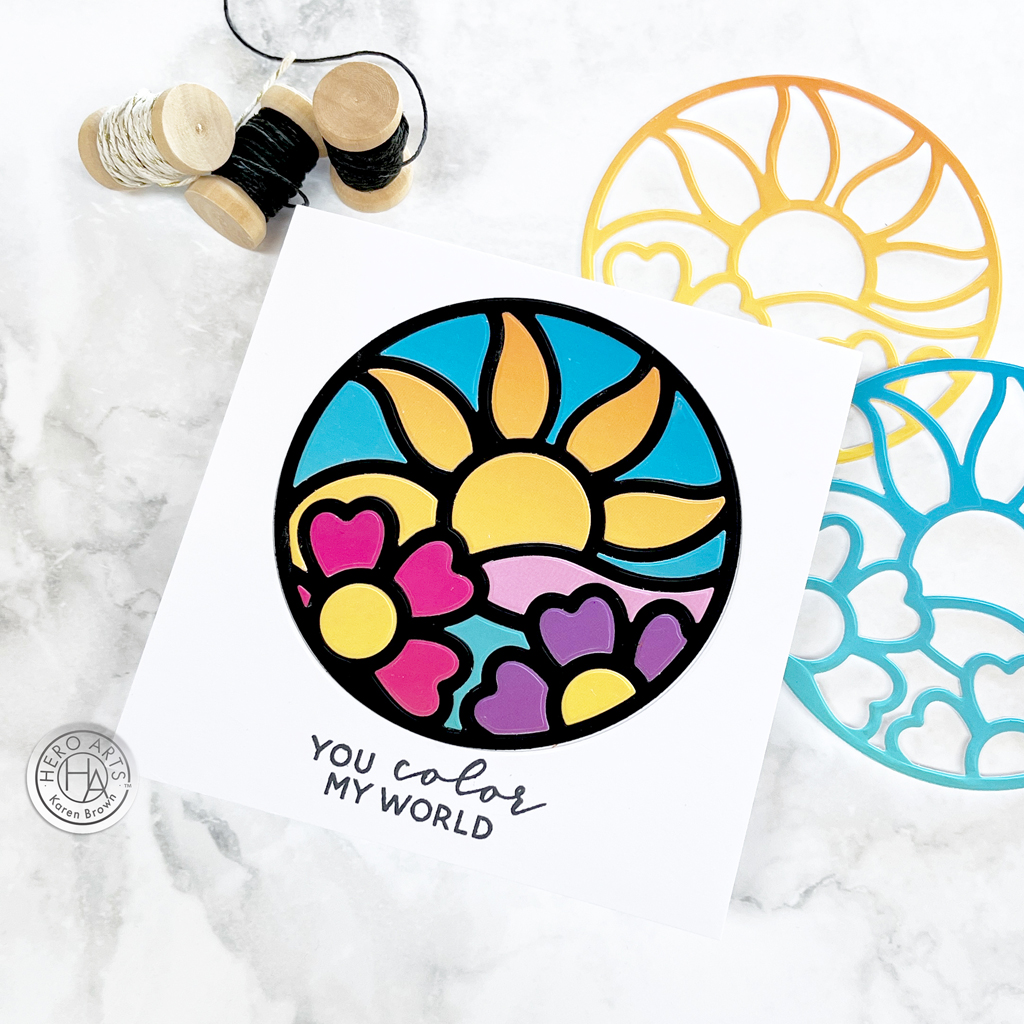
I wanted a bold color palette with variations in shade so I grabbed the new Sky Ombres Hero Transfers for die cutting my Floral Circle Fancy Die (part of the December Card Kit). I used the Inlay Die Cutting Technique which produces a beautiful “stained glass window” look.
Select the colors you want from the Sky Ombres Hero Transfers and rub on white cardstock. I enjoy using Rub-On Transfers and I love the beautiful gradients in this sampler.
With the Floral Circle Fancy Die, cut a circle in a 5″ x 5″ white cardstock panel and stamp the sentiment (included in the kit).
Glue the white panel created in step 3 to a second 5″ x 5″ panel of white cardstock.
Insert your black frame in the round window.
Die cut your colors using the panels you created in step 2. Inset these into the black frame. I kept all the die cut pieces in a small bowl until I was sure I had all the pieces I needed to create my stained glass. I placed each piece prior to gluing to make sure they were all in the correct spot. Once I was happy with my placement, I put glue in the “well” and then placed and glued the die cut components.
This techinque is great for mass-producing cards. You can see two of the leftovoer frames in the top right corner of the photo. These would be beautiful just glued to a card for a bright clean and simple look.
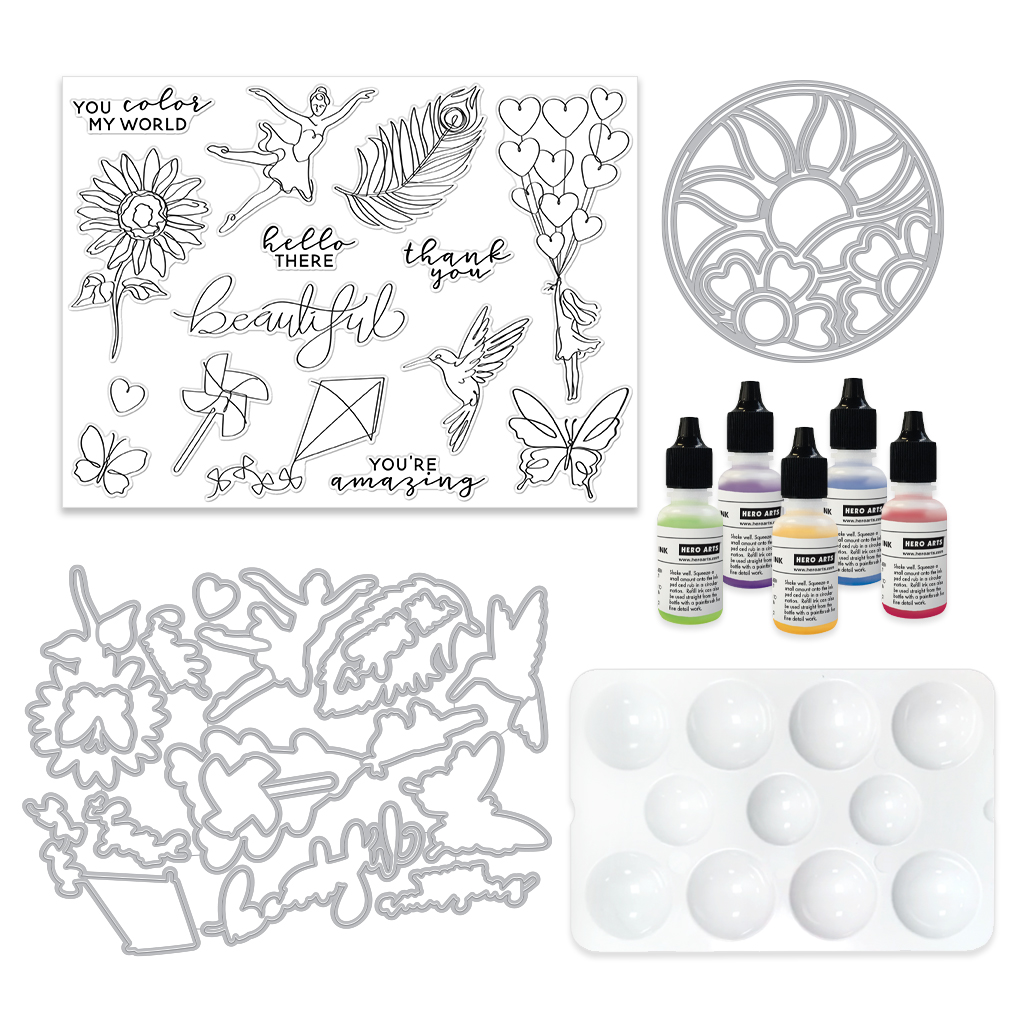
• Clear Stamp Set, 6” x 8” • 15 Coordinating Dies • Floral Circle Fancy Die • 5 Reinkers, 1/2 oz. (Purple Galaxy, Blue Hawaii, Green Apple, Lemon Drop, Fruit Punch) • Plastic Watercolor Palette
5 Wonderful Kit Options:
For this blog post, I created with the December Kit, The Clear Stamp and Dies Kit and two Extraordinary Extras, but there are 5 kits plus 6 Extras available. You can also buy the Whole Studio, which includes all 5 kits at a wonderful savings.
Hero Arts has many different Monthly Kits that you can subscribe to including:
The WHOLE Studio – All 5 Kits ($120 subscription + Free Shipping)
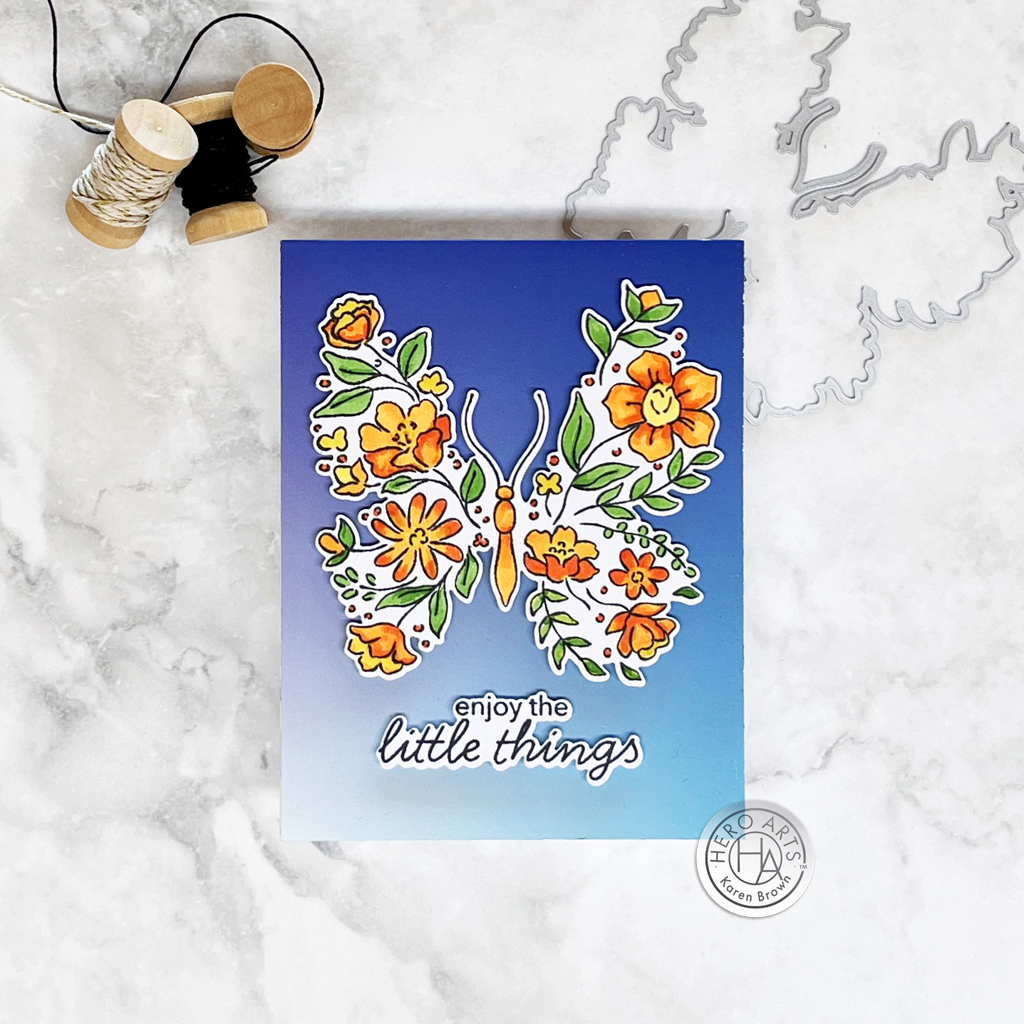
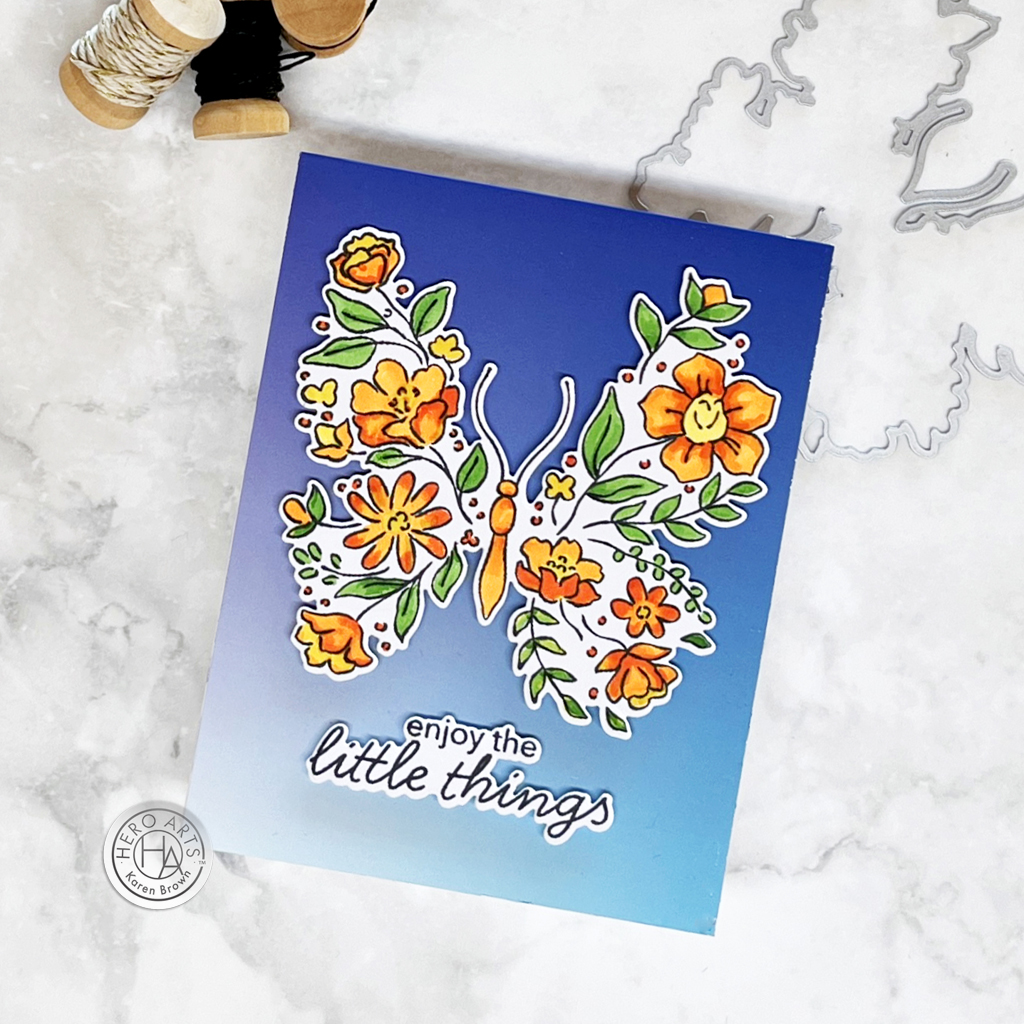
Clear Stamp and Die of the Month: Floral Butterfly
For a card that truly takes flight, try stamping the gorgeous Floral Butterfly as your centerpiece. Use alcohol markers to bring it to life with vibrant shades—blend rich oranges, sunny yellows, and lush greens to make those petals pop. Once your butterfly is a kaleidoscope of color, grab your coordinating die and cut it out. Adhere it to an ombre blue sky background, fading from light to dark, for a dreamy effect. I created my background panel by “rubbing” on the Sky Ombres Hero Transfer onto cardstock. So easy and beautiful! It’s like sending a little piece of summer to your favorite person, no sunscreen required! 🦋✨
Make their birthday extra colorful with a slimline card that’s all about the crayons! I used Box of Crayons Fancy Dies and started by die-cutting a cheerful box of crayons and filling it with every shade imaginable—this is your chance to go full rainbow mode. Hero Arts recently introduced a limited edition sampler of Rainbow Cardstock that is perfect for your favorite colorful die cutting.
I die cut each crayon in two shades of each color and then trimmed the top of the lighter toned “label” with scissors to make for a more realistic crayon look.
Hero Arts will give away a $50 gift card, drawn from the comments left across the hop. Enter by Sunday, December 8 at 11:59pm PST, and the winner will be announced on the Hero Arts blog the following week.
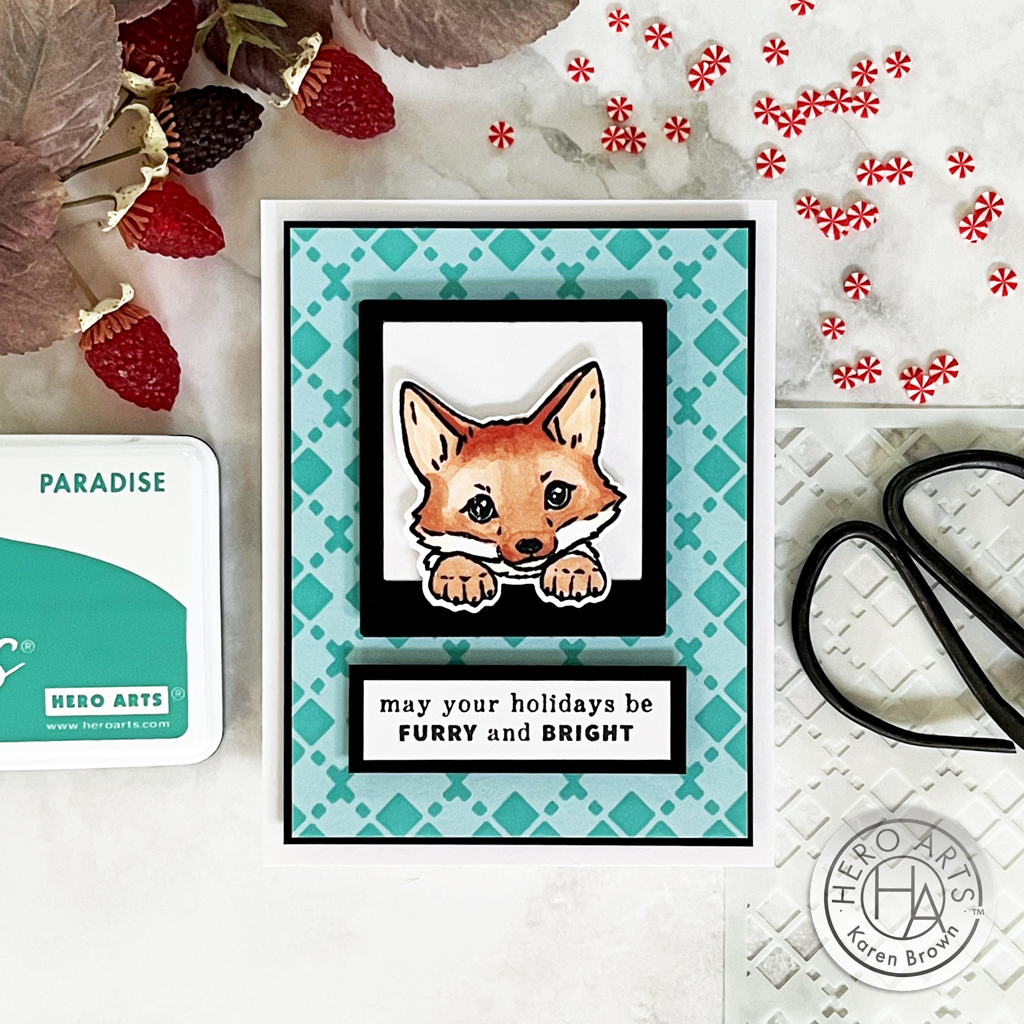
Adorable animals…..yes please! Stamping a cute puppy, reindeer or fox onto a “Holiday”, “Get Well Soon” or “Happy Birthday” card is a wonderful way to share encouragement and celebrate someone special. And it’s not just for the holidays, Hero Arts November Card Kit is going to be a year round favorite in my craft room as my family loves cute critter cards.
And, there are LOTS of changes going on at Hero Arts. I’ve included some Hero Studio changes later in this post, so keep scrolling!
Hero Studio November 2024 Card Kit of the Month
I obviously LOVE this kit! Today I am sharing three cards made with the November Kit and I can’t decide which is my favorite. The kit includes loads of greatness and I used 3 of the 8 charming animal stamps and dies, the two stencils and Merry Christmas sentiment.
Curious about this month’s kit? Let’s take a peek inside the November Card Kit:
KIT INCLUDES: • Peeking Animals Clear Stamp Set, 6” x 8” • 17 Coordinating Dies • 6 Fancy Dies • 2 Sheets Each of Pine & Cherry Cardstock, 5.5″ x 8.5″ • 2 Stencils in Argyle & Cable Knit Patterns, 4.75″ x 6″ • 28 White Die Cut Tags, 4 different styles • White Hero Pearls, 0.6 oz. • Berry Hero Wax, 1 oz.
Kit Cost:
$46 with Subscription + FREE SHIPPING!
$49.99 One Time Purchase (while supplies last)
5 Wonderful Kit Options:
For this blog post, I created with the November kit and two Extraordinary Extras, but there there are 5 kits plus 6 Extras available. You can also buy the Whole Studio, which includes all 5 kits at a wonderful savings.
I wanted to show you two more kit cards that I created. I used to have a sweet blond lab named Shelby, so I created this card with Shelby in mind. Isn’t she darling? My Shelby was with us for 12 1/2 wonderful years.
Sometimes I just like to color, and this Winter Foliage Pattern Stamp Setis perfect coloring fun! The stamps are already perfectly positioned on one large 4×6″ clear stamp, which makes stamping a breeze! I didn’t use it today, but there is also a coordinating Winter Foliage Pattern Cover Die.
Creation Details:
I stamped and Copic colored my foliage elements. Copic colors used: N1, R22, R24, R27, R39, YG03, YG25, YG17, BG11, BG23, Black.
Pro Tip: I added ink splatters by flicking the brush end of my Black Copic Marker along the inside of the cap towards the colored panel. This gives nice small ink splatters. Another easy way to add ink splatters is by putting some Licorice Reactive Ink on an Acrylic Block and then flicking the ink onto the panel with a fine brush or fan brush. Great results either way.
The sentiment is from the Holiday Messages Stamp and Die Bundle and I added a Vellum shadow.
Big Changes at Hero Arts:
Faster Orders: New subscribers will no longer have to wait until the following month to receive their first kit. Now receive the the same monthly design when you subscribe! The sign-up window will be open the 1st – 27th each month. Also, starting in December the Monthly Add-Ons will be available for purchase on the 1st of each month as well.
• Charge Edit Window: Subscription charge day is moving to the 3rd of each month. Beginning in December, we will revealing kits on the 1st, which means you can make subscription changes prior to the charge date following the reveal.
• Subscribers Come First: Non-subscribers will no longer be able to purchase the a la carte products that are live within the Hero Studio month. Those designs will ONLY be available to active subscribers the first month. If there are any leftovers, they will be available for a la carte purchase to non-subscribers the following month.
• Fulfillment Changes: We are also making some fulfillment changes to help us get the orders out quicker and more efficiently. One of the main changes will be the Hero Studio Add-Ons will ship separately from the recurring Hero Studio orders. Subscribers will still receive free shipping on the add-ons for the first week.
Want to learn more about all the changes coming to Hero Studio? Check out the FAQ section of the website.
BLOG HOP:
Hero Arts will give away a $50 gift card, drawn from the comments left across the hop. Enter by Sunday, November 10 at 11:59pm Pacific, and the winner will be announced on the Hero Arts blog the following week.
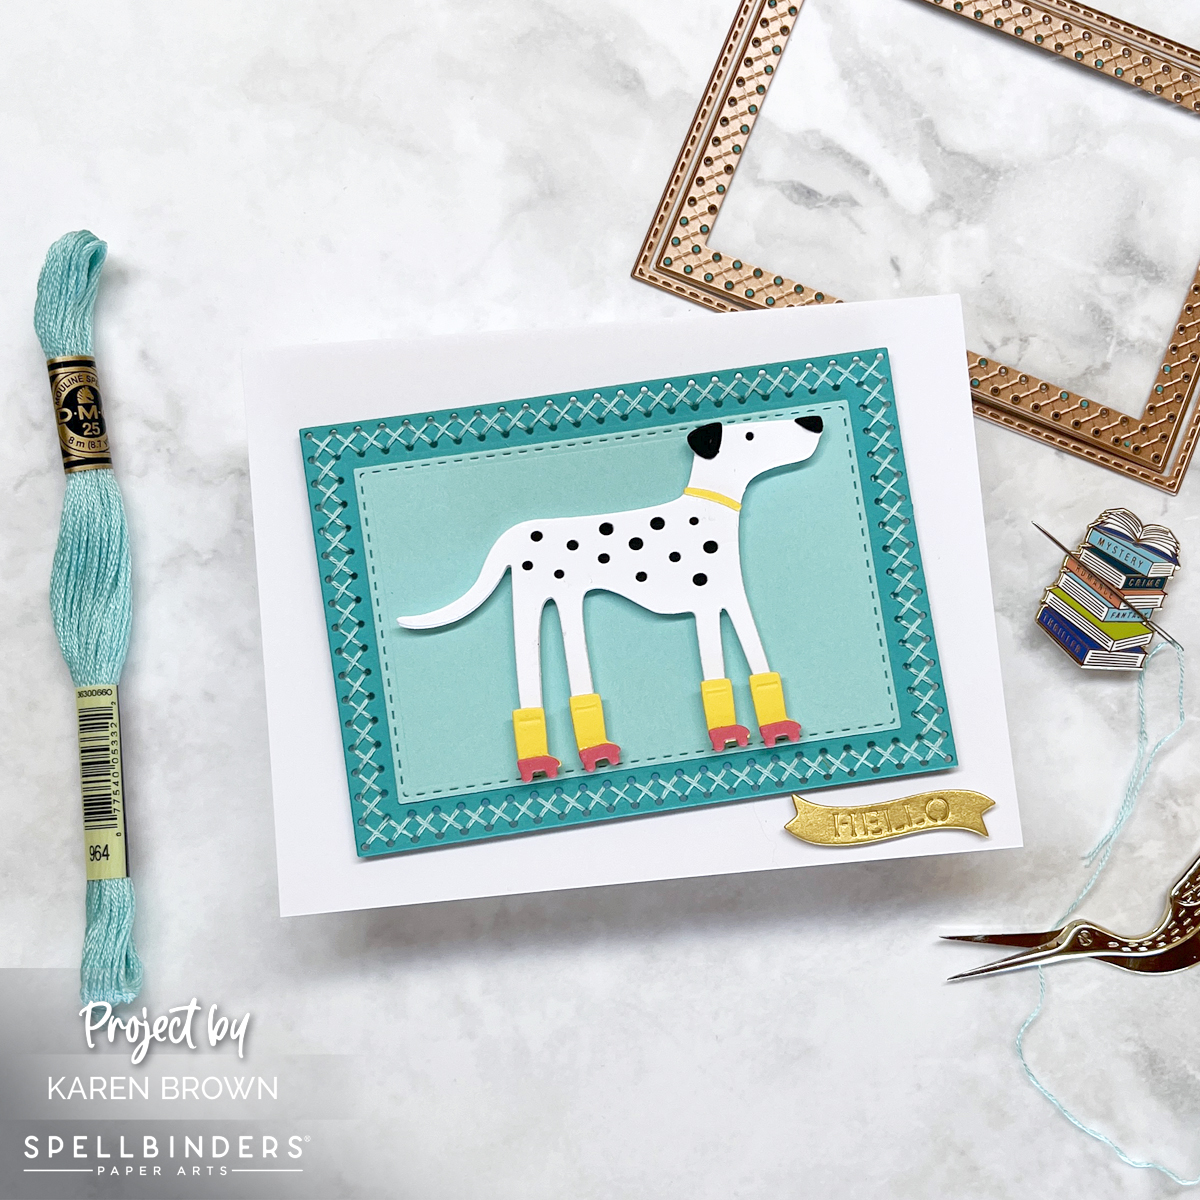
Frames add so much interest and I think this new stitched kit will become a staple in my craftroom. I can never have too many nesting inifity dies and this one would also be so pretty “unstitched”!
Cross Stitch Nested Card Front and Tag Kit
Stitching Kit Tips and Tricks:
I started by die cutting my Stitching Kit pieces with my Platinum 6 die cutting machine. This month’s kit has 7 wonderful cutting dies. I die cut the frame twice and glued them together for easier stitching. The frame is Teal Topaz and the stitched inset is Waterfall that I used from The Assorted Cardstock pack. This bundle has GREAT colors!
Spellbinders has a nice selection of stitching accessories in their shop that you can find HERE. Today, I used DMC 964 that is included in the Color Essentials Cool DMC Bundle. This thread bundle was selected to coordinate with Spellbinders cardstock colors.
When I started stitching, I took two strands of floss, separated them one at a time, brought them together and then stroked and lengthened them until they seemed tame and ready to use.
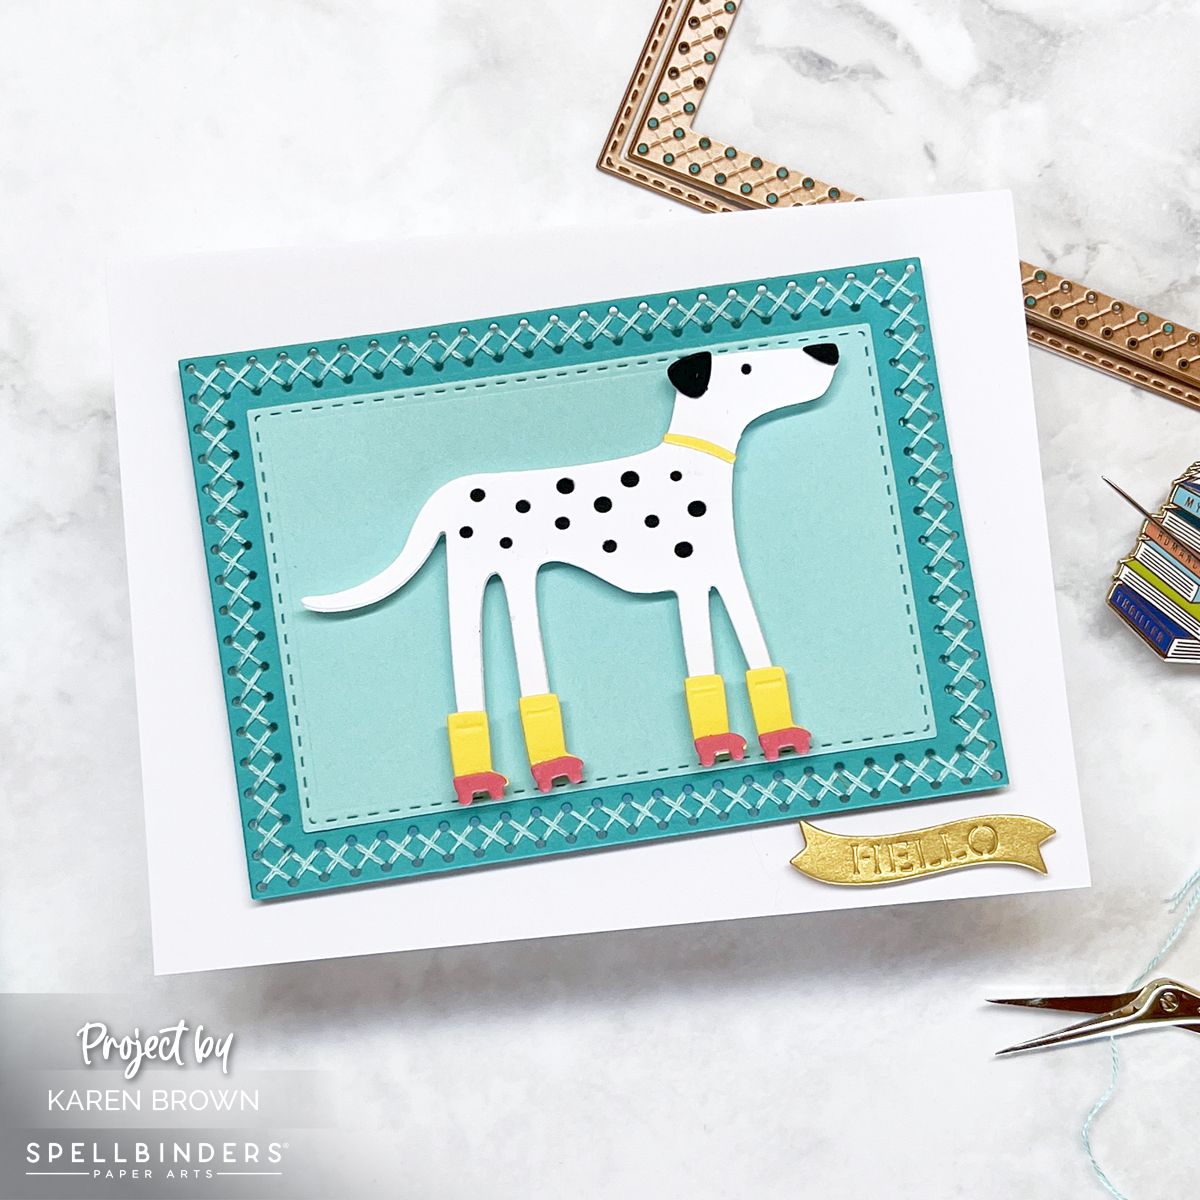
I used thin double sided tape to secure my floss to the die cuts. I like that this tape is easy to hide behind the die cuts and I don’t even bother to take the top release paper off the tape.
Remember to keep your floss taught as you stitch.
When I move from one area to the next, I run the floss through the just finished stitched area to keep the thread secure. This gives a nice look on the finished project.
Don’t stitch with threads that are too long or they are likely to knot.
When I was done, I added a bit of Bearly Glue to the ends so that they would stay in place.
Club members can cancel, upgrade or change clubs from the 1st-5th of each month. Popular Clubs frequently sell out during this period so club members get first dibs on everything.
NEW for 2024: Club Members get EARLY access to new releases on the 6th!
On the 6th, Clubs become available to non-members.
On the 27th, Club registration closes for the current month.
If a club did not sell out, you can buy under “Shop Past Clubs”. Past kits are available on the 10th of the FOLLOWING month.
Today, we’re diving into a delightful project that combines creativity and a sprinkle of love: a hand-stitched Christmas card featuring Spellbinders October Stitching Club of the Month. The kit creates a whimsical Christmas tree under a starry night sky. Let’s get started on crafting a card that your loved ones will cherish!
Merry and Bright Cloche Stitching Kit
I started by die cutting my Stitching Kit pieces with my Platinum 6 die cutting machine. I die cut the stitching pieces twice and glued them together for easier stitching. My sky is navy cardstock and the background is kraft. The stitched base element and star were die cut from Brushed Gold, which is a real staple in my craft room.
The Merry and Bright etched sentiment is included in this month’s kit.
Spellbinders has a nice selection of stitching accessories in their shop that you can find HERE. I stitched the tree and base with DMC Antique Gold Thread. I hope you can see the shimmer!
I used thin double sided tape to secure my floss to the die cuts. I like that this tape is easy to hide behind the die cuts and I don’t even bother to take the top release paper off the tape.
Remember to keep your floss taught as you stitch.
When I move from one area to the next, I run the floss through the just finished stitched area to keep the thread secure. This gives a nice look on the finished project.
Don’t stitch with threads that are too long or they are likely to knot.
When I was done, I added a bit of Bearly Glue to the ends so that they would stay in place.
With scissors, I cut 2 triangles that I added behind the tree to pop it up a bit.
Club members can cancel, upgrade or change clubs from the 1st-5th of each month. Popular Clubs frequently sell out during this period so club members get first dibs on everything.
NEW for 2024: Club Members get EARLY access to new releases on the 6th!
On the 6th, Clubs become available to non-members.
On the 27th, Club registration closes for the current month.
If a club did not sell out, you can buy under “Shop Past Clubs”. Past kits are available on the 10th of the FOLLOWING month.
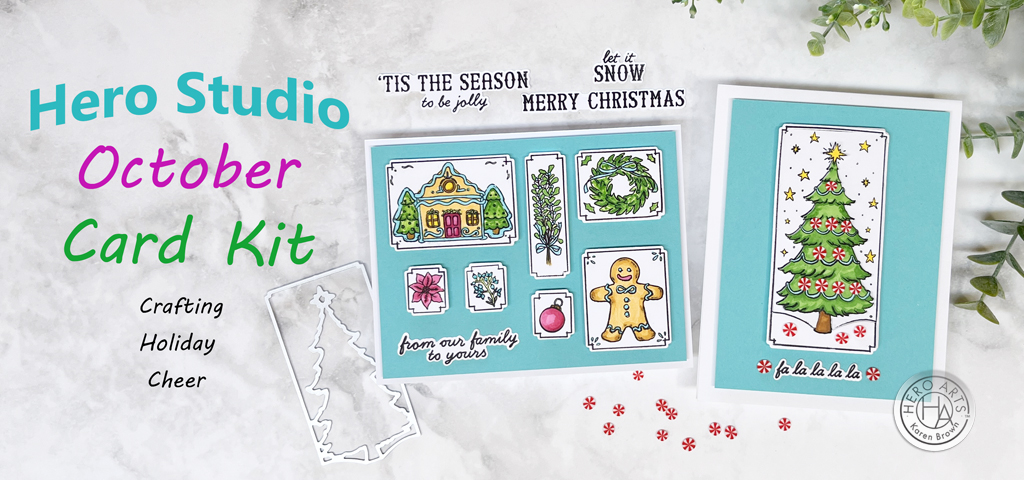
The holiday season is upon us, and that means one thing: it’s time to spread some festive cheer! What better way to do that than by creating your own holiday cards with the NEW Hero Studio October Release.
Plus a Special Promotion!
For just a couple of days, Hero Arts is offering a special 20% off Promo code on past kits: June – September. This includes the 5 kits and the extras that were released during those months.
Helpful Links (Be sure to use the Promo Code: CATCHUP20):
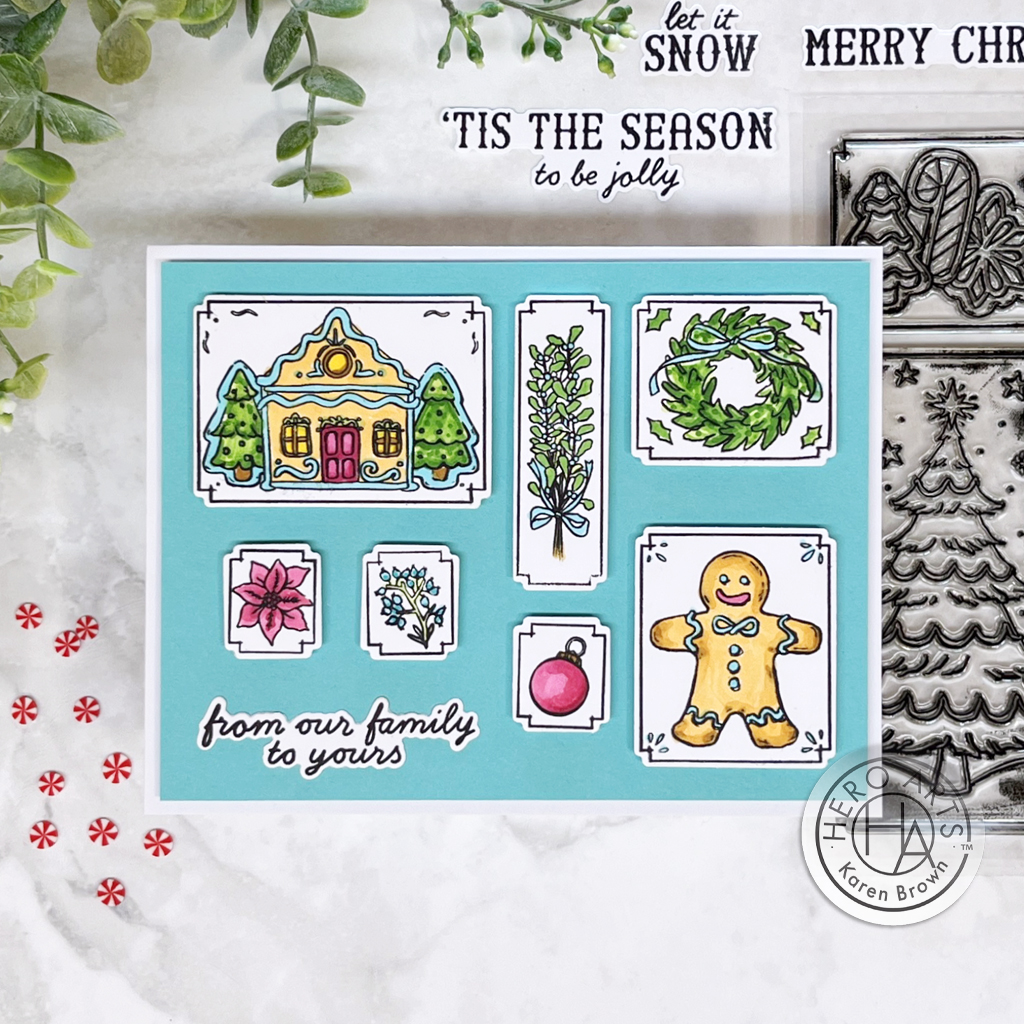
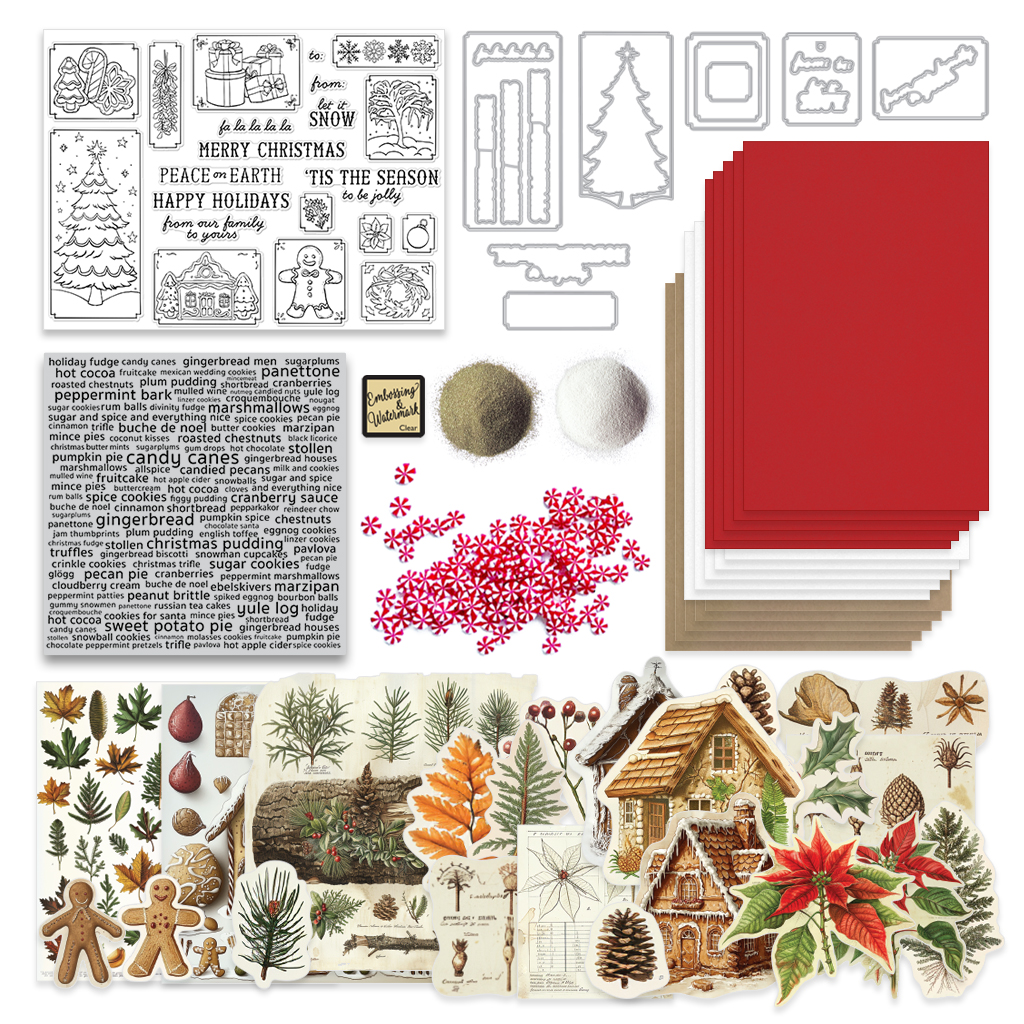
I’ve created two cards with the October Card Kit and I have to say the process released my inner Elf! And those fun Peppermint Candies are included in the kit too! I love all the winter themed stamps and there are also TONS of great sentiment stamps. This is a stand alone kit that contains just about everything you need to craft LOADS of cards!
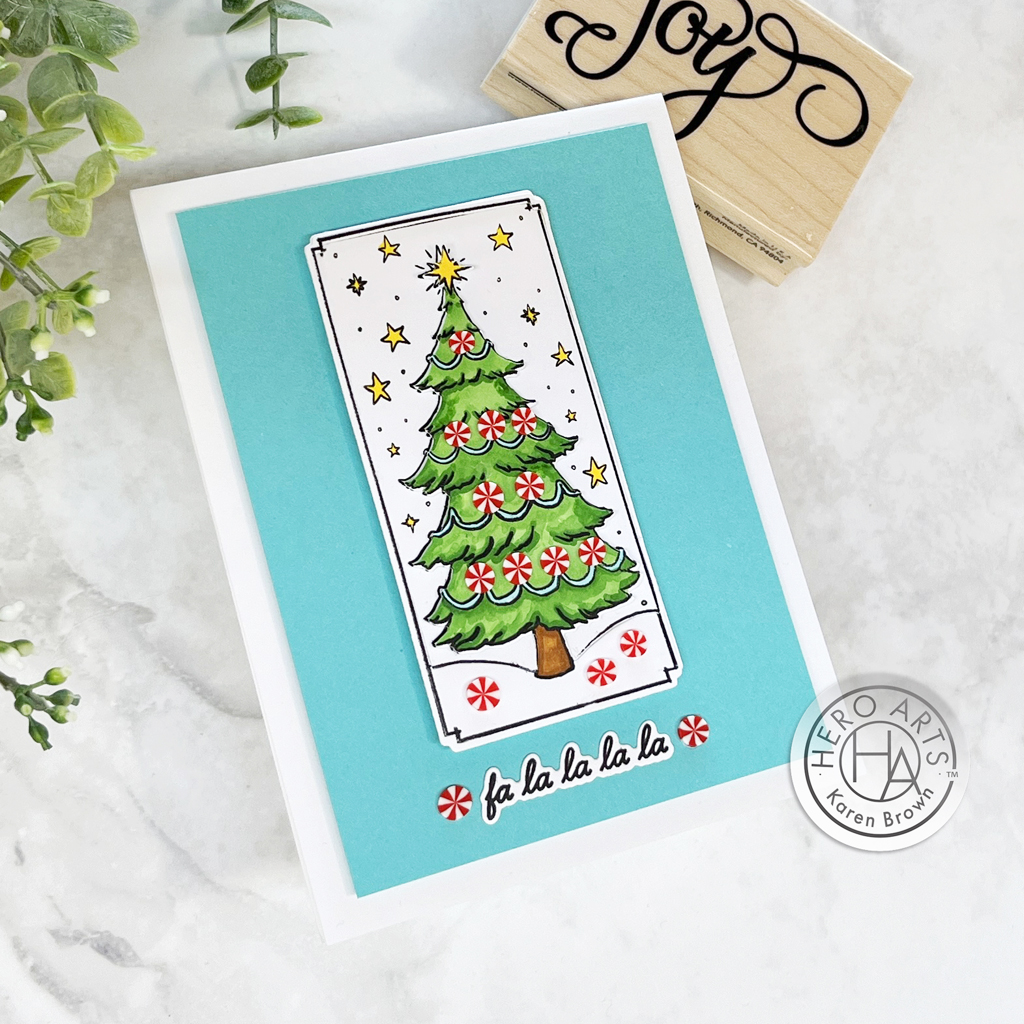
I stamped, colored with alcohol markers and die cut my elements. For the Christmas Tree card, there is an additional outline die you can use so your tree has loads of dimension. With scissors, I cut three triangles that I stacked and glued behind my die cut tree. Once my card was assembled, I added peppermint candy embellishments, which really “frosted” my card.
KIT INCLUDES: • Clear Stamp Set, 6″ x 8″ • 16 Coordinating Dies • Hole Punch Die • Tree Window Die • Holiday Treats Words Cling Stamp, 6″ x 6″ • Washi Sticker Pack, 22 pieces • Embossing & Watermark Ink Cube • 5 Sheets Each of Kraft, White & Red Cardstock, 5.5″ x 8.5″ • Gold Embossing Powder, 0.5 oz • White Embossing Powder, 0.5 oz • Peppermint Clay Embellishments (love these so much!)
Kit Cost:
$46 with Subscription + FREE SHIPPING!
$49.99 One Time Purchase (while supplies last)
The Whole Studio:
And, I’d also like to recommend THE WHOLE STUDIO, which includes ALL 5 Kits at a wonderful savings. The Whole Studio is $120 with subscription (or $138.95 One Time Purchase). That is $72 off!
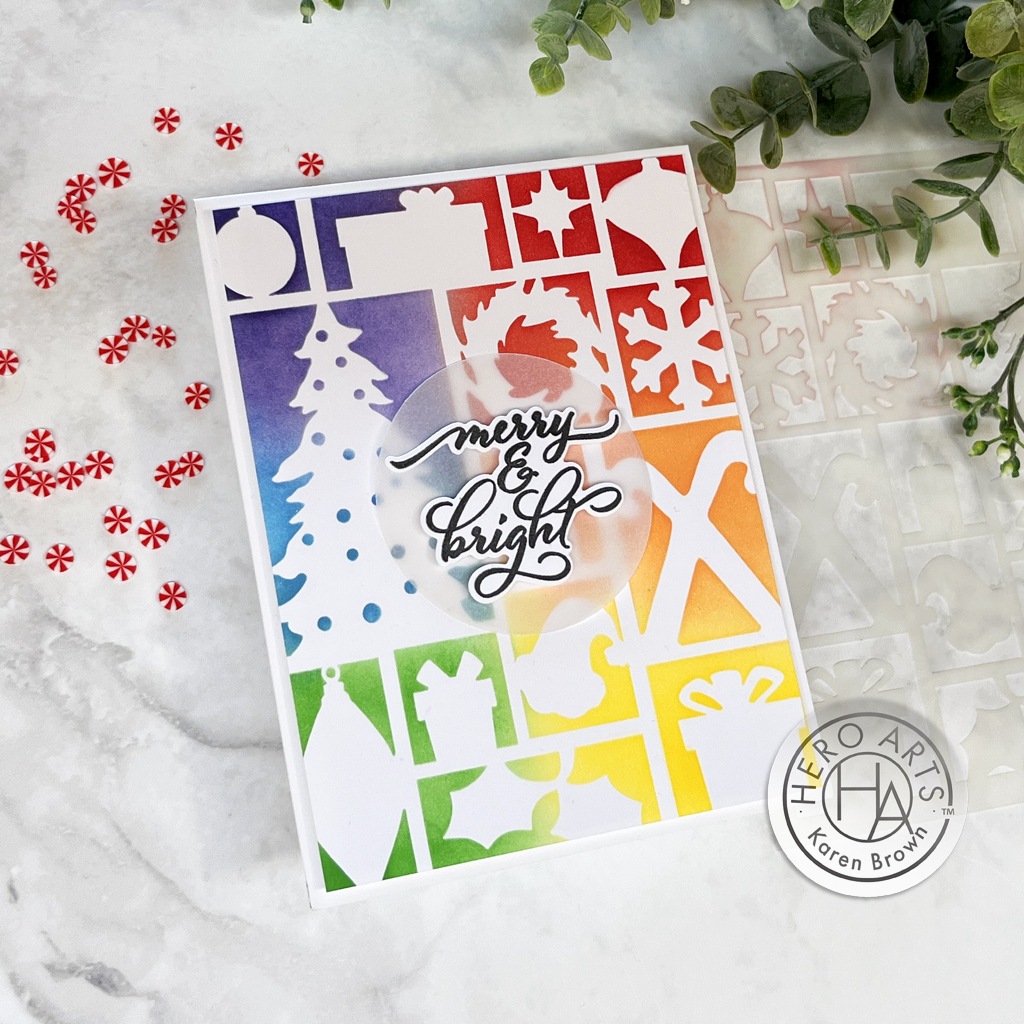
I chose 6 vibrant inks and starting with Lemon Drop, I worked my way around the stencil using my XL Blending Brush. I blended a bit at each color change.
I hope you will join us for the Blog Hop! Each blog will feature a Holiday Theme Project (or two or three!). Be sure to leave a comment so that you are in contention for a $50 gift card.
Fa la la la la….are your ready for Christmas??? I am popping by with a quick peek at the wonderful Hero Studio October 2024 Card Kit of the Month. I can’t give too much away, but here is a bright fun card I created with the kit. The October Kit, Monthly Minis and Extraordinary Extras release on Monday! But, you don’t need to wait because you can subscribe today.
I’ll be back on Monday with two more Hero Studio cards + the Hero Arts Blog Hop. Be sure to come hop with us!
Meanwhile, Hero Arts has TONS of great items in their SHOP so go take a peek!