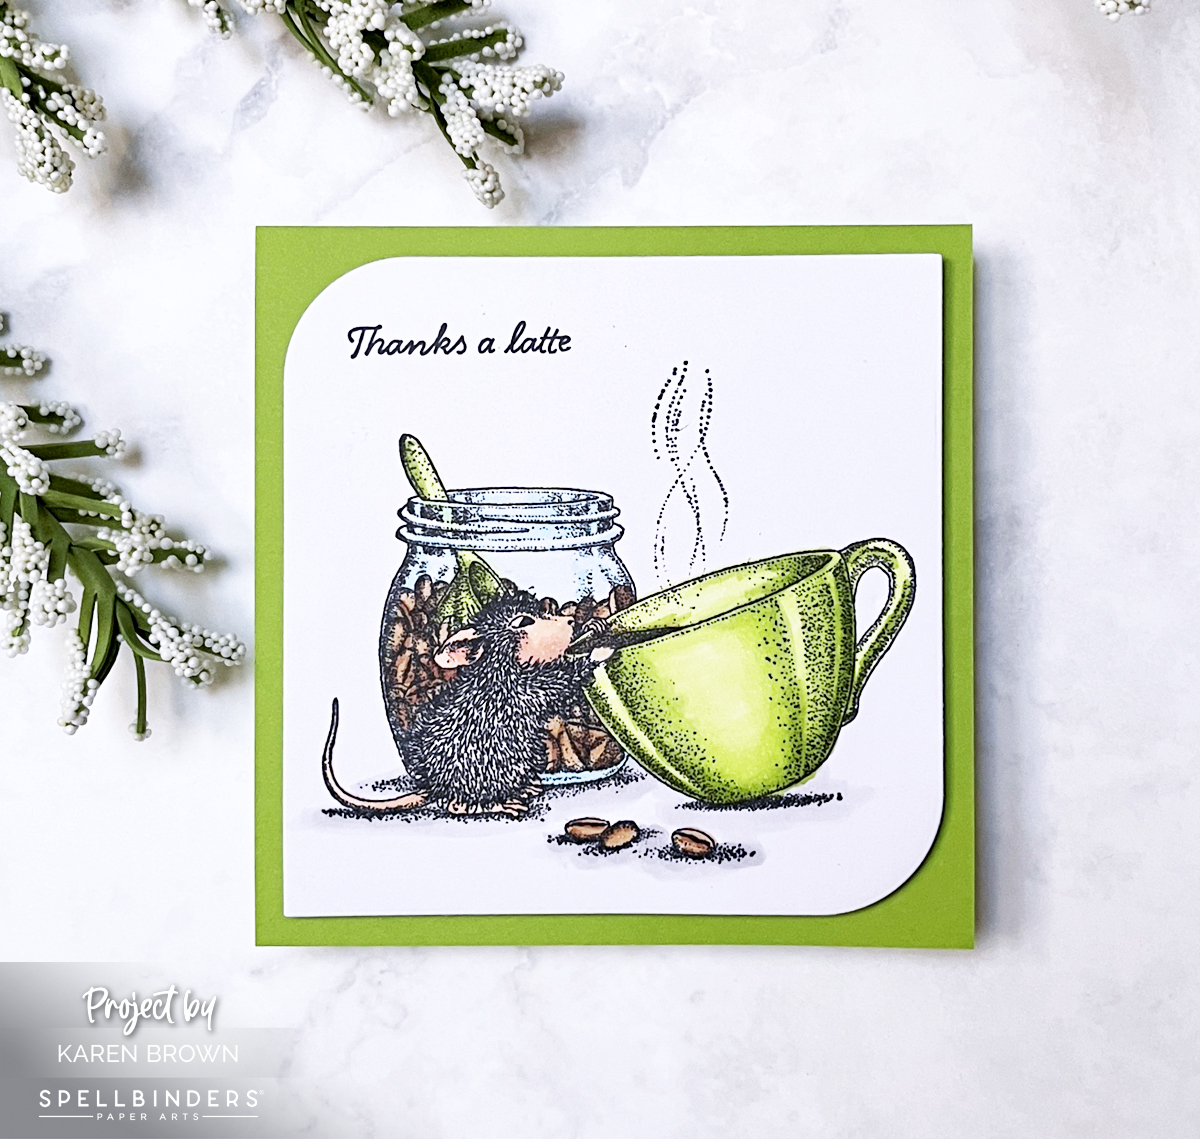
Today I’m sharing a cute square coffee-themed thank you card featuring the House Mouse Brew-tiful Day rubber stamp from Spellbinders. I can never resist a coffee pun, so I went with “Thanks a latte” for my sentiment—one of my all-time favorites!
I stamped the adorable image and colored it with Copic markers:
Copic Colors Used:
Cup & Spoon: YG01, YG03, YG05
Coffee: E55, E25
Glass: BG00, B00
Mouse: E40, E21, R20
Shadows: N0, N1
Before stamping, I simply trimmed the included sentiment using my Spellbinders Shears so only “Thanks a latte” remained—super easy! The little scene includes our sweet mouse taking a sip from a giant (to him!) latte cup, with a coffee bean canister behind him. Such a cute little tableau!
This card comes together very quickly and is so fun to color. House Mouse is always popular with card recipients—every little mouse scene just makes you smile!
I’ll link to several other House Mouse posts I’ve created, because I just can’t resist these sweet little critters. You can see House Mouse is a definite favorite!
Whimsy and Cheer – 3 House Mouse cards I created for the Spellbiners Blog
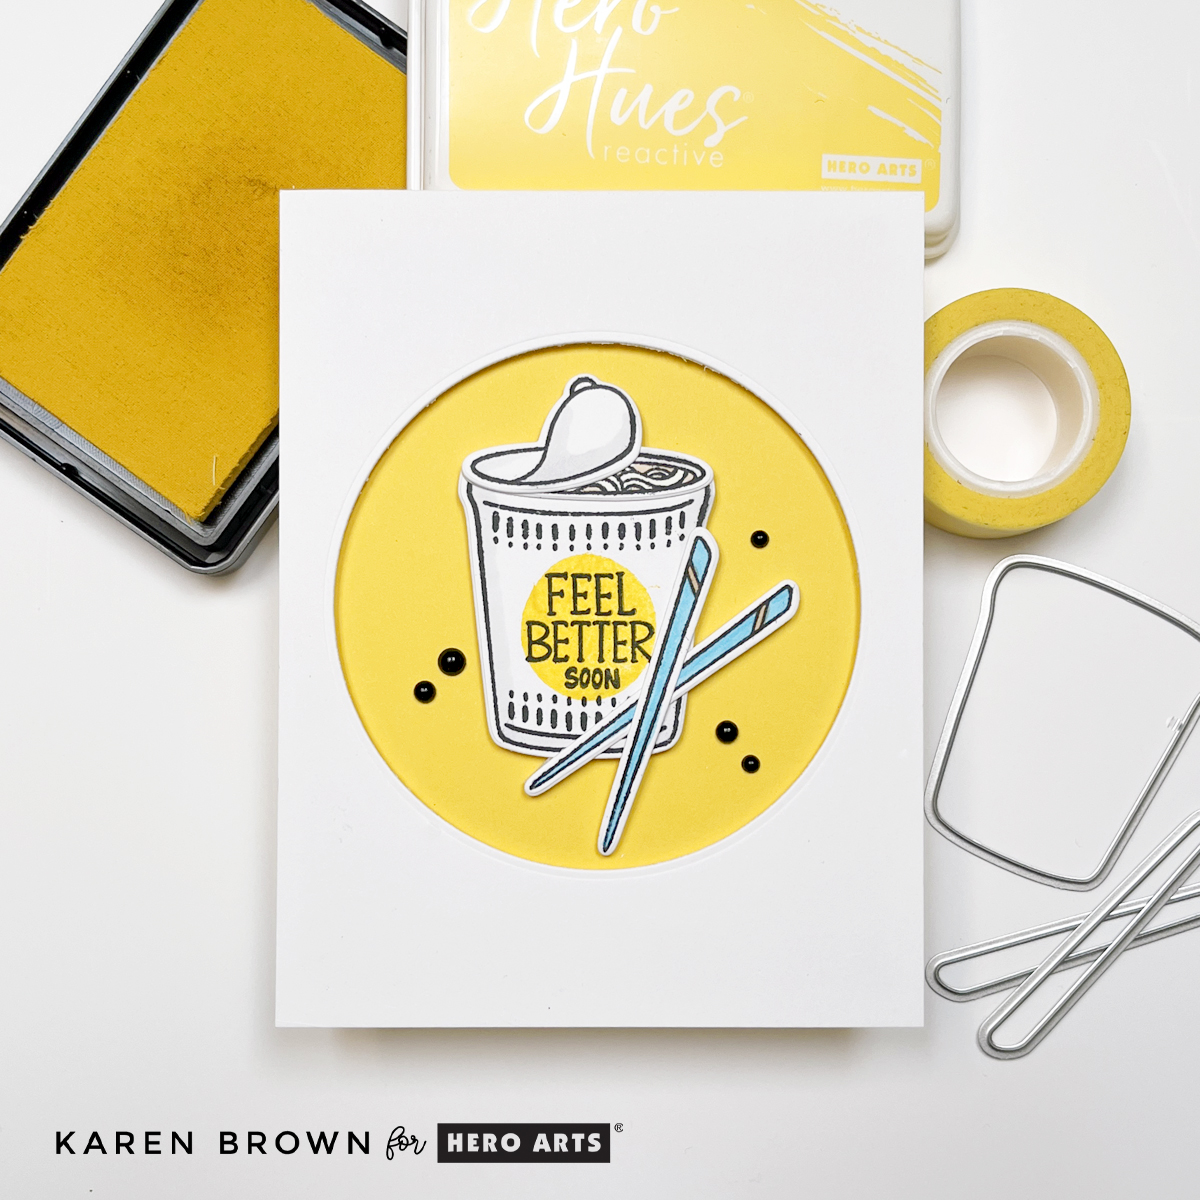
The December 2025 Hero Arts Stamp & Die Kit of the Month is called Cup of Love, and it’s perfect for creating quick, modern, and heartfelt get well cards. I always need get well cards on hand, so I love having clean and simple designs that I can mass produce—and this one definitely delivers.
This month’s kit features a charming soup cup, chopsticks, labels, and warm “feel better” sentiments that make it easy to whip up comforting cards for friends and family who need a little cheer.
Clean + Modern Design With Easy Stamping
For today’s card, I leaned into a fresh white and yellow color palette with pops of crisp black stamping and a hint of blue. The combination feels clean, modern, and cheerful—just the mood you want in a get well card.
Next, I stamped the round yellow label with Lemon Drop Ink. I waited a minute for the ink to dry, stamped the sentiment “feel better soon” and die cut the image.
I stamped and colored the blue chopsticks, die cut them, and crossed them for a playful finishing touch.
For the background, I die cut a circle from the center of a white A2 cardstock panel using my Hero Arts Nesting Circle Dies.
I layered this white panel over a yellow A2 card base, popping it up with craft foam for dimension.
In the recessed yellow circle, I glued the soup cup and chopsticks.
Finally, I added five black enamel dots. These tiny accents brought so much contrast and visual interest to the finished design.
The result? A clean and cheerful get well card with modern charm and just enough shading and dimension to feel special—without slowing you down.
Interested in two other recent Get Well Cards I created? Click HERE.
Tip for Mass Production
If you want to make a full batch of these cards (and I definitely recommend it!), simply die cut a yellow circle and adhere it directly to a white card base. Or alternatively, you could ink blend a yellow circle. You can skip the popped-up window panel and still get the same bold pop of color.
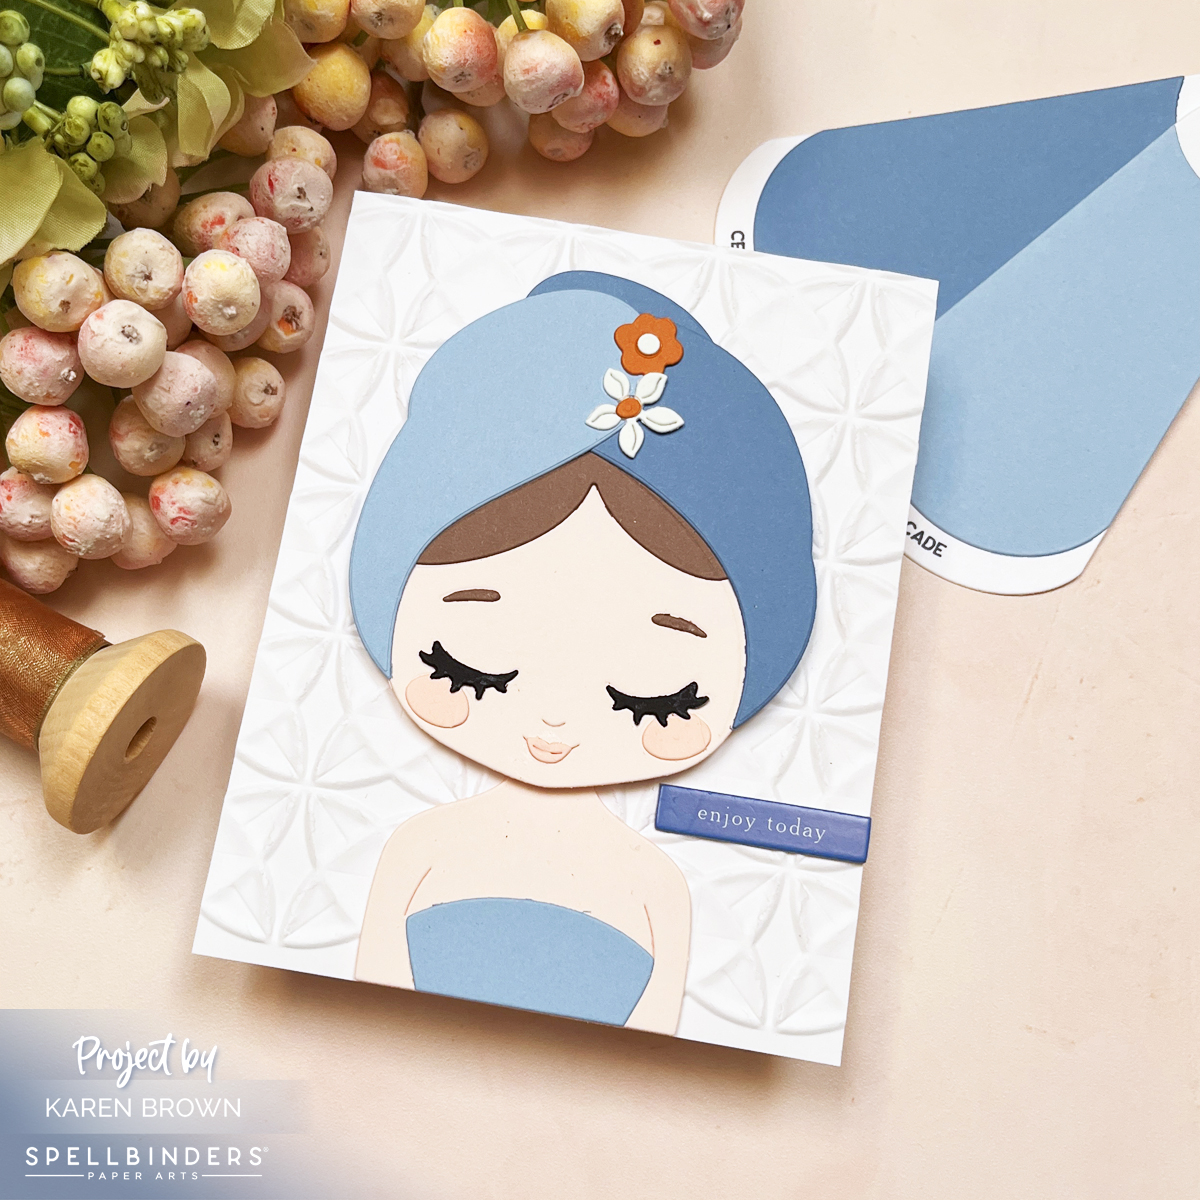
The Spellbinders December 2025 Large Die of the Month, Wrapped in Care, is an absolute delight—especially if you love creating feminine cards with personality. This adorable die set builds the sweetest girl wrapped in a fluffy spa towel turban, fully embracing her day of beauty. It’s charming, whimsical, and so customizable, which made it perfect for creating a card for my daughter. Naturally, I personalized her hair and skin tone to match!
If you enjoyed this post, you might be interested in cards for kids.
To build the scene, I embossed my background using a past Embossing Folder of the Month, which gave the card a serene, peaceful spa vibe. The textures really elevate the focal girl and tie the whole design together. For colors, I reached for my ColorWheel cardstock, one of my favorite studio essentials. The shades are Chiffon, Cascade, and Celestial, with additional details cut from scraps.
This blog post also highlights my trusty Swatching Dies and Stamps, which are invaluable when choosing harmonious colors.
Hello friends! Karen Brown here, and today I’m sharing two cards for the Hero Arts December 2025 Release + Blog Hop. This month’s theme—Soup There It Is—is warm, clever, and absolutely perfect for building a stash of Get Well cards. I don’t know about you, but I always seem to need get well cards, and this release is packed with comforting imagery and punny sentiments that make them so fun to create.
Hero Arts just announced a fantastic price drop on their subscription programs, making this the perfect time to sign up if you’ve been on the fence. The Monthly Card Kit is now $45 instead of $60, and the Whole Studio Subscription dropped from $75 to $55. That’s a big monthly savings and an incredible value considering how many products, techniques, and creative opportunities you get in each box. If you love building your stash, trying new tools, and being inspired each month, this is truly the best time to jump in.
My two cards today both feature the December Cling Stamp of the Month: Dotty—a fantastic, versatile background stamp that deserves a spot in every crafter’s studio. To help you get the most out of this staple, I’m showing two completely different background styles: ✨ Clean, fresh, and modern 🎨 Easy, layered mixed media
Let’s jump in!
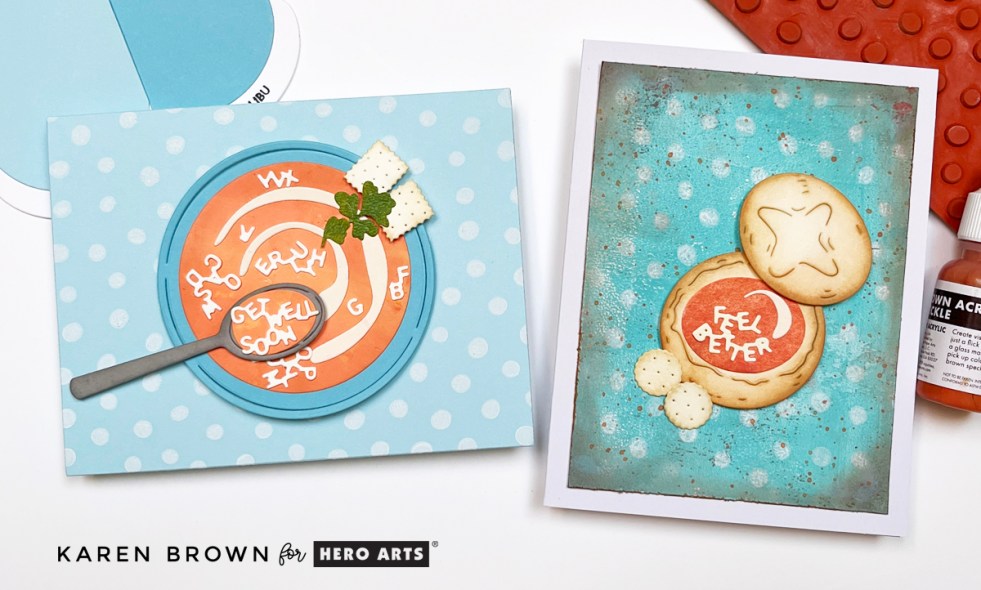
Card 1 – A Clean & Modern Background Using Pigment Ink
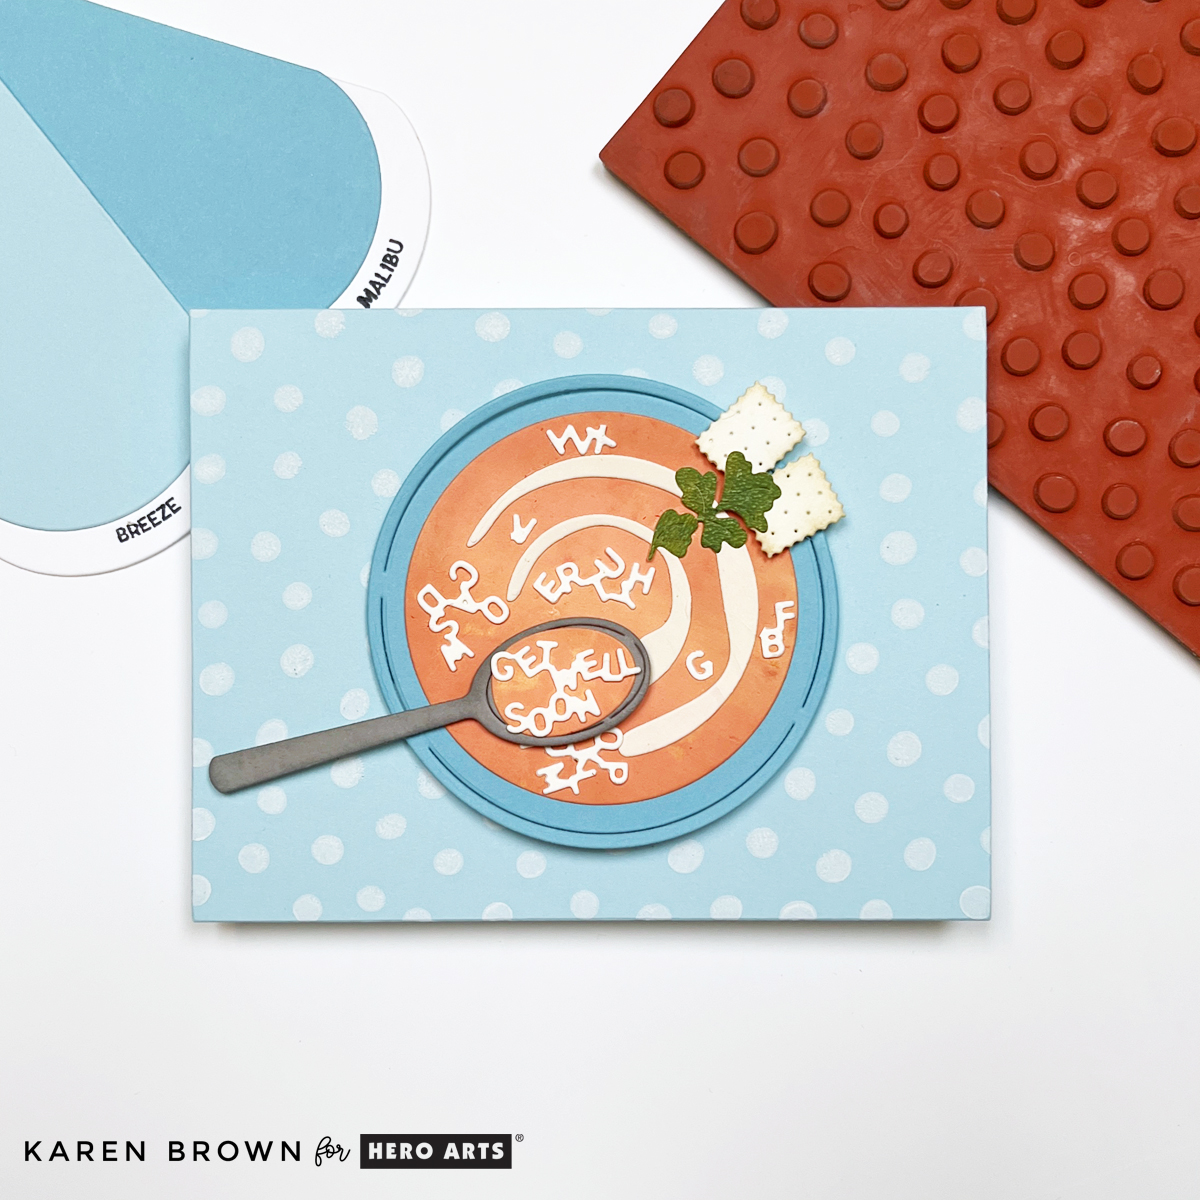
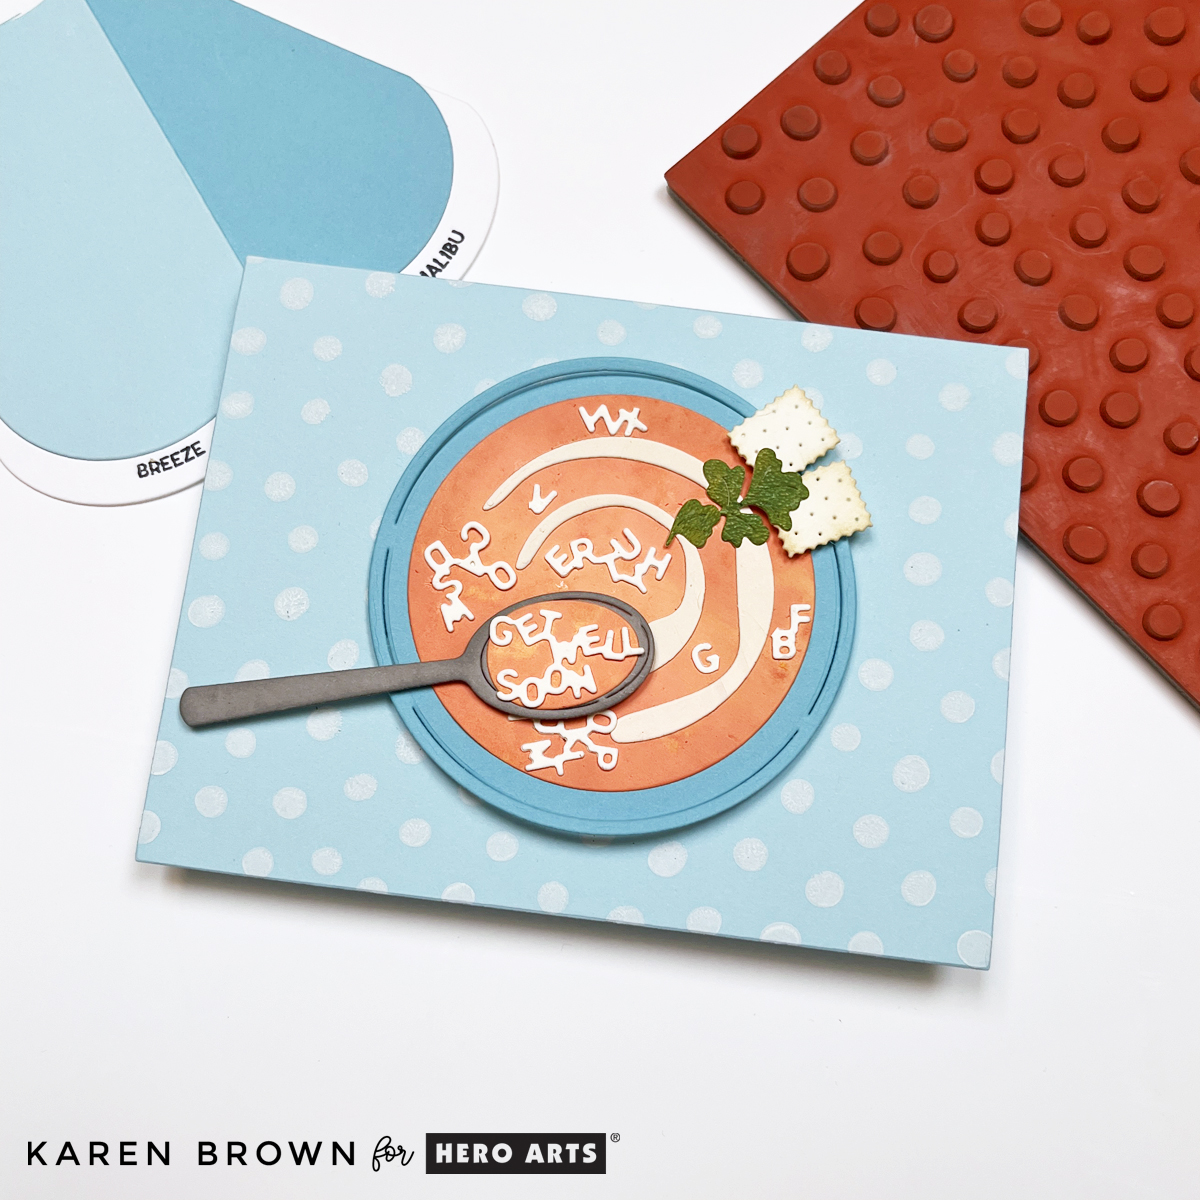
For my first card, I created a crisp and contemporary background using the Rubber Cling Dotty stamped in Unicorn White Pigment Ink on Breeze Cardstock. This combination creates a soft, airy polka dot look that works for any occasion, but feels especially soothing for a get well theme.
Background Tips:
Pigment ink gives gorgeous coverage, but it dries slowly.
Speed things along with a quick blast from your heat tool.
Try this technique on any mid-tone cardstock—it’s a great way to stretch your ink stash.
For the focal point, I used the December Die of the Month: Alphabet Soup to create an adorable soup bowl, complete with: 🥣 a spoon 🍘 cracker-style accents 🌿 sprigs of parsley …and swirling alphabetical noodles!
The spoon cleverly spells out “Get Well Soon”—such a comforting detail. This card feels clean, uplifting, and perfect for sending warm wishes to someone who needs a little TLC.
>>> Receive a FREE Bread Bowl Stamp and Cut (see card #2) when you purchase The Whole Studio!
Hero Arts has many different Monthly Kits that you can subscribe to including:
The WHOLE Studio – All 5 Kits (a 40% savings: $55 subscription + Free Shipping)
Card 2 – Easy Mixed Media Using Dotty + Gel Press Print
For my second card, I wanted to show the versatility of the Rubber Cling Dotty stamp by pairing it with a mixed media background.
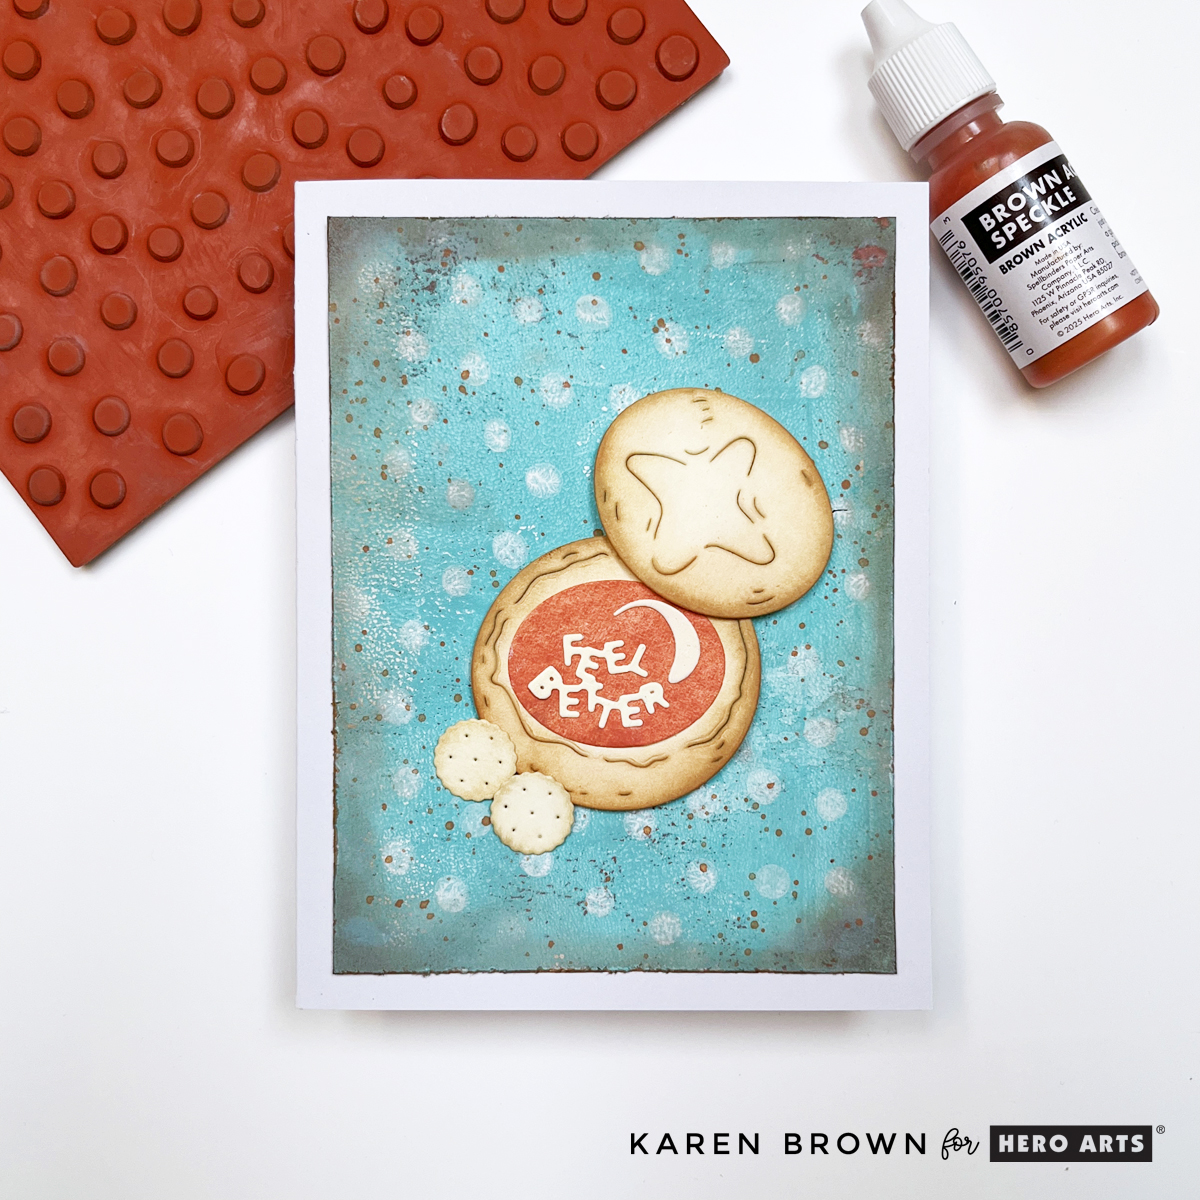
I pulled a Gel Press print from my stash—a great way to use your pre-made backgrounds—and stamped Dotty over the top with Unicorn White Pigment Ink. After drying with my heat tool, I:
Distressed the edges using a distressing tool
Ink blended around the outer edges for depth and warmth
Added Brown Acrylic Speckle (from the December Card Kit) for texture and personality. I like to use a fan brush and rotate my background for even distribution.
My focal point is the die cut from the December Whole Studio Bonus Gift: Bread Bowl, shaded with inks to mimic the look of warm crusty bread. The “Feel Better” sentiment ties the whole card together in the coziest way.
This mixed media-style card is earthy, rich, and full of character—but still incredibly easy to make.
Blog Hop and Giveaway:
Hero Arts will give away a $50 gift card, drawn from the comments left across the hop. Enter by Sunday, December 7th at 11:59pm MT, and the winner will be announced on the Hero Arts blog the following week. Leave a comment on all stops for more chances to win!
Whether you prefer clean and modern or layered and artsy, the Dotty Cling Stamp opens up endless background possibilities. Paired with this month’s heartwarming soup-themed dies, you can build a versatile stash of Get Well cards to share comfort all year long.
Be sure to hop along with the rest of the designers—there are prizes to be won and loads of inspiration waiting for you! Happy crafting, friends. ❤️
Today I’m sharing a bold, modern Valentine created with the Spellbinders December 2025 Stitching Die of the Month – A Perfect Blend. This kit is absolutely brewtiful for coffee and tea lovers, and I leaned hard into the cozy-caffeine theme for this design!
Coffee | Tea Themed Handmade Card
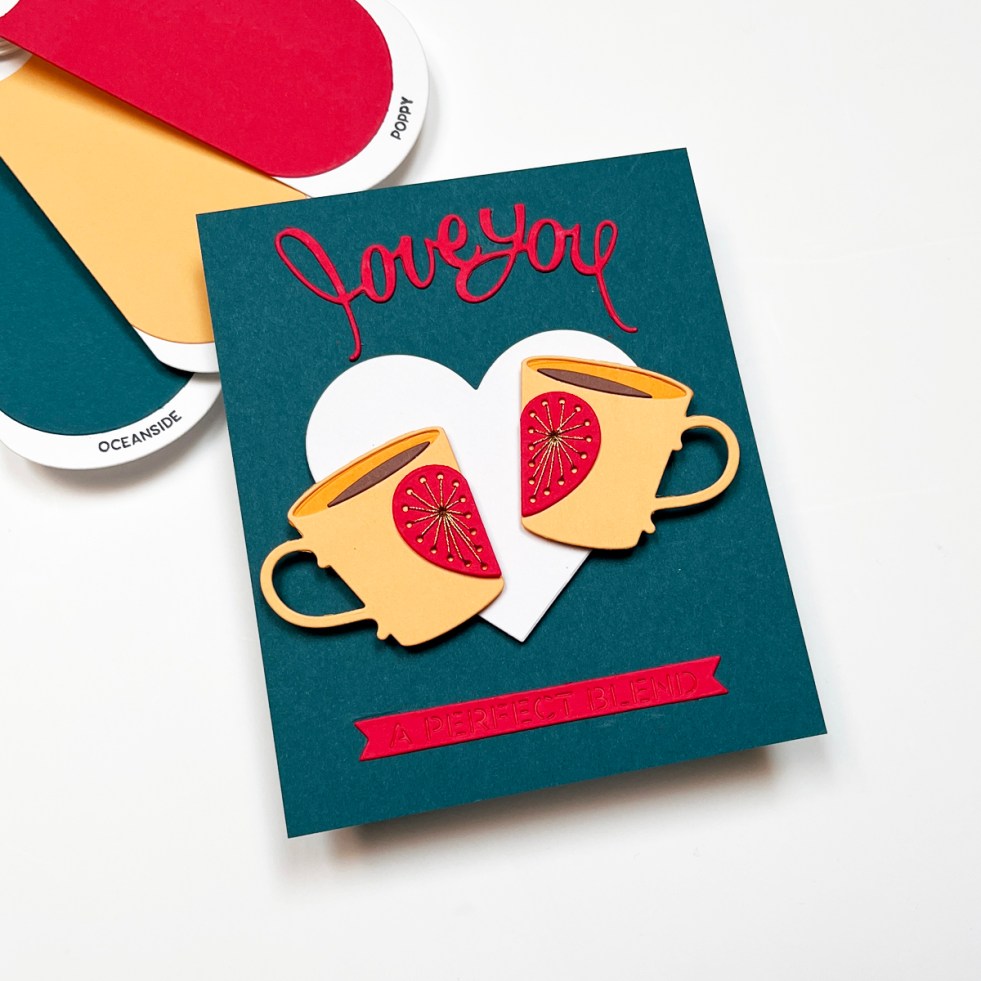
I began by die cutting two Beeswax yellow coffee mugs, each with half of a stitched heart. Once stitched, the two halves come together to form one full Poppy red heart — such a sweet little metaphor! I used gold thread (two strands) for all the stitching to keep things warm, shiny, and modern.
Behind the mugs sits a crisp white die cut heart from the Hero Arts DI334 Nesting Hearts, which frames the design and lets the bold color palette really sing. The background is Oceanside cardstock, a deep blue-green that I will never stop loving. It brings a graphic, sophisticated feel that keeps the whole card clean and contemporary.
The sentiment is a large scripty “love you” die cut from Poppy red cardstock, paired with the included “a perfect blend” sentiment strip.
To give readers a peek behind the scenes, I included this process photo showing the card mid-way through: die cuts laid out, metal dies off to the side, and my needle threaded with gold floss. I love sharing these in-progress moments because they show just how simple the stitching is — and how quickly this design comes together.
This bright and modern Valentine is for my husband — we share a latte together every afternoon, so a coffee-themed note felt absolutely perfect. ❤️☕
If you love bold color, cozy themes, and modern stitching, this kit is going to be so much fun. And if you want even more caffeine-themed inspiration, don’t miss my other favorite coffee card: 👉 What’s Brewing — graphic, bright, and equally caffeinated.
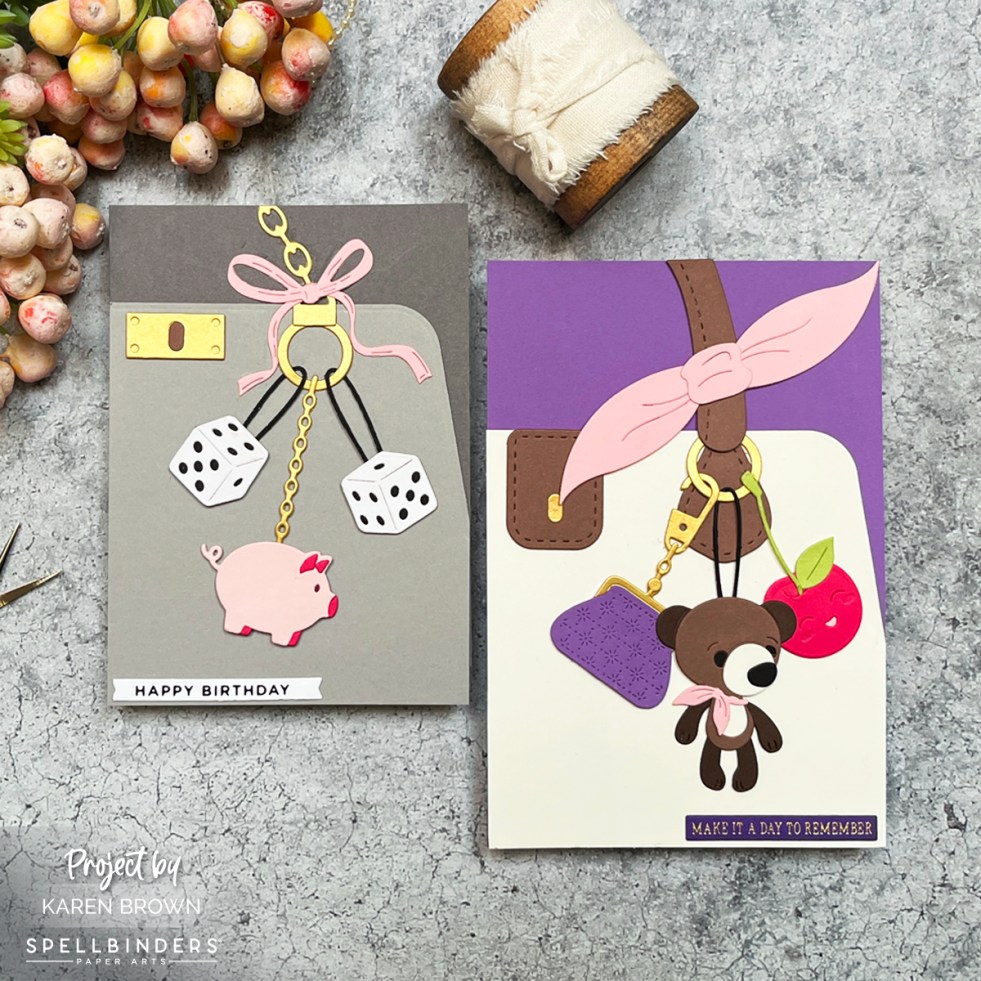
Today I’m sharing two darling purse-themed cards using the Spellbinders November 2025 Large Die of the Month Kit – Charmed to Know You. This set is pure cuteness with so many ways to personalize your bag design. Think mini luxury handbag boutique… but in cardstock form!
This die kit creates a fabulous purse with dangling charms, handles, layered details, and all the embellishments your fashionable heart could want. While it’s designed for 5” x 7” cards, I also made a 4” x 6” version because these purses are just too cute not to size-down and play.
💡 Crafter tip: I keep a clear pouch full of scrap cardstock and it was PERFECT for cutting the tiny charms. Little paper leftovers finally had their big couture moment!
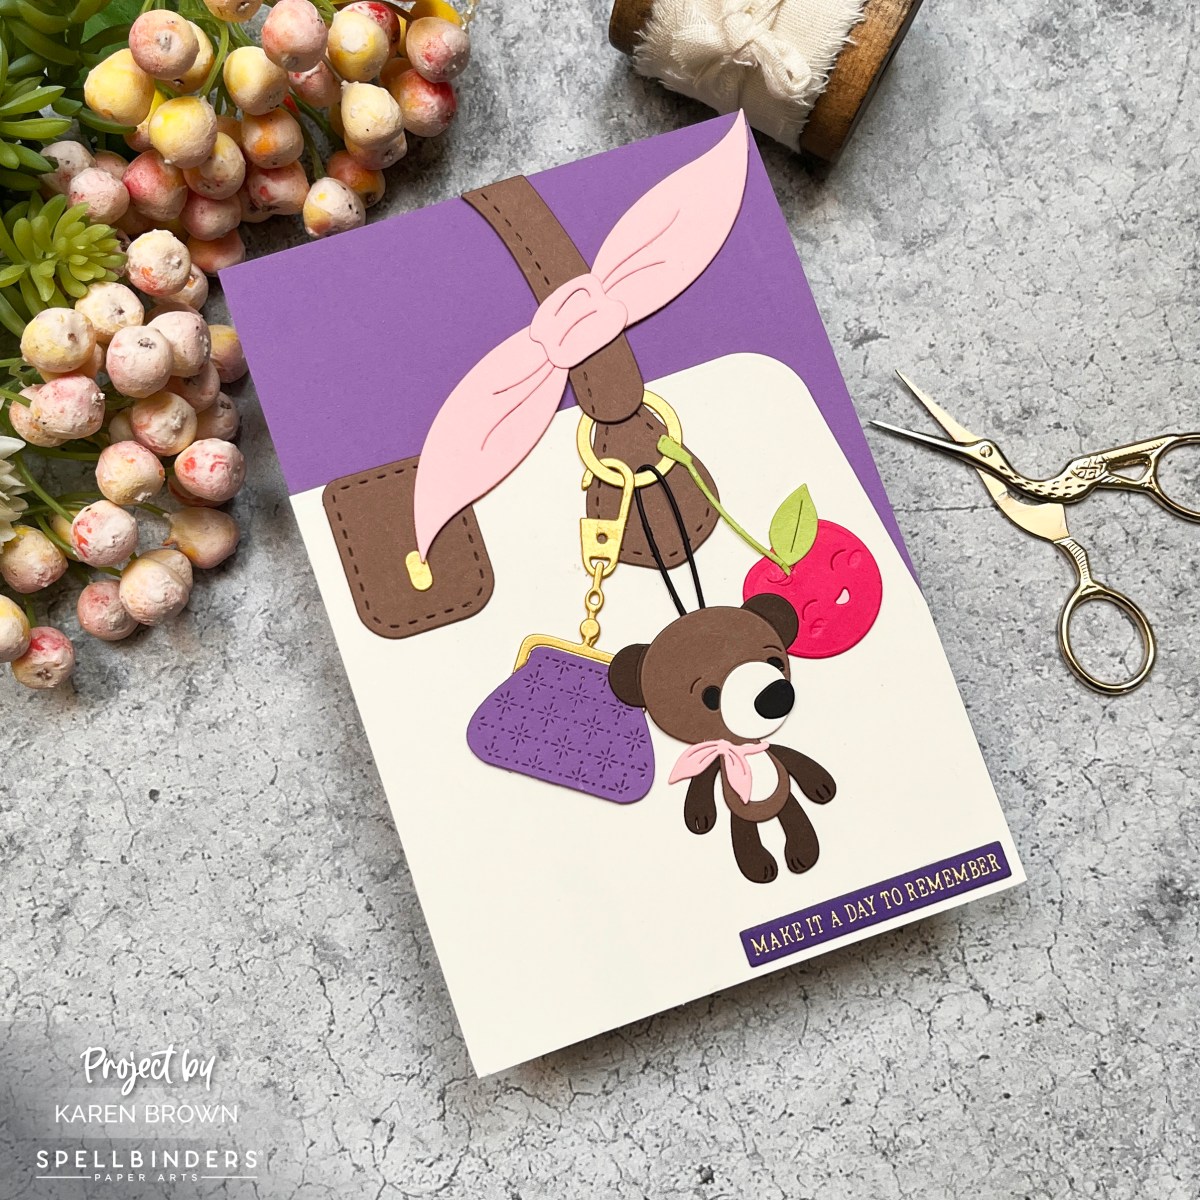
💜 Card 1 – Cream & Lilac Glam
For my first card, I created a Alabastercream purse with brown leather straps and brushed gold hardware — classic and chic!
I paired it with a lilac background (ColorWheel cardstock) and added a darling mini change purse, a pink scarf, and two charms: ✨ a sweet little bear with a matching pink neck kerchief 🍒 happy smiling cherries
And yes — this purse absolutely feels like it’s ready for brunch, shopping, and maybe a macaron or two.
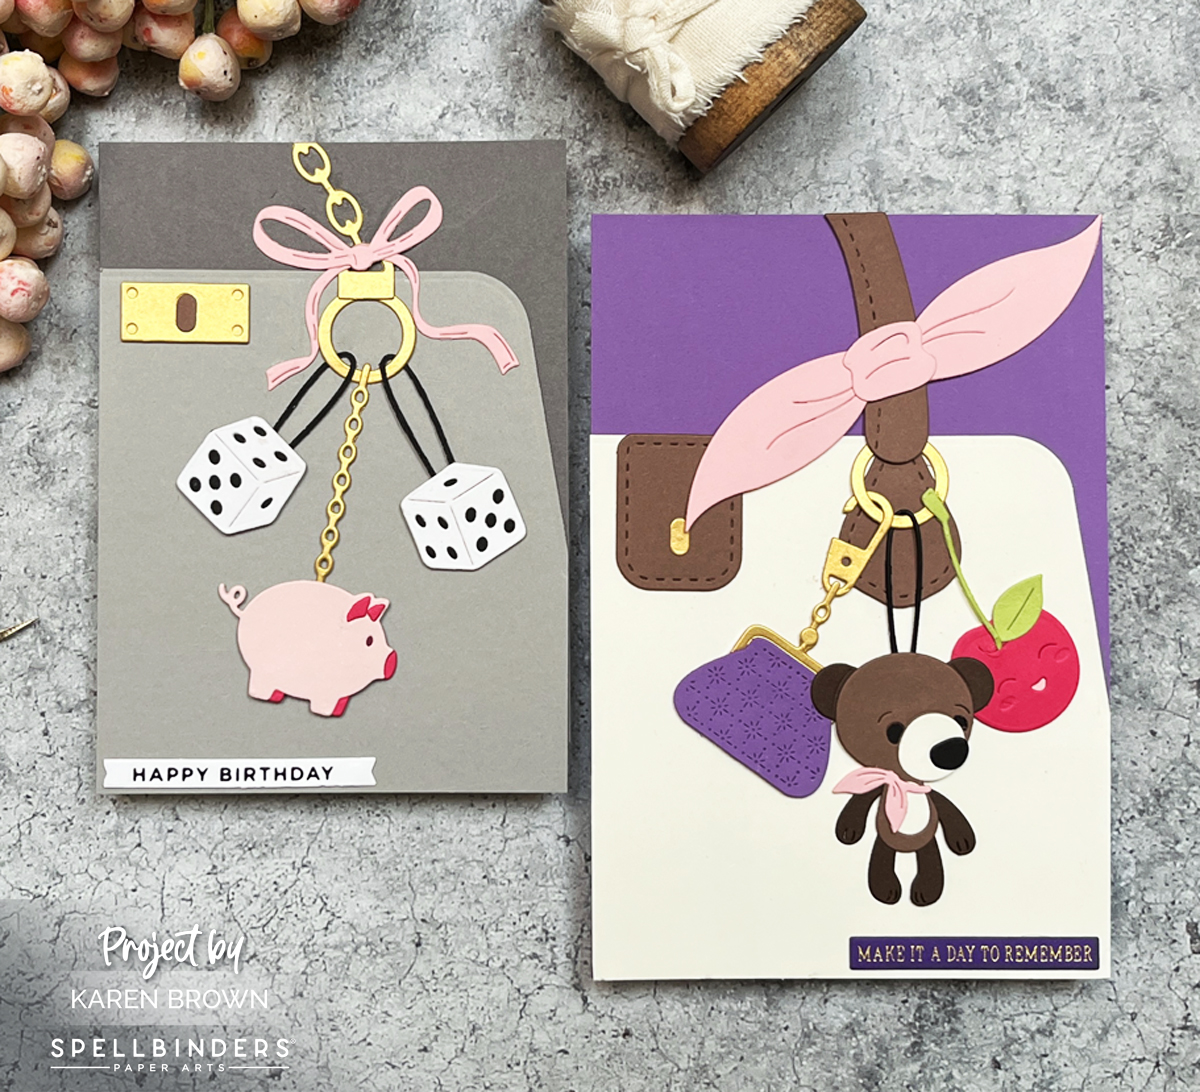
🖤 Card 2 – Chic Neutrals & Lucky Charms
My second purse fits a 4” x 6” card base and features granite and anchor gray cardstock with a brushed gold chain handle — sleek and modern!
I got playful with my charms: 🐷 I turned the Caboodle Bonus Gift pig into a charm 🎲 and added two dangling dice on each side
A sweet mini pink bow sits above all three — because even edgy handbags deserve a touch of sweetness.
The sentiment is a dainty Glimmer-foiled “Happy Birthday” — perfect for the girly-girl in your life who loves a little luxury and whimsy.
🌟 Final Thoughts
This month’s Large Die of the Month is a handbag lover’s dream — charming (pun absolutely intended), customizable, and so much fun to style. Try different color palettes, charm combos, and sizes to create purses for every personality.
Interested in my other November Card Kit Creations?
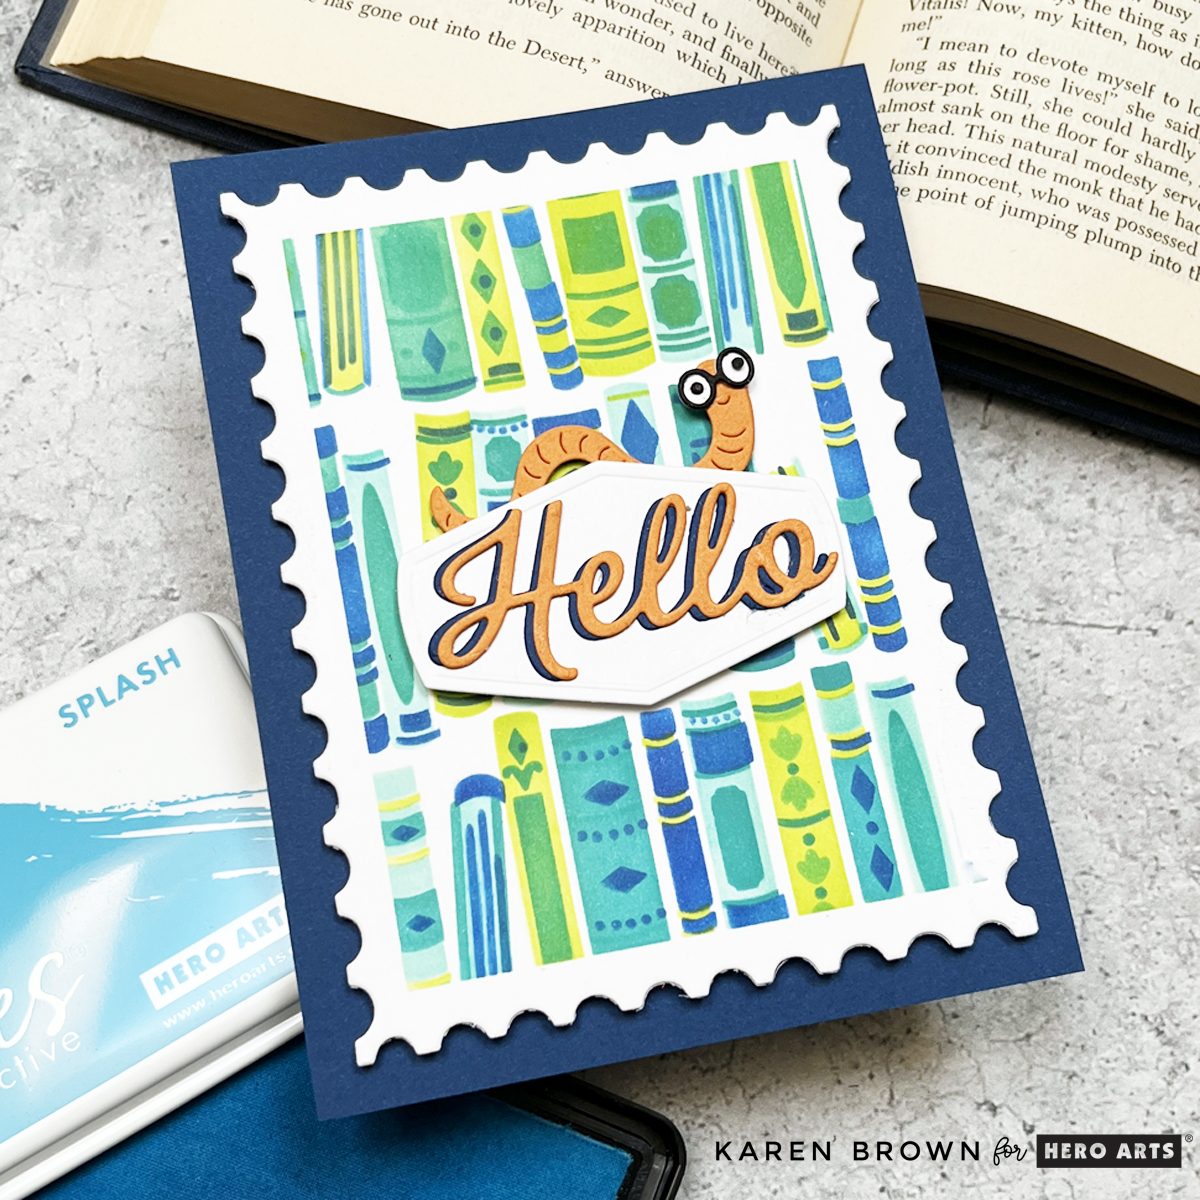
Hello, Karen here, back with another card inspired by the November 2025 Hero Studio “One More Chapter” release! I’ve been absolutely loving this book and reading-themed collection — so much so that I couldn’t resist making one more card. (Here’s a link to my previous post where I shared two other projects from this release!)
This time, I reached for the “On the Shelf” 4-Layer Stencil Kit to build my own bold bookshelf background. I wanted a crisp, postage-themed layout, so I began by masking off a 3″ x 4⅜” rectangle on a piece of Deluxe Smooth White Cardstock — giving me a clean white frame around my stenciling.
🎨 Inky Layers
I chose four analogous ink colors (adjacent on the color wheel) that flow beautifully together for a cohesive look:
Once the inky layers were dry, I die cut the panel with the 2nd largest Nesting Postage Stamp Die to give my bookish scene a framed, mail-art feel.
🧡 Complementary Pops of Color
For contrast, I reached for my ColorWheel Cardstock and added Carrot and Cosmic Sky accents. The playful bookworm with glasses and the scripty “Hello” sentiment (from the Book Bag Die Kit) are both cut from Carrot, with a Cosmic Sky shadow layer that really makes the greeting pop. Orange and blue are complementary colors (opposite on the color wheel), which makes the whole design lively and eye-catching.
Everything is layered with a bit of craft foam for dimension, then mounted onto a Cosmic Sky A2 card base.
The end result? A bright, cheeky, and happy card that would be perfect for a reader of any age — man, woman, or child.
Hero Arts has many different Monthly Kits that you can subscribe to including:
The WHOLE Studio – All 5 Kits (a 40% savings: $130 subscription + Free Shipping)
Let’s Do Brunch! | Spellbinders November 2025 Small Die of the Month
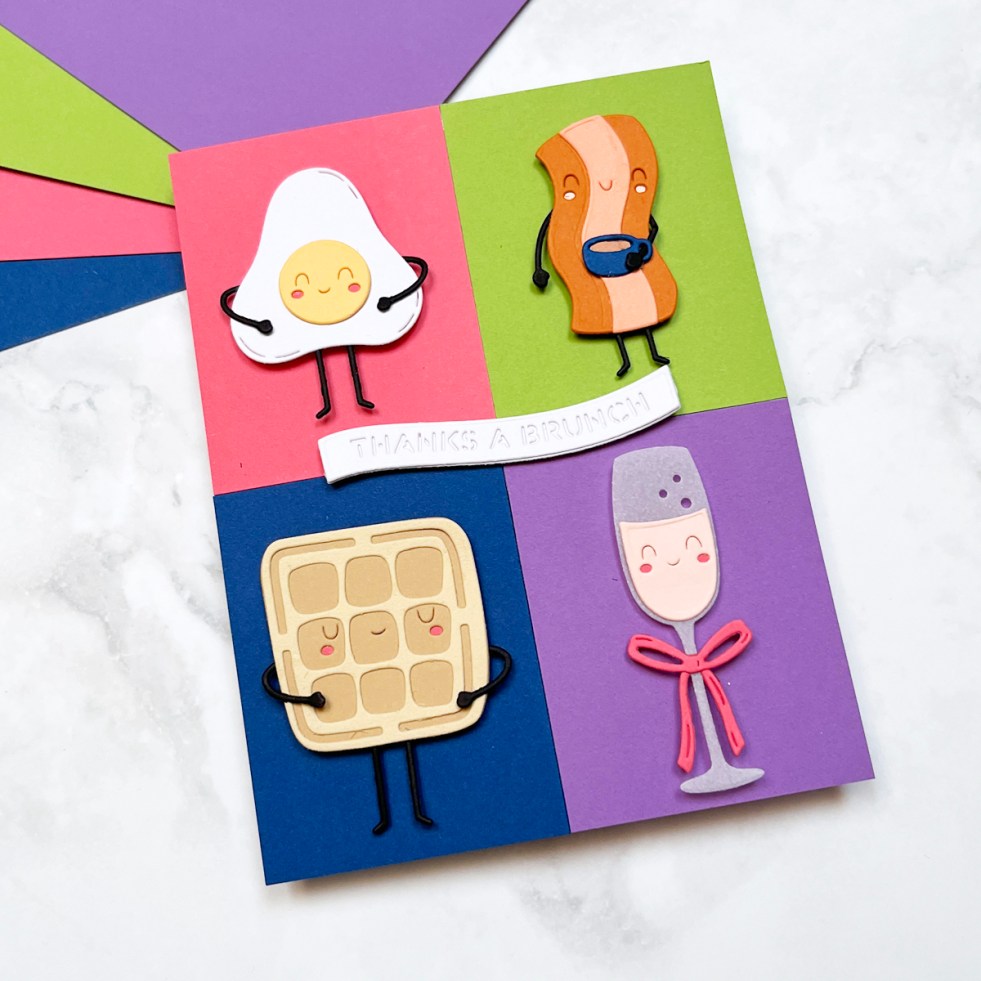
If you love playful cardmaking and adorable food-themed dies, this month’s Spellbinders Die of the Month — Let’s Do Brunch — is going to spark so much joy! This clever die set is packed with cheeky breakfast and brunch icons, complete with arms, legs, and serious personality. Think cute eggs, dancing bacon, bubbly champagne… all ready to brunch and boogie.
And the sentiment? “Thanks a Brunch.”
My Bold + Graphic Brunch Card
For today’s project, I leaned into a bold, graphic color-block look to really spotlight each quirky character. I trimmed and pieced together four vibrant cardstock quadrants to create a modern grid background. The clean, high-contrast shapes make the little food friends shine!
✨ Card Details
Theme: Foodie / Brunch / Thank You
Style: Modern color-block + cute character die cuts
Characters: ✅ Smiling sunny-side-up egg ✅ Dancing bacon strip ✅ Cheerful champagne glass (cut from vellum for fun transparency!) ✅ Sweet little waffle
Each food item gets tiny stick arms and legs — a charming little detail that gives them so much life.
📐 Measurements
To create the crisp color-blocked effect:
Cut four rectangles: 2 1/8″ x 2 ¾” each
Tape all four from the back
Adhere the full panel to an A2 card base to stabilize
Simple steps, big visual impact!
Design Tips
Vellum = perfect for glasses, bottles, and any glass objects
Foam Squares behind your food characters adds dimension and personality
Mixing playful images with clean graphic lines = fresh modern design
Don’t Miss This Kit!
If you’ve been looking for a unique, fun die set that works for birthdays, thank-yous, brunch invites, foodie friends, or just-because cards — this one’s a winner.
Be sure to check out my post for the November Stitching Die of the Month too — my favorite stitching kit of the year!
Thanks a brunch for stopping by today — and tell me, which cute brunch buddy is your favorite?
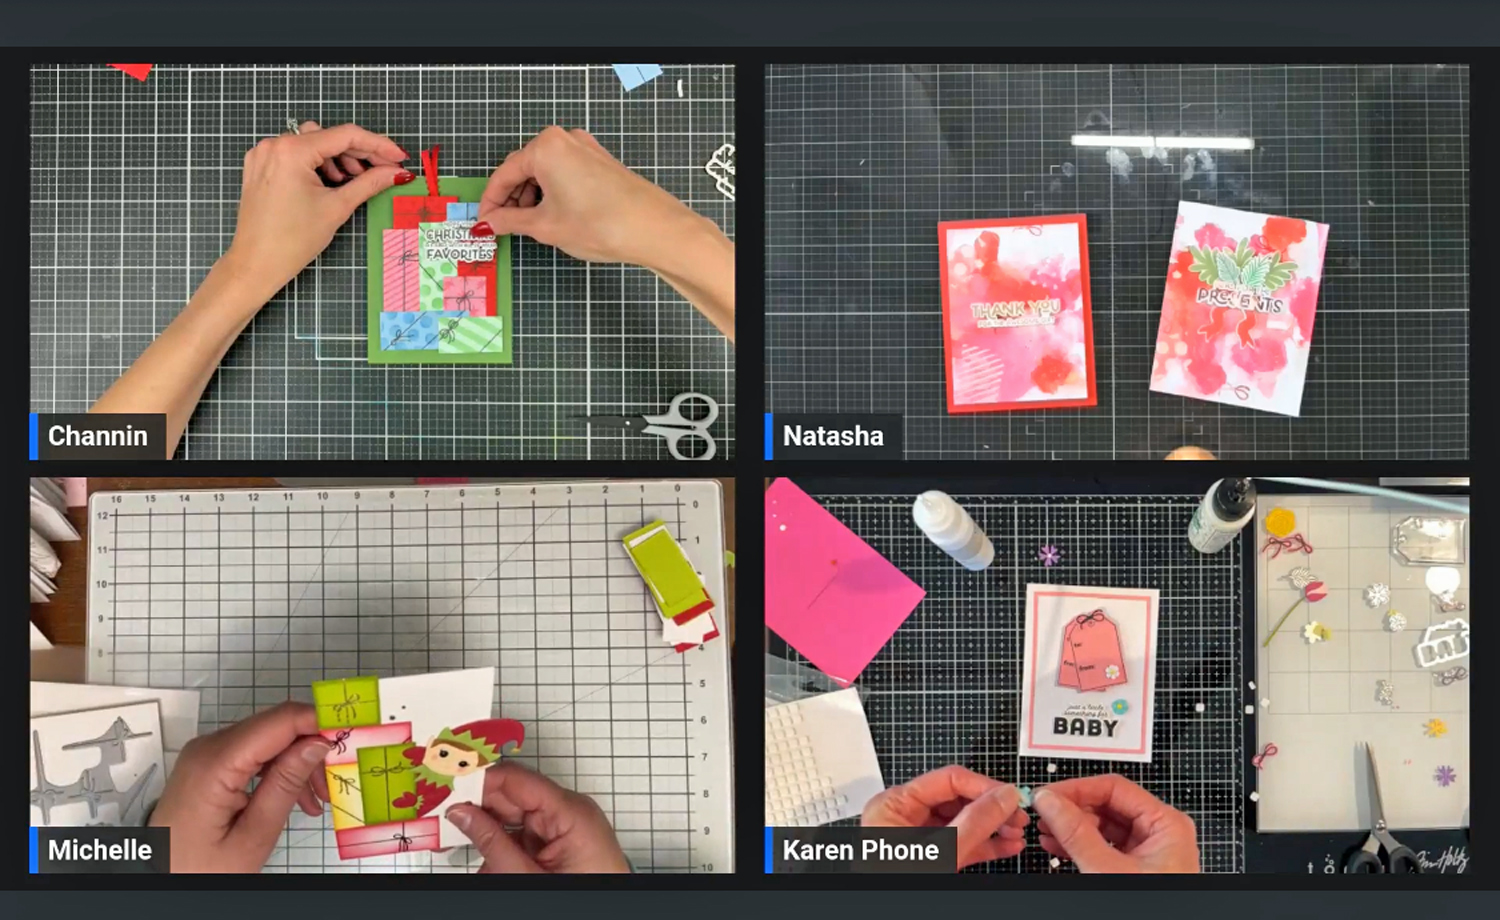
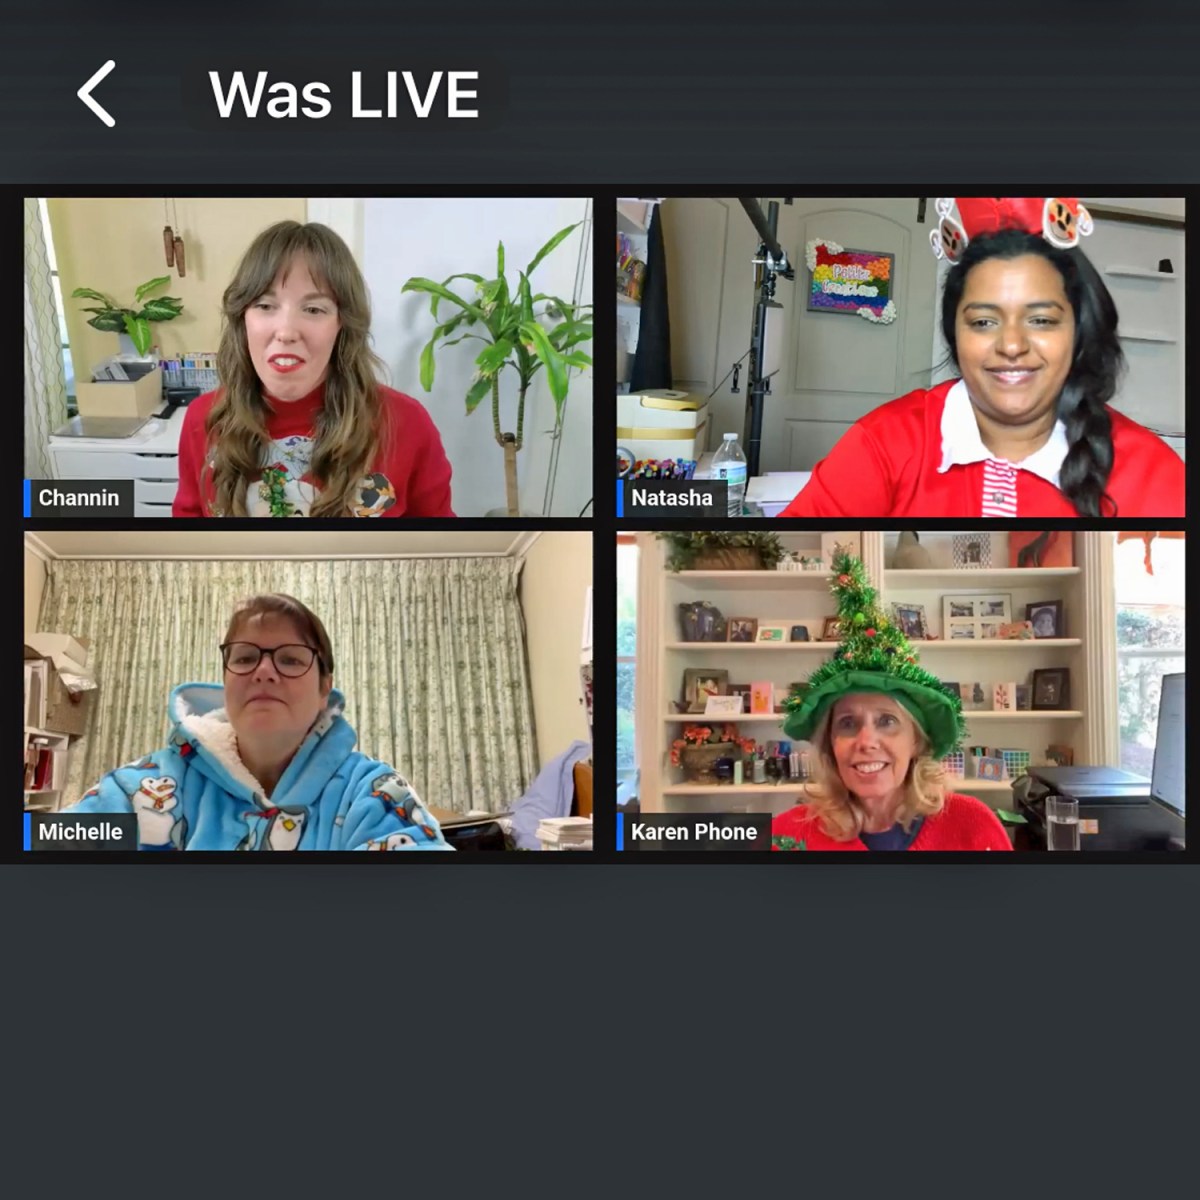
Hello crafty friends! Karen Brown here with a fun recap from Craft Lounge LIVE #4! If you missed our live session, no worries — you can still catch the replay right here 👉 Watch the rerun on Facebook.
Channin, Natasha, Michelle, and I had such a great time chatting and crafting together! We all worked with products from the Best Ever Collection, and even though we started with the same collection, our projects turned out completely different:
🎁 Channin created a beautiful stack of gift boxes.
🎨 Natasha made a stunning mixed media background.
🧝♀️ Michelle designed an adorable “peeking elf” card.
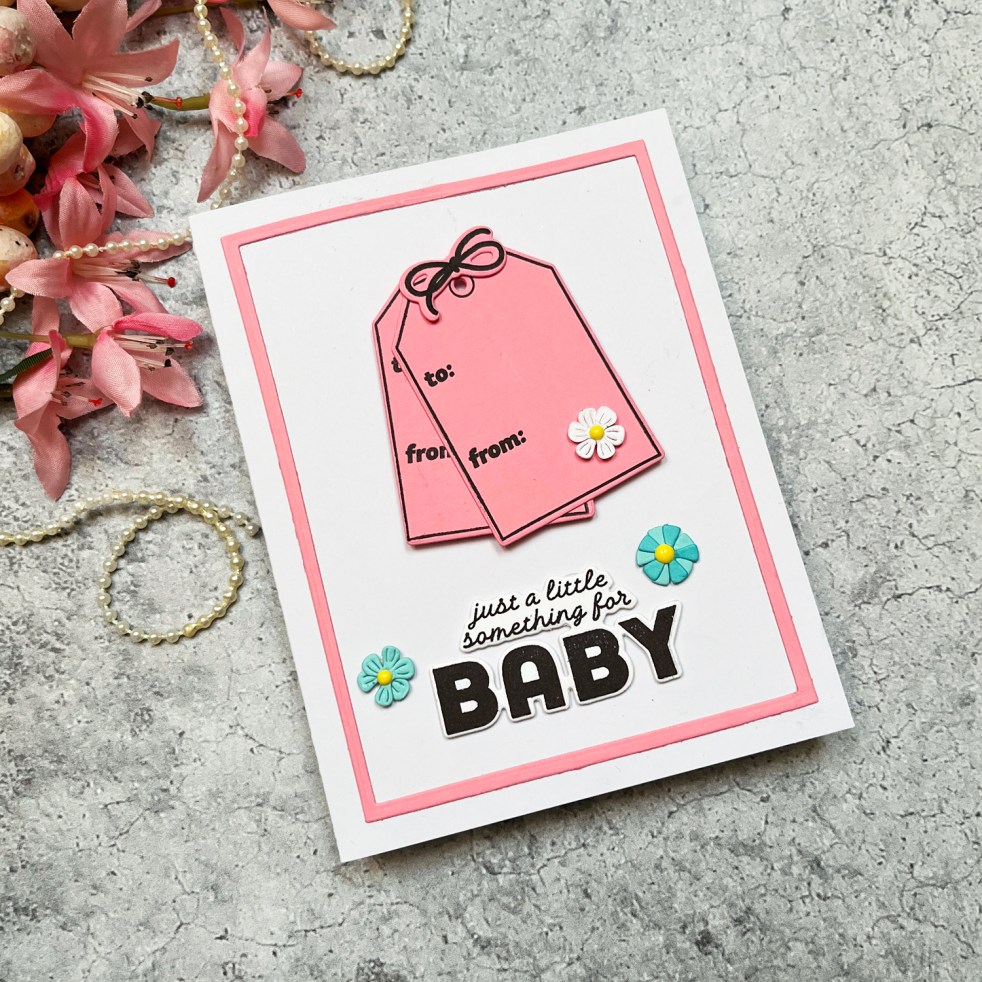
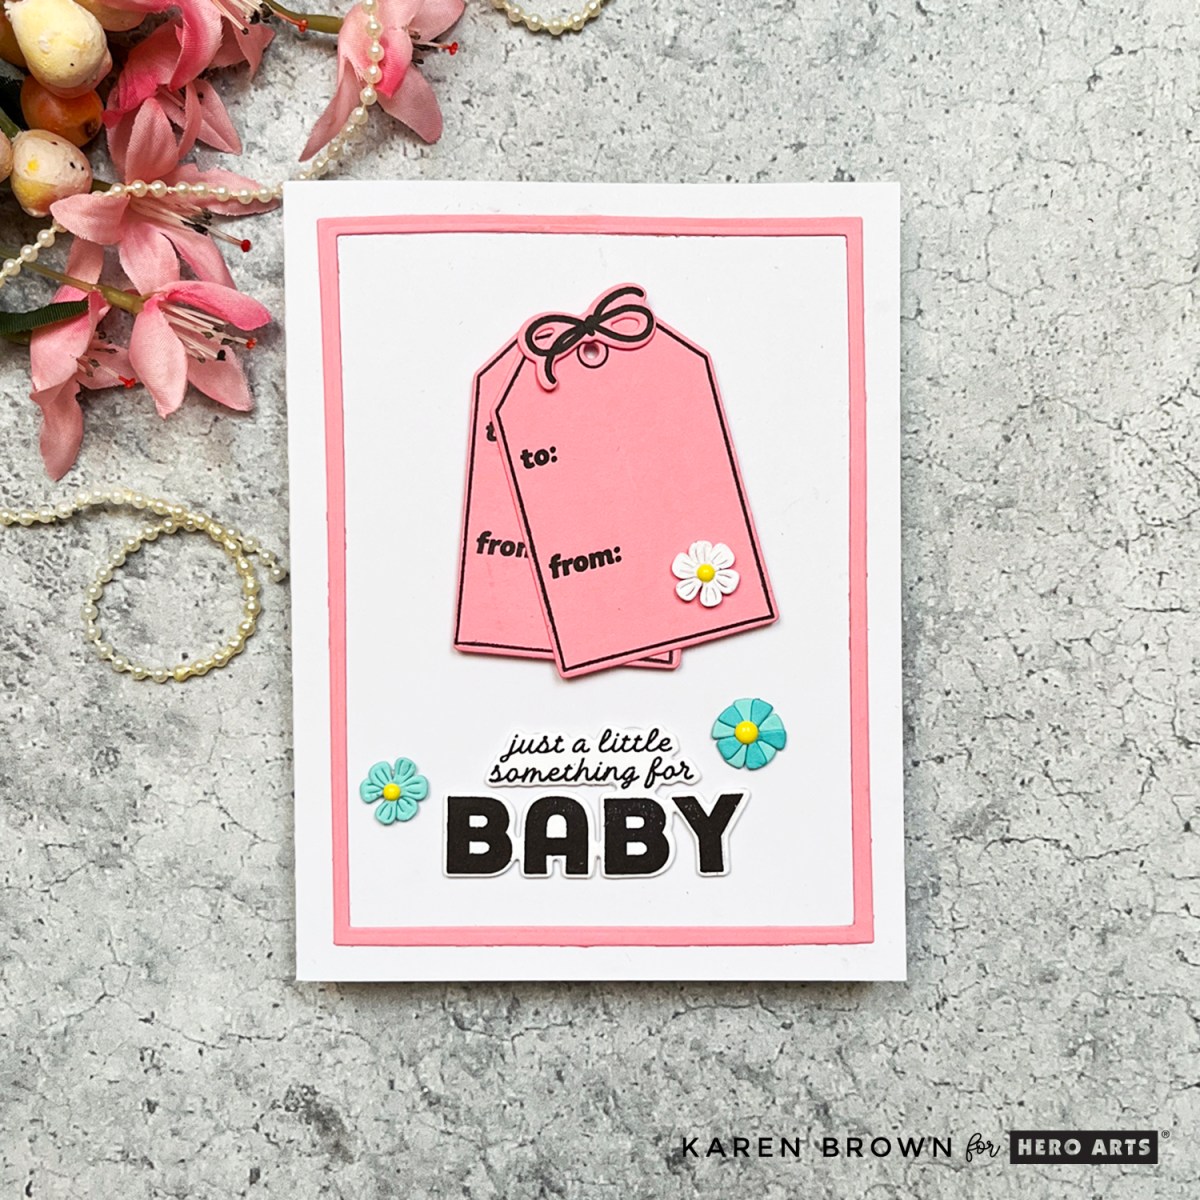
👶 And I crafted a sweet pink baby card!
My design features two stamped and die-cut tags and bows, embellished with three dainty die-cut flowers. The sentiment — “Just a little something for baby” — comes from one of my favorite sets this season, DC329 Just Because Stamp & Cut. I die cut the tags and a soft pink frame from Tutu ColorWheel Cardstock, then stamped in crisp black ink for a clean, cheerful look.
Screenshot
I’ll be taking this card to a baby shower later this month, and I know I’ll be reaching for these sentiments again and again. The “birthday,” “thank you,” and “just because” options in this set are so versatile — perfect for every occasion!
Screenshot
Thanks to everyone who joined us live — and if you couldn’t make it, grab your favorite drink, tune in to the replay, and enjoy an hour of crafty conversation and inspiration. 💕
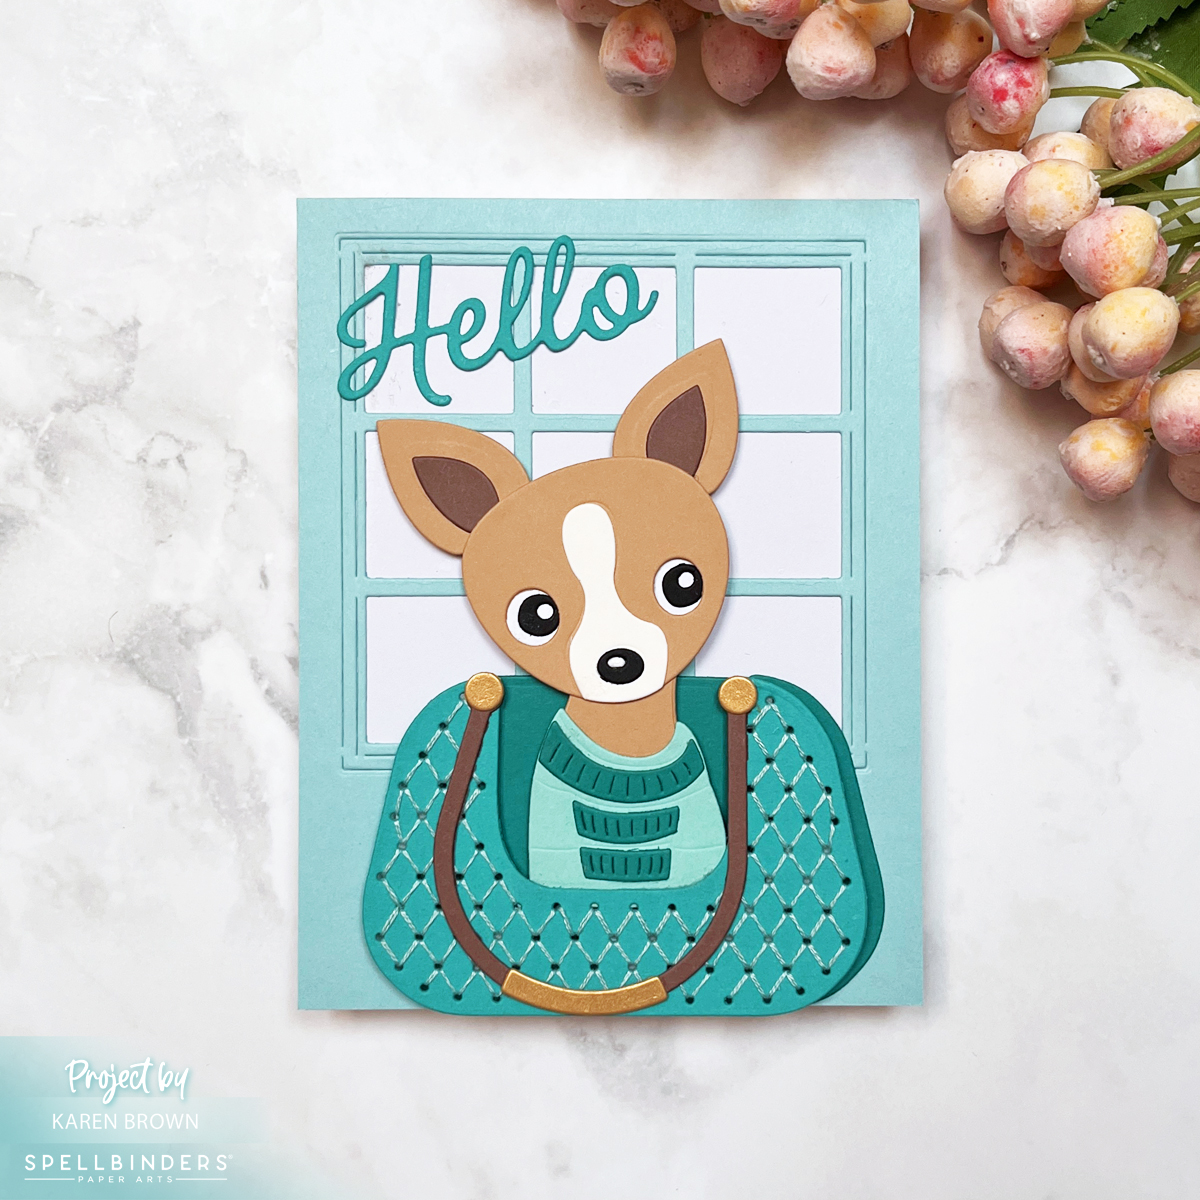
If you love stitching dies and adorable pups, you’re in for a treat with the Spellbinders November 2025 Stitching Die of the Month. This kit is pure joy — it features the most darling Chihuahua peeking out of a stitched purse, complete with a tiny sweater and irresistible details. I think this might be my favorite stitching kit of the year!
If you enjoyed this darling Chihuahua themed card you might enjoy a cute card for kids.
✂️ A Stitch Above the Rest
For the purse, I followed the etched diamond stitching guide using DMC #964 aqua floss (two strands). I like to die cut each stitched panel twice and glue them together before I start stitching — it gives the piece a nice sturdy base and helps it hold its shape.
The stitching adds beautiful texture, and the aqua floss blends perfectly with the Teal Topaz ColorWheel cardstock.
🎨 My Color Recipe
Here’s the cardstock and stitching palette I used:
For the sentiment, I used the “Hello” Die from Hero Arts’ November Fancy Die Kit — it’s the perfect elegant touch without stealing focus from the little pup. The background features the Hero Arts Elegant Window Fancy Die, which frames the scene beautifully.
The main ColorWheel palette of aquas and neutrals (Teal Topaz, Blue Spruce, Waterfall and Fawn) keeps everything cohesive while letting that sweet Chihuahua shine. The stitched purse adds just the right amount of dimension, making this card one of those “pick up and look closer” moments.
This one’s going to my daughter’s mother-in-law, who happens to have two Chihuahuas — so I know it’ll be a hit!
I have an adorable Color Block Food Theme card coming on November 11th…come back and take a peek.